Page is loading ...

302-102 RING CLIMBER (Port)
Page 1
Rev 05/15/08
Sportsplay Equipment, Inc., 5642 Natural Bridge, St. Louis, MO 63120 (314) 389-4140
IMPORTANT
PLEASE READ THESE INSTRUCTIONS BEFORE COMMENCING ASSEMBLY. Please retain
this instruction sheet in your files. It contains important replacement
parts information. All equipment must be installed in accordance with
these instructions. It is important to use and maintain all public
playground equipment properly. Playground equipment, which is improperly
maintained, can cause serious injury. Periodical inspections,
maintenance, repair and/or replacement of damaged parts is necessary for
safe operation of equipment. Appropriate publications, available at no
charge, from the consumer product safety commission, include “A Handbook
for Public Playground safety”. You can receive your free copy by calling
1-301-504-0708.
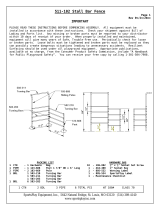
PACKING LIST HARDWARE BAG
1 CTN -1 Hardware Bag 16 - 105-015 Pipe Plug
-8 103-006 Rings 10 - 116-555 5/16” x 3½” Button Head Bolt
1 CTN -6 103-006 Rings 36 - 116-545 5/16” x 2½” Button Head Bolt
2 BDL -3 103-661 Uprights 42 - 326-501 5/16” Lock Washer
2 BDL -3 103-662 Uprights 42 - 216-512 5/16” Button Hd Nut
1 BDL -4 103-663 Uprights 2 - 416-350 3/16” Socket Key
2 CTN 5bdl 7 TOTAL PCS 97# Weight Class 70

302-102 RING CLIMBER (Port)
Page 2
Rev 05/15/08
Sportsplay Equipment, Inc., 5642 Natural Bridge, St. Louis, MO 63120 (314) 389-4140
GENERAL USE/FALL ZONE & FOOTING RECOMMENDATIONS
STATIONARY & PORTABLE EQUIPMENT – USE/FALL ZONES SHOULD EXTEND A MINIMUM OF 6 FEET IN ALL
DIRECTIONS FROM THE PERIMETER OF THE EQUIPMENT GROUND SPACE. THIS AREA SHOULD BE COVERED WITH THE
REQUIRED AMOUNT OF RESILIENT SAFETY SURFACING MATERIAL. FOR SOME EQUIPMENT – USE/FALL ZONES CAN
OVERLAP. SEE CONSUMER PRODUCT SAFETY COMMISSION GUIDELINES.
DIAMETER & DEPTH OF FOOTINGS ILLUSTRATED ARE SATISFACTORY IN MOST APPLICATIONS FOR PIPE SIZES UP TO
2 3/8” DIAMETER. VARYING SOIL & CLIMATIC CONDITIONS MAY REQUIRE DEEPER & HEAVIER FOOTING IN SOME
AREAS. CHECK LOCAL BUILDING CODES.
• If resilient surfacing is to be less than 12”, then additional pipe should be put in concrete
to maintain proper finish grade for equipment.
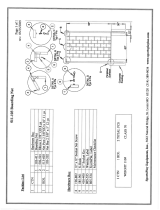
USE AREA & FOOTING LAYOUT:

302-102 RING CLIMBER (Port)
Page 3
Rev 05/15/08
Sportsplay Equipment, Inc., 5642 Natural Bridge, St. Louis, MO 63120 (314) 389-4140
GENERAL ASSEMBLY INSTRUCTIONS:
Check all the parts and hardware with the packing list to be sure you have received everything
needed to assemble this product. CONTACT YOUR LOCAL DISTRIBUTOR WITH NOTIFICATION OF ANY MISSING
OR DAMAGED PARTS. Contact must be made within ten days of receipt of your order.
Only hand-tighten nuts & bolts on initial assembly. Final tightening should be done EVENLY after
final assembly when unit has bee plumbed and leveled. After assembly is complete, ANY ENDS OF
BOLTS PROTRUDING BEYOND NUTS SHOULD BE CUT OFF AND/OR PEENED OVER TO REMOVE ANY SHARP PROJECTIONS.
Go over entire unit to file smooth any sharp edges or projections that may have been caused by
rough handling in shipping or installation.
GENERAL MAINTENANCE INSTRUCTIONS:
Check MONTHLY for loose bolts, damaged or broken parts. Tighten and/or replace
immediately.
SPECIFIC ASSEMBLY INSTRUCTIONS:
NOTE: All threaded ends of bolts protruding beyond nuts must be cut off and/or peened to
eliminate sharp edges. No more than two threads should extend beyond face of nut.
All washers, “T” nuts, and other fastener hardware used on round pipe or tubing must
be hammered down to conform to the curved underlying surface to eliminate catch
points.
STEP #1: Drive in Pipe Plugs (105-015) into bottom of all legs. File off any metal shavings
that result from wedging plugs into posts.
STEP #2: Assemble 3-Ring tower first. Cast Aluminum rings have mold ejection marks on BOTTOM
side. Assemble tower on side – rolling over until all four posts are attached.
Temporarily user longer bolts where indicated until ready to attach other towers.
SEE ILLUSTRATION #1.
STEP #3: Assemble other towers in same manner, attaching to 3-ring tower as indicated. SEE
ILLUSTRATION #2.
STEP #4: Drive in Pipe Plugs (105-015) on top of pipe posts. File off any metal shaving that
result from wedging plugs into posts.
STEP #5: Plumb & level unit. Tighten all nuts & bolts “evenly” until lock washers are flat.
/
