Page is loading ...


511-102 Stall Bar Fence Page 1
Rev 05/29/2020
SportsPlay Equipment, Inc., 5642 Natural Bridge, St. Louis, MO 63120 (314) 389-4140
www.sportsplayinc.com
IMPORTANT
PLEASE READ THESE INSTRUCTIONS BEFORE COMMENCING ASSEMBLY. All equipment must be
installed in accordance with these instructions. Check your shipment against Bill of
Lading and Parts list. Any missing or broken parts must be reported to your distributor
within 10 days of receipt of your order. When properly installed and maintained,
equipment will give many years of Safe, Trouble-Free use. Periodically check for loose
or broken parts. Loose bolts must be tightened and broken parts must be replaced as they
can possibly create dangerous situations leading to unnecessary accidents. Resilient
Surfacing should be used under all playground equipment. Appropriate publications,
available at no charge, from the Consumer Product Safety Commission, include “A Handbook
for Public Playground Safety”. You can receive your free copy by calling 1-301-504-7908.
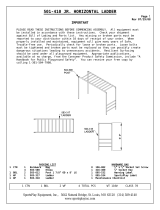
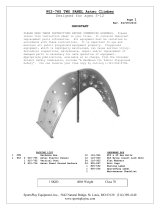
PACKING LIST HARDWARE BAG
1 CTN - 1 Hardware Bag 18 - 196-802 ½” x ½’ Socket Set Screw
1 PIPE - 1 123-608 Post 1 7/8” OD x 6’ Long 1 - 416-400 ¼” Socket Key
2 PIPE - 2 103-669 Pole 1 - 805-532 Warning Label
1 BDL 1 503-210 Turning Bar 1 - 805-534 SportsPlay Label
1 503-211 Turning Bar 1 - Maintenance Checklist
1 503-203 Turning Bar
1 BDL 6 503-203 Turning Bar
1 CTN 2 BDL 3 PIPE 6 TOTAL PCS WT 100# CLASS 70

511-102 Stall Bar Fence Page 2
Rev 0/21/2008
SportsPlay Equipment, Inc., 5642 Natural Bridge, St. Louis, MO 63120 (314) 389-4140
www.sportsplayinc.com
GENERAL USE/FALL ZONE & FOOTING RECOMMENDATIONS
Use/Fall Zones should extend a minimum of 6 Feet in All Directions from the Perimeter of
the Equipment Ground Space. This are should be covered with the required amount of
Resilient Safety Surfacing Material. For Some Equipment Use/Fall Zone can overlap. See
Consumer Product Safety Commission Guidelines.
Diameter and Depth of Footing Illustrated are Satisfactory in Most Applications for pipe
sizes Up to 2-3/8” Diameter. Varying Soil and Climatic conditions may require Deeper and
Heavier Footings in Some Areas. Check Local Building Codes.
DETAIL: Permanent Installation Suggested Bracing Method
* If resilient surfacing is to be less than 12”, then additional pipe should be put in
concrete to maintain proper finish grade for equipment.
FOOTING LAYOUT AND USE AREA

511-102 Stall Bar Fence Page 3
Rev 08/21/2008
SportsPlay Equipment, Inc., 5642 Natural Bridge, St. Louis, MO 63120 (314) 389-4140
www.sportsplayinc.com
GENERAL ASSEMBLY INSTRUCTIONS
Check all the parts and hardware with the packing list to be sure you have received
everything needed to assemble this product. CONTACT YOUR LOCAL DISTRIBUTOR NOTIFICATION
OF ANY MISSING OR DAMAGED PARTS. Contact must be made within ten days of receipt of your
order.
Only hand-tighten nuts & bolts on initial assembly. Final tightening should be done
EVENLY after final assembly when unit has been plumbed & leveled.
After assembly is complete, ANY ENDS OF BOLTS PROTRUDING BEYOND NUTS SHOULD BE CUT OFF
AND/OR PEENED OVER TO REMOVE ANY SHARP PROJECTIONS. Go over entire unit to file smooth
any sharp edges or projections that may have been caused by rough handling in shipping or
installation.
GENERAL MAINTENANCE INSTRUCTIONS
Check MONTHLY for loose bolts, damaged or broken parts. Tighten and/or replace
immediately.
SPECIFIC ASSEMBLY INSTRUCTIONS
NOTE: All threaded ends of bolts protruding beyond nuts must be cut off and/or
peened to eliminate sharp edges. No more than two threads should extend
beyond face of nut. All washers, “T” nuts, and other fastener hardware used
on round pipe or tubing must be hammered down to conform to the curved
underlying surface to eliminate catch points.
STEP #1: Mark & dig footing holes per Diagram on PAGE #2.
STEP #2: Align & position all Turning Bars per the dimensions & location on Page 1.
Position & brace in footing holes. Attach braces to legs to hold proper
height. Length of pipe legs below intended level of resilient surfacing
should be 24”. Two long braces holding 2 legs each are recommended.
STEP #3: Plumb & level. Tighten all nuts & bolts so that lock washers are flat.
Pour concrete. Let stand 48 hours before removing braces, installing
resilient surfacing and using equipment.
STEP #4: Attach Warning Label and Manufacturer’s Identification Label to a clean
surface. The labels should be attached in a location where they are clearly
visible and legible and away from normal hand and foot placement areas. The
labels must be replaced if they become illegible, destroyed or removed.
Contact your distributor for replacement labels.


/
