Page is loading ...

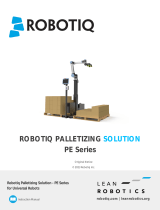
Robotiq Palletizing Solution - PE Series
for Universal Robots
User Manual
ROBOTIQ PALLETIZING
SOLUTION
PE20
robotiq.com | leanrobotics.org
Original instructions (en)
© 2023 Robotiq Inc.

Table of Contents
Revisions 4
1. General Presentation 6
1.1. Palletizing Solution Components 6
2. Safety 8
2.1. Disclaimer 8
2.2. Risk Assessment 9
2.3. Use of the Solution 15
3. Installation 20
3.1. Scope of Delivery 21
3.2. Required Tools and Equipment 23
3.3. Environmental and Operating Conditions 24
3.4. Mounting and Installation 25
3.5. Other Grippers 58
3.6. URCap Package 60
3.7. Robot Configurations 61
4. Operation 63
4.1. Start Up 63
4.2. Palletizing Operation Instructions 63
4.3. Palletizing Operation Diagrams 65
4.4. Status Light States 66
4.5. Solution Mobility (Wash Down and Production Line Shifts) 67
5. URCap Software 73
5.1. License Agreement 73
5.2. Copilot 76
5.3. Command Window 77
5.4. Program Tree 98
5.5. Palletizing Script Functions 107
6. Specifications 111
6.1. Technical Dimensions 111
6.2. Mechanical Specifications 112
2

6.3. Electrical Specifications 113
7. Periodic Inspection and Maintenance 115
7.1. Power Off and Lock Off Procedure 115
7.2. Inspection 116
7.3. Fasteners Specifications 119
7.4. Cleaning 120
7.5. Storage 120
8. Spare Parts, Kits and Accessories 121
9. Troubleshooting 122
9.1. Palletizing Solution (excluding the PowerPick20 Vacuum Gripper) 122
9.2. PowerPick20 Vacuum Gripper (Optional) 125
9. Warranty 126
10. Harmonized Standards 128
10.1. EC Declaration of Incorporation 128
10.2. Identification plate 130
11. Appendix 131
11.1. Palletizing Cell Layout 131
11.2. Conveyor Positioning Holes 133
11.3. Overhang Spacers 134
11.4. Pneumatic Diagram 135
12. Contact 136
3

Revisions
Robotiq may modify this product without notice, when necessary, due to product improvements, modifications or changes in
specifications. If such modifications are made, the manual will also be revised. See revision information below. The latest version of
this manual can be downloaded at support.robotiq.com.
2023/09/05
Initial Release
4

Copyright
© 2023 Robotiq Inc. All rights reserved.
This manual and the product it describes are protected by the Copyright Act of Canada, by laws of other countries, and by
international treaties, and therefore may not be reproduced in whole or in part, whether for sale or not, without prior written consent
from Robotiq. Under copyright law, copying includes translation into another language or format.
Information provided by Robotiq in this document is believed to be accurate and reliable. However, Robotiq shall accept no
responsibility for its use. There may be some differences between the manual and the product if the product has been modified after
the editing date.
The information contained in this document is subject to change without notice.
5

1. General Presentation
The terms "Palletizer", "Palletizing Solution", "Robotiq Palletizing Solution", "Solution" , PE20 and "PE Series" used in this manual
all refer to the PE Series Robotiq Palletizing Solution for UR20 Universal Robots. The PE Robotiq Palletizing Solution is a hardware
and software solution preconnected and ready to install. It is composed of a base fully integrated with a Robotiq control box, pallet
sensors, a pedestal, and a post with a teach pendant rack and status lights. The standard delivery also contains the Robotiq
PowerPick vacuum gripper and vacuum generator unit. The Material Handling Copilot software and accessories (e.g., box sensor,
anchor kit, cable management system, etc.) are also part of the Solution.
CAUTION
This section presents the key features of the Robotiq Palletizing Solution and must not be
considered as sufficient knowledge to operate the Solution. Each feature is detailed in the
appropriate section.
1.1. Palletizing Solution Components
Fig. 1-1: PE20 Robotiq Palletizing Solution
1.1.1. Base, Pedestal and Post
The Robotiq Palletizing Solution is composed of a base, on which a pedestal, pallet sensors and Robotiq control box are mounted,
and a post, on which a teach pendant rack, a push button enclosure, and status lights are mounted. The Solution is designed to
facilitate the positioning of pallets.
The base has to be anchored to the floor. For more details, please refer to the Installation section
6

1.1.2. Robotiq Control Box
All the components of the Solution are integrated and controlled via the Robotiq control box. It allows for the motion of the robot
during a palletizing process, and the control of the pallet sensors and status lights.
1.1.3. Standalone Post
The Solution includes a post to which a push button enclosure, status lights and teach pendant rack are attached. The post can
either be mounted to the base or positioned elsewhere, adjacent to the base.
1.1.4. Pallet Sensors
The Solution is composed of two (2) sensors used to detect pallet presence (one for each side of the solution).
1.1.5. Status Lights
Two (2) status lights are positioned at the top of the post adjacent to the base. Each status light is associated with the nearest pallet.
The color of the light gives information on the status of the system or the state of a specific pallet. Please refer to the Status Light
States section for more information.
1.1.6. PowerPick20 Vacuum Gripper (Optional)
PowerPick20 is a vacuum gripper that uses a venturi system to generate vacuum from a compressed air energy source. The
PowerPick Gripper interfaces with the robot via input/output (I/O) cables connected directly to the robot controller.
The kit consists of a gripper, multiple suction cups and interchangeable components, along with a dual-channel vacuum generation
unit. The unit also includes a shut-off valve and an integrated filter regulator.
Its design is suitable for the Robotiq Palletizing Solution when used with a UR20 robot (weight, payload, independently controllable
channels).
Fig. 1-2: PowerPick20 Gripper and vacuum generation unit
1.1.7. Box Detection Sensor
The Solution includes a box sensor that needs to be installed at the end of the conveyor, and positioned so that it triggers a signal
when a box is at the picking position.
Fig. 1-3: Box Sensor
7

2. Safety
2.1. Disclaimer
The intent of this section is to provide general guidelines for the safe use of the Robotiq Palletizing Solution.
Always follow local regulations.
The installer is responsible for the safe installation and commissioning of the Palletizing Solution.
Robotiq accepts no liability for damage, injury or any legal responsibility incurred directly or indirectly from the use of this product.
The user (installer and operator) shall observe safe and lawful practices including but not limited to those set forth in this document.
The terms
user
,
operator
and
installer
, refer to anyone responsible for any of the following operations on the Robotiq Palletizing
Solution:
lInstallation
lControl
lMaintenance
lInspection
lCalibration
lProgramming
lDecommissioning.
The present section is based on the following international standards and technical specifications:
lISO 10218-1:2011 : Safety Requirements For Industrial Robots - Robots
lISO 10218-2:2011 : Safety Requirements For Industrial Robots - Robots Systems and Integrators
lIEC 60204-1 : Safety Of Machinery - Electrical Equipment Of Machines
lISO/TS 15066:2016 : Robots and robotic devices — Collaborative robots
This manual details the components of the Robotiq Palletizing Solution, and the general operations regarding the whole lifecycle of
the product, from installation to operation and decommissioning.
The drawings and photos in this manual are representative examples. However, discrepancies may be observed between the
visual supports and the actual product.
8

2.2. Risk Assessment
2.2.1. General Risk Assessment
WARNING
The user must have read and understood all of the instructions in the following manual before operating
the Robotiq Palletizing Solution. Any use of the Palletizing Solution in non-compliance with these
instructions is deemed inappropriate and may cause injury or damage.
It is the user's responsibility to ensure that all local safety measures and regulations are met.
The entire cell (i.e., the robot, the PowerPick Vacuum Gripper or any other gripper, and any other equipment used in the final
application) must go through a comprehensive risk assessment process before they can be used.
In order to make the palletizing cell collaborative, several aspects should be taken into consideration. All cells being different, it is
important to perform a risk assessment and to enforce the required standards. Please note that the results of the risk assessment
depend on the usage and application.
The following non-exhaustive list presents risks that must be assessed during the integration process:
lRisk of load ejection resulting from loss of vacuum.
lRisk of load dropping resulting from loss of vacuum.
lRisk of pinching any moving component of the Robotiq Palletizing Solution or the robot.
lRisk of damage or breaking if using a custom suction cup bracket that does not meet the technical requirements.
lRisk of damaged objects or injury resulting from a collision between an object and the robot, the gripper or the boxes.
lRisk of injury resulting from a collision between a person and the Solution.
Additional hazards may be present, depending on the configuration and what is being palletized. For instance, the object handled
by the gripper could be inherently dangerous to the operator.
To ensure an adequate level of safety, floor markings must be applied to delineate safe zones around the Solution. It is the
responsibility of the integrator to establish the proper safe distance from the Solution to protect the user.
DANGER
A collision between a person and the Solution may result in material damage, bodily injury and even
death. Make sure anyone working around the Palletizing cell takes all necessary precautions:
lBefore starting the machine, make sure there is enough clearance around the Palletizer and make
sure no one is in the work area of the Solution.
lDuring palletization, it is possible to access the cell from all sides. The customer has to assess the
risks accordingly.
9

2.2.2. Emergency Stop
WARNING
There is no emergency stop button directly on the Robotiq Palletizer. The emergency stop button
used by the Palletizing Solution is the one found on the robot’s teach pendant. Make sure operators
know how to stop the Solution in case of emergency.
Depending on the supply source, when the emergency stop (e-Stop) button is pressed, the following consequences may occur. The
user has the responsibility to perform a risk assessment and choose the appropriate option.
Supply
Source
Behavior
Robot
control
boxsupply
(any 24V
terminal)
The Vacuum Gripper is powered on.
lAn object is detected: the vacuum level will continue to be regulated and the object will not be lost.
Note: the PowerPick gripper (optional) connects to the robot control box supply.
Robot tool
supply (tool
connector)
Power failure to the Vacuum Gripper.
lThe vacuum level will drop to ambient pressure and the object will be lost.
It is not recommended to connect the Vacuum Gripper to the tool connector.
CAUTION
Loss of vacuum can occur due to power failure or air supply interruption.
2.2.3. Noise Level
At optimal pressure (see Specifications section), the noise level at the workstation is 75.5 dBa. Hearing protection is recommended
but not required. Make sure that all local safety measures and regulations are met.
Noise levels should be measured regularly under normal operating conditions.
2.2.4. Cyber Risk
lThe customer must provide a safe firewall connection to avoid unauthorized remote control of the robot.
lThe customer must set a password to avoid unauthorized access to the robot safety configurations.
10

2.2.5. Residual Risk
For the intended use of the robot system, measures have been taken to prevent personal injury and property damage.
Nevertheless, residual risk remains in certain situations.
Maintenance and Repair
WARNING
During maintenance and repair work, make sure that the Palletizing Solution is turned off, de-
energized and cannot be accidentally turned on again.
lMaintenance and repair work should only be carried by qualified and authorized service personnel.
lAfter maintenance and repair work, make sure to remove all tools and equipment to prevent ejected or falling parts, material
damage or bodily injury.
lAll pneumatic tools and devices must be emptied of compressed air before maintenance and repair work.
lAll electric tools and devices must be safely isolated before maintenance and repair work.
lAlways inform the operator before performing maintenance or repair work. Notify a supervisor and lock out/tag out the machine to
prevent users from turning on and using the system. Enforce local safety regulations.
lIf necessary, secure the maintenance and repair area with temporary barriers.
lBefore performing repair work, clean the affected parts, especially the connections and fittings.
lInstall the Solution in a safe position. Depending on the maintenance and repair work to carry out, parts may come loose and
cause injury.
WARNING
lMaintenance and repair work on electrical equipment must be carried out by qualified and
authorized personnel.
lDo not bring electrical components into contact with cleaning agents. Electrical components
should only be cleaned when the Palletizing Solution is turned off and de-energized.
lAfter having performed maintenance and repair work, verify screw torque and adjust accordingly if required.
lIf the dismantling of safety equipment is necessary before performing maintenance or repair work, the equipment must be
reinstalled and assessed immediately after completion of said work.
lUse original spare parts exclusively.
lPerform preventive maintenance and cleaning work at regular intervals according to the Periodic Inspection and Maintenance
section.
11

Risk of Accident
WARNING
During maintenance, there is an increased risk of accident due to the parts, tools and equipment
used in and around the Palletizing Solution area.
lSlip, trip and fall hazards can be avoided by maintaining order and cleanliness in the workplace.
lFor work in elevated positions (500 mm and more), fall protection equipment must be installed and used.
lWhen dismantling or replacing machine parts in elevated positions (500 mm and more), suitable lifting devices should be used.
Hot Surfaces
The proper use of the Palletizing Solution does not create hot surfaces. If surfaces get hot, investigate to see where the heat is
coming from.
Radiation
The proper use of the Palletizing Solution does not create non-ionizing radiation.
Pneumatic Limitations
lThe maximum permissible pressure for all pneumatic components must never be exceeded.
lPneumatic tubing must be checked at regular intervals and replaced if necessary.
lLeaky connections must be sealed to avoid breakage, unnecessary or excessive noise, loss of energy, etc.
Protective Devices
Manipulating or circumventing protective devices during the operation of the Solution is generally not permitted and should be
considered negligent.
WARNING
In the event of incorrectly installed, defective or even missing protective devices, operation of the
machine is not permitted.
12

Electromagnetic Compatibility (EMC)
lUnauthorized changes to electrical components can lead to increased sensitivity to interference, and increased interference
emission. As a result, safety components may be impaired.
lWork on electrical equipment must only be carried out by qualified and authorized personnel.
lBe aware of the possible residual energy after turning off an electrical device with large capacitive components
Electrical Energy
lWork on electrical equipment must only be carried out by qualified and authorized personnel.
lBe aware of the possible residual energy after turning off an electrical device with large capacitive components. Wait the
appropriate amount of time before working on the device.
lSecure the work area with temporary barriers and a warning note. Secure the main switch with a padlock to prevent unauthorized
switching on.
lUse only isolated tools in the corresponding voltage level.
lUse only fuses with specified cut-off current and appropriate dielectric strength.
13

Robot Risks
WARNING
lAll personnel working with and around the robot must be informed of the inherent risks and safety
instructions.
lTo avoid being pinched or crushed when the robot moves toward a stationary object, always keep
a minimum distance of 500 mm.
lTo avoid being pinched or crushed when the robot moves toward the floor, always keep a minimum
distance of 300 mm.
lTo avoid being pinched or crushed between the robot (or gripper) and walls or peripherals, always
keep a minimum distance of 500 mm.
lThose values aforementioned are taken from standard EN 13854:2019 (Minimum gaps to avoid
crushing of parts of the human body). The installation must maintain the minimum distances
specified in this standard.
For more information, refer to the robot's instruction manual.
lRobots move quickly and exert high force. A program interruption or stop can be followed by rapid and dangerous movements.
lEven a programmed robot can be affected by external signals and make unexpected movements. Therefore, when entering the
work area, all safety instructions must be observed.
lRobot teaching, robot programming and software modification may only be performed by competent and authorized personnel.
lChanges to the robot's safety settings may only be made by competent and authorized personnel. The changes must be verified
and documented.
lReducing the speed and acceleration of the robot reduces the risks as it:
oGives the operator more time to react appropriately.
oReduces the robot's braking time.
WARNING
Reducing the robot's speed does not reduce the risk of pinching or crushing. Even at its slowest
speed, the robot movements can cause material damage and bodily injury.
14

Movement Without Power Supply
DANGER
If a person has been trapped by the robot arm, make sure that attempting to free the person does not
aggravate an injury or further increase the risk of injury.
In the case of an undesired event (malfunction, emergency, blockage, etc.), power loss or unwanted power surge, you can:
lUse forced back-driving. To perform forced back-driving, push or pull the robot arm hard enough to move the joint. Each joint
brake has a friction clutch that enables movement during high forced torque.
Performing forced back-driving requires high force and cannot be performed by one person alone. In clamping situations, two or
more people are required to do the forced back-driving. In some situations, two or more people are required to disassemble the
robot arm if necessary.
WARNING
Moving the robot arm manually is intended for urgent/emergency procedures and service purposes
only.
Do not move the joint more than necessary, not more than 160 degrees, to ensure the robot can find
its original physical position.
CAUTION
Attempting to release a joint brake manually may cause material damage and bodily injury.
For more information, refer to the robot's instruction manual.
2.3. Use of the Solution
2.3.1. Intended Use
CAUTION
The emergency stop function is intended for use in emergency conditions and not for stops in normal
conditions.
The Robotiq Palletizing Solution is specifically designed for palletization.
Only use the Solution in its original condition without making unauthorized modifications.
Only use the Solution if it is in perfect technical condition.
The Solution is intended to be used with a UR20 robot from Universal Robots.
Always comply with local, state, province and federal laws, regulations and directives, and always operate the Solution in
compliance with automation safety and general machine safety guidelines.
15

Do not use the Solution to handle boxes containing hazardous substances. Should hazardous substances be handled by the
Solution, perform a risk assessment that accounts for such substances.
CAUTION
Since there are numerous different materials used in the packaging industry, and since each
material has its own characteristics, properties and behavior with vacuum pressure, a thorough risk
assessment is in order, regardless of the box/packaging material.
2.3.2. Misuse
WARNING
The unit should be used exclusively within the range of its technical data. Any other use of the
Solution is deemed improper and unintended. Robotiq will not be liable for any damages resulting
from any improper or unintended use of the Solution.
Any use of the Solution other than that described in this manual is considered a misuse and should be avoided.
Misuse of the Solution includes but is not limited to the following situations.
Integration misuse:
lUse of the Solution with a robot other than a UR20.
lUse of a payload higher than the robot’s maximum payload.
lUse of the Solution outside of the environmental and operating conditions.
Operational misuse:
lStanding on the pallet.
lOperation of the Solution by inexperienced or untrained staff members.
lManual placing or adjustment of a box on the pallet while the Solution is in operation.
16

2.3.3. Final Application
Expected System Behavior in Normal Operating Conditions
NOTICE
Various types of external safety devices can interface with the Robotiq Palletizing Solution to ensure
a safe operation.
NOTICE
lCategory 0 Stop: Stops the Solution by immediate removal of power.
lCategory 1 Stop: A controlled stop of the Solution. Power is removed when the stop is achieved.
lCategory 2 Stop: A controlled stop of the Solution. Power is still available once the stop is
achieved.
Please refer to IEC 60204-1 for additional information on stop categories.
lNormal mode: The palletizer continuously fills pallets when no human operator is in the vicinity of the palletizing cell.
lSafeguarded operation
oReduced mode: The palletizer continuously fills pallets, even when an operator enters the palletizing cell. The operator can
safely remove a filled pallet or place a pallet in an empty slot. The system will not start to palletize on an empty pallet unless
the operator has pressed the “Confirm pallet(s) ready” button. To obtain this behavior, the “Confirm pallet(s) ready” checkbox
in the Installation tab must be ticked. Also, to allow cell access to the operator, a complete risk assessment must be
performed, and additional parameters must be set (which include, but are not limited to: robot speed, robot force, safety
planes, guardrails).
oSeparation monitoring mode: The system stops when a human operator enters the vicinity of the palletizing cell to
manipulate a filled pallet, place a pallet in an empty pallet slot, troubleshoot the system or any other operation requiring
human intervention. In such a state the robot will maintain a Category 2 stop. When the safeguards are removed, the system
resumes operation in Normal mode.
The system enters emergency stop mode when the emergency stop button is pressed.
17

The following table indicates which stop category based on the operation mode.
Operation mode
Robot
Force (N) Power (W) Speed (mm/s)
Normal mode
(Up to safety limits)
Up to 250 Up to 1,000 Up to 10,000
Protective stop Category 2 Stop
Safeguard stop Category 2 Stop
Emergency stop Category 1 Stop
Reduced mode Please refer to the Universal Robots user manual for more details.
Fig. 2-1: Safety Logic Diagram
WARNING
After a collision or an emergency stop, an inspection of the Solution must be performed before
resuming the use of the machine. Special attention must be given to the pedestal, the cable
management system, and the gripper components. Please contact [email protected] if any sign
of damage is detected.
18

Stopping Times of the Safety System
The stopping time related to the Solution’s safety system corresponds to the stopping time of the robot.
Please refer to the UR20 user manual on the Universal Robots website to calculate the stopping time based on the application.
If safety devices and safety relays are part of the palletizing cell, the stopping times of such devices must be accounted for (i.e.,
added to robot’s stopping time).
19

3. Installation
This section will guide you through the installation and general setup of the Robotiq Palletizing Solution.
Before installing:
lRead and understand the safety instructions related to the Palletizing Solution. Refer to the Safety section.
lVerify the package according to the scope of delivery and the order.
lMake sure to have the required parts, equipment and tools listed in the scope of delivery.
lMake sure to meet the recommended environmental conditions.
NOTICE
Robotiq uses the metric system. Unless otherwise specified, all dimensions in this manual are in
millimeters.
WARNING
lDo not turn on or operate the Palletizing Solution before making sure the device is firmly anchored
and the machine area is cleared.
lWhen assembling or moving the Solution, make sure there is enough vertical and horizontal
clearance in order to avoid material damage and bodily injury.
lMake sure that the air supply source is secured.
lFailure to properly secure and install the equipment can result in material damage and bodily
injury.
lIf the installation is not performed in compliance with the manufacturer's instructions, the warranty
will be void.
lMake sure to follow all workplace safety rules and regulations when operating the Robotiq Palletizing Solution.
lAlways wear all recommended personal protective equipment in accordance with the safety standards of the workplace, including
but not limited to:
oSafety glasses
oHearing protection
oHard hats
oSteel-toe boots
lAlways use proper safety measures when working with tools that have sharp edges, pinching surfaces, or heat sources.
lAlways lift heavy objects with the legs, not the back. Ask for help or find alternative solutions if a heavy object cannot be lifted by a
single person.
20
/