
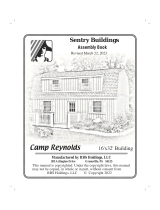
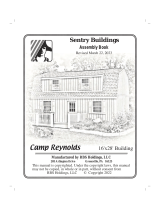
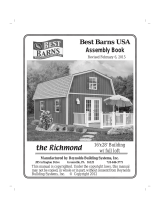
Assembly Book
Sentry Buildings
!"#$%&#'()*+,*-.
the Jefferson
/01*20,'34567'%%8'%9%:
;7*2'<4-)4+'*2'6=>?5*.7@0,A'B-,05'@70'6=>?5*.7@'+4C28'@7*2'<4-)4+
<4?'-=@'D0'6=>*0,8'*-'C7=+0'=5'*-'>45@8'C*@7=)@'6=-20-@'E5=<
''''''/(F'G=+,*-.28'HHI '''''J''I=>?5*.7@'%9%%
Manufactured by RBS Holdings, LLC
205 Arlington Drive Greenville, PA 16125

K@'*2'7*.7+?'506=<<0-,0,'@='50-@'L"M'2*$'206@*=-2'=E'264EE=+,*-.'@='24E0+?'*-2@4++'@70'206=-,'E+==5
<4@05*4+A'B20'24E0@?'745-02202'C70-'=-'@70'264EE=+,*-.A'I=-2*,05'7*5*-.'4'>5=E022*=-4+'5==E05
@='*-2@4++'@70'27*-.+02'=5'<0@4+'5==EA
IMPORTANT INFORMATION ABOUT YOUR KIT
*
Tools
Required:
!'G4-,'=5'I*56)+45'F4C ! H010+ ! N7*++*>2'F650C,5*105
! I=5,+022'O5*++ ! 3042)5*-.';4>0 ! P54<*-.'FQ)450
! I4)+R*-.'S)- ! T#'U'!9#'H4,,05L2M ! G4<<05
! F4E0@?.+42202V'W+C4?2'C045'24E0@?'.+42202'C70-'6)@@*-.'=5'-4*+*-.X
! *''F64EE=+,*-.
Building Permits: I706R'C*@7'?=)5'+=64+'GYW'=5'D)*+,*-.'6=,0'=EE*60'E=5'4-?'50Q)*50<0-@28
502@5*6@*=-2'=5'>05<*@2'-0602245?'E=5'6=-2@5)6@*=-A
Foundation: (?'=C-05A'/0E05'@='-0$@'>4.0'E=5'E=)-,4@*=-'2)..02@*=-2'4-,'2*Z0A
What's Included: Y)5'>46R4.0'*-6+),02'>50[6)@'<4@05*4+2'E=5'@70'%-,'E+==5'5==E'.4D+028'5==E
@5)2202'4-,'.4D+0'@5*<A'F00'D46R'>4.0'E=5'<4@05*4+'+*2@A';70'-4*+2'4-,'745,C450'450'>46R0,'*-'@70
@=>'=E'#W#'>4++0@A';70'=@705'<4@05*4+2'=-'@70'>4++0@'C*++'-=@'D0')20,')-@*+'@70'E*52@'E+==5'C4++2'4-,
+=E@'E+==5'450'6=<>+0@0,A
P54<*-.'+)<D05'E=5'@70'E*52@'E+==5'C4++2'4-,'+=E@'E+==58'0$@05*=5'2*,*-.8'+=E@'E+==5*-.'4-,'5==E
2704@7*-.'C*++'D0',0+*1050,'D?'4'+=64+'2)>>+*05A'F00'D46R'>4.02'E=5'<4@05*4+'+*2@A
Owner Supplied: Y105704,'T#'=5'\#'$'"]"'.454.0',==5'C*@7'+=C'704,5==<'745,C450A'^4+R[*-
<4-',==58'5==E'27*-.+028'<0@4+'5==E'0,.08'E0+@'4-,'10-@*+4@*=-'466022=5*02A'N4*-@'E=5'2*,*-.'4-,
@5*<A'W,,*@*=-4+'+)<D05'E=5'E54<*-.'4,,*@*=-4+'C*-,=C'4-,',==5'=>0-*-.2A
Assembly Help: 3=-,4?'@75)'P5*,4? T99[%&_[!_`` TV99'@='_V99'a;
^00R0-,'['4E@05'7=)52 `%&[T""[&:_`
0<4*+'@=V''helpbbarnkits.com
Care of product prior to assembly: W220<D+?'27=)+,'D0.*-'>5=<>@+?'@='>5010-@'@70'@C*2@*-.'=E
+)<D05A'KE'4220<D+?'*2'-=@'*<<0,*4@0+?'4E@05'=>0-*-.'>4++0@2'?=)'C*++'-00,'@='@*.7@+?'2@46R'<4@05*4+
4-,',='-=@'0$>=20'<4@05*4+'@='*-6+0<0-@'C04@705A'Y5.4-*Z0'4++'<4@05*4+'>5*=5'@='6=-2@5)6@*=-A
Building Tips: K3NY/;Wc;V'P=++=C'@70'4220<D+?'F@0>2'*-'20Q)0-60A'FR*>>*-.'2@0>2'C*++'502)+@
*-'6=<>=-0-@2'-=@'E*@@*-.'>5=>05+?A

%A K-2@4++'@70'50<4*-*-.'@504@0,'%$&2
D0@C00-'@70'!"#'+=-.'%$&2A'I)@'@70'+42@
@504@0,'%$&'@='E*@A
Treated 2x4-16'
Foundation Information
Foundation TypesV'^74@'E=)-,4@*=-'*2'D02@',0>0-,2'=-'C74@'@?>0'=E'*@0<2'C*++'D0'2@=50,A';70
D)*+,*-.'6=,0'*-'?=)5'4504'C*++'4+2=',0@05<*-0'C74@'@?>0'=E'E=)-,4@*=-'64-'D0')20,A'I706R'@70
Z=-*-.'4-,'D)*+,*-.'6=,0'50Q)*50<0-@2'*-'?=)5'4504A
K-2@4++4@*=-'=105'4'60<0-@'2+4D8'2@0<'C4++'=5'C==,'E+==5'E=)-,4@*=-'C*++'4+@05'@70'@?>0'=E'E42@0-052
-00,0,'@='206)50'C4++2'@='@70'E+==5A';7020'E42@0-052'450'-=@'*-6+),0,'*-'R*@A'I706R'@70'Z=-*-.'4-,
D)*+,*-.'6=,0'50Q)*50<0-@2'*-'?=)5'4504'@=',0@05<*-0'@70'6=5506@'<0@7=,'@='206)50'C4++2A
Do Not <4R0'@70'E=)-,4@*=-'+45.05'@74-'@70'D)*+,*-.'2*Z0A
!A I)@8'*E'-0602245?8'4'%$&[!"#'@504@0,'D=45,'@='!\%dA'F06)50'@7020'2*++'>+4@02'@='E=)-,4@*=-
4@'0467'!"#'0-,')2*-.'E42@0-052'506=<<0-,0,'D?'+=64+'D)*+,*-.'6=,02A
Installing Exterior Siding
;0<>=545*+?'*-205@'!9,'2*-R052'D0@C00-'@70
@504@0,'>+4@0'4-,'@70'D=@@=<'C4++'>+4@0A''H0410
2=<0'=E'@70'-4*+'0$>=20,'@='2*@'@70'2*,*-.'=-
C70-'*-2@4++*-.A
Treated 2x4-16'
^4++'E54<*-.'C*++'D0'206)50,'@='2*++'>+4@02
)2*-.':d',06R'2650C2A
Securing Walls to Sill Plates
Install Sill Plates

24" x 36" Window Opening
32" x 80" Door Opening
40" window
Cripplers
27" Header
36" Header
Supports
27" Sill
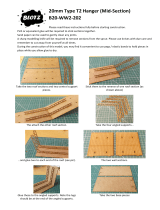
Rough Opening Details for Windows and Doors (not included)
If installing seperately purchased windows and doors follow the
manufacturers instructions for correct rough opening sizeA';70'D0+=C
0$4<>+02'450'E=5'50E050-60'=-+?'4-,'<4?'-00,'@='D0'<=,*E*0,',0>0-,*-.
=-'2@?+0'4-,'2*Z0'=E'?=)5'C*-,=C2'4-,',==52AA
!A F0+06@'4'C4++'2@),'C7050'?=)'C4-@'@=
2@45@'*-2@4++*-.'@70'C*-,=C'=>0-*-.A
K-2@4++'4-=@705'C4++'2@),'2>460,'%`d
4C4?A
%A I)@'L:M'@7500'%$&2'@='4'+0-.@7'=E'&9dA
I)@'=-0'@='4'+0-.@7'=E''%`dA
:A K-2@4++'@7020'%$&2'42'27=C-'=-'5*.7@A
&A I)@'L%M'@C='%$&2'@=':"dA'K-2@4++'42'704,05
2)>>=5@2')-,05'704,05A
_A I)@'%$&2'@='E*@'4-,'*-2@4++'D0@C00-
704,05'4-,'@=>'C4++'>+4@0A
*34*-@4*-'!"d'2@),'2>46*-.'2='@70
2*,*-.'C*++'<00@'=-'4'2@),A
*
Pre-cut Wall
Stud
80-1/2" Header
Supports
37-1/2"
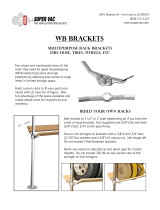
Door Header
!A F0+06@'4'C4++'2@),'C7050'?=)'C4-@'@='2@45@
*-2@4++*-.'@70',==5'=>0-*-.A'K-2@4++'4
4-=@705'C4++'2@),'2>460,':`[!]%d'4C4?A
%A I)@'L%M'@C='%$&2'@='4'+0-.@7'=E'T9[!]%A
K-2@4++'@7020'42'704,05'2)>>=5@2')-,05
704,05A
:A I)@'%$&2'@='E*@'4-,'*-2@4++'D0@C00-'704,05
4-,'@=>'C4++'>+4@0A
*
Pre-cut Wall
Stud
27" Between
Studs
Pre-cut
Wall Stud
G04,052'4D=10'C*-,=C2'4-,',==52'<)2@'D0
2)EE*6*0-@'@='2)>>=5@'C0*.7@'=E'%-,'E+==5'4-,
@5)2202A'^*,05'2>4-2'50Q)*50'+45.05'704,052A
Alter the following instructions for
rough openings as needed.

V
VVVVVV
Pre-cut 2x4
Wall Studs
If you are adding additional windows or doors, frame-in rough opening(s)
per manufacturer's instructions.
!A F0+06@'L%M'@C='%$&[T#'L=-0'C*++'D0'@504@0,M'*E'-0602245?'@5*<'@='4'+0-.@7'=E'\"dA'N=2*@*=-'@70
D=45,2'@=.0@705'4-,'*-,*64@0'C*@7'#e#''<45R2'C7050'@70'C4++'2@),2'C*++'D0'+=64@0,A
Stud Spacing
XX
X X
X
X
X
X
96" Top Wall Plate
96" Treated Bottom Plate
16"
15-1/4" 16"
Step 2A Assemble (6) Six 8' Side Wall Frames
Step 1 Assemble (2) Two 92-1/2" Rear Wall Frames
:A /0>04@'@='D)*+,'4-=@705'\%[!]%d'+=-.'C4++'E54<0A
&A 345R'D=@7'E54<02'#Rear Wall Frames''4-,'20@'E54<02'42*,0A
Treated Bottom Plate
!A I)@'L%M'@C='%$&[T#'L=-0'C*++'D0'@504@0,M'@='4'+0-.@7'=E'\%[!]%dA'N=2*@*=-'@70'D=45,2'@=.0@705
4-,'*-,*64@0'C*@7'#e#''<45R2'C7050'@70'C4++'2@),2'C*++'D0'+=64@0,A
%A 345R'4'#I#'4-?C7050'D0@C00-'E*52@'@C='2@),'<45R2A';7*2'*2'50E050-60,'*-'4'+4@05'2@0>A
Note:'When building the lower walls, use
treated 2x4s for the bottom wall plates.
%A K-2@4++'L`M'2010-'>50[6)@'C4++'2@),2'D0@C00-'@70'@=>'4-,'D=@@=<'>+4@02A''c4*+'@70
@504@0,'D=@@=<'>+4@0'@='0467'C4++'2@),'C*@7'L%M'@C='!",'.4+14-*Z0,',06R'-4*+2A
B20'L%M'@C='!9,'6=4@0,'2*-R05'-4*+2'>05'2@),'@='206)50'@70'@=>'>+4@0A
The length of pre-cut wall studs will vary from 92-1/4" to
93" depending on your locality.
Stud Spacing
XX
X X
X
X
X
X
92-1/2 Top Wall Plate
92-1/2" Treated Bottom Plate
16"
11-3/4" 16"
C
C

V
VVVVVV
Pre-cut 2x4
Wall Studs
!A KE'?=)'450'*-2@4++*-.'4'T#'C*,0'.454.0',==5'6)@'L%M'@C='!9#'+=-.'%$T'D=45,2'@='4'+0-.@7'=E'\\dA
P=5'4'\#'C*,0'.454.0',==5'6)@'%$T2'@='4'+0-.@7'=E'!!!d
Refer to the garage door manufacturers instructions
to verify correct rough opening for the door
V
V
V
V
V
V
Step 2B Assemble (6) Six 8' Side Wall Frames continued
Bottom Plate
Step 3 Assemble Door Header
%A K-2@4++'L`M'2010-'>50[6)@'C4++'2@),2'D0@C00-'@70'@=>'4-,'D=@@=<'>+4@02A''c4*+'@70'@504@0,'D=@@=<
>+4@0'@='0467'C4++'2@),'C*@7'L%M'@C='!",'.4+14-*Z0,',06R'-4*+2A'B20'L%M'@C='!9,'6=4@0,'2*-R05
-4*+2'>05'2@),'@='206)50'@70'@=>'>+4@0A
:A /0>04@'@='D)*+,'L_M'E*10'<=50'T#'+=-.'C4++'E54<0A
&A 345R'E54<02'#Side Wall Frames''4-,'20@'E54<02'42*,0A
99" Long 2x8
48" OSB Filler
GLUE
99" or 111" Long 2x8
%A H=64@0'4'%&d'$'&Td''YF('L=5*0-@0,'2@54-,'D=45,M'>4-0+2'>46R0,'*-'=)5'R*@A'P5=<'@7*2'6)@8'L%M
@C='E=5'4-'T#',==5'=5'L:M'@7500'E=5'4-'\#',==58'`[!]&d'$'&Td'E*++052'@='E*@'D0@C00-'@70'%$T'D=45,2
:A P=5'4'T#',==5'60-@05'@70'YF('D0@C00-'@70'%$T'D=45,2A'P=5'4'\#',==5'*-2@4++'E*52@'YF('E+)27'C*@7
0-,'=E'%$T'D=45,2'@70-'*-2@4++'@70'-0$@'%'YF('E*++052'6)@@*-.'+42@'=-0'@='E*@A'W>>+?'C==,'.+)0
@='D=@7'2*,02'=E'0467'YF('E*++05'C*@7'4'D5)27A'c4*+'@=.0@705')2*-.'!9,'6=4@0,'2*-R052A'B20'L!%M
@C0+10'-4*+2'2>460,'010-+?'=-'0467'2*,0A

*
*Adjust opening height per garage
door manufacture's specifications
Step 4A Assemble 15'-5' Front wall - 8' Wide Door Opening
KE'?=)'450'*-2@4++*-.'4'\#'C*,0'.454.0',==5'.='@='Step 4BA
%A W220<D+0'@70'E5=-@'C4++'E54<0')2*-.'@70'C4++'>+4@02'6)@'4D=10'4-,'LTM'0*.7@'>50[6)@'C4++'2@),2A
B20'!9,'6=4@0,'2*-R052'@='206)50'@70'>+4@02A
:A /0E05'@='@70'.454.0',==5'2>06*E*64@*=-2'@=',0@05<*-0'@70'70*.7@'=E'@70'5=).7'=>0-*-.A'I)@'L%M
@C='>50[6)@'2@),2'@='@7*2'70*.7@'+022'![!]%d'4-,'*-2@4++'@70<'42'704,05'2)>>=5@2')2*-.'L!9M'@0-
!9,'2*-R052A'K-2@4++'@70'%$T'704,05'D?'@=0[-4*+*-.'@70'0-,2'@='@70'4,f460-@'2@),2'C*@7'!9,'2*-R052A
&A I)@'L_M'E*10'>*0602'E5=<'4'>50[6)@'2@),'@='E*@'D0@C00-'704,05'4-,'@=>'%$&'>+4@0A'a10-+?'2>460
D+=6R2'465=22'704,05A'K-2@4++'C*@7'!9,'2*-R052'@75=).7'@=>'>+4@0'4-,'@=0-4*+'*-@='704,05A
!A I)@'L%M'@C='%$&[!"#'L=-0'C*++'D0'@504@0,M'@='4'+0-.@7'=E'!T_dA'N=2*@*=-'@70'D=45,2'@=.0@705'4-,
*-,*64@0'C*@7'#e#''<45R2'C7050'@70'C4++'2@),2'C*++'D0'+=64@0,'4-,'4-'#F#'C7050'@70'2)>>=5@'2@),2
C*++'D0'+=64@0,AA
2x4 Header Blocking
2x8 Door Header
Pre-cut 2x4
Studs
2x4-15'-5"' Bottom Plate
96" Door Opening Width
2x4 Header
Support Studs
15' - 5" Wall Plates
16"
11-3/4" 13-3/4" 16"
13-3/4" 11-3/4"
X
XXX
X
XXX
96" Door Opening
X
X
XX
X
X
XX
SS
99" Door Header

*
*Adjust opening height per garage
door manufacture's specifications
Step 4B Assemble 15'-5' Front wall - 9' Wide Door Opening
15' - 5" Wall Plates
16"
11-3/4" 7-3/4" 16"
7-3/4" 11-3/4"
X
XXX
X
XXX
108" Door Opening
2x4 Header Blocking
2x8 Door Header
Pre-cut 2x4
Studs
2x4-15'-5"' Bottom Plate
108" Door Opening Width
X
X
XX
X
X
XX
SS
111" Door Header
2x4 Header
Support Studs
%A W220<D+0'@70'E5=-@'C4++'E54<0')2*-.'@70'C4++'>+4@02'6)@'4D=10'4-,'LTM'0*.7@'>50[6)@'C4++'2@),2A
B20'!9,'6=4@0,'2*-R052'@='206)50'@70'>+4@02A/0E05'@='@70'.454.0',==5'2>06*E*64@*=-2'@=',0@05<*-0
@70'70*.7@'=E'@70'5=).7'=>0-*-.A'I)@'L%M'@C='>50[6)@'2@),2'@='@7*2'70*.7@'+022'![!]%d'4-,'*-2@4++
@70<'42'704,05'2)>>=5@2')2*-.'L!9M'@0-'!9,'2*-R052A'K-2@4++'@70'%$T'704,05'D?'@=0[-4*+*-.'@70
0-,2'@='@70'4,f460-@'2@),2'C*@7'!9,'2*-R052A
&A I)@'L_M'E*10'>*0602'E5=<'4'>50[6)@'2@),'@='E*@'D0@C00-'704,05'4-,'@=>'%$&'>+4@0A'a10-+?'2>460
D+=6R2'465=22'704,05A'K-2@4++'C*@7'!9,'2*-R052'@75=).7'@=>'>+4@0'4-,'@=0-4*+'*-@='704,05A
!A I)@'L%M'@C='%$&[!"#'L=-0'C*++'D0'@504@0,M'@='4'+0-.@7'=E'!T_dA'N=2*@*=-'@70'D=45,2'@=.0@705'4-,
*-,*64@0'C*@7'#e#''<45R2'C7050'@70'C4++'2@),2'C*++'D0'+=64@0,'4-,'4-'#F#'C7050'@70'2)>>=5@
2@),2'C*++'D0'+=64@0,AA

Step 5A Install Wall Frames
Front and back wall frames are positioned between long side walls.
!A K-2@4++'=-0'=E'@70'\%[!]%d'5045'C4++'E54<02'4.4*-2@'*-2*,0'=E'4'T#'2*,0'C4++'E54<0A'IMPORTANT:
Y5*0-@'0-,'<45R0,'C*@7'4'#I#'@='6=5-05A'F06)50'E54<02'@=.0@705'4@'@70'6=5-05')2*-.'L&M'E=)5'!9,
2*-R052A'(5460'C4++2'C*@7'>50[6)@'2@),2A
%A K-2@4++'@70'=@705'\%[!]%d'5045'C4++'E54<0'@='@70'5045'C4++'E54<0A'c4*+'@70'5045'C4++'E54<02'@=.0@705
C7050'@70?'D)@@'C*@7'LTM'0*.7@'!9,'2*-R05'[email protected]'-4*+2'=-'0467'2*,0'=E'@70'2@),2MA
:A K-2@4++'4-=@705'T#'E54<08'-0$@'@='@70'E*52@'T#'2*,0'C4++'E54<0A'c4*+'E54<02'@=.0@705'C7050'@70?
D)@@'C*@7'LTM'0*.7@'!9,'2*-R052'[email protected]'-4*+2'=-'0467'2*,0'=E'@70'2@),2MA
92-1/2" End Wall Frames
8' Side Wall Frame
Brace wall frames with
pre-cut wall studs.
End Marked 'C'
End Marked 'C'
8' Side Wall Frame
&A K-2@4++'L%M'@C='T#'C4++'E54<02'=-'@70'=>>=2*@0'2*,0A
_A c4*+'E54<02'@='@70'E+==5')2*-.'!",'S4+1A'2>*54+'-4*+2'=58'*E'0506@*-.'=-'4'60<0-@'2+4D8'6=-650@0
4-67=5'D=+@2'Lnot includedM'2>460,'%&d'=-'60-@05A

Step 5B Set Wall Frames continued
"A K-2@4++'T#'2*,0'C4++'E54<02'4@'@70'E5=-@'6=5-052A
15'-5" Front
Wall Frame
8' Side Wall
Frame
`A K-2@4++'@70'E5=-@'C4++'E54<0'D0@C00-'@70'2*,0'C4++'E54<02A'F06)50'E54<02'@=.0@705'4@
@70'6=5-05')2*-.'L&M'E=)5'!9,'2*-R052A
Do Not Anchor
Do Not Anchor
TA c4*+'E54<02'@='@70'E+==5')2*-.'!",'S4+1A'2>*54+'-4*+2'=58'*E'0506@*-.'=-'4'60<0-@'2+4D8
6=-650@0'4-67=5'D=+@2'Lnot includedM'2>460,'%&d'=-'60-@05A'O='-=@'-4*+'@70'%$&'>+4@0'*-'@70
,==5'=>0-*-.A

If a siding panel has a damaged edge, install this edge at a corner where it will be
covered with corner trim.
I=-650@0'F+4D'P=)-,4@*=-V K-2@4++'2*,*-.'E+)27'C*@7'@70'D=@@=<'>+4@0A
^==,'P+==5'P=)-,4@*=-V a$@0-,'@70'2*,*-.':]&d'D0+=C'@70'D=@@=<'>+4@0A
Step 6 Install 2x4 Tie Plates
16' Long 2x4 Tie Plate
:A K-2@4++'4'%$&[!%#'D=45,'=-'@70'2*,0'C4++'E54<0A';70'%$&'2*,0'C4++'@*0'>+4@0'C*++'D)@@'4.4*-2@
@70'!"#'+=-.'@*0'>+4@0'=-'@70'D46R'C4++A'B20'!9,'2*-R052A
&A I)@'@='E*@'4-,'*-2@4++'4'%$&[!%#'D=45,'=-'@70'24<0'2*,0'C4++'E54<0A
_A /0>04@'@='*-2@4++'%$&'@*0'>+4@02'=-'@70'=>>=2*@0'2*,0'C4++'E54<02A
Back Wall Frames
!A K-2@4++'4'!"#'+=-.'%$&'=-'@70'D46R'C4++A'B20'!9,'2*-R052'2>460'!"d'4>45@'@='206)50'@*0'>+4@02A
%A /0>04@'@='*-2@4++'4'!"#'+=-.'%$&'@*0'>+4@0'=-'@70'=>>=2*@0'E5=-@'C4++A
Step 7A Install Siding on Wall Frames
12' Long 2x4 Tie Plate
Exterior Siding Information
LP siding'*2'>5*<0,'504,?'@='>4*-@A''W>>+?'@C='6=4@2'=E
+4@0$'465?+*6'>4*-@'E=5'@70'E*-*27'6=4@A''N4*-@'@70'D=@@=<
0,.0'=E'@70'2*,*-.8'this is importantA''34*-@4*-'"d'@='Td
=E'6+0454-60'E5=<'@70'D=@@=<'0,.0'=E'@70'2*,*-.'4-,'@70
.5=)-,A''O=-#@'4++=C'.45,0-'<)+67'@='D)*+,')>'4-,'R00>
275)D2'4'<*-*<)<'=E'!#'4C4?'E5=<'@70'D)*+,*-.A
Tongue Edge
LAP Edge

Remove 2x4
Plate
Steps not needed with this size and model.
!A K-2@4++'4'E)++'C*,@7'2*,*-.'>4-0+'=-'@70'2*,0'C4++'C*@7'@70'#HWN#'0,.0'E+)27'C*@7'@70'%$&2'=-
@70'D46R'C4++A'K-2@4++'L_M'E*10'<=50'2*,*-.'>4-0+2A'KE'-0602245?'6)@'+42@'>4-0+'E+)27'C*@7'%$&2
=-'E5=-@'C4++A'B20'T,'.4+1A'D=$'-4*+2'2>460,'Td'4>45@A
%A K-2@4++'4'2*,*-.'>4-0+'=-'@70'D46R'C4++'C*@7'@70'#HWN#'0,.0'E+)27'C*@7'@70'2*,*-.'=-'@70'2*,0
C4++A'K-2@4++':'<=50'>4-0+2A
LAP
Edge
Side Wall
Back Wall
Install This Panel First
Step 7B Install Siding on Wall Frames continued
:A K-2@4++'2*,*-.'=-'=>>=2*@0
2*,0'C4++A
&A K-2@4++'4'E)++'C*,@7'2*,*-.'>4-0+'=-'@70'E5=-@'C4++'C*@7'@70'#HWN#'0,.0'E+)27'C*@7'@70'2*,*-.
=-'@70'2*,0'C4++A'I)@'4-,'50<=10'4-?'2*,*-.'@74@'0$@0-,2'>42@'@70',==5'=>0-*-.A
_A H=64@0'L%M'@C='!&[!]%d'$'&Td'2*,*-.'>4-0+2A'I)@'@7020'@='E*@'4D=10',==5'=>0-*-.A'34R0'2)50
@7020'450'E+)27'C*@7'D=@@=<'=E',==5'704,05A
Cut to Fit
"A K-2@4++'4-=@705'E)++'C*,@7'2*,*-.
=-'@70'5*.7@'2*,0'=E'@70',==5
=>0-*-.A
`A I)@'4-,'50<=10'%$&'>+4@0'@74@
0$@0-,2' 465=22' @70' ,==5
=>0-*-.A'F410'@70'%$&8'*@'C*++
D0')20,'*-'4'+4@05'2@0>A
LAP Edge
Step 8 thru 12
IMPORTANT: Go now to the instructions in the stair kit book to install
the stairs, floor joist and flooring.

Step 13A Assemble Rear Gable
2x4 Block
!A I)@'L%M'@C='%$&[!9#'D=45,2'@='4'+0-.@7'=E'\`[!]%dA'N=2*@*=-'@7020'%$&28'on edge'4-,'D)@@'@=.0@705A
%A N=2*@*=-'L%M'@C='T![:]&d'+=-.'%$"2'4-,'L%M'@C='`![:]Td'+=-.'%$"'D=45,2'=-'@70'%$&'>+4@02'42
27=C-'D0+=CA';70'@=>'%$"'D=45,2'7410'D+)0'<45R2'=-'@70'0-,2A'N=2*@*=-'@7020'0-,2'@=.0@705
4@'@70'@=>A
Assemble the roof gables and trusses on the center of the loft floor. This
will make it easier to stand the gable upright over the lower wall.
2x4 Block
2x4 Block
71-3/8" Long
Truss Leg
2x4 On Edge
97-1/2" Long 2x4 On edge
188-1/2"
71-3/8" Long
Truss Leg
81-3/4" Long
Truss Top
Truss Knee
:A F06)50'@70'@5)22'+0.'@='@70'%$&'>+4@0'C*@7
L%M'@C='%[!]%d'+=-.',06R'2650C2A
&A K-2@4++'_[!]%d'$'!%d'YF('E*++052'=-'@70'%$"
@5)22'+0.2'-045'%$&'C*@7'",'6=<<=-'-4*+2A
a$46@'2>46*-.'*2-#@'*<>=5@4-@A
_A FQ)450'
@5)22A'3042)50',*4.=-4++?'E5=<'@70
R-00'=E'@70'%$"'@5)22'@='@70'D=@@=<'6=5-05
=E'@70'%$&'>+4@0A';70'<042)50<0-@2'C*++'D0
@70'24<0'L!TT[!]%dM'C70-'@70'@5)22'*2'2Q)450A
"A I)@'%$&'50<=10,'E5=<',==5'=>0-*-.'*-@=
Td'+=-.'D+=6R2A';46R'-4*+'=5'2650C'@70'D+=6R2
45=)-,'@70'>05*<0@05'=E'@70'.4D+0'E54<0'@=
>5010-@'@70'.4D+0'E5=<'<=1*-.A

!A F06)50'@70'%$"'D=45,2'@=.0@705'4@'@70'R-00'4-,'5*,.0'C*@7'!]%d'YF('.)220@2A
B20'",'6=<<=-'-4*+2A'c4*+'_[!]&d'$'!%d'YF('E*++052'C7050'27=C-'D0+=CA
%A N+460'L%M'@C='T![:]&d'4-,'L%M'@C='`![:]Td'%$"2'=105'@70'E*++052A'F06)50')2*-.'L"M'2*$'!9,'2*-R052
C7050'E*++052'4-,'.)220@2'450'+=64@0,A
:A K-2@4++'4'%![:]&d'7*.7'>50[D)*+@'.4D+0'E54<0'4@'@70'>04R'=E'@70',=)D+0'5=C'=E'@5)2202A'F06)50'@70
E54<0'@='@70'%$"'@5)22'D=45,2'C*@7'L"M'2*$'%[!]%d',06R'2650C2A
&A N=2*@*=-'4'!\[!]&d'>50[D)*+@'E54<0',*506@+?'D0+=C'@70'@=>'E54<0A'B20'L%M'@C='T9[!]%d'+=-.'2@),2
@='70+>'4+*.-'@70')>>05'4-,'+=C05'E54<02A'B20'4'E54<*-.'2Q)450'@='0-2)50'@70'2@),2'450'>+)<DA
F650C'D=@@=<'E54<0'@='%$&'>+4@0')2*-.'%[!]%d'2650C2A'F06)50'@70'T9[!]%d'2@),2'@='@70'>50[D)*+@
E54<02')2*-.'%[!]%d'2650C2A
Step 13B Assemble Rear Gable continued
"A K-2@4++'4'`%[_]Td'4-,'4'"&[!]%d'C4++'2@),'=-'@70'+0E@'2*,0'=E'@70'.4D+0'E54<0A'B20'4'2Q)450'@=
0-2)50'@70'2@),2'450'>+)<DA'c4*+'@='%$&'D=@@=<'>+4@0'C*@7'!9,'2*-R052'4-,'2650C'@='%$"2'C*@7
%[!]%d'2650C2A'/0>04@'@='*-2@4++'2@),2'=-'5*.7@'2*,0'=E'.4D+0'E54<0A
1/2" Gusset
at Ridge
1/2" Gusset
at Knee
_A H=64@0'L:M'@7500'&`[:]&d
+=-.'%$&2'4-,'@5*<'@='E*@
4-,'*-2@4++'D0@C00-'E54<02A
cut to fit
Studs
Framing
Square
Framing
Square
64-1/2"
Stud
72-5/8"
Stud
Framing
Square
80-1/2"
Stud
19-1/4" High Pre-built Frame
5-1/4" x 12"
OSB Filler
5/1/4" x 12"
OSB Gusset
Two Ridge Gussets have equal angles cuts. Four Knee Gussets have offset angles cuts.
21-3/4" High Pre-built Frame
Optionally install a window
in gable. Refer to Step 17
for example of size and
placement.

16' Rear Wall
Siding Extends 3/4" Below Bottom Plate
Siding Cutoff
Step 14 Install Siding on Rear Gable Frame
16' Rear Wall Side
Wall
1x4 Corner Trim
Step 15 Install Trim on Front and Back Walls
IMPORTANT: Trim Must Be Installed Before Installing Roof Gables!
!A H=64@0'L&M'E=)5'![!]%d'$'&T[:]&d'2*,*-.'E*++05'2@5*>2A'K-2@4++'@7020'=-'D46R'C4++'E+)27'C*@7'@=>'=E
E+==5*-.A';7050'<4?'D0'4'.4>'D0@C00-'@=>'=E'2*,*-.'4-,'2@5*>2A'B20'4'E0C'T,'.4+1A'-4*+2A'W,,*@*=-4+
-4*+2'450'4>>+*0,'D0+=CA
%A I)@'4-,'*-2@4++'L%M'@C='!$&'[!9#'@5*<'D=45,2'E+)27'C*@7'@=>'=E'E+==5'4-,'D=@@=<'=E'@70'2*,*-.A
K-2@4++'@5*<'E+)27'C*@7'@70'2*,*-.'=-'@70'2*,0'C4++2A'B20'T,'.4+1A'-4*+2'2>460,'!%d'4>45@A
1x4 Trim
:A K-2@4++'L%M'@C='\"d'+=-.'!$&'@5*<
D=45,2'D0@C00-'6=5-05'D=45,2A';5*<
27=)+,'D0'E+)27'C*@7'@70'+=E@'E+==5A
I)@'%-,'D=45,'@='E*@A
&A /0>04@'@='*-2@4++'@5*<'@='@70'E5=-@
C4++'>4-0+A
Siding Filler
&A K-2@4++'T9[!]%d'+=-.'2*,*-.'>4-0+A
I)@'@70'2*,*-.'@74@'0$@0-,2'D0?=-,
@70'.4D+0'E4<0A
!A F@4-,')>'@70'.4D+0'E54<0'4-,'2+*,0'*@'@='@70'5045'=E'@70'D)*+,*-.A'N=2*@*=-'@70'E54<0'C*@7'@70
D=@@=<'@=C45,2'@70'5045'C4++'2='*@'64-'D0'0506@0,'4E@05'@70'2*,*-.'*2'4>>+*0,A
% K-2@4++'4'>50[6)@'2*,*-.'>4-0+'C*@7'@70'#6)@'0,.0#'E+)27'C*@7'@70'+0E@'2*,0'=E'@70'.4D+0'E54<0A';70
2*,*-.'27=)+,'0$@0-,':]&d'D0+=C'@70'D=@@=<'%$&'.4D+0''>+4@0A''K-2@4++'2*,*-.'C*@7'T,'.4+1A'-4*+2A
: K-2@4++'L%M'@C='&$T'2*,*-.'>4-0+2A'I)@'4-,
50<=10'2*,*-.'@74@'0$@0-,2'4D=10'@70'@=>
=E'@70'.4D+0'E54<0A
Siding Flush with Frame
All trim is installed using 8d galvanized box nails spaced 12" apart.

(0E=50'D546*-.'@70'105@*64+'%$&2'*-'>+460'4@@467
L%M'@C='%$&'D+=6R2'@='@70'D46R'=E'@70'%$&2A
;7*2'C*++'6504@0'@70'>5=>05'2>46*-.'@='20@'@70
.4D+0'=105'@70'+=C05'C4++A
2x4 Stake
2x4-12' Brace
2x4 Block
2x4-12' Vertical Boards
2x4 Block
2x4-12'
&A c4*+'D=@@=<'0,.0'=E'2*,*-.'@='!$&'@5*<
C*@7'T,'.4+14-*Z0,'D=$'-4*+2A
Siding Extends Over
Trim. Paint edge
Step 16 Install Rear Roof Gable
%A a506@'@70'.4D+0'=-'D46R'C4++A'(0'64)@*=)2'4-,'0-2)50'.4D+0'2*,*-.'0$@0-,2'=105'@5*<'=-'D46R
C4++A'I0-@05'.4D+0'C*@7'D=@@=<'%$&'0$@0-,*-.'![!]%d'>42@'+=C05'C4++'%$&2'=-'D=@7'2*,02A'c4*+
@='E+==5')2*-.'!9,'2*-R052A
:A /0<=10'@70'C4++'D54602'E5=<'*-@05*=5'C4++2'4-,')20'@70<'@='D5460'@70'.4D+0'@='@70'+=E@'E+==5A
Brace Gable with
Pre-cut Studs
!A K-2@4++'L%M'@C='%$&[!%#'D=45,2'=-'@70'D46R'C4++'@='>5010-@
@70'.4D+0'E5=<'E4++*-.'=EE',)5*-.'.4D+0'*-2@4++4@*=-A'K-2@4++
L%M'@C='<=50'%$&[!%'D=45,2'@='D5460'@70'105@*64+'%$&'*-'>+460A

floor
2x4 Tie Plate
2x6 Truss Plate
2x4 Top Plate
2x4 Wall Stud
1-1/2"
19-3/8"
24"
2x6 Truss Plate
/045'S4D+0
%$"'N+4@0'=-'F*,0'^4++
24"
19-3/8" 24" 24" 24" 24"
%A F+*,0'.4D+0'@='@70'E5=-@'=E'@70'D)*+,*-.A
N=2*@*=-'@70'E54<0'C*@7'@70'D=@@=<'@=C45,2
@70'E5=-@'C4++'2='*@'64-'D0'0506@0,'4E@05'@70
2*,*-.'*2'4>>+*0,A
:A /0>04@'Step 14'@='4>>+?'.4D+0'2*,*-.A'I)@'4-,
50<=10'2*,*-.'E5=<'@70'C*-,=C'=>0-*-.A
&A /0<=10'@70'%$&[!%#'D=45,2')20,'E=5'D546*-.
=-'D46R'.4D+0'4-,'50>04@'Step 16'@='*-2@4++
@70'E5=-@'.4D+0A
!A /0>04@'Step 13 @='4220<D+0'E5=-@'.4D+0A'W+@05'2@),'E54<*-.'E=5'C*-,=C'=>0-*-.A'H=64@0'L:M
@7500'&`[:]&d'+=-.'%$&2A'I)@'L!M'=-0'@=':"dA'N=2*@*=-'@7020'D=45,2'42'27=C-'D0+=CA'3042)50
,*2@4-60'@='D=@@=<'.4D+0'E54<0'4-,'6)@'L:M'@7500'%$&2'@='@7*2'+0-.@7'4-,'*-2@4++')-,05':"d'D=45,A
K-2@4++'%$&2'C*@7'!9,'2*-R052A
36"
Step 17 Assemble & Install Front Gable
!A K-2@4++'L:M'@7500'%$"[`#'4-,'L!M'=-0'%$"[T#'42'@5)22'>+4@02'D0@C00-'@70'E5=-@'4-,'5045'.4D+0'C4++
>4-0+2'=-'0467'2*,0'C4++A'I)@'@70'+42@'%$"'@='E*@'241*-.'@70'6)@[=EEA';70'%$"'>+4@02'27=)+,'>5=f06@
![!]%d'>42@'@70'%$&'@*0'>+4@0'L200'O0@4*+'#W#MA'c4*+'%$"2'@='@70'E+==5'C*@7'!9,'6=4@0,'2*-R05'-4*+2
,=)D+0'5=C'2>460,'&d'4>45@A'/0>04@'=-'=>>=2*@0'2*,0'C4++')2*-.'6)@'=EE'%$"'@='E*-*27A
%A F@45@*-.'4@'@70'5045'.4D+0'*-,*64@0'C*@7'#e#'<45R2'C7050'@70'@5)2202'C*++'D0'+=64@0,A';70'+42@
2>460'C*++'D0'C*,05'@74-'@70'E*52@'L!\[:]TdM'2>460A
Step 18 Install 2x6 Truss Plates
Detail 'A'
/045'S4D+0
P5=-@'S4D+0
47-3/4"
Long 2x4
36" Long
2x4
Cut to Fit
Do not remove 2x4 blocks from floor.
They will be used to assemble trusses.
Instructions show a suggested location for a 36"x36" window.
P=++=C'F@0>2'!:'['!&'@='D)*+,'C*@7=)@'4'C*-,=CA

Step 19 Install 2x6 Soffit Blocks
!A K-2@4++'L&M'E=)5'!$:[T#'2@5*>>*-.'=-'0467'2*,0'C4++A'F@45@*-.'E5=<
D46R'C4++'D)@@'4'%$"'2=EE*@'D+=6R'4.4*-2@'@70'D=@@=<'=E'@70'%$"'@5)22
>+4@0A'N=2*@*=-'@70'E*52@'!$:'D=45,'![!]%d'E5=<'D46R'C4++'@5*<'4-,
*-@='-=@67A'Tip; use a 2x4 block as a gauge to set the 1x3 correctlyA
I=-@*-)0')2*-.'@70'%$"'2=EE*@'D+=6R'42'4'.4).0'C70-'*-2@4++*-.'-0$@
!$:'D=45,2A'I)@'@70'+42@'D=45,'@='E*@'![!]%d'E5=<'E5=-@'.4D+0'@5*<A
B20'`,'2*-R052'-4*+*-.'C7050'2@),2'450'+=64@0,A
:A K-2@4++'4',=)D+0'%$"'2=EE*@'D+=6R
)-,05'@70'.4D+0'>4-0+'4@'0467'6=5-05A
K-2@4++'@7020'D+=6R2'E+)27'C*@7'@70
E460'=E'@70'.4D+0'2*,*-.A
1x3 Stripping
2x6 Soffit Block
2x6 Truss Plate
%A K-2@4++'2=EE*@'D+=6R2')-,05'0467'#e#'=-'@70'@5)22'>+4@0AF06)50'@70'@=>'=E'@70'2=EE*@'D+=6R2'*-
>+460'D?'2650C*-.'@75=).7'@70'%$"'*-@='@70'2=EE*@'D+=6R'C*@7'%[!]%d',06R'2650C2A'O5*++'4
!]Td',*4<0@05'7=+0'@='>5010-@'@70'C==,'E5=<'2>+*@@*-.A
&A F06)50'@70'2=EE*@'D+=6R2'*-'>+460
C*@7'%[!]%d',06R'2650C2A'O5*++'4'7=+0
@='>5010-@'@70'C==,'E5=<'2>+*@@*-.A
;70'D=@@=<'=E'D+=6R2'C*++'D0'206)50,
*-'4'+4@05'2@0>A
2x4 Gauge Block 1x4 Corner
Trim
Install 2x4 Double Block
Flush with Gable Siding
'X' Marks

Step 20 Assemble Roof Trusses
!A H4?'@5)22'>45@2'*-2*,0'@70'%$&'D+=6R2')20,'45=)-,'.4D+0'E54<02A'Y-0'0-,'=E'@70'T![:]&d'+=-.
%$"'D=45,2'7410'4'D+)0'<45RA'N+460'@7020'0-,2'@=.0@705'4@'@70'5*,.0A'W,,'4'%$&'D+=6R'4@'@70
D=@@=<'=E'@70'@5)22'+0.2'@='R00>'@7*2'%$"'E5=<'<=1*-.A
%A F06)50'@70'%$"'D=45,2'@=.0@705')2*-.'>50[6)@'>+?C==,'.)220@2A'g-00'.)220@2'450'%&d'C*,0A
/*,.0'.)220@'*2':![:]&d'C*,0A''W>>+?'C==,'.+)0'C*@7'4'D5)27'D0@C00-'@70'.)220@2'4-,'@70'%$"
D=45,2A'F06)50'.)220@2'C*@7'L:M'@7500'5=C2'=E'",'6=<<=-'-4*+2'2>460,'"d'4>45@A'Importanth
C70-'*-2@4++*-.'@70'.)220@'4@'@70'R-008'*-2@4++'.)220@'C*@7'@70'27=5@02@'4-.+0,'2*,0'@=C45,2'@70
5*,.0A'See detail at bottom of pageA
:A ;)5-'@5)22'=105'4-,'4>>+?'.)220@2'@='@70'=@705'2*,0A'F0@'@5)22'42*,0A
&A W220<D+0'L!9M'@0-'<=50'@5)2202A'/0<=10'%$&'D+=6R2
E5=<'E+==5A
71-3/8" Truss
Member
Add 2x4 Block
GLUE
Short Side of Gusset Towards Ridge
81-3/4" Truss
Member
31-3/4" Wide Gusset
30" Wide Gusset

2x4-12' Board
Step 22 Install Soffit
!A S4@705'LTM'0*.7@'_[!]&d'$'&T[:]&d'>5*<0,
2=EE*@'>4-0+2A'3042)50'E5=<'@70'E460'=E'@70
,=)D+0'D+=6R'@='@70'60-@05'=E'@70'E*52@'2=EE*@
D+=6RA'I)@'=-0'2=EE*@'>4-0+'@='@7*2'+0-.@7
50<=1*-.'@70'#HWN#'0,.0A'K-2@4++'C*@7'6)@
0,.0'E+)27'C*@7'@70',=)D+0'2=EE*@'D+=6R'4-,
@70'#@=-.)0#'0,.0'60-@05' =E'2=EE*@'D+=6RA
F06)50'@='D+=6R2'4-,'!$:')2*-.'' ![!]&d
2@4*-+022'@5*<'2650C2A
%A K-2@4++'E)++'+0-.@7'2=EE*@'>4-0+2'4+=-.'@70
2*,0'C4++A'I)@'@70'+42@'2=EE*@'>4-0+'E+)27'C*@7
@70'0-,'=E'@70',=)D+0'2=EE*@'D+=6RA
:A K-2@4++'2=EE*@'>4-0+2'=-'@70'=>>=2*@0'C4++A
!A K-2@4++'%$"'74-.052'=105'@70'#e#'<45R2'=-'@70'@5)22'>+4@0'4-,'E+)27'C*@7'=)@2*,0'0,.0'=E'%$"A
B20'![!]%d'f=*2@'74-.05'-4*+2A'F0@'@5)22'+0.2'*-@='74-.05A'B20'!9,'6=4@0,'2*-R05'-4*+2'@='206)50
@70'@5)22'@='@70'<0@4+'74-.05'L)20'74-.05'0?0+0@2'@='.)*,0'@70'-4*+2'4@'@70'6=5506@'4-.+0MA
%A /0<=10'@70'%$&[!%#'D=45,2')20,'@='D5460
@70'E5=-@'.4D+0A'W2'?=)'>5=.5022'20@@*-.'@5)2202
@46R'@7020'D=45,2'@='R00>'@5)2202'>+)<DA
O=-#@'50<=10'@70'%$&2')-@*+'@70'5==E'2704@7*-.
*2'4>>+*0,A
Cut Edge
&A K-2@4++'!$&'6=5-05'@5*<')-,05'2=EE*@'=-'2*,0'C4++2'E+)27'C*@7'E5=-@'4-,'D46R'C4++
@5*<A'I)@'!$&[T#'@5*<'D=45,2'E+)27'C*@7'@70'D=@@=<'=E'@70'2*,*-.A
Step 21 Install Roof Trusses
2x6 Metal
Hanger
'Tongue' Edge
Page is loading ...
Page is loading ...
Page is loading ...
Page is loading ...
Page is loading ...
Page is loading ...
Page is loading ...
Page is loading ...
-
 1
1
-
 2
2
-
 3
3
-
 4
4
-
 5
5
-
 6
6
-
 7
7
-
 8
8
-
 9
9
-
 10
10
-
 11
11
-
 12
12
-
 13
13
-
 14
14
-
 15
15
-
 16
16
-
 17
17
-
 18
18
-
 19
19
-
 20
20
-
 21
21
-
 22
22
-
 23
23
-
 24
24
-
 25
25
-
 26
26
-
 27
27
-
 28
28


Ask a question and I''ll find the answer in the document
Finding information in a document is now easier with AI
Related papers
-
 Best Barns Jefferson 16x20 User manual
-
 Best Barns Jefferson 16x32 User manual
-
 Best Barns Jefferson 16x28 User manual
-
 Best Barns Northwood 10x10 User manual
-
 Best Barns Clarion Operating instructions
-
 Best Barns Camp Reynolds 16x32 User manual
-
 Best Barns Camp Reynolds 16x28 User manual
-
 Best Barns richmond1628 Installation guide
-
Best Barns richmond1624 Installation guide
-
 Best Barns roanoke1620 Installation guide


Other documents
-
Sentry Lakewood Assembly Book
-
Gill PIT GARAGES Operating instructions
-
 BLOTZ B20_WW2_202 Assembly Instructions
-
 Synergy Manufacturing 8112-02 Installation guide
-
 Super Vac WB Bracket User manual
-
Werner A728200 Owner's manual
-
Community Playthings L210 User guide
-
 SMITH SYSTEM 56010E Assembly Instructions
-
Skov Roof Cap Mounting Guide
-
 Arrow Storage Products VT1231 Owner's manual


