Page is loading ...

Assembly Book
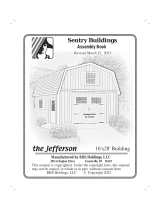
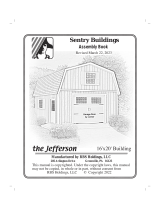
Sentry Buildings
16'x32' Building
the Jefferson
Revised March 22, 2023
This manual is copyrighted. Under the copyright laws, this manual
may not be copied, in whole or in part, without consent from
RBS Holdings, LLC © Copyright 2022
Manufactured by RBS Holdings, LLC
205 Arlington Drive Greenville, PA 16125

It is highly recommended to rent (6) six sections of scaffolding to safely install the second floor
material. Use safety harnesses when on the scaffolding. Consider hiring a professional roofer
to install the shingles or metal roof.
IMPORTANT INFORMATION ABOUT YOUR KIT
*
Tools
Required:
! Hand or Circular Saw ! Level ! Phillips Screwdriver
! Cordless Drill ! Measuring Tape ! Framing Square
! Caulking Gun ! 8' & 10' Ladder(s) ! Hammer
! Safetyglasses: Always wear safety glasses when cutting or nailing!
! * Scaffolding
Building Permits: Check with your local HOA or building code office for any requirements,
restrictions or permits necessary for construction.
Foundation: By owner. Refer to next page for foundation suggestions and size.
What's Included: Our package includes pre-cut materials for the 2nd floor roof gables, roof
trusses and gable trim. See back page for material list. The nails and hardware are packed in the
top of 'A' pallet. The other materials on the pallet will not be used until the first floor walls and
loft floor are completed.
Framing lumber for the first floor walls and loft floor, exterior siding, loft flooring and roof
sheathing will be delivered by a local supplier. See back pages for material list.
Owner Supplied: Overhead 8' or 9' x 6/6 garage door with low headroom hardware. Walk-in
man door, roof shingles, metal roof edge, felt and ventilation accessories. Paint for siding and
trim. Additional lumber for framing additional window and door openings.
Assembly Help: Monday thru Friday 800-245-1577 8:00 to 5:00 ET
Weekend - after hours 724-866-4357
email to: help@barnkits.com
Care of product prior to assembly: Assembly should begin promptly to prevent the twisting of
lumber. If assembly is not immediately after opening pallets you will need to tightly stack material
and do not expose material to inclement weather. Organize all material prior to construction.
Building Tips: IMPORTANT: Follow the assembly Steps in sequence. Skipping steps will result
in components not fitting properly.

Foundation Types & Measurements
Important: You will need to have a proper foundation installed to support the building.
Depending on the intended use determines what type of foundation is best.
Do Not make the foundation larger than the building size. When installing the building
on a concrete slab, install the siding flush with the bottom plate. When installing on a wood
floor, extend the siding 3/4" below the bottom plate to cover the edge of the flooring. !
Wood Floor on Runners: Suitable for storage
or workshop. Treated 6x6 lumber over a bed
of gravel Floor joist should be treated 2x6
spaced 16" on center and covered with 3/4"
tongue and groove wood flooring.
Foundation Types: What foundation is best depends on what type of items will be stored.
The building code in your area will also determine what type of foundation can be used.
A few different types of foundations are shown below. Check the zoning and building code
requirements in your area.
LP siding has a 50 year warranty and is already primed.
Apply two coats of latex acrylic paint for the finish coat.
Paint the bottom edge of the siding, this is important.
Maintain 6" to 8" of clearance from the bottom edge of
the siding and the ground. Don't allow garden mulch to
build up and keep shrubs a minimum of 1' away from the
building.
Wood Floor on Wood Runners
Floating Cement Slab
Foundations Types
Floating Slab A concrete slab is ideal
for storage of cars or other types of
heavy items.
Exterior Siding Information
Tongue Edge
LAP Edge

24" x 36" Window Opening
32" x 80" Door Opening
40" window
Cripplers
27" Header
36" Header
Supports
27" Sill
Rough Opening Details for Windows and Doors (not included)
If installing seperately purchased windows and doors follow the
manufacturers instructions for correct rough opening size. The below
examples are for reference only and may need to be modified depending
on style and size of your windows and doors..
1. Select a wall stud where you want to
start installing the window opening.
Install another wall stud spaced 27"
away.
2. Cut (3) three 2x4s to a length of 40".
Cut one to a length of 27".
3. Install these 2x4s as shown on right.
4. Cut (2) two 2x4s to 36". Install as header
supports under header.
5. Cut 2x4s to fit and install between
header and top wall plate.
*Maintain 16" stud spacing so the
siding will meet on a stud.
*
Pre-cut Wall
Stud
80-1/2" Header
Supports
37-1/2"
Door Header
1. Select a wall stud where you want to start
installing the door opening. Install a
another wall stud spaced 37-1/2" away.
2. Cut (2) two 2x4s to a length of 80-1/2.
Install these as header supports under
header.
3. Cut 2x4s to fit and install between header
and top wall plate.
*
Pre-cut Wall
Stud
27" Between
Studs
Pre-cut
Wall Stud
Headers above windows and doors must be
sufficient to support weight of 2nd floor and
trusses. Wider spans require larger headers.
Alter the following instructions for
rough openings as needed.

:
::::::
Pre-cut 2x4
Wall Studs
Treated Bottom Plate
Step 1 Assemble (2) Two 92-1/2" Rear Wall Frames
Note: When building the lower walls, use treated
2x4s for the bottom wall plates.
The length of pre-cut wall studs will vary from 92-1/4" to
93" depending on your locality.
4. Repeat to build another 92-1/2" long wall frame.
5. Mark both frames 'Rear Wall Frames' and set frames aside.
3. Install (7) seven pre-cut wall studs between the top and bottom plates. Nail the
treated bottom plate to each wall stud with (2) two 16d galvanized deck nails.
Use (2) two 10d coated sinker nails per stud to secure the top plate.
1. Cut (2) two 2x4-8' (one will be treated) to a length of 92-1/2". Position the boards together
and indicate with 'X' marks where the wall studs will be located.
2. Mark a 'C' anywhere between first two stud marks. This is referenced in a later step.
Stud Spacing
XX
X X
X
X
X
X
92-1/2 Top Wall Plate
92-1/2" Treated Bottom Plate
16"
11-3/4" 16"
C
C

Stud Spacing
X
X
X
X
X
X
X
X
144" Top Wall Plate
144" Treated Bottom Plate
16"
15-1/4" 16"
:
::::::
Pre-cut 2x4
Wall Studs Treated Bottom Plate
1. Trim, if necessary, (2) two 2x4-12' boards (one will be treated) to a length of 144". Position
the boards together and indicate with 'X' marks where the wall studs will be located.
Step 3A Assemble (4) Four 12' Side Wall Frames
2. Install (7) seven pre-cut wall studs between the top and bottom plates. Nail the treated
bottom plate to each wall stud with (2) two 16d galvanized deck nails. Use (2) two 10d
coated sinker nails per stud to secure the top plate.
3. Repeat to build another 8' long wall frame.
4. Mark the frames 'Side Wall Frames' and set frames aside.
Step 2 Assemble (2) Two 8' Long Side Wall Frames
Stud Spacing
XX
X X
X
X
X
X
96" Top Wall Plate
96" Treated Bottom Plate
16"
15-1/4" 16"
1. Select (2) two 2x4-8' (one will be treated) if necessary trim to a length of 96". Position the
boards together and indicate with 'X' marks where the wall studs will be located.

Pre-cut 2x4
Wall Studs
Treated Bottom Plate
:
:
:
:
:
:
1. If you are installing a 8' wide garage door cut (2) two 10' long 2x8 boards to a length of 99".
For a 9' wide garage door cut 2x8s to a length of 111"
Refer to the garage door manufacturers instructions
to verify correct rough opening for the door
2. Install (10) ten pre-cut wall studs between the top and bottom plates. Nail the treated
bottom plate to each wall stud with (2) two 16d galvanized deck nails. Use (2) two
10d coated sinker nails per stud to secure the top plate.
3. Repeat to build (3) three nore 144" long wall frame.
4. Mark both frames 'Side Wall Frames' and set frames aside.
Step 3B Assemble (4) Four 12' Side Wall Frames continued
99" Long 2x8
48" OSB Filler
GLUE
99" or 111" Long 2x8
2. Locate a 24" x 48" OSB (oriented strand board) panels packed in our kit. From this cut, (2)
two for an 8' door or (3) three for an 9' door, 7-1/4" x 48" fillers to fit between the 2x8 boards
3. For a 8' door center the OSB between the 2x8 boards. For a 9' door install first OSB flush with
end of 2x8 boards then install the next 2 OSB fillers cutting last one to fit. Apply wood glue
to both sides of each OSB filler with a brush. Nail together using 10d coated sinkers. Use (12)
twelve nails spaced evenly on each side.
Step 4 Assemble Door Header

15' - 5" Wall Plates
16"
11-3/4" 13-3/4" 16"
13-3/4" 11-3/4"
Treated X
XXX
Regular X
XXX
96" Door Opening
X
X
XX
X
X
XX
SS
99" Door Header
*
*Adjust opening height per garage
door manufacture's specifications
Step 5A Assemble 15'-5' Front wall - 8' Wide Door Opening
1. Cut (2) two 2x4-16' (one will be treated) to a length of 185". Position the boards together and
indicate with 'X' marks where the wall studs will be located and an 'S' where the support studs
will be located..
2x4 Header Blocking
2x8 Door Header
Pre-cut 2x4
Studs
2x4-15'-5"' Treated Bottom Plate
96" Door Opening Width
If you are installing a 9' wide garage door go to Step 5B.
2x4 Header
Support Studs
2. Assemble the front wall frame using the wall plates cut above and (8) eight pre-cut wall studs.
Use 16d galvanized deck nails for the bottom plate and 10d coated sinkers for the top plate.
3. Refer to the garage door specifications to determine the height of the rough opening. Cut (2)
two pre-cut studs to this height less 1-1/2" and install them as header supports using (10) ten
10d sinkers. Install the 2x8 header by toe-nailing the ends to the adjacent studs with 10d sinkers.
4. Cut (5) five pieces from a pre-cut stud to fit between header and top 2x4 plate. Install with 10d
sinkers through top plate and toenail into header.

*
*Adjust opening height per garage
door manufacture's specifications
Step 5B Assemble 15'-5' Front wall - 9' Wide Door Opening
1. Cut (2) two 2x4-16' (one will be treated) to a length of 18 5". Position the boards together and
indicate with 'X' marks where the wall studs will be located and an 'S' where the support studs
will be located..
15' - 5" Wall Plates
16"
11-3/4" 7-3/4" 16"
7-3/4" 11-3/4"
Treated X
XXX
Regular X
XXX
108" Door Opening
2x4 Header Blocking
2x8 Door Header
Pre-cut 2x4
Studs
2x4-15'-5"' Treated Bottom Plate
108" Door Opening Width
X
X
XX
X
X
XX
SS
111" Door Header
2x4 Header
Support Studs
2. Assemble the front wall frame using the wall plates cut above and (8) eight pre-cut wall studs.
Use 16d galvanized deck nails for the bottom plate and 10d coated sinkers for the top plate.
3. Refer to the garage door specifications to determine the height of the rough opening. Cut (2)
two pre-cut studs to this height less 1-1/2" and install them as header supports using (10) ten
10d sinkers. Install the 2x8 header by toe-nailing the ends to the adjacent studs with 10d sinkers.
4. Cut (5) five pieces from a pre-cut stud to fit between header and top 2x4 plate. Install with 10d
sinkers through top plate and toenail into header.

Step 6 Set Wall Frames
4. Install another 12' long side wall frame.
15'-5" Front
WAll Frame
5. Install opposite side wall frames.
6. Install the front wall frame
between the side wall frames. Turn
the wall frame around if you want
the window located on the right.
Secure frames together at the
corner using (4) four 10d sinkers.
7. Nail frames to the floor using 16d
Galv. spiral nails or, if erecting on
a cement slab, concrete anchor
bolts (not included) spaced 24"
on center.. Do not nail the 2x4
plate in the door opening.
3. Install a 12' frame, next to the first 8' side wall frame. Nail frames together where they butt
with (8) eight 10d sinkers (stagger nails on each side of the studs).
92-1/2" End Wall Frames
8' Side Wall Frame
Brace wall frames with
pre-cut wall studs.
End Marked 'C'
End Marked 'C' 12' Side Wall Frame
1. Install one of the 92-1/2" rear wall frames against inside of a 8' side wall frame. Brace walls
with pre-cut studs. IMPORTANT: Orient end marked with a 'C' to corner. Secure frames
together at the corner using (4) four 10d sinkers
2. Install the other 92-1/2" rear wall frame to the rear wall frame. Nail the rear wall frames together
where they butt with (8) eight 10d sinker (stagger nails on each side of the studs) .
Front and back wall frames are positioned between long side walls.

If a siding panel has a damaged edge, install this edge at a corner where it will be
covered with corner trim.
Concrete Slab Foundation: Install siding flush with the bottom plate.
Wood Floor Foundation: Extend the siding 3/4" below the bottom plate.
Step 7 Install 2x4 Tie Plates
16' Long 2x4 Tie Plate
3. Install a 2x4-12' on the side wall. The 2x4 will butt against the 16' long tie plate on the back
wall. Use 10d sinkers.
4. Install another 2x4-12' boards on the same side wall frame.
5. Cut to fit and install a 2x4-8' board to finish.
6. Repeat to install 2x4 tie plates on the opposite sidewall frames.
Back Wall
Frames
1. Install a 16' long 2x4 on the back wall. Use 10d sinkers space 16" apart to secure tie plates.
2. Repeat to install a 16' long 2x4 tie plate on the opposite front wall.
Step 8A Install Siding on Wall Frames
12' Long 2x4 Tie Plate
LP siding has a 50 year warranty and is already primed.
Apply two coats of latex acrylic paint for the finish coat.
Paint the bottom edge of the siding, this is important.
Maintain 6" to 8" of clearance from the bottom edge of
the siding and the ground. Don't allow garden mulch to
build up and keep shrubs a minimum of 1' away from the
building.
Exterior Siding Information
Tongue Edge
LAP Edge

Remove 2x4
Plate
Steps not needed with this size and model.
1. Install a full width siding panel on the side wall with the 'LAP' edge flush with the 2x4s on
the back wall. Install (7) seven more siding panels. If necessary cut last panel flush with 2x4s
on front wall. Use 8d galv. box nails spaced 8" apart.
2. Install a siding panel on the back wall with the 'LAP' edge flush with the siding on the side
wall. Install 3 more panels.
LAP
Edge
Side Wall
Back Wall
Install This Panel First
Step 8B Install Siding on Wall Frames continued
3. Install siding on opposite
side wall.
4. Install a full width siding panel on the front wall with the 'LAP' edge flush with the siding
on the side wall. Cut and remove any siding that extends past the door opening.
5. Locate (2) two 14-1/2" x 48" siding panels. Cut these to fit above door opening. Make sure
these are flush with bottom of door header.
Cut to Fit
6. Install another full width siding
on the right side of the door
opening.
7. Cut and remove 2x4 plate that
extends across the door
opening. Save the 2x4, it will
be used in a later step.
LAP Edge
Step 9 thru 12
IMPORTANT: Go now to the instructions in the stair kit book to install
the stairs, floor joist and flooring.

Step 13A Assemble Rear Gable
2x4 Block
1. Cut (2) two 2x4-10' boards to a length of 97-1/2". Position these 2x4s, on edge and butt together.
2. Position (2) two 81-3/4" long 2x6s and (2) two 71-3/8" long 2x6 boards on the 2x4 plates as
shown below. The top 2x6 boards have blue marks on the ends. Position these ends together
at the top.
Assemble the roof gables and trusses on the center of the loft floor. This
will make it easier to stand the gable upright over the lower wall.
2x4 Block
2x4 Block
71-3/8" Long
Truss Leg
2x4 On Edge
97-1/2" Long 2x4 On edge
188-1/2"
71-3/8" Long
Truss Leg
81-3/4" Long
Truss Top
Truss Knee
3. Secure the truss leg to the 2x4 plate with
(2) two 2-1/2" long deck screws.
4. Install 5-1/2" x 12" OSB fillers on the 2x6
truss legs near 2x4 with 6d common nails.
Exact spacing isn't important.
5. Square
truss. Measure diagonally from the
knee of the 2x6 truss to the bottom corner
of the 2x4 plate. The measurements will be
the same (188-1/2") when the truss is square.
6. Cut 2x4 removed from door opening into
8" long blocks. Tack nail or screw the blocks
around the perimeter of the gable frame to
prevent the gable from moving.

1. Secure the 2x6 boards together at the knee and ridge with 1/2" OSB gussets.
Use 6d common nails. Nail 5-1/4" x 12" OSB fillers where shown below.
2. Place (2) two 81-3/4" and (2) two 71-3/8" 2x6s over the fillers. Secure using (6) six 10d sinkers
where fillers and gussets are located.
3. Install a 21-3/4" high pre-built gable frame at the peak of the double row of trusses. Secure the
frame to the 2x6 truss boards with (6) six 2-1/2" deck screws.
4. Position a 19-1/4" pre-built frame directly below the top frame. Use (2) two 80-1/2" long studs
to help align the upper and lower frames. Use a framing square to ensure the studs are plumb.
Screw bottom frame to 2x4 plate using 2-1/2" screws. Secure the 80-1/2" studs to the pre-built
frames using 2-1/2" screws.
Step 13B Assemble Rear Gable continued
6. Install a 72-5/8" and a 64-1/2" wall stud on the left side of the gable frame. Use a square to
ensure the studs are plumb. Nail to 2x4 bottom plate with 10d sinkers and screw to 2x6s with
2-1/2" screws. Repeat to install studs on right side of gable frame.
1/2" Gusset
at Ridge
1/2" Gusset
at Knee
5. Locate (3) three 47-3/4"
long 2x4s and trim to fit
and install between frames.
cut to fit
Studs
Framing
Square
Framing
Square
64-1/2"
Stud
72-5/8"
Stud
Framing
Square
80-1/2"
Stud
19-1/4" High Pre-built Frame
5-1/4" x 12"
OSB Filler
5/1/4" x 12"
OSB Gusset
Two Ridge Gussets have equal angles cuts. Four Knee Gussets have offset angles cuts.
21-3/4" High Pre-built Frame

16' Rear Wall
Siding Extends 3/4" Below Bottom Plate
Siding Cutoff
Step 14 Install Siding on Rear Gable Frame
16' Rear Wall Side
Wall
1x4 Corner Trim
Step 15 Install Trim on Front and Back Walls
IMPORTANT: Trim Must Be Installed Before Installing Roof Gables!
1. Locate (4) four 1-1/2" x 48-3/4" siding filler strips. Install these on back wall flush with top of
flooring. There may be a gap between top of siding and strips. Use a few 8d galv. nails. Additional
nails are applied below.
2. Cut and install (2) two 1x4 -10' trim boards flush with top of floor and bottom of the siding.
Install trim flush with the siding on the side walls. Use 8d galv. nails spaced 12" apart.
1x4 Trim
3. Install (2) two 96" long 1x4 trim
boards between corner boards. Trim
should be flush with the loft floor.
Cut 2nd board to fit.
4. Repeat to install trim to the front
wall panel.
Siding Filler
4. Install 80-1/2" long siding panel.
Cut the siding that extends beyond
the gable fame.
1. Stand up the gable frame and slide it to the rear of the building. Position the frame with the
bottom towards the rear wall so it can be erected after the siding is applied.
2 Install a pre-cut siding panel with the 'cut edge' flush with the left side of the gable frame. The
siding should extend 3/4" below the bottom 2x4 gable plate. Install siding with 8d galv. nails.
3 Install (2) two 4x8 siding panels. Cut and
remove siding that extends above the top
of the gable frame.
Siding Flush with Frame
All trim is installed using 8d galvanized box nails spaced 12" apart.

Before bracing the vertical 2x4s in place attach
(2) two 2x4 blocks to the back of the 2x4s.
This will create the proper spacing to set the
gable over the lower wall.
2x4 Stake
2x4-12' Brace
2x4 Block
2x4-12' Vertical Boards
2x4 Block
2x4-12'
4. Nail bottom edge of siding to 1x4 trim
with 8d galvanized box nails.
Siding Extends Over
Trim. Paint edge
Step 16 Install Rear Roof Gable
2. Erect the gable on back wall. Be cautious and ensure gable siding extends over trim on back
wall. Center gable with bottom 2x4 extending 1-1/2" past lower wall 2x4s on both sides. Nail
to floor using 10d sinkers.
3. Remove the wall braces from interior walls and use them to brace the gable to the loft floor.
Brace Gable with
Pre-cut Studs
1. Install (2) two 2x4-12' boards on the back wall to prevent
the gable from falling off during gable installation. Install
(2) two more 2x4-12 boards to brace the vertical 2x4 in place.

floor
2x4 Tie Plate
2x6 Truss Plate
2x4 Top Plate
2x4 Wall Stud
1-1/2"
19-3/8"
24"
2x6 Truss Plate
Rear Gable
2x6 Plate on Side Wall
24"
19-3/8" 24" 24" 24" 24"
2. Slide gable to the front of the building.
Position the frame with the bottom towards
the front wall so it can be erected after the
siding is applied.
3. Repeat Step 14 to apply gable siding. Cut and
remove siding from the window opening.
4. Remove the 2x4-12' boards used for bracing
on back gable and repeat Step 16 to install
the front gable.
1. Repeat Step 13 to assemble front gable. Alter stud framing for window opening. Locate (3)
three 47-3/4" long 2x4s. Cut (1) one to 36". Position these boards as shown below. Measure
distance to bottom gable frame and cut (3) three 2x4s to this length and install under 36" board.
Install 2x4s with 10d sinkers.
36"
Step 17 Assemble & Install Front Gable
1. Install (3) three 2x6-7' and (1) one 2x6-12' as truss plates between the front and rear gable
wall panels on each side wall. Cut the last 2x6 to fit. The 2x6 plates should project 1-1/2"
past the 2x4 tie plate (see Detail 'A'). Nail 2x6s to the floor with 10d coated sinker nails;
double row spaced 16" apart.
2. Starting at the rear gable indicate with 'X' marks where the trusses will be located. The last
space will be wider than the first (19-3/8") space.
Step 18 Install 2x6 Truss Plates
Detail 'A'
Rear Gable
Front Gable
47-3/4"
Long 2x4
36" Long
2x4
Cut to Fit
Do not remove 2x4 blocks from floor.
They will be used to assemble trusses.
Instructions show a suggested location for a 36"x36" window.
Follow Steps 13 - 14 to build without a window.

Step 19 Install 2x6 Soffit Blocks
1. Install (4) four 1x3-8' stripping on each side wall. Starting from
back wall butt a 2x6 soffit block against the bottom of the 2x6 truss
plate. Position the first 1x3 board 1-1/2" from back wall trim and
into notch. Tip; use a 2x4 block as a gauge to set the 1x3 correctly.
Continue using the 2x6 soffit block as a gauge when installing next
1x3 boards. Cut the last board to fit 1-1/2" from front gable trim.
Use 7d sinkers nailing where studs are located.
3. Install a double 2x6 soffit block
under the gable panel at each corner.
Install these blocks flush with the
face of the gable siding.
1x3 Stripping
2x6 Soffit Block
2x6 Truss Plate
2. Install soffit blocks under each 'X' on the truss plate.Secure the top of the soffit blocks in
place by screwing through the 2x6 into the soffit block with 2-1/2" deck screws. Drill a
1/8" diameter hole to prevent the wood from splitting.
4. Secure the soffit blocks in place
with 2-1/2" deck screws. Drill a hole
to prevent the wood from splitting.
The bottom of blocks will be secured
in a later step.
2x4 Gauge Block 1x4 Corner
Trim
Install 2x4 Double Block
Flush with Gable Siding
'X' Marks

Step 20 Assemble Roof Trusses
1. Lay truss parts inside the 2x4 blocks used around gable frames. One end of the 81-3/4" long
2x6 boards have a blue mark. Place these ends together at the ridge. Add a 2x4 block at the
bottom of the truss legs to keep this 2x6 from moving.
2. Secure the 2x6 boards together using pre-cut plywood gussets. Knee gussets are 24" wide.
Ridge gusset is 31-3/4" wide. Apply wood glue with a brush between the gussets and the 2x6
boards. Secure gussets with (3) three rows of 6d common nails spaced 6" apart. Important;
when installing the gusset at the knee, install gusset with the shortest angled side towards the
ridge. See detail at bottom of page.
3. Turn truss over and apply gussets to the other side. Set truss aside.
4. Assemble (14) fourteen more trusses. Remove 2x4
blocks from floor.
71-3/8" Truss
Member
Add 2x4 Block
GLUE
Short Side of Gusset Towards Ridge
81-3/4" Truss
Member
31-3/4" Wide Gusset
30" Wide Gusset

2x4-12' Board
Step 22 Install Soffit
1. Gather (10) ten 5-1/4" x 48-3/4" primed
soffit panels. Measure from the face of the
double block to the center of the first soffit
block. Cut one soffit panel to this length
removing the 'LAP' edge. Install with cut
edge flush with the double soffit block and
the 'tongue' edge center of soffit block.
Secure to blocks and 1x3 using 1-1/4"
stainless trim screws.
2. Install full length soffit panels along the
side wall. Cut the last soffit panel flush with
the end of the double soffit block.
3. Install soffit panels on the opposite wall.
1. Install 2x6 hangers over the 'X' marks on the truss plate and flush with outside edge of 2x6.
Use 1-1/2" joist hanger nails. Set truss legs into hanger. Use 10d coated sinker nails to secure
the truss to the metal hanger (use hanger eyelets to guide the nails at the correct angle).
2. Remove the 2x4-12' boards used to brace
the front gable. As you progress setting trusses
tack these boards to keep trusses plumb.
Don't remove the 2x4s until the roof sheathing
is applied.
Cut Edge
4. Install 1x4 corner trim under soffit on side walls flush with front and back wall
trim. Cut 1x4-8' trim boards flush with the bottom of the siding.
Step 21 Install Roof Trusses
2x6 Metal
Hanger
'Tongue' Edge
/