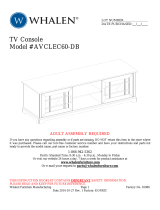
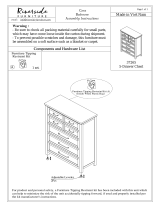
Whalen AVCBEC60-SMB TV console comes with two adjustable large shelves and four adjustable small shelves that can bear a maximum load of 50 lb. To prevent potential hazard, the TV console is not intended for use with CRT TVs. It can support most 70” flat-panel TVs weighing up to 135 lb. To avoid instability, the flat-panel TV should be placed in the center of the unit to prevent it from falling or breaking the unit. This unit also includes two cable wheels to keep the cords and cables organized. Please refer to the instruction manual for detailed assembly instructions.
Whalen AVCBEC60-SMB TV console comes with two adjustable large shelves and four adjustable small shelves that can bear a maximum load of 50 lb. To prevent potential hazard, the TV console is not intended for use with CRT TVs. It can support most 70” flat-panel TVs weighing up to 135 lb. To avoid instability, the flat-panel TV should be placed in the center of the unit to prevent it from falling or breaking the unit. This unit also includes two cable wheels to keep the cords and cables organized. Please refer to the instruction manual for detailed assembly instructions.


-
 1
1
-
 2
2
-
 3
3
-
 4
4
-
 5
5
-
 6
6
-
 7
7
-
 8
8
-
 9
9
-
 10
10
-
 11
11
-
 12
12
-
 13
13
-
 14
14
-
 15
15
-
 16
16
-
 17
17


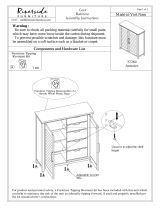
Whalen AVCBEC60-SMB TV console comes with two adjustable large shelves and four adjustable small shelves that can bear a maximum load of 50 lb. To prevent potential hazard, the TV console is not intended for use with CRT TVs. It can support most 70” flat-panel TVs weighing up to 135 lb. To avoid instability, the flat-panel TV should be placed in the center of the unit to prevent it from falling or breaking the unit. This unit also includes two cable wheels to keep the cords and cables organized. Please refer to the instruction manual for detailed assembly instructions.
Ask a question and I''ll find the answer in the document
Finding information in a document is now easier with AI
Related papers
-
 Whalen TV Console User manual
-
 Whalen BBAVCWL60-BC User manual
-
 Whalen BBHC60DBC User manual
-
 Whalen HAN8RO-DO-E User manual
-
 Whalen HAN8RO-DO-E User manual
-
 Whalen NOA8RO-WG-E User manual
-
 Whalen BBAVCD54N User manual
-
 Whalen WS3060926FP Operating instructions
-
 Whalen AVCEC54-AT User manual
-
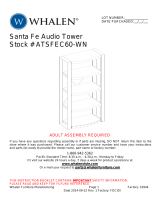 Whalen ATSFEC60-WN User manual


Other documents
-
 Riverside Furniture 50290 Assembly Instructions
-
Costway HW63975 3 Shelf Bookcase User manual
-
Home Styles 5520-945 Assembly Instructions
-
 Riverside Furniture 37556 Assembly Instructions
-
 Riverside Furniture 37560 Assembly Instructions
-
 Riverside Furniture 37265 Assembly Instructions
-
 Riverside Furniture 37264 Assembly Instructions
-
 Riverside Furniture 37256 Assembly Instructions
-
ANGELES HOME M66-8HW205GR User manual
-
Home Decorators Collection 1590000410 Installation guide


