Page is loading ...

Quick Start Guide
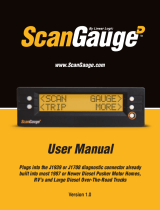
Plugs into the diagnostic connector already
built into all 1996 or newer cars and light trucks.
www.ScanGauge.com
4) Calibrating Your ScanGauge
II
5) Learn How to Save Fuel With ScanGauge
II
The accuracy of your ScanGaugeII can
be improved by calibrating the fuel con-
sumption. Calibrating your ScanGaugeII
to accurately report fuel consumption is
a two step process; your first fill up
and your second fill up.
For more detail information about calibrating your fuel consumption as well as how to
calibrate your ScanGaugeII to your vehicle’s speed, please refer to the user manual.
The easiest way to learn to improve your fuel economy is to have real-time feedback
about how your driving style effects overall fuel use. ScanGaugeII can provide both
Miles Per Gallon (MPG) as well as
Average Fuel Economy (AVG) in real-
time to help you adjust your driving style
to reach maximum fuel economy.
Start Learning to Save Fuel!
With your Gauges set, your ScanGaugeII is now ready to provide real-time feedback about
your fuel usage as you drive. This will allow you to see what adjustments in your driving
style can be made to actually raise or lower your Average Fuel Economy (AVG).
Your goal is to bring up your AVG reading
as high as possible. To do this, try and
adjust your driving style so that your
Miles Per Gallon (MPG) reading is equal
to or higher than your AVG. You can also
use the Gallons/Liters Per Hour (GPH/
LPG) to gauge how much fuel your vehicle will use each hour of driving. The Trip Fuel
Cost (TFC) gauge will show you the total cost of the fuel used. You can think of the TFC
gauge as a taxi meter.
Using these real-time gauges, you can experiment with different driving styles, or even
different driving routes to reduce your fuel cost.
Step 1 - Your First Fill Up
Follow these calibration instructions only
when you are filling your fuel tank. If you
do not fill your tank to it’s capacity, then the
calibration process will not produce accurate
results.
When filling the tank on your Second Fill up, •
try and use the same pump you used for your
first fill up with the vehicle pointed in the same
direction. If you fill up your fuel tank with your
vehicle on an incline, it can have an effect on
the amount of fuel the pump can dispense
into your tank.
When filling your tank, let the pump shut off •
automatically - do not top off.
To maintain accurate “TO EMPTY” informa-•
tion in the ScanGaugeII’s trip computers, you
should always fill your tank to capacity and
follow the FILLUP sequence in Step 1.
Once you have completed your second fill up, •
subsequent fill ups may not require adjusting
the gallons/litters before pressing DONE.
Helpful Hints:
Fill up the tank, letting the pump shut off 1)
automatically.
Use the FILLUP function to tell 2)
ScanGaugeII you have filled the tank. From
the Home screen, follow the sequence:
MORE>FILLUP>DONE
After pressing DONE, the FUEL COST 3)
screen will appear. Enter the cost per
gallon/liter and press the SAVE button.
Keep the ScanGaugeII connected to 4)
your vehicle and use the vehicle normally.
Once you reach approximately 1/4 tank 5)
of fuel left, follow the directions in Step 2.
On your first fill up DO NOT make
any adjustments to the indicated
fuel. Simply press the button next
to DONE.
<SCAN
<TRIP
GAUGE>
MORE>
HOME Screen
<DISPLAY
<SETUP
FILLUP>
MORE>
DONE>
< 0.1 GALLONS >
0.0%
< $ 3.00 >
FUEL COST
SAVE>
Once you have set the fuel cost,
press SAVE.
When the tank is around 1/4 full1) ,
fill up your tank again. Be sure to let the
pump shut off automatically
Use the FILLUP function to tell 2)
ScanGaugeII you have filled the tank.
from the HOME screen follow the
sequence:
MORE>FILLUP>
The next screen will show the amount 3)
of fuel your ScanGaugeII believes
was used since the previous fill up.
Use the upper left and right function
buttons (A,C) to adjust the amount of
fuel you actual put in the tank.
Push the DONE button4)
After pressing DONE, the FUEL COST 5)
screen will appear. Enter the cost per
gallon/litter and press the SAVE button.
Step 2 - Your Second Fill Up
DONE>
< 12.6 GALLONS >
0.0%
<SCAN
<TRIP
GAUGE>
MORE>
HOME Screen
<DISPLAY
<SETUP
FILLUP>
MORE>
< $ 3.00 >
FUEL COST
SAVE>
Once you have set the fuel cost,
press SAVE.
20.5 AVG
25.2 MPG
1.2 GPH
9.20TFC
Push the function buttons to
cycle through the available Digital Gauges.
Set Your Gauges
If necessary, use the function buttons to
select the following gauges:
AVG Average Fuel Economy
MPG Mile Per Gallon
GPH/GPL Gallons/Liters Per Hour
TFC Trip Fuel Cost
<SCAN
<TRIP
GAUGE>
MORE>
HOME Screen
20.5 AVG
15.2 MPG
1.2 GPH
9.20 TFC
20.5 AVG
25.2 MPG
1.2 GPH
9.20 TFC

Package Contents
ScanGauge•
6ft OBDII Cable•
Velcro Strips•
User Manual•
Quick Start Guide•
Front
A. Function/Selection Button
B. Function/Selection Button
C. Function/Selection Button
D. Function/Selection Button
E. Home Button
G. LCD Display Screen
Back
F. OBDII Connection Plug
Side
H. Optional OBDII Connection Plug
Front Side
Back
A
B
C
D
E
H
F
G
1) Quick Start Installation 2) Basic Setup Options 3) Using Your ScanGauge
II
Locate your vehicle’s OBDII connector. •
Generally located under the dash on the left
or right side of the steering column.
Choose a suitable location for the ScanGaugeII and Mount
•
your ScanGaugeII using the supplied velcro strips.
Route the cable from the ScanGaugeII to your vehicle’s
•
OBDII connector
Connect the small end of the cable to your ScanGaugeII
•
Start your vehicle or turn the ignition to the ON position.•
Connect the large end of the cable to your •
vehicle’s OBDII connector
Once connected with the vehicle running or the ignition
•
in the ON position, your ScanGaugeII will display the
CONNECTING screen for a few seconds, and then switch to
the HOME screen.
When the HOME is displayed, your ScanGaugeII is
•
connected and has established communication with your vehicle’s computer.
Proceed to setup.
It is important to setup your new
ScanGaugeII so that it may provide
the most accurate real-time data.
This section outlines the basic setup
options which include the ENGINE
and FUEL parameters, for proper
operation of your ScanGaugeII.
For more detailed setup instructions
and a complete explanation of addi-
tional setup functions, please refer to
the user manual.
DO NOT mount the ScanGaugeII over an airbag cover
where it could be propelled by a deploying airbag.
Large End of the cable
connects to your vehicle.
Small end of the cable
connects to your ScanGaugeII.
TANK SIZE: Use the Function buttons (A,
C) to increase or decrease the GALLONS
shown until it matches the size of the fuel
tank in your vehicle. When you’re done,
push the function button next to SET.
FUEL TYPE: Use the Function buttons
(A, C) to cycle through the different selec-
tions. Selection inlcude: GAS, DIESELa,
DIESELb, HYBRID, and LPG. When you’re
done, push the function button next to SET
to save your selection.
ENGINE SIZE: Use the Function buttons
(A, C) to increase or decrease the LITERS
size until it matches the size of your engine.
When you’re done, push the function button
next to SET.
< GAS >
Fuel Type SET>
< 19 GALLONS >
Tank Size SET>
<TYPE
<TANK SIZE
CUTOFF>
< 4.6 LITERS >
SET>Engine
<DISPLAY
<SETUP
FILLUP>
MORE>
<SCAN
<TRIP
GAUGE>
MORE>
<ENGINE
<SPEED
UNITS>
FUEL>
ENGINE SIZE
HOME Screen
TANK SIZE
FUEL TYPE
Connecting...
<TRIP MORE>
<DISPLAY
<SETUP
FILLUP>
MORE>
CONNECTING Screen HOME Screen
Less than
30 seconds
< 75 MPH MAX >
<CURRENT RESET>
Push to cycle through the available Trip Computers.
Push to cycle through the available trip data.
Displays the data stored for the currently selected Trip Computer
The currently selected Trip Computer
TRIP
Using the Trip Computers
ScanGaugeII stores up to 4 sets of trip data. To view the Trip computers, select
TRIP from the HOME Screen:
1180RPM
20.2MPG
7.2VLT
297°
FWT
Push the function buttons to cycle through the
available Digital Gauges.
GAUGE
Use the built-in Digital Gauges
The Function buttons next to each
gauge allow you to select and display
upto 4 gauges at a time.
SCAN
Turn off the Check Engine Lamp
When you vehicle’s computer detects
a problem, it may store a trouble code
which can cause the check engine
lamp on your dash to light up. The
ScanGaugeII gives you the ability to
read and clear these trouble codes.
1 Stored Code
<CODES FRZD>
P0143
<PREVIOUS
CLEAR>
NEXT>
Push the function button next to CLEAR to clear
the code and turn off the check engine lamp. If
there is more than one code stored, you may
need to clear all.
Your ScanGaugeII features an easy
to use menu driven design. Pushing
the button next to each selection will
display that information. Pushing the
HOME button will take you back to
the Home Menu at anytime.
<SCAN
<TRIP
GAUGE>
MORE>
Push the HOME button to return to
the HOME Menu at anytime.
Typical OBDII Connector location
OBDII Connector
ScanGauge
II
Layout

Quick Start Guide
Plugs into the diagnostic connector already
built into all 1996 or newer cars and light trucks.
www.ScanGauge.com
4) Calibrating Your ScanGauge
II
5) Learn How to Save Fuel With ScanGauge
II
The accuracy of your ScanGaugeII can
be improved by calibrating the fuel con-
sumption. Calibrating your ScanGaugeII
to accurately report fuel consumption is
a two step process; your first fill up
and your second fill up.
For more detail information about calibrating your fuel consumption as well as how to
calibrate your ScanGaugeII to your vehicle’s speed, please refer to the user manual.
The easiest way to learn to improve your fuel economy is to have real-time feedback
about how your driving style effects overall fuel use. ScanGaugeII can provide both
Miles Per Gallon (MPG) as well as
Average Fuel Economy (AVG) in real-
time to help you adjust your driving style
to reach maximum fuel economy.
Start Learning to Save Fuel!
With your Gauges set, your ScanGaugeII is now ready to provide real-time feedback about
your fuel usage as you drive. This will allow you to see what adjustments in your driving
style can be made to actually raise or lower your Average Fuel Economy (AVG).
Your goal is to bring up your AVG reading
as high as possible. To do this, try and
adjust your driving style so that your
Miles Per Gallon (MPG) reading is equal
to or higher than your AVG. You can also
use the Gallons/Liters Per Hour (GPH/
LPG) to gauge how much fuel your vehicle will use each hour of driving. The Trip Fuel
Cost (TFC) gauge will show you the total cost of the fuel used. You can think of the TFC
gauge as a taxi meter.
Using these real-time gauges, you can experiment with different driving styles, or even
different driving routes to reduce your fuel cost.
Step 1 - Your First Fill Up
Follow these calibration instructions only
when you are filling your fuel tank. If you
do not fill your tank to it’s capacity, then the
calibration process will not produce accurate
results.
When filling the tank on your Second Fill up, •
try and use the same pump you used for your
first fill up with the vehicle pointed in the same
direction. If you fill up your fuel tank with your
vehicle on an incline, it can have an effect on
the amount of fuel the pump can dispense
into your tank.
When filling your tank, let the pump shut off •
automatically - do not top off.
To maintain accurate “TO EMPTY” informa-•
tion in the ScanGaugeII’s trip computers, you
should always fill your tank to capacity and
follow the FILLUP sequence in Step 1.
Once you have completed your second fill up, •
subsequent fill ups may not require adjusting
the gallons/litters before pressing DONE.
Helpful Hints:
Fill up the tank, letting the pump shut off 1)
automatically.
Use the FILLUP function to tell 2)
ScanGaugeII you have filled the tank. From
the Home screen, follow the sequence:
MORE>FILLUP>DONE
After pressing DONE, the FUEL COST 3)
screen will appear. Enter the cost per
gallon/liter and press the SAVE button.
Keep the ScanGaugeII connected to 4)
your vehicle and use the vehicle normally.
Once you reach approximately 1/4 tank 5)
of fuel left, follow the directions in Step 2.
On your first fill up DO NOT make
any adjustments to the indicated
fuel. Simply press the button next
to DONE.
<SCAN
<TRIP
GAUGE>
MORE>
HOME Screen
<DISPLAY
<SETUP
FILLUP>
MORE>
DONE>
< 0.1 GALLONS >
0.0%
< $ 3.00 >
FUEL COST
SAVE>
Once you have set the fuel cost,
press SAVE.
When the tank is around 1/4 full1) ,
fill up your tank again. Be sure to let the
pump shut off automatically
Use the FILLUP function to tell 2)
ScanGaugeII you have filled the tank.
from the HOME screen follow the
sequence:
MORE>FILLUP>
The next screen will show the amount 3)
of fuel your ScanGaugeII believes
was used since the previous fill up.
Use the upper left and right function
buttons (A,C) to adjust the amount of
fuel you actual put in the tank.
Push the DONE button4)
After pressing DONE, the FUEL COST 5)
screen will appear. Enter the cost per
gallon/litter and press the SAVE button.
Step 2 - Your Second Fill Up
DONE>
< 12.6 GALLONS >
0.0%
<SCAN
<TRIP
GAUGE>
MORE>
HOME Screen
<DISPLAY
<SETUP
FILLUP>
MORE>
< $ 3.00 >
FUEL COST
SAVE>
Once you have set the fuel cost,
press SAVE.
20.5 AVG
25.2 MPG
1.2 GPH
9.20TFC
Push the function buttons to
cycle through the available Digital Gauges.
Set Your Gauges
If necessary, use the function buttons to
select the following gauges:
AVG Average Fuel Economy
MPG Mile Per Gallon
GPH/GPL Gallons/Liters Per Hour
TFC Trip Fuel Cost
<SCAN
<TRIP
GAUGE>
MORE>
HOME Screen
20.5 AVG
15.2 MPG
1.2 GPH
9.20 TFC
20.5 AVG
25.2 MPG
1.2 GPH
9.20 TFC
/