Page is loading ...

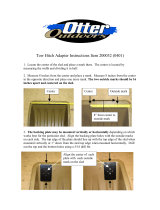
Otter Bench Instructions
Note: Installing bench before attaching the fish house will make the
installation much easier.
Parts included:
Tools required:
Drill
9/32 drill bit
7/16 wrench and socket and ratchet
½ wrench and socket and ratchet
Phillips screwdriver
1. Layout all parts. Turn bench over so the bottom is facing upward and the hinges are
facing away from you. Place the curved support bar with the two holes near the end on
the bench. On the left side, line up the edge of the seat with the inside edge of the tube.
Place the tube clamp bracket over the bar and attach with the Phillips head machine
screws by threading them into the inserts in the bottom of the bench. Attach brackets in
two places on the support bar.
Hinge
Line up inside edge of the
tube with the edge of the seat.
Hole near end
Inserts in bench

2. Attach the center support brace to the bench tube with the ¼ x 2 bolts, washers, and
nylock nuts.
3. Place the second shorter tube on the bench as shown in the picture below. On the left
side, line up the inside edge of the tube with the outside edge of the bench. Adjust it as
necessary so the holes in the main tube line up with the holes in the center support brace.
Attach with the ¼ x 2 bolts, washers and nylock nuts. Also attach the tube clamp
brackets to the bottom of the bench.
Tube clamp
Tube clamp
Attach here
Bolt
Nylock nut
and washer
Line up inside edge of
tube with the outside
edge of the bench.
Attach here with bolts,
washers and nylock nuts .
Attach tube clamp
brackets here.
Center
support
brace

4. Attach sled brackets to the rear main tube using the 5/16 x 2 ½ bolts, washers and
nylock nuts.
5. Turn bench over from left to right. and align it on the sled as shown. The brackets and
the main support tube should line up on the edge of the sled,
Attach the bracket
with the long leg
to the left side.
Bracket should
stick outside of
the tube.
Attach
bracket with
the short leg
to the right
side.
5/16 x 2 ½ bolt
with washers on
each side and
nylock nut.
Bracket with short
leg aligns here and
support tube aligns
here.
Align bracket
here and support
tube here.

6. After the bench is properly aligned drill out one of the top holes in the front bracket
and and secure with the ¼ x 1 bolt, washers and nylock nut. The washers should go on
both the top and the bottom. Drill out the second hole and secure. Repeat at the rear of
the sled.
7. Drill out one of the lower holes in the front bracket and secure with the ¼ x 1 bolt,
washer and nylock nut. The washer goes on the outside of the sled only. Drill out the
second hole and secure. Repeat at the rear of the sled.
8. Insert end caps into the tubes in four places. Pound in until they are flush.
Drill out
and secure
here
Drill out
and secure
here
Drill out and
secure here
Drill out and
secure here.
Insert end caps into tubes.

Completed bench is offset toward the
rear of the sled to minimize tipping of
the sled due to the front angle on the
sled.
/