Page is loading ...

USB/Ethernet
DSL Modem
Model #: GT701
Firmware Version: 3.0.1.0.6.0-GT701
User Manual
Ver 1.0
Solutions for the Digital Life
™

i
Table of Contents
1 Introduction 1
Package Contents 1
Minimum System Requirements 2
Features 2
Getting to Know the Modem 4
2 Setting Up the Modem 7
Connecting a Computer to the Modem 7
Installing Phone Filters 22
Setting Up the DSL Connection 26
3 Performing a Basic Setup 31
Basic Setup 31
Changing the Admin User Name and Password 33
4 Using Advanced Setup 35
Accessing Advanced Setup 35
WAN IP Address 36
LAN IP Address 40
DHCP Server 40
Services Blocking 42
Website Blocking 43
Remote Management 44
Application Layer Gateway and Port Forwarding 45
DMZ Hosting 46
Firewall 47
Dynamic Routing 49
NAT (Network Address Translation) 50
Static Routing 50
UPnP (Universal Plug and Play) 51
Time Zone 51
Remote Syslog Capture 52
5 Viewing the Modem’s Status 53
General Status 53
Routing Table 55
ARP Table 55
WAN Status 56
LAN Status 57
Active User List 57

ii
Actiontec USB/Ethernet DSL Modem User Manual
ii
6 Using Utilities 59
Web Activity Log 59
System Log 60
DSL Settings 61
Restore Default Settings 62
Upgrade Firmware 62
7 Setting Up a Network 63
Ethernet 63
USB 68
8 Troubleshooting 73
Troubleshooting 73
Frequently Asked Questions 74
a Reference 79
Locating Computer Information 79
Locating Windows Operating System Files 80
b Setting Up Static IP on the Computer 83
Windows 98 SE 83
Windows Me 86
Windows 2000 89
Windows XP 93
c Computer Security 97
Comparing DSL Service with a Dial-Up Modem 97
Modem Security 98
Computer Security 98
Electronic Security 99
d Specifications 101
General 101
LED Indicators 102
Environmental 102
e Glossary 103
f Non-Windows System Setup 107
Classic 107
OS X 109
Notices 111
Regulatory Compliance Notices 111
Modifications 111
Miscellaneous Legal Notices 112
Limited Warranty 113

1
Introduction
Thank you for purchasing the Actiontec USB/Ethernet DSL Modem. The Modem
is the simplest way to connect computers to a high-speed broadband connection.
This easy-to-use product is perfect for the home office or small business. If you
want to take your computing to the next level, the Actiontec USB/Ethernet DSL
Modem is sure to be one of the keys to your success.
Package Contents
s Actiontec USB/Ethernet DSL Modem
s Power cord
s Phone filters
s DSL cable
s Yellow (Ethernet) cable
s Blue (USB) cable
s Installation CD (includes user manual)
s Quick Start guide
s Start Here guide
s Technical Support card
1

2
Actiontec USB/Ethernet DSL Modem User Manual
3
Chapter 1 Introduction
Minimum System Requirements
s Internet DSL service
s Compatible laptop, desktop, or Macintosh computer with an available
Ethernet or USB (USB compatible with PCs only)
s Microsoft Windows 98, 98 Second Edition (SE), Millennium Edition (Me), NT
4.0, 2000, XP; Mac OS 7.1 and above
☞
Note: USB LAN port is not supported with Microsoft Windows
95 and NT 4.0, or any Mac OS.
s Internet Explorer 4.0 or higher (5.x recommended) or Netscape Navigator
4.0 or higher (4.7 recommended)
s TCP/IP network protocol installed
Features
s Plug-and-Play installation support for systems with Windows operating
systems (98SE, Me, 2000, and XP)
s ADSL WAN port (RJ-11)
s Compliant with full-rate ANSI T1.413 Issue 2, ITU G.992.1 (G.dmt) and
G.992.2 (G.lite) standard
s Auto-handshake for different ADSL flavors
s USB 1.1 device specification compliance
s 12 Mbps USB data rate (full speed)
s Multiprotocol encapsulation over ATM, PPP over ATM, PPP over Ethernet
s Precise ATM traffic shaping
s IP packet routing and transparent bridge
s Routing protocol supports RIP-1, RIP-2, static routing

2
Actiontec USB/Ethernet DSL Modem User Manual
3
Chapter 1 Introduction
s Built-in NAT, DHCP server
s DNS relay support
s PAP/CHAP authentication, administrative passwords through Telnet and
HTTP
s Compliant with IEEE 802.3 Ethernet standard
s 10/100 Base-T Ethernet port
s Flow control support for Fast Ethernet
s Web-based configuration setup
s Default configuration backup restore
s Firmware upgradeable
s Web download support

4
Actiontec USB/Ethernet DSL Modem User Manual
5
Chapter 1 Introduction
Getting to Know the Modem
This section contains a quick description of the Modem’s lights, ports, etc.
The Modem contains several indicator lights (LEDs) on its front panel and a series
of ports on its rear panel.
Front Panel
The front panel of the Modem features five lights: Power, DSL, Internet,
Ethernet, and USB.
Powe
r
DSL
Int
ern
e
t
Et
h
er
ne
t
US
B
Power
DSL
Int
erne
t
E
t
herne
t
U
S
B
USB/Ethern
et
DSL Mode
m
Power Light
The Power light displays the Modem’s current status. If the Power light glows
steadily green, the Modem is receiving power and fully operational. When the
Power light flashes rapidly, the Modem is initializing. If the Power light is not
illuminated when the Power cord is plugged in and the Power switch is turned
on, the Modem has suffered a critical error and technical support should be
contacted.
DSL Light
The DSL light illuminates when the Modem is connected to a DSL line. When it
flashes, the Modem is training for your DSL service.

4
Actiontec USB/Ethernet DSL Modem User Manual
5
Chapter 1 Introduction
Internet Light
When the Internet light glows steadily, the Modem is connected to the DSL provider.
Ethernet Light
The Ethernet light illuminates when the Modem is connected via its Ethernet
port.
USB Light
The USB light illuminates when the Modem is connected via its USB port.
Rear Panel
The rear panel of the Modem contains four ports (Phone, USB, Ethernet, and
Power), as well as Reset and Power switches.
Power
R
e
se
t
P
h
o
n
e
USB
E
t
h
er
n
e
t
Phone Port
The Phone port is used to connect the Modem to a DSL (Digital Subscriber
Line) connection.

6
Actiontec USB/Ethernet DSL Modem User Manual
USB Port
The USB port is used to connect a computer to the Modem via USB cable.
☞
Note: It is not recommended to perform a recovery or update
for the Modem from a computer connected via USB.
Ethernet Port
The Ethernet port is used to connect computers to the Modem via Ethernet
cable. The Ethernet port is a 10/100 Mbps auto-sensing port, and either a
straight-through or crossover Ethernet cable can be used when connecting to
the port.
Power Port
The Power port is used to connect the Power cord to the Modem.
N
Warning: Do not unplug the Power cord from the Modem dur-
ing the reset process. Doing so may result in permanent damage
to the Modem.
Reset Switch
Depressing the Reset switch for one or two seconds will power cycle the Modem
(similar to unplugging and then plugging in the Modem’s Power cord). To
restore the Modem’s factory default settings, depress and hold the Reset switch
for approximately 15 seconds. The reset process will start about 10 seconds after
releasing the switch.
Power Switch
The Power switch is used to power the Modem on and off.
N
Warning: Do not click the Power switch to its “off” postion
during the reset process. Doing so may result in permanent
damage to the Modem.

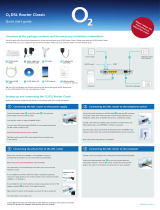
7
Setting Up
the Modem
The instructions that follow parallel the steps contained in the Actiontec Installation
Buddy
™
, which provides a visual guide to setting up the Modem. It is recommended
the user run the Installation Buddy first, before attempting any other procedures.
To set up the Modem, it must be connected to a computer, and then configured.
After connecting this first computer, other computers can be added to the network
via USB or Ethernet (see “Setting Up a Network” on page 63).
Connecting a Computer to the Modem
Connecting a computer to the Modem for setup involves three basic steps: initial
setup, plugging in the Modem’s power cord, and connecting the Modem to the
computer.
Connecting Via Ethernet
1. Insert the Installation CD in the CD-ROM drive of the computer. The
Installation Buddy starts automatically. Wait until the following screen
appears, read the on-screen instructions, then click Next.
2

8
Actiontec USB/Ethernet DSL Modem User Manual
9
Chapter 2 Setting Up the Modem
2. Read the instructions, select Initial Setup by clicking on the appropriate check
box, then click Next.
3. Click in the check box next to Ethernet (Recommended), then click Next.

8
Actiontec USB/Ethernet DSL Modem User Manual
9
Chapter 2 Setting Up the Modem
4. Make sure the items needed to connect the Modem to the first computer are
included in the kit, then click Next.
5. Get the Modem from the kit, then click Next.

10
Actiontec USB/Ethernet DSL Modem User Manual
11
Chapter 2 Setting Up the Modem
6. Get the Power cord and plug the smaller end into the black Power port on
the rear panel of the Modem, then click Next.
7. Plug the larger end of the Power cord into a power outlet, then click Next.

10
Actiontec USB/Ethernet DSL Modem User Manual
11
Chapter 2 Setting Up the Modem
8. Click the On/Off switch to its on position (as shown in the picture on-
screen), then click Next.
9. Confirm the Power light on the front of the Modem glows solid green, then
click Next.

12
Actiontec USB/Ethernet DSL Modem User Manual
13
Chapter 2 Setting Up the Modem
10. Get the yellow Ethernet cable from the kit and plug one end into the yellow
Ethernet port on the back of the Modem, then click Next.
11. Plug the other end of the yellow Ethernet cable into an Ethernet port on
the back of the computer. Click Next.
☞
Note: An Ethernet port looks similar to a phone jack, but is
slightly larger.

12
Actiontec USB/Ethernet DSL Modem User Manual
13
Chapter 2 Setting Up the Modem
12. Make sure the Ethernet light on the front of the Modem glows solid green.
Click Next.
13. Get the black or gray DSL cable from the kit and plug one end into the gray
Line port on the rear panel of the Modem. Click Next.

14
Actiontec USB/Ethernet DSL Modem User Manual
15
Chapter 2 Setting Up the Modem
14. Plug the other end of the black or gray DSL cable into the phone jack clos-
est to the computer. Click Next.
The Modem is connected to a computer via Ethernet. Next, install the filters as
described in “Installing Filters” on page 22.
Connecting Via USB
1. Insert the Installation CD in the CD-ROM drive of the computer. The
Installation Buddy starts automatically. Wait until the following screen
appears, read the on-screen instructions, then click Next.

14
Actiontec USB/Ethernet DSL Modem User Manual
15
Chapter 2 Setting Up the Modem
2. Read the instructions, select Initial Setup by clicking on the appropriate check
box, then click Next.
3. Click the check box next to USB, then click Next.

16
Actiontec USB/Ethernet DSL Modem User Manual
17
Chapter 2 Setting Up the Modem
4. Make sure the items needed to connect the Modem to the first computer are
included in the kit, then click Next.
5. Get the Modem from the kit, then click Next.

16
Actiontec USB/Ethernet DSL Modem User Manual
17
Chapter 2 Setting Up the Modem
6. Get the Power cord and plug the smaller end into the black Power port on
the rear panel of the Modem, then click Next.
7. Plug the larger end of the Power cord into a power outlet, then click Next.
/