Page is loading ...

Phone: 800.447.8638
Email: [email protected]
Online: www.kregtool.com
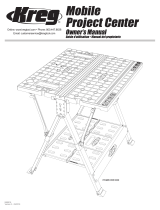
TRACK HORSE
ITEM# KWS500
100757
Version 1 - 03/2018
Owner’s Manual
Guide d’utilisation • Manual del propietario

WARNING
!
When using electric tools with this product, always follow the tool manufacturer’s instructions in addition to the safety precautions below to reduce risk of
re, electric shock, and personal injury. Read all these instructions before attempting to operate this product. SAVE THESE INSTRUCTIONS.
GENERAL SAFETY INSTRUCTIONS
1) WORK AREA SAFETY
A) Keep work area clean and well lit. Cluttered or dark areas invite accidents.
B) Don’t use power tools in a dangerous environment. Don’t use
power tools in damp or wet locations, or expose them to rain.
C) Do not operate power tools in explosive atmospheres, such
as in the presence of ammable liquids, gases or dust.
Power tools create sparks that can ignite the fumes or dust.
D) Keep children and bystanders away while operating a
power tool. Distractions can cause you to lose control.
E) Make your workshop child proof. Use padlocks,
master switches, or remove starter keys.
2) ELECTRICAL SAFETY
A) Ground electric tools. If the tool is equipped with a three-prong
plug, it must be plugged into a grounded three-hole electrical outlet.
If the proper outlet is not available, have one installed by a qualied
electrician. Never remove the third prong or modify the provided
plug in any way.
B) Do not expose power tools to rain or wet conditions.
Water entering a power tool increases the risk of electric shock.
C) Do not abuse the cord. Never use the cord for carrying, pulling
or unplugging the power tool. Keep cord away from heat, oil, sharp
edges or moving parts. Damaged or entangled cords increase
the risk of electric shock.
D) Use a proper extension cord and make sure it is in good
condition. When using an extension cord, be sure to use one
heavy enough to carry the current your power tool draws.
An undersized cord causes a drop in line voltage resulting in
loss of power and overheating. Table 1 shows the correct cord
gauge to use depending on cord length and tool nameplate
ampere rating. If in doubt, use the next heavier gage.
The smaller the gage number, the heavier the cord.
E) When operating electric tools, avoid body contact with
grounded or earthed surfaces such as pipes, radiators, kitchen
ranges, and refrigerators. Contact with a grounded surface
increases the risk of electric shock.
3) PERSONAL SAFETY
A) Stay alert, watch what you are doing and use common sense
when operating a power tool. Do not use a power tool while you
are tired or under the inuence of drugs, alcohol or medication.
A moment of inattention while operating power tools can result
in serious personal injury.
B) Always wear safety glasses. Everyday eyeglasses are not safety
glasses. Safety glasses have specially constructed lenses, frames,
and side shields.
C) Use safety equipment. Use a face or dust mask when the cutting
operation is dusty. Safety equipment such as a dust mask, non-skid
safety shoes, hard hat, or hearing protection used for appropriate
conditions reduces personal injuries.
D) Avoid accidental starting. Make sure the switch is in the
off-position before plugging in. Carrying power tools with your
nger on the switch or plugging in power tools that have the
switch on invites accidents.
E) Remove any adjusting key or wrench before turning the
power tool on. A wrench or a key left attached to a rotating part
of the power tool can result in personal injury.
F) Do not overreach. Keep proper footing and balance at all times.
This enables better control of the power tool in unexpected situations.
G) Secure workpieces. Use clamps or a vise to hold work when
practical. This is safer than using your hand and it frees both
hands to operate the tool.
H) Never stand on the machine. Serious injury can occur
if the tool tips or if the cutting tool is unintentionally contacted.
) Dress properly. Do not wear loose clothing or jewelry. Keep your hair,
clothing and gloves away from moving parts. Loose clothes, jewelry or
long hair can be caught in moving parts. Roll up long sleeves to
the elbow. Wear protective hair covering to contain long hair.
J) If devices are provided for the connection of dust extraction
and collection equipment, ensure these are connected and
properly used. Use of these devices reduces dust-related hazards.
4) POWER TOOL USE AND CARE
A) Keep guards in place and in working order.
B) Do not force the power tool. Use the correct power tool
for your application. The correct power tool will do the job better
and safer at the rate for which it was designed.
C) Use the right tool. Don’t force a tool or
attachment to do a job for which it was not designed.
D) Do not use the power tool if the switch does not turn
it on and off. Any power tool that cannot be controlled
with the switch is dangerous and must be repaired.
E) Disconnect the plug from the power source and/or the battery
pack from the power tool before making any adjustments, changing
accessories, or storing power tools. Such preventive safety
measures reduce the risk of starting the power tool accidentally.
F) Never leave a tool running unattended. Turn power off.
Do not leave the tool until it comes to a complete stop.
G) Store idle power tools out of the reach of children and
do not allow persons unfamiliar with the power tool and these
instructions to operate the power tool. Power tools are
dangerous in the hands of untrained users.
H) Maintain power tools. Check for misalignment or binding
of moving parts, broken parts, and any other condition that can
affect power tool operation. If damaged, have the power tool
repaired before use. Many accidents are caused by poorly
maintained power tools.
) Keep cutting tools sharp and clean. Properly maintained cutting tools
with sharp cutting edges are less likely to bind and are easier to control.
J) Use the recommended speed for the cutting tool
or accessory and workpiece material.
K) Only use parts and accessories recommended by the
manufacturer. Consult the owner’s manual for recommended
accessories. Using improper accessories can cause personal injury.
L) Use the power tool, accessories, and tool bits in accordance with
these instructions and in the manner intended for the particular type
of power tool, taking into account the working conditions and the
work to be performed. Use of the power tool for operations different
from those intended can result in a hazardous situation.
5) SERVICE
A) Have your power tool serviced by a qualied
repair person using only identical replacement parts.
This ensures that the safety of the power tool is maintained.
6) SAFETY INSTRUCTIONS SPECIFIC TO THE KREG TRACK HORSE
A) When deploying the legs, make sure the locking
pins are fully engaged in the leg-bracket holes.
Keep hands away from potential pinch points.
B) When adjusting leg height, make sure the
locking pins are fully engaged in the leg holes.
C) When folding the legs, do not trap hand between the leg
and the track. Keep hands away from potential pinch points.
D) Always work on a sturdy, dry, level surface.
E) When using power tools with the Track Horse,
follow the tool manufacturer’s safety instructions.
F) When using two Track Horses in Table Setup, always support
workpieces on both 2x4 side rails or both Track Horses. Make sure
the saw blade does not contact the side rails or Track Horses.
G) When using two Track Horses in Cutting Setup, always
support workpieces on both 2x4 side rails and at least one
2x4 cross-member attached to the Track Horse T-track with
the provided hardware. Adjust the saw depth of cut to
1
⁄8" [3mm]
deeper than the thickness of the workpiece.
H) The Track Horse is not intended for use
outdoors in damp conditions.
) Always store the Track Horse inside or in an area sheltered from weather.
J) Do not use the Track Horse as scaffolding, a step,
or seat, or for any purpose not indicated in this manual.
K) Do not rest material on leg-extension locks.
L) Do not hang items from the Track Horse,
except as indicated in this manual.

GUIDELINES FOR EXTENSION CORD USE
Extension cords are only to be used for temporary purposes.
They do not replace the need for installation of outlets and
proper wiring where necessary.
IN THE SHOP AND ON CONSTRUCTION SITES:
1. Extension cords with an equipment grounding conductor
must be used at all times.
2. Extension cords must be protected from damage,
and not run through doorways or windows where the
doors or windows may close, causing damage to the cord.
3. Extension cords should be a minimum of 16 AWG and be
rated for the equipment in use.
4. Extension cords must be periodically inspected to ensure that
the insulation and conductivity of the wires are not compromised.
5. Extension cords should not be run through water or allowed to
have connections that may be exposed to accumulated water.
TABLE 1
NAMEPLATE
AMPERES
@120 V
EXTENSION CORD LENGTH
25' 50' 75' 100' 150' 200'
RECOMMENDED WIRE GAUGE
0 - 5 16 16 16 14 12 12
5.1 - 8 16 16 14 12 10 NR
8.1 -12 14 14 12 10 NR NR
12.1 - 16 12 12 NR NR NR NR
NR – NOT RECOMMENDED
ELECTRICAL SHOCK HAZARD
:
The metal parts of this product conduct
electricity. Avoid any condition that causes electrical contact. Improperly grounded
power tools present a hazard of electrical shock that can result in serious bodily
injury or death, particularly when used in a damp location, in proximity to plumbing
and other earthed surfaces, or outdoors.
WARNING
:
!
This product can expose you to chemicals including Carbon Black,
which is known to the State of California to cause cancer. For more information go to
www.P65Warnings.ca.gov.
GENERAL SAFETY INSTRUCTIONS
KREG TRACK HORSE LIMITED WARRANTY
Kreg Tool Company warrants to the original purchaser only, that
the Kreg Track Horse will be free from defects in material and
workmanship for a period of three (3) years from date of purchase.
Kreg Tool Company will, at its option, repair or replace any product
(or component part thereof) proving defective during said warranty
period. This warranty applies only to products which are used in
accordance with all instructions set forth in catalogs, manuals
and/or instruction sets furnished by Kreg Tool Company.
This warranty becomes effective only if the original
purchaser fully and properly completes product registration
online (www.kregtool.com) or calls Kreg Tool Company
Customer Service (1-800-447-8638).
This warranty is null and void if the product has been subjected
to (1) misuse, abuse or improper storage; (2) accident, neglect,
damage or other circumstances beyond Kreg Tool Company’s
control; (3) modications, disassembly, tampering, alterations or
repairs not authorized by Kreg Tool Company; and (4) for non-
original purchasers. This warranty does not apply to normal wear
and tear, corrosion, abrasion, or repairs required due to natural
causes or acts of God.
This is Kreg Tool Company’s sole warranty. Any and all other
warranties which may be implied by law, including any warranties
for merchantability or tness for a particular purpose, are hereby
limited to the duration of this warranty. Kreg Tool Company shall
not be liable for any loss, damage or expense directly or indirectly
related to the use of its products or from any other cause or for
consequential damages (including without limitation, loss of time,
inconvenience, and loss of production). The warranty contained
herein may not be modied and no other warranty, expressed or
implied, shall be made by or on behalf of Kreg Tool Company.
For your records the following information will
be useful in the event a warranty claim is required.
For complete records attach copy of proof of purchase.
Date of Purchase ___/___/___
Purchased From:
________________________________________
EXPLANATION OF SAFETY SYMBOLS
FOUND ON THE TRACK HORSE
DO NOT STAND ON THE TRACK HORSE
DO NOT SIT ON THE TRACK HORSE
ALWAYS WEAR EYE PROTECTION
MAXIMUM LOAD, TWO TRACK HORSES
USED TOGETHER: 2200 LBS. [997 KG.],
EVENLY DISTRIBUTRED
PINCH POINT

PARTS
# NAME QUANTITY
A
SUPPORT BRACKETS 2
B
TRACK BUSHINGS & SCREWS 2
C
LEG BRACKET 2
D
LEG-PIVOT LOCK 4
# NAME
QUANTITY
E
LEG-EXTENSION LOCK 4
F
CLAMP TRACK 1
G
BENCH CLAMP 1
A
A
B
C
C
D
D
E
E
E
E
F
G

SETUP
SETUP
1
2
3
1
EXTEND LEGS
1
2
3
1
Depress leg-extension lock.
2
Pull leg to down position.
3
Click!
TRACK HORSE HEIGHTS
LEG POSITION HEIGHT OF TRACK
Folded 6.63" [168mm]
1 24.65" [626mm]
2* 31.65" [804mm]
3 32.65" [829mm]
4 33.65" [855mm]
5 34.65" [880mm]
6 35.65" [906mm]
*Leg Position 2 matches the height of the Kreg Mobile Project Center.
STOW
1
Return legs to height position 1.
2
Squeeze leg-pivot lock.
3
Pivot leg to folded position.
4
Make sure locking pin engages.
2
3
4
Click!
Click!
1
Squeeze leg-pivot lock.
2
Pivot leg to down position.
3
Click!
Click!

SETUP
TABLE SETUP
1
Place two Track Horses
maximum 7 feet [2m] apart.
2
Support Brackets in lower position,
one 2x4 in each pair of Brackets.
3
3
⁄4" plywood rests on 2x4s and edges
of both Clamp Tracks.
4
Plywood edges placed tightly against
both Clamp Tracks.
5
Distribute weight uniformly.
WARNING:
!
Maximum load, two Track Horses used together,
2,200 lb. [998 kg.], evenly distributed
3
2
2
2
2
4
4
1
BRACKET POSITION: TABLE SETUP
Mount Support Brackets in lower slots.

SETUP
3
2
CUTTING SETUP
1
Place two Track Horses
maximum 7 feet [2m] apart.
2
Support Brackets in upper position,
one 2x4 in each pair of Brackets.
3
Sacricial 2x4 installed on
each Mobile Project Center.
(see MOUNTING A SACRIFICIAL 2X4)
4
Workpiece rests on 2x4s and
sacricial 2x4s.
5
Distribute weight uniformly.
3
2
2
2
4
4
4
1
WARNING:
!
Maximum load, two Track Horses used together,
2,200 lb. [998 kg.], evenly distributed
Mount the Support Brackets in upper slots.
BRACKET POSITION: CUTTING SETUP
Use a pair of Track Horses with the legs
folded in TABLE SETUP (leg brackets
resting on the ground) to create a low-height
assembly table or in CUTTING SETUP
(leg brackets resting on the ground)
for cutting large, heavy sheet goods.
GROUND-LEVEL MODE

SETUP
MOUNTING A SACRIFICIAL 2X4
1
Fasten the Track Bushings to the 2x4.
2
Slide them into the T-slot.
2
1
31
1
⁄2" [800mm]-long 2x4
MOUNTING A BENCH CLAMP
1
Adjust the clamp anchor screw.
2
Slide it into the T-slot.
1
2
ADJUSTING BENCH CLAMP PRESSURE
Less
Pressure
More
Pressure

SETUP
1
Install the Bench Clamp in lower
keyhole slot.
2
Install the Support Bracket in
middle slots.
3
Rest the workpiece on Bracket
4
and clamp.
CLAMP VISE
1
2
3
4
BRACKET POSITION: CLAMP VISE
Mount Support Brackets in middle slots.
ADDITIONAL FEATURES
Hang Kreg screw containers from Track edges.
ATTENTION:
!
Hang only Kreg 250-count and smaller screw
containers, and Kreg small or large hardware containers.

PIÈCES
# NAME QUANTITÉ
A
SUPPORTS 2
B
DOUILLES ET VIS POUR RAIL 2
C
SUPPORT DE PIED 2
D
DISPOSITIF DE BLOCAGE
DES PIEDS
4
# NAME
QUANTITÉ
E
DISPOSITIF DE BLOCAGE DES
RALLONGES DE PIED
4
F
RAIL POUR SERRE-JOINT TRAK 1
G
SERRE-JOINT D’ÉTABLI
BENCH CLAMP
1
A
A
B
C
C
D
D
E
E
E
E
F
G

PIEZAS
# NOMBRE
CANTIDAD
A
ABRAZADERAS DE SOPORTE 2
B
CONECTORES Y TORNILLOS
DE RIELES
2
C
ABRAZADERA DE PATAS 2
D
TRABA DE PIVOTE DE PATAS 4
# NOMBRE CANTIDAD
E
TRABA DE EXTENSIÓN DE PATAS 4
F
RIEL DE ABRAZADERA 1
G
ABRAZADERA DE BANCO 1
A
A
B
C
C
D
D
E
E
E
E
F
G

For assistance with any Kreg product, contact us through our Web site or call Customer Service.
Si vous avez besoin d’aide concernant les produits Kreg, communiquez avec nous
sur notre site Web ou appelez notre service à la clientèle.
Si requiere asistencia con cualquier producto Kreg, póngase en contacto
con nosotros a través del sitio web o llame al Servicio al Cliente.
www.kregtool.com • 800.447.8638
/