Page is loading ...

Bath On/Off Control for Amerec
AK Steambath Generators
Steambath ON/OFF control with no temperature control.
FOR THE SAFETY OF YOU AND YOUR FAMILY PLEASE
READ THE WARNINGS TO THE RIGHT AND ALL
INSTRUCTIONS BEFORE USING YOUR STEAMBATH.
POST "STEAMBATH INSTRUCTIONS" LABEL OUTSIDE
THE STEAMBATH FOR SAFETY WARNINGS.
SAVE THIS MANUAL
Thank you for purchasing your new Amerec steam generator. If we can be of any
assistance do not hesitate to call Technical Support at:
1-425-951-1120 or 1-800-363-0251 or email us at [email protected].
WARNING
4209-20 05/22/17
R30i Control Installation & Owners Manual
SECTION 1: INSTALLATION
The low voltage control can be mounted up to 75 feet (23 m) from the generator either inside
or outside the steam room. We recommend the control be located inside the steam room
so it can be used to turn the steam generator on and off during a steam bath to control the
bath temperature. Two controls may be wired in parallel to provide controls both inside and
outside the steam room. Contact Support at 1-425-951-1120 or 1-800-363-0251 or support@
amerec.com for assistance.
1. Control Cable Rough-In: Run the 25 feet (7,6 m) control cable (provided) from the
control location through 1/2" (12 mm) holes in the wall studs or ceiling joists to the generator.
Note: 1) Do not staple through or damage wires.
2) Label or color code wires for proper circuit board to control connection
orientation. (See diagram 3)
2. Control Cable at the Generator: To prepare the steam generator, make certain that power
to the steamer is disconnected then remove the steamer's cover.
Electrical grounding is required
on all Steam Generators.
All electrical supplies should be
disconnected when servicing a
Steam Generator.
All wiring must be installed by a
licensed electrical contractor in
accordance with local and
national codes.
All plumbing must be installed
by a licensed plumber in
accordance with all applicable
local and national codes.
Steamers are for indoor use only.
Steamers are not for
space-heating purposes.
Be certain that steam bath
enclosures are properly sealed
to avoid water damage from
escaping steam. It is
recommended that 100%
silicone caulk be used to seal
all pipes and fi ttings. Steam
must be prevented from
escaping into the wall cavity.
Never shut off the water to an
appliance that is in use.
Electric Shock Hazard
High Voltage exists within this equipment.
There are no user serviceable parts
in this equipment.
REDUCE THE RISK OF
1. Exit immediately if uncomfortable, dizzy or sleepy. Staying too long in
a heated area is capable of causing overheating.
REDUCE THE RISK OF
Use care when entering or exiting the steam room, floor may be slippery.
NOTE: For additional safety instructions, see owner's manual.
CAUTION!
Do not contact steam head. Stay at least 12" away
from hot steam escaping from the steam outlet.
OVERHEATING AND SCALDING
2. Supervise children at all times.
3. Check with a doctor before use if pregnant, diabetic, in poor health or
under medical care.
4. Breathing heated air in conjunction with consumption of alcohol, drugs
or medication is capable of causing unconsciousness.
SLIPPING AND FALL INJURY
WARNING
4110-79
05-21-07

4209-20 05/22/17
R30i Control Installation & Owners Manual
page 2
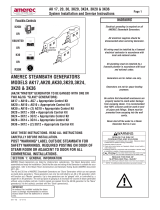
1-3/4" (47 mm) DIAMETER
HOLE IN FINISHED WALL
THIS LOW VOLTAGE CONTROL CAN BE LOCATED
INSIDE OR OUTSIDE THE STEAM ENCLOSURE
WARM START
ON/OFF
WARM START
ON/OFF
DIAGRAM 1
DIAGRAM 2
DIAGRAM 3
REQUIRES 18 TO 22 AWG SOLID WIRE, RATED 300V, 75°C MINIMUM
FROM GENERATOR TO CONTROL. STRIP WIRE ENDS 1/4" (6mm)
Press on
orange tab and
insert wire
APPLY SEALANT
(100% SILICONE CAULK)
A LOW VOLTAGE CONTROL CABLE (25' (7,6M)) IS PROVIDED FOR 5 VOLT DC SWITCH CONNECTION
TO THE STEAM GENERATOR. NO ADDITIONAL ELECTRICAL SUPPLY OR WIRING REQUIRED.
3221-xxx PCA 3224-xxx PCA 3224-03x PCA
Strain Relief
Bushing
R30i Control
Circuit Board
Terminal Block
To R30i Control
1
3
2
1
2
3
Knockout
Hole A

page 3 4209-20 05/22/17
R30i Control Installation & Owners Manual
SECTION 1: INSTALLATION (continued)
SECTION 2: VERIFY INSTALLATION
2. Control Cable at the Generator: (continued)
a. Feed the control cable through a knock-out (hole A) in the right hand of the steam generator and connect to the R30i terminal block on the circuit
board (See diagram 3). The three wires must be connected to corresponding terminals on the R30i and the steamer circuit board ( 1 to 1, 2 to 2
and 3 to 3). Note: there are three AK steam generator circuit boards (PCAs) compatible with the R30i control. Which board is installed depends
on the age of the steam generator. Refer to diagram 3 and the generator's wiring diagram to see where to connect the control to the circuit board.
b. Place a strain relief bushing approximately 9" (230 mm) from the stripped end of the control cable jacket. Snap strain relief bushing into
hole A. There must be no strain on the control cable or its wires.
c. Replace the steamer cover.
3. Install R30i Control: The low voltage control can be mounted directly to a fi nished wall either inside or outside the steam room.
a. Using a 1-3/4" (44 mm) hole saw, drill a hole in the fi nished wall where the control is to be mounted (the control wires should already be
roughed-in to this location).
b. Locate the control wires, pull them out through the 1-3/4" (44 mm) hole and plug the 3 wires into the connector on the back of the control,
as shown in diagram 3.
c. Run a bead of 100% silicone caulk around the perimeter on the back of the control housing. (See diagram 2). Insert the control into the wall
cavity. Tape the control to the wall while the silicone dries. Note: A mounting plate for a switch box is included in your R30i kit, too.
1. Assure that both the power circuit and water supply to the generator are on.
2. Press the R30i control's ON/OFF button. The control's LED should light and the steam generator will fi ll with water and start heating. In about
5 to 10 minutes, steam should start entering the steam bath (the time will vary depending on the wattage of the generator). Note: the LED will
light while the steam generator is running and turn off when the generator is turned off.
3. After the steam starts, press the ON/OFF button. The steam should stop; there shouldn't be any water fl ow, and the control should not be lit.
Press the ON/OFF button again. The control should light and steam should be visible within 1 minute. Typically, the steam generator will call
for water every 2 minutes or more, depending upon its power rating. It is normal for the fl ow of steam out the steam head to slow for up to
10 seconds each time the unit calls for water.
4. The steam generator will shut down automatically 30 minutes after the last time the control turned it on. When the bath time runs out, the
steam will stop and there should not be any water fl ow. The control should not be lit.
5. If the unit does not operate as described above, contact Technical Support at 1-425-951-1120 or 1-800-363-0251 or [email protected].
SECTION 3: SERVICE
If the LED on the R30i Control does not light steadily while the steamer is operating or the control
does not start or stop the steam bath, or for other assistance, contact Technical Support.
P.O. Box 2258
Woodinville WA 98072
Phone: 1-425-951-1120 or
1-800-363-0251
Fax:
1-425-951-1130
email: support @ amerec .com
SECTION 2: OPERATION
1. Assure that both the power circuit and water supply to the generator are on.
2. Press the R30i control's ON/OFF button to start the steam bath. The control's LED should light and the steam generator will fi ll with water and
start heating. Note: the LED will remain lit while the steam generator is running and turn off when the generator is turned off.
3. Allow the steam room to reach a comfortable temperature, then enjoy your bath. If the room becomes too warm,use the control to stop the
steam generator. If the room becomes too cool, turn the generator on again.
4. To end the steam bath, press the R30i control's ON/OFF button (while the LED is lit) and the LED on the control should turn off and the steam
generator should stop producing steam. Note: the steam generator will turn off automatically 30 minutes after the last time the R30i control
was used turn the steam generator on.
/
