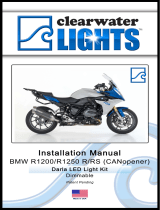
ClearWater Lights F900XR Installation guide

Category
Motorcycle Accessories
Type
Installation guide

ClearWater Lights F900XR offer enhanced visibility and functionality for your motorcycle adventures. With simple installation, these lights provide a range of features to elevate your riding experience. Customize lighting modes, including high beam, horn, and dimming, using the user-friendly CANopener interface. Enjoy precise leveling to minimize glare, ensuring optimal illumination without disturbing oncoming traffic. Experience the freedom of controlling your lights on/off and dimming via CANopener and WonderWheel, adding convenience to your rides.

ClearWater Lights F900XR offer enhanced visibility and functionality for your motorcycle adventures. With simple installation, these lights provide a range of features to elevate your riding experience. Customize lighting modes, including high beam, horn, and dimming, using the user-friendly CANopener interface. Enjoy precise leveling to minimize glare, ensuring optimal illumination without disturbing oncoming traffic. Experience the freedom of controlling your lights on/off and dimming via CANopener and WonderWheel, adding convenience to your rides.

Page 2
Parts List and Bike Preparation
• Check the parts list supplied with your kit to be sure all parts are handy.
• First, park the motorcycle on hard pavement or concrete to insure the
bike will be stable during the installation. Use the center stand or if you can
mount the bike on a stand with tie-down straps, this will help secure the
motorcycle.
• Follow the manufacturers guidelines for disconnecting the battery. This is
important to prevent damage to the electrical system.
Please be sure to read our instructions thoroughly
before attempting installation.
Note:
With the standard setup, your lights will stay on while the bike is on.
You have the ability to turn the lights on/off as well as the ability to dim
the lights via CANopener and WonderWheel. Please reference the
CANopener manual for programming proceedures.
Clearwater lights include a simple and high quality means of connecting to the
motorcycles electrical system. “Posi” devices made by Posi-Products are used
to securely and safely make electrical connections on the bike. You can view
instructions on the proper installation of the Posi-Products on the manuals page of
our website or on Posi-Product’s web site at http://www.posi-lock.com. They simply
screw together and mate the wires.
Fender Mount Parts List
Page 1
Page 3
Step 1: Parts List and Bike Preparation
Tools Needed For Installation
Page 2
4mm Hex Key
T25 Torx T30 Torx
Zip Tie Cutting Tool
Terminal CrimperWire Strippers
10mm Wrench
Page 4
Wiring Diagram
Page 3
(optional)
BMW
Bike
Connector
Page 5
Mounting The Lights / Fender Mount
Note: The engine needs to be running for lights to work
Fender Mount Overview (For F900R/XR):
To mount the Darlas to the front fender of your F900R/XR, first remove the
existing factory bolts from the fender using the T25 Torx. It may help to do
one side at a time.
Reference the exploded diagram below for assembly. Note that the
longer spacer and longer M5 bolt should be installed on the bottom of the
assembly. Be sure to use the correct sequence of hardware starting from
the shoulder washer, then the spacer, then bracket, M5 flat washer, and
finally the M5 bolt.
Page 4
Page 6
Step 1: Parts List and Bike Preparation
Disassembly
Page 5
Removal of the seat/seats and left side fairing is required for a clean install.
Disconnect the battery from the bike to prevent damage to the electrical sys-
tem. Follow the photos below as a guide to remove the left side fairing. The
fasteners that need to be removed have been highlighted.
2
1
3
4
5
6
7
8
Tips: Fastener 4 denoted in the photo above utilizes a T30 Torx, otherwise
all other OEM fasteners use a T25 Torx wrench. Fasteners 7 & 8 are slightly
longer than all of the others. Fastener 1 is accessible from the inside.
Once these fasteners have been removed, the left side fairing can be
removed by lifting the bottom of the fairing up and out slowly. Be careful, the
turn signal wire is connected to the fairing. Be sure to disconnect the turn
signal wire (circled below) before walking away with the fairing.
Mounting the Harness
Page 6
We recommend that the harness be mounted near the front of the bike, just
behind the steering column (highlighted below with red circle). The data cable
(cable with green connectors on both ends) and the power wires from the
harness should be routed back from the harness through the bikes left side
wiring trough to the area where the battery is located. Follow the green line
for wire routing path. A pull tool may be helpful for routing through the frame.
The light wires should be routed toward the front wheel and dressed such
that they avoid pinch points and suspension. The path for the light wires is
highlighted in blue. It may be helpful to follow the factory brake cable path.
Also, reference the wiring diagram for an overview of the system.
Installing the CANopener
Page 7
The CANopener utilizes the bikes Lean Angle Sensor and its connector for
a proper install. The Lean Angle Sensor is located just in front of the battery
(highlighted with a red circle). Unplug the factory harness from the Lean An-
gle Sensor and plug in the CANopener. Then plug the BMW factory harness
back into the CANopener such that the CANopener acts as a pass through.
Plug the data cable into the mating
connector on the CANopener (green
connector) and ensure it is plugged
into the harness at the front of the
bike as well. Neatly bundle any ex-
cess wires with a couple zip ties and
mount the CANopener in the area in
front of the battery with the attached
velcro. Remove the the fuse from the
fuse holder and attach it to the red
wire from the harness. The power
wires can be connected to the battery.
Finishing the Install
Page 8
Note: Bike engine must be running for lights to work.
To finish the install of your Clearwater Lights, verify that all wires are routed
away from pinch points, steering stops and direct contact with heat sources.
Insert the fuse into the fuse holder and start the engine to activate the
Clearwater Lights. Reference the CANopener manual for programmability
and functionality of the lights. Make sure that all functions such as high
beam, horn, and dimming modes work as expected.
Once the system is confirmed working, reassemble the bike including the
fairings, turn signal connector and seat. You can now level the lights to
minimize unneccessary glare to oncoming traffic.
Do Not Kink The Grommet
Do Not Kink The
Grommet
To maintain the
integrity of the water
sealling grommet,
do not kink, deform
or put pressure on
the grommet when
dressing the wires
during install of
Clearwater Lights.
Aligning the Lights:
Ask an assistant to help you with this
procedure. Make sure the bike is on
level ground and have an assistant sit
on the bike. With a right angle board
or object, position the board on the
floor and slide it up to the light.
The goal is to adjust the lights so that
the light is level with the ground.
CANopener Controls & Functions
Page 9
Notes
Page 10
As Of 12/2/22
  • Page 1 1
  • Page 2 2
  • Page 3 3
  • Page 4 4
  • Page 5 5
  • Page 6 6
  • Page 7 7
  • Page 8 8
  • Page 9 9
  • Page 10 10
  • Page 11 11
  • Page 12 12

ClearWater Lights F900XR Installation guide

Category
Motorcycle Accessories
Type
Installation guide

ClearWater Lights F900XR offer enhanced visibility and functionality for your motorcycle adventures. With simple installation, these lights provide a range of features to elevate your riding experience. Customize lighting modes, including high beam, horn, and dimming, using the user-friendly CANopener interface. Enjoy precise leveling to minimize glare, ensuring optimal illumination without disturbing oncoming traffic. Experience the freedom of controlling your lights on/off and dimming via CANopener and WonderWheel, adding convenience to your rides.

Ask a question and I''ll find the answer in the document

Finding information in a document is now easier with AI