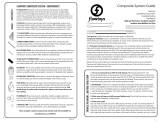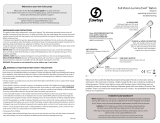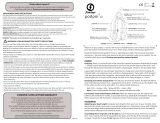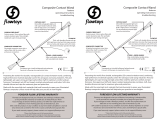
QUICK START GUIDE :: THINGS TO KNOW BEFORE YOU FLOW
1. Optimize and manage your batteries!
Use rechargeable batteries. The owlight was designed for rechargeables.
Flowlights are bright and draw a lot of power—cheapo disposable batteries can’t
keep up and don’t last as long.
Have 2 batteries for each owlight. This way you always have a charged set ready
to glow! We oer great rechargeable NiMHs for $1 each.
If you use NiMHs, charge shortly before use! Typical NiMHs hold a good charge
for 1-2 weeks. After that they may have less than 50% of their charge left, so we rec-
ommend charging them within a week of important uses like performances, parties
rst dates or festivals.
2. Cleaning your owtoys. If your crystal cases get dirty after hours of practice in the
park, owing in the forest or rockin’ out on a danceoor, you can clean them with soap
and water, or put them in the wash with your laundry: air-dry, no heat!
2
FLOWLIGHTS IN CRYSTAL CASES
Crystal case v2 is designed and 3D-printed with facets that line up with the owlight’s but-
ton no matter which way your owlight is oriented, so you can feel and turn on your lights
in the dark.
ADJUSTING THE LENGTH OF YOUR LEASH
Adjusting your leash to t your body & style optimizes your spinning experience:
The j-lace comes longer than most people need. To shorten, pull out the owlight from
the case, tie another knot, test the length and adjust as needed - a popular length for
poi is from hand to shoulder. Once you’ve chosen your length, nish the leash end. The
result is a high performance leash with minimal hardware or knots.
Finishing the leash end:
• After you’ve chosen your leash length, tighten the knot. Cut excess o with scissors.
• Melt the end of the knot with a lighter. While the end is still soft/melted, use the edge of
the lighter to atten and shape the melted ends of the knot onto the rest of the knot. This
ensures the knot will not come undone.
Tip: If the melted plastic sticks to the lighter, it’s too hot. Wait a second before shaping it.
Leash types: Crystal case v2s are designed to accommodate J-lace through the leash
opening. If you want to install smithy or other larger diameter cord to your crystal poi lite
v2, you can drill out the leash opening.
3
23 mm
130 mm
3 superbright LEDs
advanced micro-controller
single button, easy use
voltage regulator
color indicator
100% optical shell,
durable polycarbonate
no tools battery door
rechargeable AAA cell*
custon battery spring
easy attachment points
State-of-the-art, latest
technologies, design,
versatile, attractive,
easy-to-use, intuitive,
sustainble alternative to
chemical glowsticks.
Designed from the
ground up with great
engineering, awesome
design, good taste
and love.
37g w/ battery
Bright: 3 regulated ultrabright RGB LEDs (9 LEDs total) provide maximum
brightness for entire battery life.
Long lasting: 7-12 hours run-time in most modes
Durable: high impact polycarbonate shell, rugged circuit board, and replace-
able battery provide a lifetime of service.
Easy to use: intuitive one-button operation. Easy battery access, convenient
attachment points.
Sustainable: replaces chemical glowsticks, runs on 1 AAA battery, recharge-
able, repairable, built to last.
Low battery mode: blinks and goes into low-power mode to continue provid-
ing useable light for hours.
Battery charge indicator: hold button while o to see your battery charge
level.
Favorite mode recall: program your 10 favorite patterns in page 4, you can
also adjust and rearrange them!
State-of-the-art: Advanced micro-controller is super-ecient and powerful
for complex functionality and patterns.
Beautiful design: carefully designed to optimize light distribution, durability,
functionality, look and feel.
FLOWLIGHT - FULL SPECTRUM :: LED LIGHTSTICK
There is a slight lip at the tip of the door - push the lip DOWN towards the belly of the
light and FORWARDS towards the head of the light. There is a tiny “latch” inside near the
button that needs to be released before you can push the door forwards.
Use your thumb or another hard object (the tail end of another owlight works really well)
to push down and forwards on the tip of the door. Don’t push on the main part of the door
itself—this will not release the internal latch. Once you have released the battery door, pull
rmly on the door to separate the door from the light and access the battery compartment.
Inserting and removing the battery
There is a transparent battery pull tab—make sure you insert the battery with the tab
across the bottom of the compartment. Insert the positive end of the battery (pointy end)
in the direction of the head of the owlight (pointy end). Pull the tab to release battery. A
rm tap on a table or other semi-hard object will also pop the battery out of the compart-
ment.
Push the front lip of the door
down and forwards towards the
button rmly. The back of the door
should pop out. It may help to use a
small object like a battery or the end
of another owlight.
Pull the door out to access the
battery compartment. The antenna
are very strong and durable. You can
pull hard to remove the door. This
is normal.
To remove the battery, pull on the
clear battery pull tab, or tap the tail
of the owlight rmly against a rm
surface. Battery may be snug, this
is normal.
Insert battery “+” end rst towards the
pointy head of the light. Ensure clear
tab is placed correctly. Push battery “-”
end down. Insert antennae of battery
door. Push door down and back to
secure it. Power up & enjoy!
OPENING YOUR BATTERY DOOR
Glowstick warning!
Flowlights are made of polycarbonate, and chemical glowsticks release gaseous esters
that break down polycarbonate and make it brittle. This can occur even if an uncracked
glowstick is placed near polycarbonate, and is not only a result of broken or leaking
glow-sticks. Avoid exposure!


