Flowtoys HIGH PERFORMANCE User guide

Type
User guide

Flowtoys HIGH PERFORMANCE: A modular system for endless flow possibilities. With interchangeable light units, tubes, and caps, you can create almost any illuminated prop imaginable. From staffs to poi, chucks to rope darts, the possibilities are endless. The system is also highly durable and easy to maintain, so you can flow with confidence knowing that your props will last. Get ready to take your flow to the next level with Flowtoys HIGH PERFORMANCE!

Flowtoys HIGH PERFORMANCE: A modular system for endless flow possibilities. With interchangeable light units, tubes, and caps, you can create almost any illuminated prop imaginable. From staffs to poi, chucks to rope darts, the possibilities are endless. The system is also highly durable and easy to maintain, so you can flow with confidence knowing that your props will last. Get ready to take your flow to the next level with Flowtoys HIGH PERFORMANCE!

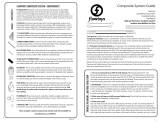
QUICK START GUIDE: THINGS TO KNOW BEFORE YOU FLOW
1. Do not use glowsticks or WD-40 with tubing. While polycarbonate is very strong, it breaks down
in the presence of certain esters, including those produced by chemical glowsticks, mineral spirits and
WD-40. Do NOT put chemical glowsticks into the tubes, otherwise they can become brittle and
shatter. We recommend lubricating the ends of your tubes with a touch of petroleum jelly.
2. Be careful when using your owtoys in the presence of sand or grit!
Sand and grit can get inside your caps and connectors and make them dicult to use. If you’re using
owtoys in a sandy area, blow out/clean your caps and connectors of sand before attaching them to
the tubing. If your caps and tubes feel gritty, clean them and apply a bit of vaseline for lubrication.
3. Make sure all caps and connectors are fully secured before use! Check that the buttons in your
caps and connectors are fully clicked into the holes of the tubes.
4. Cleaning your owtoys. If your owcaps, pod shells, crystal cases or owmass get dirty after hours
of practice in the park, owing in the forest or rockin it on a danceoor, clean them with soap and
warm water, or put them in the wash with your laundry: air-dry, no heat!
Modular System Guide
features
operating instructions
troubleshooting
inspiration
Combining versatile owtoys LED light units – the owlight and the capsule light – and a
series of click-in caps, screw connectors and tubes that are interchangeable, the modular
system enables the creation of almost any illuminated prop imaginable.
Gone are the days of wondering how to check in our 5’ stas for travel, or deciding which
owtoys to bring to an event. Now with just a few lights, tubes, caps, and various housings,
you can have 4’ double stas that transform into a contact sta, a couple of 3’ stas, poi,
chucks and more, and everything ts in a backpack!
The world just became a little more awesome for us, because of the versatility, creativity
and fun the Flowtoys Modular System enables. We hope that it will bring more ow and
more awesome to your life!
high performance modular system - endless possibilities for ow
1
4
FLOWTOYS MODULAR SYSTEM - COMPONENTS
FLOWLIGHT-FS: World’s most revolutionary LED glowstick. Beautifully sculpted
polycarbonate shell refracts full spectrum LEDs. 40 adjustable modes with many
bright and beautiful color and pattern options, kinetic awareness, accelerometer
response, battery and charge level indicators and more. 1 rechargeable AAA pro-
vides 3-27 hours runtime. Connect as many as you like to ll your tubes with lights.
CAPSULE 2: Amazing capsule light with over 60 adjustable modes, up to 60
programmable modes, wireless connectivity, USB rechargeable, custom high-
temp super bright LEDs, adjustable brightness, accelerometer, motion responsive
modes, USB rmware updateable with more features to come.
CAPSULE LINK: Tiny but tough, this link ts inside leash-ports of 2 capsules to
link them securely inside tubes. Leaves both buttons accessible.
1” CLEAR TUBES: Highest quality polycarbonate extrusion, transparent yet virtu-
ally bulletproof, connects to caps and connectors via snap-button holes. Available
in a variety of interchangeable lengths for instant reconguration.
TUBE CONNECTOR: New ultra secure and snug 3D-printed connectors with a
rigid carbon ber core and integrated snap buttons that securely connect 2 tubes.
Plus its highly-engineered structural design looks so cool ...
CORD CONNECTORS & LEASHES: Cord connectors enable a strong and reliable
connection between your owtoys tubes and leashcord. Screw holes align with
holes in tubing for a very secure connection. Features unique anti-pinch tapered
top. Used with poi, chucks and darts.
FLOWCAP & ADAPTORS: Thick, soft, durable silicone body. Inner polycarbonate
snap-cap buttons snap securely onto tubes and release with a rm twist. Built-in
button compatible with capsule lights; connects to owlights and vision core with
adaptors.
POD SHELL: Beautiful, thick, super-soft and durable silicone, built-in button com-
patible with capsule lights, strategic internal petal-ribs provide structure and focus
mass at the bottom for great rotational inertia. Possible to connect to owlights,
but not recommended. Pod shells attach to tubes with a friction t - please
read instructions and use caution.
FLOWMASS: These translucent crystalline-looking weights add more inertia to
your ow and optimize the balance of your owtoy. They can be added to crystal
cases and owtoys 1” tubing. Add two or more if you like your tools heavy!
KNOB-LEASH: Adjustable integrated leash with knob handle and minimal
hardware. Highest quality for durability, aordability, comfort & endless hours of
fun-lled ow!
LINKED CORD CONNECTOR: Two cord connectors linked by a user-adjustable
cord that forms a exible connection between 2 tubes. Allows you to create
chucks, tri-sectionals, cubes, tetrahedrons, ails and more.
More modular system components, details and info available on
www.owtoys.com/ parts
2021.09
FOREVER FLOW LIFETIME WARRANTY
Flowtoys are designed to last you a lifetime, but nothing is indestructible,
so we provide this warranty to enable you to freely nd your ow*.
If you manage to break a owtoys product, we oer free replacements on
defective or non-working parts due to intended use, and
50% credit for products in any condition at any time. Capsule battery depletion is
normal wear & tear and covered for free in rst 2 years and half-price/capsule after.
If you need warranty support, please contact us at support@owtoys.com.
* Please check owtoys.com for full warranty details.
Flowtoys reserves the right to refuse coverage to anyone abusing this warranty.
Please contact us before sending in your product, or it may be returned to sender.
2
CAPS :: FLOWCAP
Flowcaps are compatible with all owtoys light engines (owlights, capsules and vision), and
securely click into any owtoys 1” polycarbonate tubes.
FLOWTOYS MODULAR SYSTEM - INSTRUCTIONS
INSTRUCTIONS FOR LIGHTS
Modular system props are compatible with both owlights and capsule lights - instructions
for your lights are included in a separate manual with your prop.
CAPS :: POD SHELL
Pod shells are intended for use with capsule lights only. Can be used as caps for sta ends.
Pod shells provide great rotational inertia for stas and baton ends, but are not recommend-
ed for other props like poi, rope darts, chucks and swinging clubs.
INSERTING CAPSULES INTO POD SHELLS:
Capsules MUST have their C-ring installed before inserting into pod shell. Insert capsule
with C-ring into the bottom of the pod shell rmly. Check button for normal operation. If the
button is dicult to press, check that the capsule is all the way inside the shell and the C-ring
is properly installed on the capsule. Also check that there is not a C-ring already in the pod!
ATTACHING POD SHELL ONTO TUBE:
The pod shell attaches to the tube with a friction t. Push the pod shell over the tube rmly,
ensuring the plastic tube is between the capsule and the silicone tube inside the pod that
holds the capsule in place.
Be aware - the tube must be clean and the edge of the silicone that holds the capsule must
cover the holes in the tube for a secure t. Silicone does not stretch out, warp, or relax like
other plastics, and as long as it is installed correctly the pod cannot y o during use. You
have been warned. We will not replace parts that go ying due to inadequate connection!
ATTACHING CAPSULES TO FLOWCAPS: Insert capsule into owcap, button side in.
Twist and push until it settles. The seams of the capsule must be aligned with the but-
tons inside the cap for it to t in the tube.
DETACHING/ATTACHING FLOWCAPS TO TUBES:
To detach, twist rmly to release the buttons and pull.
To attach, place cap over tube, push and twist until snap-buttons
click into the holes.
ATTACHING/DETACHING FLOWLIGHTS TO FLOWCAPS:
• Push the narrow “head” of the owlight into the adaptor, then
insert owlight+adaptor into the owcap.
Twist until the adaptor clicks into place. The sides of the light
should align with the buttons in the cap.
To remove owlight with adaptor attached, push the center of
the cap while twisting the light.
To leave adaptor in the cap, pull light out while gripping the cap.
*click!*
*click!*
*click!*
3
INSTALLING FLOWMASS
Flowmass is slightly tapered with more material on one end make sure the heavier end is
installed at the far end of your prop, where it counts.
Adding mass to a crystal case: Thread leash through the mass. Hold leash with one hand
and pull the mass down the length of the case with your other hand until mass is in place.
Adding mass to tubes: Apply a little bit of vaseline/petroleum jelly to the inside surface of
the mass and slide the tube through it. Ensure there is enough clearance at the top for your
owcaps to click in properly and securely.
CAPSULE LINK :: CONNECT 2 CAPSULE LIGHTS
The capsule link is a little 3D-printed part that can connect 2 capsule lights together.
• Remove the o-rings from the leash-port (battery side) of two capsules.
• Pry open one shell enough to insert the capsule link then reinstall the O-ring.
• Roll the second capsule’s O-ring over the rst’s, then connect the second capsule to
the link and roll the O-ring onto it.
It is also possible to install and remove the link by prying and holding the capsule
open with the O-rings in place - if you have strong ngers! Only two capsules can be
connected - both buttons should face out.
CONNECTING 2 FLOWLIGHTS
If you have two or more owlights in one tube, you will need to attach the opposite
ends of the owlight to each other for the lights to t properly, and slide in and out of
the tubes conveniently.
Be sure to click them together and apart sideways (laterally as shown in the picture),
NOT up and down in the direction of the pivot (vertically), as this can cause splitting at
the seam and loosen the connection.
LINKED CORD CONNECTORS :: Enable a removable, strong and
exible connection between two owtoys 1” clear tubes.
• Lay the 2 separated cord connectors side-by-side.
• Slide the loop over each connector.
• Pull the connectors to create a secure connection.
You can shorten the length of your loop by shifting the knot inside
the connector. Cut o excess cord, and melt the ends of the knot.
To melt: use a small ame, melt the end of the cord until it reaches
the surface of the knot and use a at metal surface to press the melted end into the sides
of the knot, fusing it together and ensuring it cannot come undone! (the side of a lighter
works great :)
To install: Use your nger to apply a very small lm of petroleum jelly or any other safe
grease (lip-balm, hand-lotion, etc.) to the inside of the tube.
• Line up the screw holes on the connector with the holes in your tube. Insert the connector
into your lubed tube. Install the 2.5mm hex head screws in the two holes in each tube. Be
sure not to strip the threads by over-tightening!!!
Note: Holes are intentionally aligned off-center (towards the cord) to create tension +
ensure a snug fit.
TUBE CONNECTORS :: CONNECT 2 TUBES
Tube connectors need some lubrication to avoid getting stuck inside tubes. We pre-
lubricate tubes with a tiny bit of vaseline, but you can use almost any greasy sub-
stance, e.g. lip balm, coconut oil. Apply some lubricant with your nger or a tissue and
wipe the inside of tube - you only need a slight lm - wipe away any excess that may
hold dirt. Repeat as needed for maintenance (when you feel the connector beginning
to bind in the tube).
To attach, insert the 3D-printed tube connector into the clear tube, line the buttons
on the connector with the holes in the clear tube, push and click in to secure.
To detach, twist the tubes in opposite directions to disengage the buttons from the
holes then pull. The buttons are not directional :) but the t might be very snug.
  • Page 1 1
  • Page 2 2

Flowtoys HIGH PERFORMANCE User guide

Type
User guide

Flowtoys HIGH PERFORMANCE: A modular system for endless flow possibilities. With interchangeable light units, tubes, and caps, you can create almost any illuminated prop imaginable. From staffs to poi, chucks to rope darts, the possibilities are endless. The system is also highly durable and easy to maintain, so you can flow with confidence knowing that your props will last. Get ready to take your flow to the next level with Flowtoys HIGH PERFORMANCE!

Ask a question and I''ll find the answer in the document

Finding information in a document is now easier with AI