Page is loading ...

Check Box for These Contents
In the event of missing or defective parts please call our customer service department at
1 877 234 6196
(Mon. to Fri. 8:00 AM to 4:00 PM EST).
1.
Post Cap
(1)
2. Pickets
(
11) - 7/8” x 3“ x 29¾”
3. Post (1) - 2“ x 3½” x 38 5/8“
4.
Rail Brackets
(4)
5. Top Rail
(1) - 1½” x 3½“ x 68¼”
6. Anchor Pipe
(1) - 46 7/8”
7. Bottom Rail (1) - 1½” x 3½“ x 68¼”
8. 1” Self-Auguring Hex Head Steel Screws (2)
9. 3/4” Self-Auguring Stainless Steel Screws (24)
10.
1/4“ Hardened Steel Drill Bit
(1)
Sold Separately:
Newport Vinyl Fence Finishing Post (36” High)
with No-Dig Steel Pipe Anchor Kit
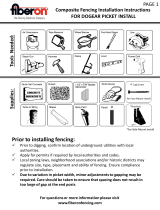
Tools You Will Need
• Cordless Drill
• Level
Newport Vinyl Picket Fence with Post
and No-Dig Steel Pipe Anchor Kit
(36” H x 72” W)
Please read through before starting assembly.
ASSEMBLY GUIDE
1
8
Not to Scale
IMPORTANT: CHECK THE INSIDE OF THE LARGER PIECES IN YOUR BOX FOR OTHER MATERIALS
PACKED INSIDE.
Ver 2.0/021117
1
5
2
3
6
9
7
Ground
70 3/8 in
72 in
2 in
2 15/16 in
68 1/2 in
6 in
18 1/2 in
24 in
4 in
36 in
33 1/2 in
22 7/8 in
4
DO-IT-YOURSELF
FRIENDLY PRODUCTS
Zippity
2”x3½” Fence Run Finishing Post with Cap and
No-Dig Steel Pipe Anchor Kit Sold Separately
This fence can easily be trimmed
down horizontally to fit your custom
space. Use a fine toothed circular
saw or hack saw.
10

Purchase post pounder at any hardware store or go to: www.wambamfence.com. Post pounders cost roughly $25 to $30 at Hardware Store
(or rental stores often have for rent).
5lb Sledgehammer 10lb Sledgehammer Post Pounder
Hammer
GOOD BETTER BEST
TOOL OPTIONS FOR DRIVING PIPE INTO GROUND
DO NOT USE
2 Newport Vinyl Picket Fence Instructions
Install Anchor Pipes
After establishing your fence lines with string and stake, drive
your first pipe into the ground. The bottom of the plastic
bushing should sit just above the ground when finished.
Try and drive the pipe as level as possible. Check level about
every 12”. After about 18” deep, the trajectory of the pipe is
usually established and you cannot manually pull the pipe
back into level.
Identify location of your second pipe anchor and drive into
the ground. The distance from plastic bushing to the next
pipe should be 70¼” (Or center to center of pipe at 72”)
1
2
STEP ONE
3
72 in.
70 1/4in.
1
2
3
DO-IT-YOURSELF
FRIENDLY PRODUCTS
Zippity
Note:
Check level in both directions

Install Post over Anchor Pipe
If your ground is dry and hard, use a claw hammer to loosen
2” or 4“ of dirt around the base of the pipe. This will allow the
vinyl post to easily insert itself into the ground in step 2 below.
Orient post correctly with tabs at top and slide the vinyl post
over the anchor pipe down into the ground.
Using a wood block (or something to protect the top of the
vinyl extrusion), pound down the post another 2” to 4”
below the ground.
Repeat for second post.
1
STEP TWO
2
3
Newport Vinyl Picket Fence Instructions
2
1
DO-IT-YOURSELF
FRIENDLY PRODUCTS
Zippity
3
Optional
Optional:
Important
!
The Bottom of the Vinyl Post Must Penetrate 2 to 4”
Below the Ground to Prevent it Twisting on the Pipe.

STEP TWO
Use the self-drilling tek screw to secure the bottom of just one
vinyl post to the pipe as illustrated.
The hex head screws are designed to be installed without pre-drilling,
however you may find that using the included drill bit for pre-drilling
will allow easier installation of hex head screw into pipe.
Using a level, adjust the top of the vinyl post to level as
illustrated.
Visually look down the top of the post to determine
location of pipe on vinyl post and secure with second self-
drilling tek screw as illustrated
4
5
4
Newport Vinyl Picket Fence Instructions
5
6
4
6
Visually check pipe location inside of post
to determine placement of tek screw
Secure only one post on pipe for now (not both) .
This will allow you to adjust the second post for
fence panel installation

STEP THREE
Install Fence Panel
Install one vinyl bracket on the vinyl post that has been
secured to the pipe using 3/4” screws (approximately 2”
off the ground)
Slide second bracket over the opposite end of the bottom
rail and slide the rail down into the pre-installed bracket on
the opposing side.
Use a level on the top of the bottom rail to determine
height of opposing bracket and mark for installation.
1
5
Newport Vinyl Picket Fence Instructions
2
3
1
3
2
Note: Adjust this post by sliding
left or right to fit the rail length.
DO-IT-YOURSELF
FRIENDLY PRODUCTS
Zippity
2 in

STEP THREE
Temporarily remove bottom rail and install bracket using
screws.
Install top brackets as illustrated using screws, as per
measurement illustrated below.
Orientate bottom and top rails correctly (to receive vertical
pickets) and slide down into brackets. Use screws to secure.
Once the top and bottom rails are secured, fasten the
second post, following the same steps as outlined on
page 4.
4
5
6
6
Newport Vinyl Picket Fence Instructions
4
6
5
18½ in
7
7
DO-IT-YOURSELF
FRIENDLY PRODUCTS
Zippity

7
STEP FOUR
Install Pickets & Post Caps
Install pickets by inserting through top rail and locking
into the bottom rail.
Install post caps. Push down on cap to lock it to vinyl post.
1
Install ONE complete
panel of fence FIRST
.
Then proceed to install
only one or two pipe
anchors at a time, until
you fully understand
the fundamentals.
This will help you to
avoid repetitive mistakes.
2
2
1
Newport Vinyl Picket Fence Instructions
DO-IT-YOURSELF
FRIENDLY PRODUCTS
Zippity
Post tops can be trimmed down as necessary.
Use pvc glue (not provided) to permanently install post caps as necessary

1
2.
fence panel and posts and continue driving all your pipe. This will enable you to work with an unobstructed string line.
3.
4. For easier spacing of pipe anchors, you can optionally use a piece of 1x4 wood lumber cut at 70 1/4” for step 3 on page
two.
Use a wood spacing guide (not included) cut to 70 1/4” to
help identify the location of your next pipe anchor.
5
. Most yards are relatively level and will allow for a fairly simple installation.
If your yard is steeply pitched or is very uneven you may need to stair step your panels as illustrated below.
Post heights can be trimmed down as necessary.
Ground
WARNING!
If your yard has a severe slope or elevation change
greater than approximately 5” to 6” over one panel of
fence, you will not be able to install this fence. your
post will not be long enough to accomodate.
8 Newport Vinyl Picket Fence Instructions
TIPS
DO-IT-YOURSELF
FRIENDLY PRODUCTS
Zippity
Dig Bottom Rail into Higher Elevation to Minimize Gap on the Lower Side

9
Newport Vinyl Picket Fence Instructions
TIPS
DO-IT-YOURSELF
FRIENDLY PRODUCTS
Zippity
Installing Bottom Bracket on a 90°
Corner?
Place the bottom bracket on the post and mark the locations
of the two holes on the post.
Using a 9/64” drill bit for steel, pre-drill the vinyl post and
internal steel pipe.
Install bracket to vinyl post and pipe.
1
2
3
2
1
3
Tip: Alternatively you can use
self-drilling metal screws
(not included) for steel and
avoid having to pre-drill.

1. Have you contacted local utilities?
You must call before you start installation of your fence to avoid puncturing any unseen
underground utilities, especially electrical or gas lines. Fortunately, this is made easy for you.
Simply call 811 in the US, or visit
www.call811.com
.
In Canada, visit www.transcanada.com/contactus.html
for a list of phone numbers by province.
2. Have you checked your local zoning laws?
Local zoning laws and Home Owners Associations may regulate the height, style and placement
of your fence. Some locations may even require a permit.
3. Are you absolutely sure where your property line is?
Many disputes have arisen from questions about whose side the fence is on. We recommend
the outside edge of your fence to be at least 2” inside your property line to avoid any encroach-
ment on adjacent property
4. Have you talked to your neighbors?
Your fence will become part of their yard, and you’ll have an easier time building it if you can
have access from both sides. Besides, you may get lucky if they decide to share the cost with you.
IMPORTANT!
5. UNSTABLE GROUND OR ROCK?
If you encounter rock or unstable ground, you can dig a hole and concrete the pipe
into place much the same way you would a traditionally installed fence. This can be
done either during the pipe installation or even after the fence is complete.
Please visit www.zippity-outdoor.com or call us at 1-877-234-6196 for answers to your other questions.
We are eager to help you succeed in your project. Thanks for choosing Zippity Outdoor and all the best with your project.
10
10616 Bailey Road, Unit H, Cornelius NC 28031
Toll Free Phone: 1 877 234 6196 Fax: 704 631 4685
www.zippity-outdoor.com
AVOID THESE PITFALLS
DO-IT-YOURSELF
FRIENDLY PRODUCTS
Zippity
/