Page is loading ...

AMERITRON AL-80B
INSTRUCTION MANUAL
116 Willow Road
Starkville, MS 39759 USA
662-323-8211
Version 2F for Serial Numbers 20737 and above
Printed in U.S.A.
HIGH POWER
LINEAR AMPLIFIER
PLEASE READ THIS MANUAL BEFORE OPERATING THIS EQUIPMENT!
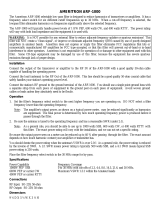
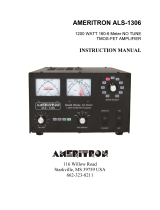
The Ameritron AL-80B is a one kilowatt PEP output linear amplifier that operates from 160 through 15
meters. Export modification instructions are available from Ameritron with valid amateur radio license.
AL-80BX/BY are export models which operate from 160 through 10 meters. The AL-80B uses a single
3-500Z tube in a class AB2 grounded grid circuit. High quality power supply and RF components
combine with an accurate peak detecting directional coupler, front panel adjustable true ALC circuit, and
automatic bias switching to make this the best featured and most reliable 3-500Z amplifier available. The
AL-80B/BY is shipped factory wired for 120 volts, 50/60 Hz AC line voltage. The AL-80BX is factory
wired for 240 volts, 50/60 Hz AC line voltage. The AL-80B/BX/BY is easily converted to other supply
voltages between 90 and 250 volts AC.
Improper tuning or improper operation of this amplifier can destroy the tubes and cause severe
damage to the amplifier. Improper operation is not covered under the warranty policy.
WARNING!!
NEVER APPLY POWER TO THIS AMPLIFIER WITH THE COVER REMOVED!
CONTACT WITH THE POWER SUPPLY VOLTAGES IN THIS AMPLIFIER CAN BE FATAL!

AL-80B Instruction Manual
ii
WARNING!!!
NEVER APPLY POWER TO THIS AMPLIFIER WITH THE COVER REMOVED!
CONTACT WITH THE VOLTAGES INSIDE THIS AMPLIFIER CAN BE FATAL!
PLEASE READ THIS MANUAL BEFORE ATTEMPTING TO OPERATE EQUIPMENT!
Improper or abusive operation of this amplifier can damage the tubes or other components in
this amplifier. Damage caused by improper or abusive operation is not covered under the
warranty policy.

AL-80B Instruction Manual
iii
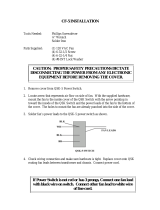
Unpacking Instructions
Remove the 3-500Z tube from its shipping carton. Carefully inspect the tube for visible damage.
Look for bent or broken pins. Roll the tube over slowly while listening and watching for loose
internal materials. Be sure the anode is not off center at the end away from the anode connector.
Contact either your Ameritron dealer or Ameritron immediately if any damage exists.
Carefully lift the amplifier from the shipping carton, and place it on a firm, level surface. Inspect
the amplifier for shipping damage. Contact either your Ameritron dealer or Ameritron
immediately if any damage exists. Remove the cover screws with a #2 Phillips screwdriver.
Save the screws to re-secure the cover. Carefully lift the rear of the cover while sliding the cover
back. The AL-80B is shipped with the fuses and fuse caps packed inside the amplifier.
Additional screws will be included in the fuse pack if they are required.
WARNING:
Never remove the cover while this amplifier is connected to the power
mains! Contact with the voltages in this amplifier can be fatal.
The tube must be installed in its socket prior to operation. Observe the pin configuration on the
tube and the socket. One of the pins is separated by a large space from the other four pins.
Carefully observe the pin alignment to be sure the tube pins are centered on the socket's holes.
Firmly press the tube into the socket. Do NOT twist or force the tube into the socket.
Install the anode connector on the tube's anode terminal and secure it with the screw provided.
Snug the screw enough to secure the anode connector. Do not over-tighten the screw.
Install the fuses and fuse caps on the back of the amplifier. This amplifier uses two 20A fuses
for standard 120 Vac operation (models B and BY) or two 10A fuses for 240 Vac operation
(model BX only). If you wish to operate the amplifier on a line voltage other than 120 Vac, the
jumpers on the power transformer primary windings must be changed. If the primary wiring is
changed, the correct fuses must be installed. See the "Transformer Connections" section on page
12 for more information.
CAUTION
:
Always use fast-blow fuses rated at 250 Vac or higher. NEVER use standard
automotive glass fuses or slow-blow fuses.
The top cover should now be installed with the side ventilation holes positioned on the left (front
view). The ventilation holes on the top of the cover should be on the right side of the amplifier
(front view). Secure the cover by installing the corner screws first. Install all the screws loosely
until every screw is in place. Tighten the screws after they have all been installed.
Note: Save all packing materials for future shipping. The packing materials used to ship this
amplifier are specially designed to prevent damage. Replacement packing materials
may be purchased from Ameritron if original packing materials are unavailable.
Ameritron will NOT be responsible for re-shipping damage due to improper packing.

AL-80B Instruction Manual
iv
Ameritron AL-80B
1000 watt PEP Linear Amplifier Instruction Manual
Features........................................................................................................................................1
AL-80B Technical Specifications................................................................................................2
Introduction..................................................................................................................................3
Safety Interlock................................................................................................................3
Circuit Descriptions .....................................................................................................................4
ALC..................................................................................................................................4
Dynamic Bias...................................................................................................................4
Power Supply...............................................................................................................................5
Filament Supply...............................................................................................................5
Plate (HV) Supply............................................................................................................5
Meters ..........................................................................................................................................5
Current Meter (plate and grid):........................................................................................5
Multimeter........................................................................................................................6
Multimeter Functions.......................................................................................................6
Wattmeter Circuit.............................................................................................................7
Peak Envelope Power vs. Average Power.......................................................................7
Tube Life......................................................................................................................................8
Export Modifications...................................................................................................................9
Technical Assistance....................................................................................................................9
Installation Guidelines And Suggestions.....................................................................................10
Location Of The Amplifier ..............................................................................................10
Ventilation........................................................................................................................10
Power Connections ..........................................................................................................10
Grounding........................................................................................................................11
Transformer Connections.............................................................................................................12
Interconnections...........................................................................................................................13
Operating Instructions And Guidelines........................................................................................13
Front Panel Controls ........................................................................................................13
"MULTIMETER" Switch....................................................................................13
"OFF-ON" Switch................................................................................................13
"STBY-OPR" Switch...........................................................................................14
"PLATE" Control.................................................................................................14
"LOAD" Control..................................................................................................14
ALC Metering, Controls, and Adjustments.....................................................................14
ALC Metering Functions .....................................................................................14
ALC Controls.......................................................................................................15
ALC Adjustments ................................................................................................15
Rear-panel "ALC LIMIT" control....................................................................................16
ALC Limit Adjustment (rear panel).................................................................................17
Driving Power..............................................................................................................................17
Tuning..........................................................................................................................................18
WARNING:.....................................................................................................................18

AL-80B Instruction Manual
v
The transformer must be wired correctly for your line voltage. This amplifier is normally
shipped wired for standard 120Vac operation. Refer to the "Transformer Connection"
section on page 12 for details...........................................................................................18
Tuning Procedure.............................................................................................................18
Additional SSB Notes..................................................................................................................22
AM (Amplitude Modulation) Operation......................................................................................22
FM (Frequency Modulation), RTTY, and Digital Operation.......................................................22
Audio Distortion ..........................................................................................................................22
QSK Operation.............................................................................................................................23
Periodic Maintenance...................................................................................................................23
Parts List ......................................................................................................................................25
Power Supply / SWR Board (50-0080-1).......................................................................25
TR Relay Board (862-1306-RLY)..................................................................................26
Tuned Input Board (50-0080-2).......................................................................................26
AL-80B Tuned Input Chart..............................................................................................26
Meter Board (50-0080-3).................................................................................................27
Timer / Overload Board (50-0080-5)...............................................................................27
Al-80B Main Chassis Parts List.......................................................................................28
Frequency Coverage.....................................................................................................................29
Amplifier Tuning Log..................................................................................................................29
Notes:...............................................................................................................................30
Schematic Diagrams ....................................................................................................................27
Figure 1 Power Line Jumper Settings.........................................................................................12
Figure 2 Initial Tuning................................................................................................................19
Figure 3 Frequency Coverage.....................................................................................................29
Figure 4 Tuning Log ...................................................................................................................29
Figure 5 AL-80B Wiring Diagram..............................................................................................27
Figure 6 Power Supply / SWR Board.........................................................................................28
Figure 7 Input Filter Board and TR Relay Board........................................................................29
Figure 8 Overload Board and Meter Board.................................................................................30
The Schematics in this manual are for Serial Numbers 20737 and above. Refer to earlier
versions of this manual for amplifiers before this serial number.

AL-80B Instruction Manual
1
Version 2F
Features
•
The AL-80B uses a rugged, inexpensive 3-500Z tube.
•
The 3-500Z requires only a few seconds of warm-up time.
•
A dynamic bias circuit eliminates hundreds of watts of unnecessary heat generation in the
power amplifier tube. The result is cooler operation and longer component life.
•
A multi-voltage heavy-duty transformer with a unique "buck-boost" winding allows
adjustment of the primary voltage to 14 different voltages centered on 115 and 230 Vac. This
versatile Ameritron feature allows the user to select the optimum primary voltage for maximum
performance and life.
•
The tuning and loading controls have vernier 6:1 reduction drives for smooth tuning.
Logging scales allow quick and repeatable control adjustments for rapid band changes.
•
The AL-80B has two illuminated cross-needle panel meters. The left meter provides a
continuous reading of grid and plate currents. The right meter indicates peak RF power output
on one scale and Plate Voltage (HV), Reflected power and SWR (REF), ALC detector voltage
(ALC), and ALC adjustment level (ALC SET) on the other.
•
Filament and plate voltages are maintained using the "STBY/OPR" switch. This allows the
amplifier to be conveniently bypassed for "barefoot" operation.
•
A front panel "ALC SET" control allows convenient adjustment of the ALC threshold. The
unique ALC circuit samples the grid current and power supply voltage.
•
An "XMT" LED on the front panel indicates proper keying of the amplifier by the exciter.
•
A rear panel "12 V" auxiliary output jack provides up to 200 mA at 12 Vdc for accessories
such as the ATR-15 Antenna Tuner.
•
A step-start circuit limits the inrush current to the power supply and tube filament. This circuit
extends the life of the amplifier components.

AL-80B Instruction Manual
2
Version 2F
AL-80B Technical Specifications
Input:
Circuit type: Pi-network, slug tuned coils
Maximum VSWR at resonance: 1.3:1 or less
Minimum 2:1 VSWR bandwidth: 20% of center frequency
Maximum drive power permissible: 100 watts PEP
Typical drive for full power output: 85 watts
Output:
Circuit type: Pi-L, Pi-network
Typical SSB PEP voice operation: 1000+ watts
CW continuous operation: 800 watts
1/2 hour PEP two-tone test: 850 watts
1/2 hour continuous carrier (RTTY): 500 watts
Frequency Coverage: 1.8 to 21 MHz amateur bands. (Export models include
24.5 and 28 MHz)
Third Order IMD: -35 dB or better (at rated output)
Efficiency:
CW: approximately 65%
SSB: approximately 65% (envelope crest)
Power Supply:
Circuit type: Full wave voltage doubler
No load voltage: 3100 V
Full load voltage: 2700 V
Full load current: .6 A
Regulation: >13%
Transformer: 26 lb. E-I lamination grain oriented
Capacitors: 26 mFd total, computer grade
Normal line current at rated CW output: 12 A at 120 Vac
Normal line current at 1000 watt PEP output: 8 A at 120 Vac
Power line current in standby: 1 A at 120 Vac
Tube:
Type: 3-500Z
Continuous dissipation: 500 watts
Warm-up time: 10 seconds
Estimated life: 12,000 hours ICAS
Metering:
Multimeter: Peak forward power (continuous). The second scale switches between peak reflected
power (and SWR), ALC threshold, ALC output voltage, and high voltage.
Current meter: Plate and grid current (simultaneously) on separate scales.
ALC:
Negative going, 0 to 10 volts, adjustable.
Relay:
Requires contact closure or sink of +12 Vdc at 100 mA. Back pulse protected.
Connectors:
RF: SO-239
Line: NEMA 5-15P, standard 120 V three wire
Others: RCA Phono
Physical:
Dimensions: 15-1/2" D x 14-1/2" W x 8-1/2" H
Weight: 48 lbs.

AL-80B Instruction Manual
3
Version 2F
Introduction
The Ameritron AL-80B is an 800 watt CW, 1000 watt PEP output linear amplifier that operates on
all Amateur bands from 160 through 15 meters. The AL-80BX and AL-80BY are export models
that operate from 160 through 10 meters. Export modification instructions are available with proof
of a valid amateur radio license.
The AL-80B uses a single 3-500Z tube in a class AB2 grounded grid circuit. High-quality power
supply and RF components combine with an accurate peak-detecting directional coupler, front panel
adjustable true ALC circuit, and automatic bias switching to make this the best featured and most
reliable single 3-500Z amplifier available. The AL-80B and AL-80BY are factory-wired for 120
Vac, 50/60 Hz line voltage. The AL-80BX is factory wired for 240 Vac. All models are easily
converted to other supply voltages between 90 and 250 Vac.
Safety Interlock
The top cover of the AL-80B operates an interlock switch which completes the primary circuit of
the power transformer. The interlock will open and de-energize the transformer primary if the top
cover is removed.
WARNING
:
High voltage can kill!! Accidental contact with the voltages in this amplifier
can be lethal!!!
For your personal safety, please observe the following precautions:
1. NEVER defeat the interlock.
2. NEVER remove the cover with the amplifier connected to the power line.
3. ALWAYS allow several minutes for the capacitors to discharge after unplugging the
amplifier and before removing the cover.
4. ALWAYS select the high-voltage (HV) function of the Multimeter to check the high
voltage potential. Do not remove the cover if voltage is indicated.
5. ALWAYS ground the tube anode (top metal conductor) to the chassis before touching
anything inside the amplifier.
6. ALWAYS be cautious of heat. Many components inside the amplifier operate at high
temperatures.
7. NEVER make any unauthorized component or circuit modifications to this product. The
only
acceptable source for modifications is Ameritron or a source approved by Ameritron.
Unauthorized modifications almost certainly will increase the risk of equipment failure or
personal injury.

AL-80B Instruction Manual
4
Version 2F
Circuit Descriptions
ALC
The AL-80B is one of the few amplifiers using a "true" automatic level control (ALC) circuit. In
this amplifier, the ALC actually samples grid current and power supply loading to determine the
ALC voltage. The front panel "ALC SET" knob adjusts the level of grid current where ALC action
begins. ALC action begins softly over a range of a few milliamperes to minimize distortion. This
soft-touch ALC is an Ameritron exclusive.
The ALC circuit is located on the METER BOARD P/N 50-0080-3 (behind the "MULTIMETER"
switch). IC301 (pins 9 and 10) compares the voltage drop (caused by grid current) across R106 in
the main power supply board. ALC voltage is derived by comparing the grid shunt voltage to the
voltage from the power supply.
The output of IC1 (pin 8) will go negative if the grid shunt voltage exceeds the voltage from divider
R311 and R2 (chassis mounted control), or if the supply voltage sags from excessive line voltage
drop. Pin 8 is followed by current buffer Q303 that sources the negative ALC voltage to the ALC
output jack.
This amplifier includes an ALC Limit control on the rear panel. This control reduces overshoot and
eliminates "motor-boating" (a slow rhythmic fluctuation) in the transmitted signal. These problems
are caused by excessive transceiver ALC attack time delay. This control sets the maximum voltage
level available from the ALC circuit. Adjustment details are given on page 15.
Dynamic Bias
Conventional bias circuits force high power linear amplifiers to dissipate hundreds of watts during
low or no signal periods. This creates needless heat, since virtually no dissipation is required unless
the amplifier is being driven with large signal levels.
The AL-80B contains an exclusive bias circuit that reduces the idling (quiescent) current very close
to the tube's cut-off region. The power amplifier tube in the AL-80B has a full resting period of
very low dissipation between dots and dashes on CW and between words on SSB. The lower idling
current reduces component temperature on both CW and SSB. If only a few milliwatts of RF power
are applied to the amplifier, the quiescent current will increase. Linearity remains excellent with
this circuit because the tube can remain biased for class AB operation without unnecessary standing
dissipation.
The dynamic bias circuit is located on the Power Supply Board P/N 50-0080-1. Diodes D101 and
D102 rectify a small sample of the RF drive voltage. This voltage is applied to the base of dc switch
Q101. If Q101's base is driven with a few microamperes of current from the RF sampling circuit,
Q101's collector will pull the base of PNP transistor Q102 low. This turns dc switch Q102 on.
When Q102 is on, zener diode D103 is connected between the collector and base of Q103.
D103 sets the operating bias. This zener applies forward bias to Q103's base whenever the collector
voltage of Q103 exceeds the voltage of D103. This forward bias will turn Q103 on harder and will
reduce the collector voltage. If the collector voltage is less than the breakdown voltage of D103,
Q103 will move towards cut-off and the collector voltage will increase. Q103 functions as a current
buffer for zener diode D103.

AL-80B Instruction Manual
5
Version 2F
Power Supply
Filament Supply
The filament circuit of this amplifier satisfies all requirements of the tube manufacturer related to
tube performance and life. The filament voltage and inrush current are controlled by the power
transformer's internal resistance and impedance, filament choke resistance, filament wiring
resistance, and the step-start circuit. NEVER replace any circuit components or wiring with
substitute parts. This precaution will insure maximum life for the tube.
Plate (HV) Supply
The plate supply uses a full wave doubler circuit with 200 amp surge rated diodes and a heavy duty
26 pound grain oriented transformer. Filtering is accomplished by a bank of high quality computer
grade capacitors totaling 26 mFd. Large 50k ohm, 7 watt bleeders are used for safety and superior
voltage equalization. The transformer allows user selection of fourteen different line voltages (see
the "Transformer Connections" section on page 12 for details).
Power is supplied through "OFF-ON" switch S2. A 10 ohm resistor (R27) limits the line current
during the filter capacitor charge time to lower component stress. When the filter capacitor
charging current decreases sufficiently, RLY102 shorts the 10 ohm resistor. This applies full power
line voltage to the transformer. The 10 ohm resistor is protected from high-voltage supply shorts by
a 2A slow-blow fuse (F101) during start-up. If F101 or the 10 ohm resistor (R27) fails the amplifier
will not start. If F101 fails from a momentary HV to ground fault, meter protection diode D117 may
also fail. See the "Metering Functions" section that follows for more information.
Meters
Current Meter (plate and grid):
The plate and grid current meter is located on the far left side of the front panel. This meter
indicates the plate current (Ip) on the right-hand meter scale. This scale has a small picket every 25
mA, a large picket every 75 mA, and indicates 750 mA at full deflection.
The left-hand meter scale indicates the grid current (Ig). The small pickets on this "Ig" scale appear
every 10 mA and the larger pickets appear every 50 mA. The full scale "Ig" reading is 250 mA.
The plate and grid meters in this amplifier normally indicate maximum grid current and maximum
RF output at or near the same "PLATE" tuning setting. Maximum grid current and minimum plate
current also generally occur at the same "PLATE" tuning setting.
NOTE:
If the grid and plate meters always track (move together in exact step) as the tuning
controls are adjusted and if they show the same approximate amount of pointer
movement, diode D117 on the power supply board could be shorted.
D117 protects the overload circuit (if used) and the meters. This diode is located near the
electrolytic capacitors on outside edge of the main circuit board. D117 will usually short if there is
a large high-voltage-to-chassis current fault. The grid and plate current meters will not read correctly
if this diode fails. If D117 is shorted the overload circuit (if used) may repeatedly trip and the grid
current may appear excessively high before full power is reached.

AL-80B Instruction Manual
6
Version 2F
Multimeter
The multimeter is the meter on the right. It continuously reads the forward peak envelope power on
its left-hand scale (FWD). This scale is calibrated in 100 watt steps up to 2 kW.
The right-hand scale of this meter provides four metering functions that are selected by the
"MULTIMETER" switch. These functions include the measurement of high voltage (HV), reflected
power and SWR (REF), ALC voltage output (ALC), and relative ALC threshold (ALC SET). The
MULTIMETER FUNCTIONS section that follows describes these functions in more detail.
Multimeter Functions
HV: The multimeter indicates the dc plate voltage applied to the PA tube when the
MULTIMETER switch is placed in the HV position. The correct scale to use is the
ALC/ HV scale. This scale has a picket every 100 volts. Two zeros must be mentally
added behind the numbers indicated on the meter scale (i.e. multiply by 100), so that
"25"=2500 volts and "20"=2000 volts. Do not operate the amplifier if the high voltage
is over 3200 volts with the amplifier on standby. See the "Transformer Connections"
section on page 12 for information on correcting excessive high voltage.
REF: The multimeter measures the antenna (or load) peak envelope reflected power and the
SWR when the MULTIMETER switch is placed in the REF position. The full scale
reflected power reading is 500 watts. This scale is marked every 10 watts below 100
watts, and every 100 watts from 100 to 500 watts.
Note:
The SWR of the load is measured when the "MULTIMETER" is in the REF
position by observing the different red SWR curves. The forward and reflected
power meter pointers will cross each other on, or near, the correct SWR curve.
ALC: The multimeter measures the output voltage of the ALC detector when in the ALC
position. The full scale ALC reading is 35 volts and is read directly from the ALC/ HV
scale. The meter should flick upwards occasionally during normal ALC action. See
ALC Circuit operation on page 15 for more information.
ALC SET: The multimeter measures the approximate grid current that will produce ALC activity
when the meter switch is in the ALC SET position. One zero must be added to the
reading on the ALC/ HV scale for this function. For example, ALC action will begin
at approximately 150 mA of grid current (typically between 120 mA and 180 mA)
when the "ALC SET" control is adjusted until the meter reads "15."

AL-80B Instruction Manual
7
Version 2F
Wattmeter Circuit
The AL-80B wattmeter circuit uses an accurate directional coupler followed by a true peak detector
circuit. This circuit will accurately determine the true peak envelope power (PEP) of normal voice
waveforms. If the load SWR is high, the true power reading will be obtained by subtracting the
reflected power from the forward power.
Peak Envelope Power vs. Average Power
Peak envelope power (PEP) is often misunderstood by amateurs. PEP is not associated with the
sine wave or root-mean-square (RMS) power, and PEP has no fixed ratio to average power on any
mode except FM, FSK or CW. It is impossible to use a formula or "rule of thumb" approximation to
convert between average and peak voice waveform powers.
PEP is the power at the crest (highest point) of the RF envelope waveform. On SSB, the average
power can vary from a few percent of the PEP to over half of the PEP. Generally, the PEP on SSB
is two to five times greater than the average power. A 50 watt average power SSB signal could have
peak envelope powers that are lower than 100 watts or that exceed 250 watts.
On CW and other constant amplitude modes (such as FM or RTTY), the PEP is always equal to the
average power. On CW, FM or RTTY 1000 watts of average power produces exactly 1000 watts of
PEP.

AL-80B Instruction Manual
8
Version 2F
Tube Life
The 3-500Z is a reasonably rugged tube. The primary concern in this tube are element failures from
excessive temperatures. Element temperature is a function of the duration and the amount of power
dissipated. The elements in the 3-500Z have very good immunity to short term overload failures.
The anode in the 3-500Z can tolerate large dissipation overloads for short periods of time due to the
thermal mass of the anode. Anode color is a good indication of correct tube operation. The anode
in the 3-500Z is designed to operate at very high temperatures. These temperatures normally
produce a dull to bright red anode color. This is a normal operating condition.
The anode is coated with a "getter" material that de-gasses the tube. This material is activated by
the high anode temperatures. The likelihood of a long term gas failure is reduced by operating the
3-500Z with a slight amount of anode color.
Care must be taken to avoid exceeding the temperature ratings of the tube's glass-to-metal seals.
The life of the tubes in this amplifier may be prolonged if tuning periods are kept short and a brief
"cool-down" periods are provided between tuning periods. Try to allow a one or two minute non-
transmitting "cool-down" period after lengthy CW or RTTY transmissions before shutting off the ac
power switch.
Incorrect operation is most likely to damage the tube's control grid or anode. Applying full drive
power for several seconds with excessively "light" loading can cause control grid damage. Several
seconds of high drive power operation with improper tuning or excessively "heavy" loading can
melt or damage the anode. These conditions can be avoided by following the tuning procedures in
this manual.
In the AL-80B, a grid current of 250 mA (at 100 watts of drive) produces the rated grid dissipation
of 20 watts. For maximum tube life, the grid current and drive power should always be kept below
these values.
WARNING:
NEVER drive this amplifier with more than 100 watts of short term average envelope power.
NEVER allow the grid current to exceed 250 mA under any operating condition.
Maximum power output normally will occur with approximately 175 mA of grid current on CW, or
approximately 45 mA of maximum grid current (175 mA instantaneous peak) on SSB (two-tone
test). The grid dissipation with 175 mA of grid current and 70 watts of drive is approximately ten
watts.
If you wish to add control grid protection to the AL-80B, always remember fuses and resistors are
too slow and unpredictable to adequately protect tubes. While grid protection is generally not
required with tubes like the 3-500Z, Ameritron does offer an optional fast-acting electronic circuit
that will rapidly disable the amplifier if excessive grid dissipation occurs. This circuit also reduces
or eliminates the chance of tank component damage from incorrect loading or a load failure. The
part number of this add on board is 50-01172-1.

AL-80B Instruction Manual
9
Version 2F
The continuous commercial plate current rating of the 3-500Z is 400 mA. For maximum tube life,
plate current should be maintained below 400 mA on CW and other "steady" carrier modes. Brief
periods of plate current exceeding 400 mA will not cause loss of emission or shorten the life of the
tube in this amplifier.
The application of filament voltage causes thermal stresses from rapid and uneven temperature
changes. Needless cycling of the filament may cause premature failure or unnecessary stress in the
tube's filament.
An accumulation of gas (or stray debris) in the tube can cause arcs between the anode and the other
elements of the tube. The resulting "gas arc" will generally manifest itself as a loud "pop" when the
amplifier is first turned on. A "gas arc" will often damage diode D117 on the negative rail of the
filter capacitor bank and open the fuses in the amplifier. If this problem occurs frequently, the tube
should be tested or replaced. The use of low quality tubes, tubes that have been stored for extended
periods, or abused tubes increase likelihood of a "gas arc". Ameritron recommends using only
current code date Eimac 3-500Z tubes.
Export Modifications
A simple modification will allow operation on frequencies above 15 meters. Instructions for this
modification are available by sending a written request for "Export Modification Instructions" along
with a copy of a valid amateur license. There is no charge for this information. Export models are
shipped with this modification installed and have an "X" or "Y" following the serial number.
Standard frequency ranges are indicated in the chart on page 29.
Technical Assistance
Technical assistance is available during normal central standard time business hours on weekdays.
Customer service is more effective when our engineers are provided the following information:
1. Model and serial number
2. Date of purchase and dealer
3. An accurate description of the problem
Meter readings at all stages of the tuning procedure are very important along with a complete
description of the other equipment used with our product.
Written assistance is also available. Due to time delays in processing mail, please allow at least
three weeks for a written reply. For service or written correspondence, use the following address:
AMERITRON
116 Willow Road
Starkville, MS 39759
Telephone (662) 323-8211
FAX (662) 323-6551
NOTE:
Service history has clearly shown that most problems are operating or installation
errors, rather than equipment failures. Most problems can be resolved over the
telephone. Please contact our staff before shipping parts or equipment to us.

AL-80B Instruction Manual
10
Version 2F
The packing materials used to ship this amplifier were specially designed to prevent shipping
damage. The original packing materials should be used to ship this amplifier. Replacement packing
materials may be purchased from Ameritron if original packing materials are unavailable or
damaged.
CAUTION: Never ship this amplifier with the tube installed. Ameritron will not be
responsible for shipping damage caused by improper packing.
Installation Guidelines And Suggestions
Location Of The Amplifier
Do not install the amplifier in excessively warm locations or near heating vents or radiators. Be
sure air can circulate freely around and through the amplifier cabinet. Provide an unobstructed cold
air inlet for the amplifier. DO NOT place any books, magazines or equipment that will impede the
free flow of air on or near the cabinet ventilation holes.
Ventilation
The AL-80B ventilation system has been designed and tested to maintain tube seal temperatures
safely below the tube manufacturer's rating at 500 watts of continuous carrier output, or 800 watts of
continuous two-tone or CW power output when the amplifier is properly tuned. The fan in the AL-
80B is a permanently lubricated type that requires no maintenance in normal operation. To insure
adequate cooling in your installation, please observe the following:
1. Do not block or unduly restrict the ventilation holes in the cover. Be sure that the amplifier is
located in an area so the ventilation holes have open air circulation. It is particularly important
to avoid restricting the air inlet.
2. The exhaust airflow is over 30 CFM. Do not "assist" the exhaust airflow with cabinet mounted
fans.
3. The most efficient way to improve airflow is to pressurize the air inlet area. Be sure that any
fan used to assist the inlet airflow has at least a 60 CFM rating.
4. The exhaust air will become quite warm at high power levels. Do not place any heat sensitive
objects in the exhaust air stream.
Power Connections
The AL-80B is supplied with a NEMA 5-15P plug for 120 Vac operation. Full duty cycle operation
with ac supply voltages below 100 volts is not recommended. The "Transformer Connections"
section on page 12 shows the correct wiring for various supply voltages.
This amplifier has a current demand of 14 amperes at 120 Vac with 1000 watts of RF carrier output.
The average power line current during voice peaks on SSB will be approximately 9 amperes at 1000
watts PEP output. The average current demand on CW will be less than 12 amperes. Most normal
residential power lines and house-wiring will easily meet this current requirement.

AL-80B Instruction Manual
11
Version 2F
If the power mains have excessive resistance, the high voltage may sag to less than 2700 volts under
load. Voltage sag will not hurt the amplifier if the fully loaded high voltage remains above 2500
volts.
CAUTION:
Never allow the high voltage to exceed 3200 volts under any condition.
For 120 Vac operation, the wiring between the fuse box and the amplifier ac outlet must be number
14 gauge (or larger) in order to supply the current required (12 A) without a significant drop in the
line voltage. The 120 volt outlet should be fused for 20 amperes.
Grounding
Connect a good RF and dc ground to the ground post on the rear panel of the amplifier. Use the
heaviest and shortest connection possible. The best materials to use for ground connections are (in
order of effectiveness) smooth wide copper flashing, copper tubing, or solid copper wire. Never use
braided or woven conductors unless the lead needs to be flexed. Braided or woven conductors
offer a much higher impedance to lightning and RF than equivalent solid conductors.
Water pipes, metal heating ducts, metal fences and other large metallic masses offer convenient RF
grounds. If a water pipe ground is used, inspect all the pipe connections to be sure that no plastic or
rubber connections are insulating the pipes. Insulated pipe connections will interrupt the electrical
continuity in the water supply system. Install a jumper around any insulated pipe connections you
find. Use heavy copper wire or flashing with stainless hose or pipe clamps for the jumpers.
The following tips will help prevent lightning damage and RF grounding problems:
1. Avoid using braided or woven conductors, they have very high resistance for RF and lightning.
Remember that RF and lightning flows along the surface of conductors, almost no current
flows in the center of the conductor. The lowest RF resistance occurs with wide, smooth
conductors.
2. Avoid routing a single small gauge conductor along the various pieces of equipment (or to
connect multiple ground sources). Instead, use multiple ground leads that connect to a single
wide buss at the operating position. Keep all ground leads as short and wide as possible.
3. Buried radials provide much better lightning and RF ground connections than ground rods do,
although both are needed for safety.
4. Avoid sharp bends in ground leads. When changing the direction of a ground lead use a
gradual radius turn.
5. Avoid second story operation. A good ground is much easier to obtain on the first floor or in
the basement of a structure.
6. Air-core choke baluns should be used on all coaxial feedlines. The feedlines should be coiled
into several 4" to 6" diameter turns before they enter the building. Either directly bury the
feedlines a few inches deep in the ground for a minimum distance of ten feet or ground the
shields to a separate earth ground on the antenna side of the choke.

AL-80B Instruction Manual
12
Version 2F
Transformer Connections
The power transformer of the AL-80B has fourteen different voltages available on the primary and
is rated at full power on frequencies of 50 and 60 Hz. The "JUMPER CONNECTIONS" chart
below indicates the proper placement of jumpers for various power line voltages.
The high voltage secondary of the AL-80B has three leads. The normal wiring is indicated on the
circuit board silk-screen by the initials R/Y (RED/YELLOW) and R/G (RED/GREEN). For low
power operation the R/Y and R/G wire can be reversed. This will reduce the plate voltage of the
AL-80B to permit operation at output levels below 400 watts.
WARNING
:
The AL-80B requires different back panel fuses for various line voltages. Use the
fuse listed above for maximum protection.
JUMPER FROM TOP LETTERS
TO BOTTOM LETTERS IN COLUMN
HIGHEST
LINE-V
A
B
C
D
E
F
LINE
FUSE
205 C B 3 1 12
215 C B 3 2 12
220 C B 2 1 12
230 C B F E 10
240‡ C B 1 2 10
245 C B 2 3 10
250 C B 1 3 8
90 B A D C 3 1 25
100 B A D C 3 2 25
110 B A D C 2 1 25
115 B A D C F E 20
125† B A D C 1 2 20
130 B A D C 2 3 20
140 B A D C 1 3 15
Figure 1 Power Line Jumper Settings
†Factory wired Model AL-80B and AL-80BY
‡Factory wired Model AL-80BX
DANGER: Never change jumpers with the power cord connected to an outlet.

AL-80B Instruction Manual
13
Version 2F
Interconnections
1. Connect the exciter's RF output to the "RF IN" connector on the rear of the AL-80B with 50
ohm coax. Use any good quality 50 ohm cable long enough to connect the amplifier to the
exciter. This amplifier connection uses a standard SO-239 female that mates with a PL-259
male connector on the cable.
2. Connect the existing station antenna system to the "RF OUT" connector on the rear of the AL-
80B with RG-8 type coax. This amplifier connection uses a SO-239 female that mates with a
PL-259 connector on the cable.
3. Shielded audio type cable with a standard male phono plug should be used to connect to the
"RLY" jack on the AL-80B. This jack has positive 12 Vdc open circuit and supplies 100 mA
of current when pulled to ground. The relay circuit has an internal back pulse canceling diode
to protect sensitive exciter circuits from damage.
4. Connect a short, wide, smooth ground lead from a good earth and RF ground to the rear panel
"GND" terminal. Avoid using braided conductors for ground leads.
5. The "12 V" connection on the rear panel provides 12 Vdc at 200 mA maximum to operate
external dial lamps or accessories such as the ATR-15 Antenna Tuner.
6. Connect the "ALC" jack to the ALC input of the exciter with a shielded cable and a phono
plug. The proper connection point on the exciter should be indicated in the exciter's manual.
The AL-80B ALC will operate with any exciter that uses a negative-going ALC voltage of up
to 10 volts.
Note: Transceiver ALC response times and ALC voltage requirements vary with different
manufacturers.
Operating Instructions And Guidelines
Front Panel Controls
"MULTIMETER" Switch
This four position switch selects either the plate voltage (HV) of 0-3500 volts, the reflected peak
envelope power (REF) of 0-500 watts, the ALC detector output voltage (ALC) of 0-35 volts, or the
approximate ALC grid current threshold (ALC SET) of 0-350 mA. See the "Multimeter Functions"
section on page 6 for more details.
"OFF-ON" Switch
This switch turns the main power off and on. When this switch is placed in the "ON" position, the
fan should start, the meters should be illuminated, and high voltage should appear.

AL-80B Instruction Manual
14
Version 2F
"STBY-OPR" Switch
This switch disables the amplifier's internal antenna relay. In the "STBY" position the amplifier is
bypassed without turning the tube's filaments or the power supply off.
This switch will also reset the grid protection circuit if an optional grid overload protection circuit is
installed. The overload circuit will be reset whenever this switch is placed in the "STBY" position
and returned to the "OPR" position.
"PLATE" Control
The "PLATE" control adjusts the output tank circuit to resonance. This control should always be
adjusted for maximum RF output power. Maximum RF output power normally occurs
simultaneously with maximum grid current and very close to the plate current "dip."
"LOAD" Control
This control adjusts the coupling of the amplifier to the antenna or load. This adjustment insures
optimum coupling between the tube and the load as the SWR of the load, the operating frequency,
or the power level is changed. Advancing the "LOAD" control clockwise increases the RF power
output capability and the linearity of the amplifier. Advancing the "LOAD" control also decreases
the grid current and increases the plate current for a given amount of drive.
The efficiency of the amplifier and the grid current decrease if the "LOAD" control is rotated
beyond the point of maximum output. The linearity, however, will increase. The proper position for
this control is slightly clockwise from the setting that produces maximum output with full drive
power applied to the input. Never use this control to adjust the output power.
The "PLATE" control should always be checked after the "LOAD" control is adjusted by more than
one number. This is especially important at the high end of the "LOAD" range on 20 meters and
above. For example, if the "LOAD" is advanced from 7-1/2 to 8-3/4, the "PLATE" should be re-
tuned. If the "LOAD" is touched up only a slight amount, the "PLATE" setting will not usually
require re-adjustment.
ALC Metering, Controls, and Adjustments
ALC Metering Functions
The "MULTIMETER" switch in the AL-80B has two positions that indicate the functioning of the
ALC circuit. These positions are as follows:
ALC In this position the multimeter measures the output voltage of the ALC detector. The
full scale reading of the ALC detector is 35 volts. It is read directly from the ALC/ HV
scale of the multimeter. The multimeter will indicate the maximum value of ALC
voltage available from the internal ALC circuit. The meter should flick upwards
occasionally during normal ALC action in this position.

AL-80B Instruction Manual
15
Version 2F
ALC SET In this position the multimeter measures the approximate grid current that will produce
ALC activity. One zero must be added to the reading on the ALC/ HV scale for this
function.
For example: If the meter reads 15, add one zero (150). In this example ALC action will begin at
approximately 150 mA of grid current.
ALC Controls
The position of the "ALC SET" control determines the grid current value that will begin to produce
ALC voltage. Rotating the "ALC SET" control counter-clockwise reduces the maximum grid
current obtainable and the available RF power output. Rotating the "ALC SET" control clockwise
increases the maximum grid current level.
The approximate grid current available before ALC action begins can be determined by placing the
"MULTIMETER" switch in the "ALC SET" (far clockwise) position. The "ALC SET" control
should normally be adjusted to produce a multimeter reading of 12 to 18 volts with the
"MULTIMETER" switch in the "ALC SET" position. This will allow a maximum grid current of
approximately 120 to 180 mA.
ALC Adjustments
During SSB operation, two adjustments affect the ALC and the sound of the signal. One is the
exciter's microphone gain (or RF output level) adjustment. It will control the "fullness" of the ALC
and the average output power. It will have very little effect on the peak output power, however.
The fullness of ALC action is indicated by the multimeter reading in the ALC position. More
exciter audio gain or power output will drive the amplifier's ALC circuit harder, and produce a more
constant meter reading. This produces RF compression that increases the "talk power" without
increasing signal bandwidth or distortion.
Note: Audio background noise will increase while using heavy ALC levels on SSB. Objectionable
background noise levels may occur while using heavy amounts of ALC, especially if the
heavy ALC levels are used in conjunction with other speech processing. In these situations,
operating in a quiet room and "close talking" the microphone will minimize objectionable
background noise.
The amplifier's "ALC SET" control determines the level of grid current that produces ALC activity,
the maximum power output level. This amplifier has the best linearity when the "ALC SET" control
is adjusted to limit the peak grid current to 150 mA or lower. This adjustment must be made with a
carrier or single tone signal. When the "ALC SET" control is properly adjusted, it will be
impossible to exceed 150 mA of grid current with any tuning or drive adjustment.
/