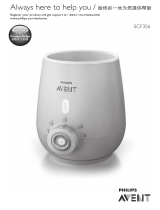
Philips Consumer Lifestyle B.V. Philips Avent Fast bottle warmer_AV3580 User manual

Category
Bottle warmers
Type
User manual
SCF358
EN User manual 2
ES-MX Manual del usuario 19
FR-CA Mode d’emploi 38
PT-BR Manual do utilizador 57
2 ENGLISH
Contents
IMPORTANT SAFEGUARDS 3
Introduction 6
Instructions for use 6
Cleaning and descaling 14
Disposal 16
Troubleshooting 16
Warranty and support 18
3ENGLISH
IMPORTANT SAFEGUARDS
When using electrical appliances, basic safety precautions should always be
followed including the following:
Read all instructions.
Danger
- To protect against electrical shock, do not immerse the
cord, plug or appliance in water or other liquid.
Warning
- Only use the appliance indoors.
- Do not let the power cord hang over the edge of a table
or worktop. Store excess cord in the base of the bottle
warmer.
- A short power-supply cord is provided to reduce the risk
resulting from becoming entangled in or tripping over a
longer cord.
- If extension cord is used: The cord should be arranged
so that it will not drape over the countertop or tabletop
where it can be pulled on by children or tripped over
unintentionally.
- The marked electrical rating of the cord set or extension
cord should be at least as great as the electrical rating of
the appliance.
- Keep the power cord away from hot surfaces.
- Only connect the appliance to a grounded wall socket.
Always make sure that the plug is inserted into the wall
socket properly.
- Before you connect the appliance, check that the voltage
indicated on the bottom of the appliance corresponds to
the local voltage.
- If you need to use an extension cord, make sure it is
a grounded extension cord with a rating of at least
13 amperes.
4 ENGLISH
- Extension cords may be used if care is exercised in their
use.
- Do not use the appliance if the plug, the power cord
or the appliance itself is damaged. If the power cord is
damaged, you must have it replaced by Philips, a Philips
authorized service center or similarly qualied persons in
order to avoid a hazard.
- Do not place the appliance on or near a hot gas or
electric cooker, or in a heated oven.
- This appliance can be used by persons with reduced
physical, sensory or mental capabilities or lack of
experience and knowledge if they have been given
supervision or instruction concerning use of the
appliance in a safe way and understand the hazards
involved.
- Children must not play with the appliance.
- Close supervision is necessary when any appliance is
used by or near children.
- Do not spill water on the power plug.
- Only use the appliance as described in the user manual
to avoid injury due to misuse.
- Do not preheat the appliance.
- Always place a fully assembled bottle with cap in the
bottle warmer before you add water.
- Make sure you add water before you switch on the bottle
warmer.
- Hot water can cause serious burns. Be careful when the
bottle warmer contains hot water.
- The accessible surfaces of the appliance may become
hot during use and are subject to residual heat after use.
- Do not move the appliance when it contains hot water.
- When the food or milk has reached the required
temperature, remove the bottle or container from the
bottle warmer.
5ENGLISH
- If the appliance is of the grounded type, the cord set or
extension cord should be a grounding-type 3-wire cord.
- Unplug from outlet when not in use and before cleaning.
Allow to cool before putting on or taking o parts.
- The use of accessory attachments not recommended by
the appliance manufacturer may cause injuries.
- To disconnect, turn any control to “o”, then remove plug
from wall outlet.
- Before serving be sure food is at safe temperature.
- Before serving, unplug cord form wall outlet and dish. Do
not leave cord within child’s reach.
Caution
- This appliance is intended for use in household.
- The food should not be heated for too long.
- Always check the food temperature before you feed
your child. Gently swirl the bottle and check by sprinkling
a few drops on the inside of your wrist. (Follow the
instructions in section ‘‘Feed your baby the milk’’.)
- Unplug the appliance when it is not in use.
- The surface of the heating element is subject to residual
heat after use.
- Let the appliance cool down before you clean it.
- Follow the descaling instructions to avoid irreparable
damage.
- Do not try to open or repair the appliance yourself.
Contact the Philips Consumer Care Center in your
country (see www.philips.com/support).
SAVE THESE INSTRUCTIONS
The production date code YYWW is located in the cord storage compartment in the
base of the bottle warmer.
Electromagnetic elds (EMF)
This Philips appliance complies with all applicable standards and regulations
regarding exposure to electromagnetic elds.
6 ENGLISH
Introduction
Congratulations on your purchase and welcome to Philips Avent! To fully benet
from the support that Philips Avent oers, register your product at
www.philips.com/welcome.
With this bottle warmer, you can warm and defrost milk in Philips Avent and other
most common branded feeding bottles and baby food in containers.
To help preserve the quality of your breast milk, it is important to warm the milk
in a safe and controlled way. The built-in sensor tracks the temperature to avoid
overheating.
Instructions for use
Product overview
A
B
CD
F
E
A Bottle warmer D Keep warm / defrost setting
B Progress indicator E Milk volume setting
C Baby food warming setting F On / o button
7ENGLISH
Explanation of settings
Milk volume
Select the milk volume you want to warm. You
can set from 30 ml / 1 oz up to 330 ml / 11 oz.
The bottle warmer warms the milk to
approximately body temperature. It then
switches to keep warm mode automatically for
about 60 minutes.
Baby food warming
Select this setting to warm baby food.
Keep warm / defrost
The built-in sensor detects the milk / baby
food temperature to nd the optimal setting. If
the milk / baby food is warm, it will be warmed
gradually and kept at the right temperature.
If the milk / baby food is frozen, it will be
defrosted to liquid state and then warmed to
the right temperature.
When the entire progress indicator is on but not ashing, the milk / food is ready
for feeding. Feed your baby when the milk / food is warmed. Do not rewarm the
milk / food after it has cooled down, as bacteria may start to develop in it.
Warm milk
1
Place the bottle in the bottle warmer. Fill with drinking water to the level of
the milk. If you have a large volume of milk, ll with water to approximately
1 cm below the top of the bottle warmer.
2
Select the desired setting based on the milk volume and press the on / o
button to switch on.
7
210
7oz
210ml
8 ENGLISH
3
The progress indicator ashes gradually to show the progress of milk
warming.
4
When the entire progress indicator lights up continuously, the milk is ready
for feeding and the bottle warmer automatically switches to keep warm
mode.
5
The bottle warmer switches o automatically after about 60 minutes,
including warming time. The progress indicator turns o.
60 min
Tip
If you want the milk warmer, keep the bottle in the appliance until it reaches the desired
temperature after the entire progress indicator lights up.
If you are using a milk bag, select the keep warm / defrost setting because it takes less
power to warm milk bags.
If you are using a silicone bottle, it takes longer to warm milk. Keep it in the bottle warmer
for 3-4 minutes after the entire progress indicator lights up.
Recommended setting for dierent containers
Container Recommended Setting
Plastic Milk volume setting
Glass Milk volume setting
Silicone Milk volume setting + 3-4 minutes
Milk bag Keep warm/ Defrost setting
Check the instructions of your milk bag and make sure it can be warmed in a bottle
warmer.
Note
The time to warm milk depends on the volume, initial temperature and bottle material.
9ENGLISH
Feed your baby the milk
Press the on / o button to switch o the appliance and take out the milk bottle.
Note
If you are using a small bottle, such as a 2 oz bottle, be careful to avoid touching the hot
water when you remove the bottle.
Always check the temperature of the milk before you feed your baby. Gently swirl
the bottle and check by sprinkling a few drops on the inside of your wrist.
Reuse the bottle warmer right away for another bottle
If you want to warm another bottle, let the bottle warmer cool down for a few
minutes. To speed up, ll the bottle warmer with fresh cold water.
When you switch on the bottle warmer, the progress indicator ashes gradually to
indicate that the appliance is warming again.
Note
If the progress indicator is on but not ashing, the bottle warmer is still too hot to warm
another bottle. Switch o the bottle warmer and let it cool down for a few minutes.
10 ENGLISH
Warm baby food
1
Place the baby food container in the bottle warmer. Fill with drinking water
to the level of the baby food. If you have a large volume of baby food, ll with
water to approximately 1 cm below the top of the bottle warmer.
2
Select the baby food warming setting and press the on / o button to switch
on.
3
The progress indicator ashes to show it is in the warming process.
Note
Due to variations in baby food consistency, it is not possible for the appliance to detect
precisely how long the baby food should be warmed.
4
Stir the baby food while the jar or container is in the bottle warmer. For
optimal result, check its temperature while it is warming up.
» Be careful not to burn your ngers when holding the container or jar while
stirring.
5
When the entire progress indicator lights up continuously, the baby food
is ready for feeding and the bottle warmer automatically switches to keep
warm mode.
11ENGLISH
6
The bottle warmer switches o automatically after about 60 minutes,
including warming time. The progress indicator turns o.
60 min
Feed your baby the baby food
Press the on / o button to switch o the appliance and take out the food
container or jar.
Always check the temperature of the baby food before you feed your baby. Gently
stir the baby food in the food container or jar and taste it to make sure it is not
too hot.
Reuse the bottle warmer right away for another container of baby
food
Follow the same steps as indicated in the section “Warm milk”
12 ENGLISH
Keep warm
With this setting, the built-in sensor detects the milk temperature to switch to the
optimal setting. If you put warm milk into the appliance, it is warmed gradually and
kept at the right temperature.
1
Place the bottle in the bottle warmer. Fill with drinking water to the level of
the milk. If you have a large volume of milk, ll with water to approximately
1 cm below the top of the bottle warmer.
2
Select the keep warm / defrost setting and press the on / o button to
switch on.
3
The progress indicator ashes to show that milk is warming.
4
When the entire progress indicator lights up continuously, the milk is ready
for feeding and the bottle warmer keeps the milk at this temperature.
13ENGLISH
5
The bottle warmer switches o automatically after about 60 minutes,
including warming time. The progress indicator turns o.
60 min
Note
The time may vary depending on the milk volume and starting temperature.
Defrost
With this setting, the built-in sensor detects the milk / food temperature to nd
the optimal setting. If you put frozen milk / baby food into the appliance, the bottle
warmer defrosts the milk / baby food to liquid state and then warms it to the right
temperature.
1
Place the bottle in the bottle warmer. Fill with drinking water to the level of
the milk. If you have a large volume of milk, ll with water to approximately
1 cm below the top of the bottle warmer.
2
Select the keep warm / defrost setting and press the on / o button to
switch on.
14 ENGLISH
3
The progress indicator ashes to show that milk is defrosting and warming.
4
When the entire progress indicator lights up continuously, the milk / baby
food is ready for feeding.
5
The bottle warmer switches o automatically after about 60 minutes,
including defrosting and warming time. The progress indicator turns o.
60 min
You can also defrost baby food in the Philips Avent food container with this
setting. Due to variations in baby food consistency, it is strongly recommended you
continuously stir and check the baby food while you are defrosting it for optimal
results.
Cleaning and descaling
Cleaning
1
Unplug the bottle warmer and let it cool down.
2
Pour out water sideways rather than forwards or backwards to keep water
from spilling onto the knob or main plug.
15ENGLISH
3
Wipe with a moist cloth.
» Do not use abrasive, antibacterial cleaning agents, chemical solvents or
sharp tools to clean the bottle warmer.
Note
If you used the bottle warmer to warm baby food, make sure that no spilled baby food
remains at the bottom of the bottle warmer.
Descaling
It is recommended to descale the bottle warmer every four weeks to ensure it
works eciently.
To descale, mix 60 ml / 2 oz of white vinegar with 120 ml / 4oz of cold water. Switch
on and select the milk warming setting for contents under 180 ml / 6 oz and let the
appliance operate for 10 minutes. Leave the solution in the bottle warmer until all
scale has dissolved.
10 min
180ml
6oz
Note
You can also use citric acid based descalers.
Do not use other types of descalers.
Empty the bottle warmer and rinse the inside thoroughly with a moist cloth. If you
still see traces of scale, repeat the descaling procedure.
16 ENGLISH
Disposal
Your product is designed and manufactured with high quality materials and
components, which can be recycled and reused. For recycling information, please
contact your local waste management facilities or visit www.recycle.philips.com.
Troubleshooting
This chapter summarizes the most common problems you could encounter with
the appliance. If you are unable to resolve the problem with the information below,
contact the Consumer Care Center in your country.
Problem After switching on the bottle warmer, the entire progress indicator
blinks fast and switches o.
Cause
The temperature of water in the bottle warmer is too hot or too
cold.
The boil-dry protection is activated.
Solution
Switch o and unplug. Let it cool down for a few minutes. Make
sure you ll it with fresh room temperature water.
The bottle warmer automatically switches o if it is on and there
is no water or not enough water in it. Switch o and unplug. Let
it cool down rst. Make sure you ll it with enough fresh room
temperature water. The bottle warmer is ready to use again.
Problem The milk is too hot.
Cause
You may have selected an incorrect setting or are using a milk bag.
Solution
Select the milk volume setting based on the milk volume, not the
bottle size.
If you are using a milk bag, select the keep warm / defrost setting.
Problem The milk is still cold.
Cause
You may have selected an incorrect setting, are using a silicone
bottle, or have lled the bottle warmer with warm water.
Solution
Select the milk volume setting based on the milk volume, not the
bottle size.
If you are using a silicone bottle, select the milk volume setting
based on the milk volume. When the entire progress indicator is
on, wait for 3-4 minutes for the milk to warm.
Fill the bottle warmer with fresh room temperature water. Do not
use warm water.
17ENGLISH
Problem After switching on the bottle warmer, the entire progress indicator is
on but not ashing.
Cause
The bottle warmer is still too hot to warm another bottle. You may
have just nished warming a bottle. Switch o and let it cool down
for a few minutes.
Solution
To speed up, rell the bottle warmer with fresh cold water. When
you switch on the bottle warmer, the progress indicator lights up
gradually to indicate that the appliance is warming again.
Problem The entire progress indicator ashes when warming baby food.
Cause
Due to variations in baby food consistency, it is not possible for
the appliance to detect precisely how long the baby food should
be warmed.
Solution
Stir the baby food while the jar or container is in the bottle warmer.
For optimal result, check its temperature while it is warming .
When the entire progress indicator lights up continuously, the
baby food is ready for feeding.
18 ENGLISH
Warranty and support
For assistance, visit our website: www.philips.com/support or call toll free
1-800-54-Avent
Full Two-Year Warranty
Philips North America LLC warrants each new Philips product, Model SCF358
against defects in materials or workmanship for a period of two years from the date
of purchase and agrees to repair or replace any defective product without charge.
IMPORTANT: This warranty does not cover damage resulting from accident, misuse
or abuse, lack of reasonable care, the axing of any attachment not provided
with the product or loss of parts or subjecting the product to any but the specied
battery.
NO RESPONSIBILITY IS ASSUMED FOR ANY SPECIAL, INCIDENTAL OR
CONSEQUENTIAL DAMAGES.
In order to obtain warranty service, simply go to www.philips.com/support or
call toll free 1-800-54-Avent. It is suggested that for your protection you return
shipments of product by insured mail, insurance prepaid. Damage occurring during
shipment is not covered by this warranty.
NOTE: No other warranty, written or oral, is authorized by Philips North America
LLC. This warranty gives you specic legal rights, and you may also have other rights
which vary from state to state. Some states do not allow the exclusion or limitation
of incidental or consequential damages, so the above exclusion and limitations
may not apply to you.
* Read enclosed instructions carefully.
Manufactured for: Philips Personal Health, A division of Philips North America LLC,
P.O. Box 10313, Stamford, CT 06904, USA.
PHILIPS and Philips Shield are registered trademarks of Koninklijke Philips N.V.
© 2020 Philips North America LLC. All Rights Reserved.
Any other servicing should be performed by an authorized service representative.
19ESPAÑOL
Contenido
PRECAUCIONES IMPORTANTES 20
Introducción 23
Instrucciones de uso 24
Limpieza y eliminación de depósitos de sarro 33
Eliminación 34
Resolución de problemas 35
Garantía y asistencia 37
20 ESPAÑOL
PRECAUCIONES
IMPORTANTES
Si utiliza un artefacto eléctrico siempre debe tomar medidas de seguridad básicas,
tales como:
Lea todas las instrucciones.
Peligro
- Para evitar una descarga eléctrica, no sumerja el cable
de alimentación, los conectores ni el artefacto en agua u
otros líquidos.
Advertencia
- Utilice el artefacto solo en interiores.
- No deje que el cable de alimentación cuelgue del borde
de la mesa o de la encimera. Guarde el cable sobrante
en la base del calentador de biberones.
- Se proporciona un cable de alimentación corto para
evitar enredarse o tropezarse con un cable más largo.
- Si utiliza un cable de extensión, este se debe colocar de
manera que no cuelgue de la encimera ni la sobremesa,
donde los niños puedan tirarlo o tropezar con él.
- La clasicación eléctrica del cable o del cable de
extensión debe ser, como mínimo, igual a la del
artefacto.
- Mantenga el cable de alimentación alejado de
supercies calientes.
- Conecte el artefacto solo en enchufes de pared con
conexión a tierra. Asegúrese siempre de que el enchufe
esté insertado correctamente en el enchufe de pared.
- Antes de conectar el artefacto, revise que el voltaje
indicado en la parte inferior corresponda con el voltaje
local.
  • Page 1 1
  • Page 2 2
  • Page 3 3
  • Page 4 4
  • Page 5 5
  • Page 6 6
  • Page 7 7
  • Page 8 8
  • Page 9 9
  • Page 10 10
  • Page 11 11
  • Page 12 12
  • Page 13 13
  • Page 14 14
  • Page 15 15
  • Page 16 16
  • Page 17 17
  • Page 18 18
  • Page 19 19
  • Page 20 20
  • Page 21 21
  • Page 22 22
  • Page 23 23
  • Page 24 24
  • Page 25 25
  • Page 26 26
  • Page 27 27
  • Page 28 28
  • Page 29 29
  • Page 30 30
  • Page 31 31
  • Page 32 32
  • Page 33 33
  • Page 34 34
  • Page 35 35
  • Page 36 36
  • Page 37 37
  • Page 38 38
  • Page 39 39
  • Page 40 40
  • Page 41 41
  • Page 42 42
  • Page 43 43
  • Page 44 44
  • Page 45 45
  • Page 46 46
  • Page 47 47
  • Page 48 48
  • Page 49 49
  • Page 50 50
  • Page 51 51
  • Page 52 52
  • Page 53 53
  • Page 54 54
  • Page 55 55
  • Page 56 56
  • Page 57 57
  • Page 58 58
  • Page 59 59
  • Page 60 60
  • Page 61 61
  • Page 62 62
  • Page 63 63
  • Page 64 64
  • Page 65 65
  • Page 66 66
  • Page 67 67
  • Page 68 68
  • Page 69 69
  • Page 70 70
  • Page 71 71
  • Page 72 72
  • Page 73 73
  • Page 74 74
  • Page 75 75
  • Page 76 76

Philips Consumer Lifestyle B.V. Philips Avent Fast bottle warmer_AV3580 User manual

Category
Bottle warmers
Type
User manual

Ask a question and I''ll find the answer in the document

Finding information in a document is now easier with AI