SCF355/05

Philips AVENT SCF355/05, SCF355, SCF355/00, SCF355/01, SCF355/06 User manual

  • Hello! I am an AI chatbot trained to assist you with the Philips AVENT SCF355/05 User manual. I’ve already reviewed the document and can help you find the information you need or explain it in simple terms. Just ask your questions, and providing more details will help me assist you more effectively!
www.philips.com/avent
Philips Consumer Lifestyle BV
Tussendiepen 4, 9206 AD Drachten, Netherlands
Philips Personal Health
A division of Philips North America LLC,
P.O. Box 10313, Stamford, CT 06904, USA
Trademarks owned by the Philips Group.
© 2018 Koninklijke Philips N.V. All rights reserved
Les marques de commerce sont la propriété du Groupe Philips.
© 2018 Koninklijke Philips N.V. Tous droits réservés.
SCF355
www.philips.com 4213 342 20548
User manual
SCF355
ENGLISH 6
ESPAÑOL MÉXICO 17
FRANÇAIS CANADA 30
6
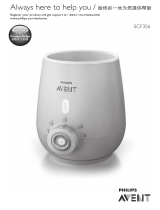
General description (Fig. 1)
1. Bottle warmer
2. Light
3. Settings knob
4. O setting
5. Defrost setting
6. Keep warm setting
7. Express milk warming setting for contents up to
180ml/6oz
8. Food warming setting
9. Express milk warming setting for contents over and
including 180ml/6oz
IMPORTANT
SAFEGUARDS
When using electrical appliances, basic safety precautions
should always be followed including the following:
Danger
- To protect against re, electric shock and injury to persons
do not immerse the cord, plug or appliance in water or
other liquid.
Warning
- Read all instructions.
- Do not use outdoors.
- Do not let cord hang over the edge of table or counter, or
touch hot surfaces. Excess cord can be stored in the base
of the bottle warmer.
- This appliance has a polarized plug (one blade is wider
than the other). To reduce the risk of electric shock, this
plug is intended to t into a polarized outlet only one way.
ENGLISH
7
If the plug does not t fully into the outlet, reverse the
plug. If it still does not t, contact a qualied electrician.
Do not attempt to modify the plug in any way.
- Check if the voltage indicated on the appliance
corresponds to the local mains voltage before you
connect the appliance.
- A short power-supply cord should be used to reduce the
risk resulting from becoming entangled in or tripping over a
longer cord. Extension cords are available and may be used
if care is exercised in their use. If an extension cord is used,
the marked electrical rating of the extension cord should
be at least 13 amperes and the cord should be arranged
so that it will not drape over the countertop or tabletop
where it can be pulled on by children or tripped over
unintentionally.
- Do not operate any appliance with a damaged cord or plug
or after the appliance malfunctions, or has been damaged
in any manner. Return appliance to the nearest authorized
service facility for examination, repair or adjustment.
- The use of accessory attachments not recommended by
the appliance manufacturer may cause injuries.
- Do not place the appliance on or near a hot gas or electric
burner, or in a heated oven.
- Close supervision is necessary when any appliance is used
by or near children.
- This appliance is not intended for use by persons
(including children) with reduced physical, sensory or
mental capabilities, or lack of experience and knowledge,
unless they have been given supervision or instruction
concerning use of the appliance by a person responsible
for their safety.
- Children should be supervised to ensure that they do not
play with the appliance.
- Keep the appliance and its cord out of the reach of children.
- Do not spill water on the appliance plug.
- Only use the appliance as described in the user manual to
avoid potential injury due to misuse.
ENGLISH
8
- Do not preheat the appliance.
- Always place a fully assembled bottle with cap in the
bottle warmer before you add water.
- Make sure you add water before you switch on the bottle
warmer.
- Hot water can cause serious burns. Be careful when the
bottle warmer contains hot water.
- Extreme caution must be used when moving an appliance
containing hot oil or other hot liquids.
- Do not touch hot surfaces. Use handles or knobs. The
accessible surfaces may become hot during use.
- Do not move the appliance when it contains hot water.
- When the food or milk has reached the required
temperature, remove the bottle or container from the
bottle warmer. If you leave food or milk in the bottle
warmer, the temperature of the food or milk increases.
- Before serving be sure the food is at safe temperature.
- Before serving, unplug the cord from the wall outlet and
dish. Do not leave the cord within child’s reach.
- Always turn the knob to “o” before you remove the plug
from the wall outlet.
Caution
- This appliance is intended to be used in household and
similar applications such as farm houses, bed and breakfast
type environments, sta kitchen areas in shops, oces
and other working environments, and by clients in hotels,
motels and other residential type environments.
- Unplug from outlet when not in use and before cleaning.
Allow to cool before putting on or taking o parts, and
before cleaning the appliance.
- The surface of the heating element is subject to residual
heat after use.
- Follow the descaling instructions to avoid irreparable damage.
- Do not try to open or repair the appliance yourself. You
can contact the Philips Consumer Care Centre in your
country (see www.philips.com/support).
- Do not use appliance for other than intended use.
ENGLISH
9
SAVE THESE
INSTRUCTIONS
You can nd the production date code in the cord storage
compartment in the base of the bottle warmer.
Using the bottle warmer
With this bottle warmer, you can quickly warm Philips Avent
feeding bottles and milk/baby food in containers and other
baby food jars.
Note: Philips Avent breast milk bags and Philips Avent
2oz/60ml bottles cannot be used in this bottle warmer.
Explanation of settings
-
O setting: The bottle warmer is switched o and the light
is o. On every other setting, the appliance is switched on
and the light is lit (Fig. 2).
-
Express milk warming setting for contents up to 180ml/6oz:
Select this setting when you want to quickly warm a bottle of
milk with a content up to 180ml/6oz.
The bottle has to be taken out immediately after warming to
the right temperature, otherwise the milk will be overheated.
- Food warming setting: Select this setting when you want
to warm a container/jar of baby food.
- Express milk warming setting for contents over and
including 180ml/6oz:
Select this setting when you want to quickly warm a bottle
of milk with a content over and including 180ml/6oz.
The bottle needs to be taken out immediately after
warming to the right temperature, otherwise the milk will be
overheated.
- Keep warm setting: Milk is warmed at a slower speed and
be kept at right temperature.
ENGLISH
10
- Defrost setting: Defrost a bottle/container of milk/baby
food to liquid state. No warming occurs.
Using the bottle warmer with express milk warming
setting
1 Put the appliance plug in the wall outlet (Fig. 3).
2 Place a bottle in the bottle warmer (Fig. 4).
3 Fill the bottle warmer with drinking water up to the level
of the milk in the bottle. In case of large amounts of milk,
the maximum level of water is approximately 1 cm below
the top of the bottle warmer. An accurate water level
ensures correct warming performance (Fig. 5).
4 Select the desired setting based on the milk volume. See
the express warming reference table at the end of this
chapter to check how long the milk needs to be warmed
in the selected setting (Fig. 6).
Note: The speed of warming milk depends on the amount of
the milk warmed and on its initial temperature, i.e. room
temperature (70°F/20°C) or fridge temperature (40°F/5°C).
5 The orange light goes on when you select a setting. This
indicates that the bottle warmer is on (Fig. 7).
Note: While warming the milk circulates and heats evenly.
6 Check the express warming reference table for the time
required to warm the milk. Remove the bottle from the
bottle warmer after the time indicated in the express
warming reference table has passed (Fig. 8).
Tip: When you nd the milk is not warm enough, you can
place the bottle back into the appliance for a maximum of
30 seconds of extra warming. This will create a slightly
warmer result but without overheating.
ENGLISH
11
Caution: If you leave the bottle in the bottle warmer longer
than the time indicated in the settings table, the milk may
become overheated.
Note: If you overheat breast milk, valuable nutrients and
vitamins may be lost.
7 Always check the temperature before you feed your baby.
Gently shake the bottle or milk storage container and check
the temperature of the milk by sprinkling a few drops on the
inside of your wrist (Fig. 9).
8 Turn the knob back to the ‘o’ position (Fig. 10).
Caution: The water in the bottle warmer might be hot after
nishing warming milk / baby food. Be careful that hot water
can cause serious burns.
If you do not turn the knob back to the ‘o’ position, the
water keeps heating up and will reach a very high
temperature.
Express warming reference table
ml/oz min min
5°C/40°F 20°C/70°F
60 ml/2 oz-90 ml/3 oz 4.5 3.0
90 ml/3 oz-110 ml/3.7 oz 5.5 3.0
125 ml/4 oz-150 ml/5 oz 3.5 3.0
180 ml/6 oz-210 ml/7 oz 5.5 4.0
240 ml/8 oz-260 ml/9 oz 7.0 4.5
290 ml/10 oz-330 ml/11 oz 7.5 5.0
ENGLISH
12
Note: The indicated warming times are based on Philips
Avent Classic and Natural PP bottle ranges. Be aware that
warming timings of Philips Avent standard bottles and
glass bottles deviate from these indications. The
characteristics of bottles such as material or thickness may
also impact the warming times, therefore it may take less time
to warm a larger volume of milk.
Note: The milk may feel cool to you, but for a newborn baby
its temperature is very pleasant.
Using the bottle warmer to warm baby food
1 Follow the same steps as indicated in the previous
paragraph.
2 Make sure to stir the baby food during warming as it does
not circulate automatically. Be careful not to burn your
ngers when holding the container/jar while stirring
(Fig. 11).
After warming test the baby food with a spoon to ensure it is
not too hot. If the baby food is not warm enough, put the
container back into the bottle warmer and warm the baby food
until it has the desired temperature.
Note: Due to the high variety of baby food consistencies, it
is not possible to indicate warming timings for baby food.
Therefore, it is strongly recommended to continuously stir
and check while you are warming the baby food for an
optimal result.
Using the keep warm setting to warm milk
1 Put the appliance plug in the wall outlet (Fig. 3).
2 Place the bottle or container in the bottle warmer (Fig. 4).
3 Fill the bottle warmer with drinking water up to the
level of the milk in the bottle/container. In case of
large amounts of milk, the maximum level of water
is approximately 1 cm below the top of the bottle
warmer (Fig. 5).
ENGLISH
13
4 Select the position of keep warm (Fig. 6).
At this setting, you can warm your milk at a slow pace and
keep it warm at the right end temperature. E.g. to warm a
bottle of 125ml/4oz milk starting from room temperature,
it will take 15-20min. The warming time may be longer
or shorter depending on the milk volumes and starting
temperature.
Note: Philips Avent recommends to feed your baby as
soon as possible after the milk is warmed. We advise not to
reheat the milk after it has cooled down again.
Note: Always check the temperature before you feed your
baby (Fig. 9).
5 Turn the knob back to the ‘o’ position when the bottle/
container is removed from the bottle warmer (Fig. 10).
Using the bottle warmer with defrost setting
1 Put the appliance plug in the wall outlet (Fig. 3).
2 Place the bottle or container in the bottle warmer (Fig. 4).
3 Fill the bottle warmer with drinking water up to the level
of the milk/baby food in the bottle/container. In case of
large amounts of milk/baby food, the maximum level of
water is approximately 1 cm below the top of the bottle
warmer (Fig. 5).
4 Select the position of defrost (Fig. 6).
At this setting, your frozen milk/baby food can be defrosted
to a liquid state.
For frozen milk, check the warming reference table for the
expected defrost timings. After your milk is defrosted, choose
express warming setting or keep warming setting to warm
your milk. Please refer to the previous chapters for usage
instructions. Consider the start temperature of your milk
around fridge temperature for the warming timings as rough
guideline.
ENGLISH
14
ml/oz hours
60 ml/2 oz-90 ml/3 oz 1-1.5
180 ml/6 oz-210 ml/7 oz 1.5-2.5
5 You may also defrost baby food in Philips Avent food
container with this setting. After your baby food is
defrosted, choose food warming setting to warm it.
Please refer to the previous chapter for usage instruction.
Note: Due to the high variety of baby food consistencies, it
is not possible to indicate warming timings for baby food.
Therefore, it is strongly recommended to continuously stir
and check while you are warming the baby food for an
optimal result.
Cleaning and descaling
Cleaning
1 After each use, unplug the bottle warmer and let it cool
down (Fig. 12).
2 Remove the water from the bottle warmer for hygienic
reasons (Fig. 13).
3 Wipe the outside and inside of the bottle warmer with a
moist cloth (Fig. 14).
Do not use abrasive, anti-bacterial cleaning agents,
chemical solvents or sharp tools to clean the bottle warmer.
Note: If you used the bottle warmer to warm containers with
baby food, make sure that no spilled baby food remains on
the bottom of the bottle warmer.
ENGLISH
15
Descaling
It is recommended to descale the bottle warmer every
four weeks to ensure it continues to work eciently.
1 Mix 50ml/1.7oz of white vinegar with 100ml/3.4oz of cold
water to descale the bottle warmer. Switch on the bottle
warmer, select the milk warming setting for contents
under 180ml/6oz and let the appliance operate for
10 minutes. Leave the solution in the bottle warmer until
all scale has dissolved (Fig. 15).
Note: You can also use citric acid based descalers.
Note: Do not use other types of descalers.
2 Unplug the bottle warmer before you empty it (Fig. 16).
3 Empty the bottle warmer and rinse its inside thoroughly.
If you still see traces of scale after rinsing, repeat the
descaling procedure (Fig. 13).
This product has no other user-serviceable parts. For
assistance call 1-800-54-Avent.
Disposal
Your product is designed and manufactured with high quality
materials and components, which can be recycled and
reused. For recycling information, please contact your local
waste management facilities or visit www.recycle.philips.com
Warranty and support
For assistance, visit our website:
www.philips.com/support or call toll free
1-800-54-Avent
Full Two-Year Warranty
Philips North America LLC warrants each new Philips product,
Model SCF355 against defects in materials or workmanship
ENGLISH
16 ENGLISH
for a period of two years from the date of purchase and
agrees to repair or replace any defective product without
charge.
IMPORTANT: This warranty does not cover damage resulting
from accident, misuse or abuse, lack of reasonable care, the
axing of any attachment not provided with the product
or loss of parts or subjecting the product to any but the
specied battery.
NO RESPONSIBILITY IS ASSUMED FOR ANY SPECIAL,
INCIDENTAL OR CONSEQUENTIAL DAMAGES.
In order to obtain warranty service, simply go to
www.philips.com/support or call toll-free 1-800-54-Avent.
It is suggested that for your protection you return shipments
of product by insured mail, insurance prepaid. Damage
occurring during shipment is not covered by this warranty.
NOTE: No other warranty, written or oral, is authorized by
Philips North America LLC. This warranty gives you specic
legal rights, and you may also have other rights which vary
from state to state. Some states do not allow the exclusion
or limitation of incidental or consequential damages, so the
above exclusion and limitations may not apply to you.
* Read enclosed instructions carefully.
Manufactured for: Philips Personal Health, A division of
Philips North America LLC, P.O. Box 10313, Stamford, CT
06904, USA.
PHILIPS and Philips Shield are registered trademarks of
Koninklijke Philips N.V.
© 2017 Philips North America LLC. All Rights Reserved.
/