SCF355

Philips AVENT SCF355 User manual

  • Hello! I'm your chat assistant and I have reviewed the user manual for the Philips Avent bottle warmer SCF355. This document provides instructions on how to use the bottle warmer with its defrost, keep warm, and express warming settings. It also includes important safety guidelines and cleaning instructions, ensuring safe and efficient use. I'm ready to assist you with any questions you have about the device.
  • Which bottles or food jars fit in the bottle warmer?
    How much water should I add to the bottle warmer?
    Can I defrost milk or baby food in the bottle warmer?
    Why does it take long to defrost milk?
    Can I use the bottle warmer to keep milk or baby food warm overnight?
Question?
有疑问?
Contact Philips
请联系飞利浦
SCF355
1
SCF355
ENGLISH 6
简体中文 16
6
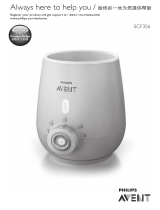
General description (Fig. 1)
1 Bottle warmer
2 Light
3 Settings knob
4 Off setting
5 Defrost setting
6 Keep warm setting
7 Express warming setting
Important
To fully benet from the support that Philips offers, register your
appliance at www.philips.com/welcome.
Read this user manual carefully before you use the bottle warmer and
save it for future reference.
Danger
- Do not immerse the cord, plug or appliance in water or other liquid.
Warning
- Only use the appliance indoors.
- Do not let the mains cord hang over the edge of a table or worktop.
Excess cord can be stored in the base of the bottle warmer.
- Keep the mains cord away from hot surfaces.
- Only connect the appliance to an earthed wall socket. Always make
sure that the plug is inserted into the wall socket properly.
- Check if the voltage indicated on the bottom of the appliance
corresponds to the local mains voltage before you connect the appliance.
- If you need to use an extension cord, make sure it is an earthed
extension cord with a rating of at least 13 amperes.
- Do not use the appliance if the plug, the mains cord or the appliance
itself is damaged. If the mains cord is damaged, you must have it
replaced by Philips, a service centre authorised by Philips or similarly
qualied persons in order to avoid a hazard.
- Do not place the appliance on or near a hot gas or electric cooker,
or in a heated oven.
ENGLISH
- This appliance is not intended for use by persons (including children)
with reduced physical, sensory or mental capabilities, or lack of
experience and knowledge, unless they have been given supervision
or instruction concerning use of the appliance by a person
responsible for their safety.
- Children should be supervised to ensure that they do not play with
the appliance.
- Keep the appliance and its cord out of the reach of children.
- Do not spill water on the mains plug.
- Only use the appliance as described in the user manual to avoid
potential injury due to misuse.
- Do not preheat the appliance.
- Always place a fully assembled bottle with cap in the bottle warmer
before you add water.
- Make sure you add water before you switch on the bottle warmer.
- Hot water can cause serious burns. Be careful when the bottle
warmer contains hot water.
- The accessible surfaces of the appliance may become hot during use.
- Do not move the appliance when it contains hot water.
- When the food or milk has reached the required temperature,
remove the bottle or container from the bottle warmer. If you leave
food or milk in the bottle warmer, the temperature of the food or
milk increases.
- Always check the food temperature before you feed your child.
Caution
- This appliance is intended to be used in household and similar
applications such as farm houses, bed and breakfast type
environments, staff kitchen areas in shops, ofces and other working
environments, and by clients in hotels, motels and other residential
type environments.
- Unplug the appliance when it is not in use.
- The surface of the heating element is subject to residual heat after use.
- Let the appliance cool down before you clean it.
- Follow the descaling instructions to avoid irreparable damage.
ENGLISH 7
- Do not try to open or repair the appliance yourself. You can contact
the Philips Consumer Care Centre in your country
(see www.philips.com/support).
You can nd the production date code YY/MM/DD in the cord storage
compartment in the base of the bottle warmer.
Electromagnetic elds (EMF)
This Philips appliance complies with all applicable standards and
regulations regarding exposure to electromagnetic elds.
Using the bottle warmer
With this bottle warmer, you can quickly warm all Philips Avent feeding
bottles and milk/baby food in containers and other baby food jars.
Note: Philips Avent breast milk bags and Philips Avent 2oz/60ml bottles
cannot be used in this bottle warmer.
Explanation of settings
- Off setting: the bottle warmer is switched off and the light is off.
On every other setting, the appliance is switched on and the light is lit.
(Fig. 2)
- Defrost setting: defrost a bottle/container of milk/baby food to liquid
state. No warming occurs.
- Keep warm setting: the milk/baby food is warmed slowly and kept
warm until you switch off the appliance.
- Express warming setting: the milk/baby food will be warmed quickly.
The bottle needs to be taken out immediately after warming,
otherwise the milk will overheat.
Using the bottle warmer with defrost setting
1 Put the mains plug in the wall socket (Fig. 3).
2 Place the bottle or container in the bottle warmer (Fig. 4).
3 Fill the bottle warmer with drinking water up to the level of the
milk/baby food in the bottle/container. In case of large amounts of
milk, the maximum level of water is approximately 1 cm below the
top of the bottle warmer. (Fig. 5)
ENGLISH8
4 Select the position of defrost (Fig. 6).
At this setting, your frozen milk/baby food can be defrosted till liquid
state. Depending on the milk volume it can take up to 2 hours to defrost
your milk/baby food. When your milk/baby food is defrosted, choose the
keep warm setting or express warming setting to warm your milk/baby
food. Consider the start temperature of your milk around fridge
temperature for the warming timings as rough guideline.
Note: Due to the high variety of baby food consistencies, it is strongly
recommended to continuously stir and check while you are defrosting the
baby food for an optimal result.
5 Turn the knob back to the ‘off’ position when the bottle/container
is removed from the bottle warmer. (Fig. 7)
Using the bottle warmer with keep warm setting
1 Put the mains plug in the wall socket (Fig. 3).
2 Place the bottle or container in the bottle warmer (Fig. 4).
3 Fill the bottle warmer with drinking water up to the level of the
milk/baby food in the bottle/container. In case of large amounts of
milk, the maximum level of water is approximately 1 cm below the
top of the bottle warmer. (Fig. 5)
4 Select the position of keep warm (Fig. 6).
At this setting, you can warm your milk/baby food at a slow pace and
keep it warm at the right end temperature. Depending on the milk/baby
food volumes and the baby food consistencies, the warming time will take
longer/shorter.
Note: Philips Avent recommends to feed your baby as soon as possible after
the milk/baby food is warmed. We advise not to reheat the milk/baby food
after it has cooled down again.
Note: Always check the temperature before you feed your baby.
5 Turn the knob back to the ‘off’ position when the bottle/container
is removed from the bottle warmer. (Fig. 7)
ENGLISH 9
Using the bottle warmer with express warming setting
1 Put the mains plug in the wall socket (Fig. 3).
2 Place the bottle or container in the bottle warmer (Fig. 4).
3 Fill the bottle warmer with drinking water up to the level of the
milk/baby food in the bottle/container. In case of large amounts of
milk, the maximum level of water is approximately 1 cm below the
top of the bottle warmer. An accurate water level ensures correct
warming performance (Fig. 5).
4 Select a position in the express warming area. Consider the
beginning of this area as milk content volume up to 180ml and the
end of the area as milk content volume over and including 180 ml,
see the express warming reference table for you reference. (Fig. 6)
Baby food can also be warmed quickly if you select a position in this area.
Make sure to stir and check the food regularly during warming. Be careful
not to burn your ngers during stirring.
Note: The speed of warming milk/baby food depends on the amount of the
milk/baby food warmed and on its initial temperature, i.e. room temperature
(20°C) or fridge temperature (5°C).
5 The orange light goes on when you select a setting. This indicates
that the bottle warmer is on (Fig. 8).
Note: Whilst warming the milk circulates and heats evenly.
6 Check the warming reference table for the time required to warm
the milk. Remove the bottle/container from the bottle warmer
immediately after the warming is nished (Fig. 9).
Caution: Please make sure to check the milk/baby food on a regular
basis for temperature during warming.
Caution: If you leave the bottle/container in the bottle warmer too
long, the milk/baby food may become overheated.
Note: Due to the high variety of baby food consistencies, it is strongly
recommended to continuously stir and check while you are warming the baby
food for an optimal result.
ENGLISH10
Note: If you overheat breast milk, valuable nutrients and vitamins may be lost.
7 Always check the temperature before you feed your baby:
- Milk: Gently shake the bottle or milk storage container and check the
temperature of the milk by sprinkling a few drops on the inside of
your wrist. (Fig. 10)
- Baby food: Stir the baby food thoroughly and test it yourself with a
spoon to ensure it is not too hot. If the baby food is not warm
enough, put the container back into the bottle warmer and warm the
baby food until it has the desired temperature. (Fig. 11)
8 Turn the knob back to the ‘off’ position. The orange light goes
off (Fig. 7).
Caution: If you do not turn the knob back to the ‘off’ position, the
water keeps warming.
Caution: In case of selecting a position in the express warming area
which is not the beginning or the end, please make sure to check the
milk on a regular basis for temperature during warming.
Express warming reference table
ENGLISH 11
Note: The indicated warming times are based on Philips Avent Classic and
Natural PP bottle ranges. Be aware that warming times of Philips Avent
standard bottles and glass bottles deviate from these indications.
The characteristics of bottles such as material or thickness may also impact the
warming times, therefore it may take less time to warm a larger volume of milk.
Note: Due to the high variety of baby food consistencies, it is not possible to
indicate warming times for baby food.
Note: The warming indications in the table above are solely applicable to the
Express Warming setting of the product.
Note: The baby food or milk may feel cool to you, but for a newborn baby its
temperature is very pleasant.
Cleaning and descaling
Cleaning
1 After each use, unplug the bottle warmer and let it cool down (Fig. 13).
2 Remove the water from the bottle warmer for hygienic reasons.
(Fig. 14)
3 Wipe the outside and inside of the bottle warmer with a moist cloth
(Fig. 15).
Do not use abrasive, anti-bacterial cleaning agents, chemical solvents or
sharp tools to clean the bottle warmer.
Note: If you used the bottle warmer to warm containers with food, make sure
that no spilled food remains on the bottom of the bottle warmer.
ENGLISH12
Descaling
It is recommended to descale the bottle warmer every four weeks to
ensure it continues to work efciently.
1 Mix 50ml/1.7oz of white vinegar with 100ml/3.4oz of cold water to
descale the bottle warmer. Switch on the bottle warmer, select the
express warming setting at the beginning of the express warming
area and let the appliance operate for 10 minutes. Leave the
solution in the bottle warmer until all scale has dissolved (Fig. 16).
Note: You can also use citric acid based descalers.
Note: Do not use other types of descalers.
2 Turn the knob back to the ‘off’ position and unplug the bottle warmer
(Fig. 13).
3 Empty the bottle warmer and rinse its inside thoroughly. If you still
see traces of scale after rinsing, repeat the descaling procedure
(Fig. 14).
Recycling
Do not throw away the appliance with the normal household waste at
the end of its life, but hand it in at an ofcial collection point for recycling.
By doing this, you help to preserve the environment.
Guarantee and support
If you need information or support, please visit www.philips.com/
support or read the separate worldwide guarantee leaet.
Troubleshooting
This chapter summarises the most common problems you could
encounter with the appliance. If you are unable to solve the problem with
the information below, visit www.philips.com/support for a list of
frequently asked questions or contact the Consumer Care Centre in your
country.
ENGLISH 13
Question Solution
Which bottles or
food jars t in the
bottle warmer?
The bottle warmer is compatible with any Philips
Avent bottles, VIA storage cups, baby food jars or
tins as well as any other brand of baby bottles
which t in the bottle warmer.
How much water
should I add to
the bottle
warmer?
Fill the bottle warmer with water just above the
level of the milk/baby food. When the level of milk/
baby food comes above the bottle warmer rim, ll
the warmer up to 1cm below the rim. Never let the
water level rise above the neck of the bottle or jar.
Can I defrost milk
or baby food in
the bottle
warmer?
Yes, milk or baby food can be defrosted at the
defrost setting.
Why does it take
long to defrost
milk?
Milk should never be defrosted at high
temperatures because that can lead to loss of
nutrients. Due to the gentle temperature at which
the milk is being defrosted, it might take longer
than expected to defrost the milk.
Can I use the
bottle warmer to
keep milk or baby
food warm
overnight?
Yes, with the keep warming setting you can keep
milk or baby food warm at the right temperature.
It is recommended to feed your child as soon as
possible after the milk/baby food is warmed. We
advise not to reheat the milk/baby food.
How can it be
that the time
needed to heat
the milk or baby
food does not
correspond to
the times
indicated in the
reference table?
The reference table in the user manual gives an
indication of the heating time but the exact time
depends on several external factors like the
amount of the milk/baby food warmed, the initial
temperature of milk/ baby food, the consistency of
food, bottle material, water volume in the bottle
warmer. It is important to always check the milk/
baby food before feeding your child.
ENGLISH14
Question Solution
How can it be
that milk or food
becomes too
warm in the
bottle warmer?
If you do not take out the bottle or turn the knob
back to the ‘off position, the water keeps warming.
The temperature of the water can reach 95°C. If
you leave the milk/baby food for a longer time in
the bottle warmer, it can overheat.
What should I do
when white or
rust-coloured
spots appear
inside the bottle
warmer?
The white or rust-coloured spots are scale
deposits. It is recommended to descale the bottle
warmer every four weeks to ensure it continues to
work efciently. In areas with hard water, it can be
necessary to descale more frequent. See chapter
‘Descaling’ to learn how to descale your bottle
warmer.
ENGLISH 15
基本说明 (图 1)
1 温奶器
2 指示灯
3 设置旋钮
4 关闭设置
5 解冻设置
6 保温设置
7 快速加热设置
注意事项
为了您能充分享受飞利浦提供的支持,请在
www.philips.com/welcome注册您的产品。
使用温奶器之前,请仔细阅读本用户手册,
并妥善保管以供日后参考。
危险
-切勿将电源线、插头或产品浸入水中或其他
液体中。
警告
-仅限室内使用。
-切勿将电源线悬挂在桌子或工作台的边缘。
多余的电源线可存放在温奶器的底座上。
-不要让电源线接触到高温的表面。
-产品必须插入有接地的插座,且务必确保其
已正确插入。
-在将产品接通电源以前,首先确认产品底部
所标示的电压是否与当地的电压相符。
-如果需要使用延长线,确保接地延长线的额
定电流至少达到13安培。
16 简体中文
简体中文 17
-如果插头、电源线或产品本身已损坏,请勿
使用本产品。如果电源软线损坏,为了避免
危险,必须由制造商、其维修部或类似部门
的专业人员更换。
-切勿将产品置于加热的煤气灶或电饭煲附近
或发热炉具内。
-本产品不打算由肢体不健全、感觉或精神上
有障碍或缺乏相关经验和知识的人(包括儿
童)使用,除非有负责他们安全的人对他们
使用本产品进行监督或指导。
-应照看好儿童,确保他们不玩耍本器具。
-将产品及其线缆放在儿童接触不到的地方。
-请勿将水溅在电源插头上。
-为避免因误用而导致潜在伤害,请仅按照用
户手册中所述的方式使用产品。
-请勿对产品预热。
-务必将完整组装的带盖奶瓶放入温奶器中后
再加水。
-确保加水后再打开温奶器。
-热水可引起严重的烫伤。如果温奶器中有热
水,要特别注意。
-使用过程中,产品的可接触表面可能会变得
很热。
-请勿移动盛有热水的产品。
-食物或乳汁达到所需的温度后,请从温奶器
中取出存储杯或奶瓶。如果将食物或乳汁留
在温奶器中,其温度会升高。
-哺喂宝宝之前,请务必检查食物的温度。
18
注意
-本产品可用于家用及类似用途,如农庄、
提供住宿和早餐类型的场所、商店、办公场所
及其他工作环境中的员工厨房以及供旅店、
汽车旅馆及其他住宿型环境中的客人使用。
-不用时要拔下产品的插头。
-使用后,加热元件表面仍有余热。
-待产品冷却后再清洁。
-为避免对产品造成不可修复的损坏,请按照
除垢说明操作。
-请勿尝试自行打开或修理本产品。您可以联
系所在国家/地区的飞利浦客户服务中心
(请参阅 www.philips.com/support)。
您可以在温奶器底部的电线储藏格中找到产品
的日期代码YY/MM/DD。
电磁场 (EMF)
本飞利浦产品符合所有有关暴露于电磁场的适用标准和法规。
使用温奶器
使用本温奶器,您可以快速加热所有所有飞利浦新安怡奶瓶和母
乳/婴儿食物存储杯及其它婴儿食物储存杯。
注意: 不能在本温奶器中使用飞利浦新安怡母乳储存袋和飞利浦
新安怡 2 安士/60 毫升奶瓶。请将母乳倒入奶瓶,然后用温奶器
加热。
简体中文
设置说明
-关闭设置:温奶器关闭,指示灯熄灭。打开所有其它设置,
产品打开,指示灯亮起。(图2)
-解冻设置:缓慢加热乳汁/婴儿食物并保温,直至产品关闭。
-保温设置:产品关闭前缓慢加热乳汁/婴儿食物并保温。
-快速加热设置:快速加热乳汁/婴儿食物。加热后需立即取出奶
瓶,否则乳汁会过热。
使用使用温奶器解冻功能
1 将电源插头插入插座。 (图 3)
2 将奶瓶或存储杯放入温奶器中。 (图 4)
3 向温奶器中注入纯净水,使水位达到奶瓶或存储杯中乳汁/婴儿
食物的位置。如果乳汁容量很大,则最高水位为温奶器顶部以
下1厘米处。 (图 5)
4 选择解冻设置。 (图 6)
在此设置下,冷冻的乳汁/婴儿食物可以解冻至液态。冷冻的乳
汁/婴儿食物可能需要2小时来解冻,这取决于乳汁的容量。
当乳汁/婴儿食物解冻后,选择保温设置或快速加热设置进行加
热。解冻后的乳汁/婴儿食物约为冰箱冷藏室温度,可作为加热的
起始温度参考。
注意: 由于婴儿食物的稠度各异,强烈建议您在解冻婴儿食物时
不断搅拌并检查,以便获得理想效果。
5 解冻完毕将奶瓶/存储杯取出时,将设置旋钮旋转回关闭设置。
(图 7)
使用温奶器保温功能
1 将电源插头插入插座。 (图 3)
2 将奶瓶或存储杯放入温奶器中。 (图 4)
3 向温奶器中注入纯净水,使水位达到奶瓶或存储杯中乳汁/婴儿
食物的位置。如果乳汁容量很大,则最高水位为温奶器顶部以
下 1 厘米处。 (图 5)
4 选择保温设置。 (图 6)
简体中文 19
在此设置下,您可以缓慢加热乳汁/婴儿食物至合适的温度并保
温。取决于母乳/婴儿食物量和婴儿食物的稠度,所需加热时间可
能更长/更短。
注意: 飞利浦新安怡建议您在母乳/婴儿食物加热后尽快哺喂宝宝。
我们建议不要在母乳/婴儿食物冷却后重新对其加热。
注意: 哺喂宝宝之前,务必检查乳汁或食物的温度。
5 结束保温将奶瓶/存储杯取出时,将设置旋钮旋转回关闭设置。
(图 7)
使用温奶器快速加热功能
1 将电源插头插入插座。 (图 3)
2 将奶瓶或存储杯放入温奶器中。 (图 4)
3 向温奶器中注入纯净水,使水位达到奶瓶或存储杯中乳汁/婴儿
食物的位置。如果乳汁容量很大,则最高水位为温奶器顶部以
下 1 厘米处。精确的水位可确保正确的加热效果。 (图 5)
4 将设置旋钮旋至转快速加热设置。若乳汁容量低于 180 毫升,
请选择快速加热设置的起始位置,若乳汁容量为 180 毫升及
以上,请选择快速加热设置的终止位置。 请参考快速加热时间
参考表。 (图 6)
如果您选择该区域中的位置也可以快速加热婴儿食物。在加热过
程中,确保经常搅拌并检查食物温度。搅拌时注意不要灼伤手指。
注意: 加热速度取决于需加热的乳汁/婴儿食物的量及其初始温度,
如室温 (20°C) 或冰箱温度 (5°C)。
5 选择快速加热设置后橙色指示灯会亮起。这表示温奶器已打开。
(图 8)
注意: 温奶器加热乳汁时,可使乳汁自然对流,使瓶内温度趋于
平衡,确保均匀加热。
6 查阅快速加热时间参考表。加热合适的时间后,请立即将奶瓶/
储存杯从温奶器中取出。 (图 9)
注意: 加热期间,请确保及时检查乳汁/婴儿食物的温度。
简体中文20
/