Page is loading ...


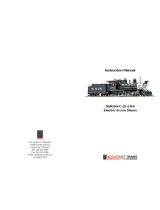
INTRODUCTION
The Sandy River & Rangely Lakes Railroad was a two foot gauge line in
Franklin County, Maine, USA. Set in the hills and forests of this New
England State, it was aptly named, “The Scenic Route”.
Building started in the 1870s and the line reached its peak around the time
of the First World War when it had some sixteen locomotives operating
on the 113 miles of track that made up the system
Falling revenue during the late 1920s and the effects of the great
depression forced the line to close in 1932. That was not the end however,
for the Railroad Commission ordered it to reopen the main line from
Farmington to Phillips and a branch line from Strong to Carrabassett
following representations from local officials and business. The service
recommenced on April 17th 1933, the first train hauled by No.24, but the
hard times continued and eventually, in 1935 the line closed for the last
time. In 1936 a public auction was held and the remaining equipment was
sold, what wasn't sold was scrapped.
No 24 was the second largest locomotive bought by the company. It was
built by Baldwin Locomotive Works in 1919 as works No.51804. It
weighed in at 43.75 tons, was over 46 feet in length and had a tractive
effort of 1O,115 lbs. It cost the company $15,200 and proved to be an
excellent piece of motive power.
When the line closed in 1935, it was bought by a rail fan for a reported
$250; however he later resold it for scrap.
The Sandy River & Rangely Lakes Railroad has a fascinating history and
is well documented. We recommend the following to those who would
like to know more about this great narrow gauge line and its stock.
Two Feet Between the Rails by Robert C. Jones, published by
Sundance Books in two volumes.
Main Two Foot Pictorial by Gary Kohler, published by
Railhead Publications.
Ride The Sandy River, a video by Steam Powered Video.
2

3
CONTENTS
Tool kit. Page 4
Running in. Page 4
Access to controls. Page 4
Coupling engine and tender. Page 4
Identification of parts of the locomotive. Page 5
Preparations for operation. Page 6
1. Filling the Gas Tank. Page 6
2. Filling the Boiler. Page 7
3. Lubrication. Page 8
4. Lighting the Burner. Page 8
Running the locomotive. Page 9
Driving manually. Page 10
Driving by radio control. Page 11
Storage between operating sessions. Page 12
Altering wheel gauge. Page 13
Trouble shooting & maintenance. Page 13
Steam leaks. Page 14
Regulator not shutting. Page 14
Radio control. Page 14
Gas system. Page 15
Boiler and Gas Tank Certificate, Pages 17 & 18
(EC Declaration Of Conformity).
Service and parts. Page 20
SR&RL Instruction Booklet

TOOL KIT
The following items are included with your locomotive.
One 60ml bottle of special steam oil for use in the cylinder lubricator.
One 60ml syringe with plastic tube for filling the boiler with water.
One set of spare washers and ‘0’ rings.
One pair of protective gloves.
One cleaning duster.
One water pump bottle.
One spare gas jet.
One wheel setting (back to back) gauge and key.
RUNNING IN
All locomotives are test run before leaving the factory, but will require
several hours of running in, when new, to overcome initial tightness and
allow valves etc. to ‘bed in’ completely. It is recommended that the model
is run with light loads for the first few hours of operation. Also, the loco
will waste a proportion of its water and steam until ‘run in’ due to leaking
slide valves, a tendency to prime more, and simply overcoming the initial
tightness of the moving parts. As the model heats up and cools down each
time you raise steam, screws and nuts have a tendency to stretch and
loosen a little so you will also need to make regular checks and ‘nip up’
any that become loose. Most are quite visible and easy to get to however if
there is any steam leaking from the valve chests on top of the cylinders,
refer to the Trouble Shooting section.
ACCESS TO THE CONTROLS
For normal operation, all controls are accessible without the need to
remove any part of the locomotive, however, for ease of servicing, the cab
roof hinges up. Lift the front of the roof vertically a little then it will hinge
forward if lifted from the rear. The gas regulator is accessible through the
right hand cab window and on manual control engines, the steam regulator
is accessible through the rear cab doorway and reversing lever through the
left hand cab window. The radio control receiver, batteries and switch are
all housed in the tender and access to the receiver and batteries is gained
by lifting the dummy coal load. Batteries are not included.
COUPLING ENGINE AND TENDER
On radio controlled versions, the servo leads should be coupled to the
leads from the tender. Ensure that any plug with a coloured dot (red or
white) is connected to a socket with a similar marking.
The tender has a coupling hook on the front bogie which should be fitted
into the hole in the draw bar from the rear engine pony truck.
4

OPERATING INSTRUCTIONS
IMPORTANT: Read these instructions carefully before operating the
locomotive
The following items are required for running this engine and are not
included with the model.
Fuel Butane gas. See 'Filling the gas tank'
Water See 'Filling the boiler'
Lubricating oil See 'Lubrication'
5
IDENTIFICATION OF PARTS OF THE LOCOMOTIVE
Radio controlled version illustrated
1) Pressure gauge. 2) Boiler filler plug. 3) Safety valve.
4) Boiler top up valve. 5) Gas filler valve 6) Gas regulator.
7) Gas burner. 8) Lubricator cap. 9) Water gauge.

6
SAFETY PRECAUTIONS
This is a working model locomotive using steam under pressure and
highly flammable fuel. Provided it is operated with reasonable care and
attention, no problems should arise.
It is intended for use out of doors and must only be operated in a well
ventilated area.
Whilst the locomotive is in use, hot gasses are exhausted up the chimney
and excess steam frequently blows off through the safety valve even when
stationary, so operator and spectators should not bend over the model.
As you will appreciate, this is not a toy and is therefore unsuitable for
young unsupervised children.
Follow manufacturer’s recommendations regarding the safe storage of
Butane gas canisters.
Some areas of the model will get quite hot whilst it is operating, so a pair
of gloves is provided in the tool kit for your protection.
Always have to hand either a fire extinguisher or wet cloth when
operating the model.
PREPARING FOR OPERATION
The locomotive must be serviced before being operated. It is important to
perform all the following operations.
1) FILLING THE GAS TANK
The filling of the gas tank should only be carried out in a well-ventilated
area, where there are no naked lights or other lighted locomotives close
by. Ordinary Butane or Iso-butane gas (as used in gas cigarette lighters) is
the preferred fuel, though for economy, the larger canisters as used for
blowlamps or camping stoves etc. are better. The larger canisters have an
EN417 threaded self sealing valve on top and require a special adapter to
couple up to the filler valve on the locomotive. A special brass gas filler
adapter is obtainable from your local garden railway supplier or direct
from ROUNDHOUSE. Mixed gasses are also available and may be used

if ordinary butane or iso-butane are not available, but see the ‘Gas
System’ section for more information on this subject.
Before attempting to fill the gas tank, make sure that the gas control valve
is closed by turning it clockwise.
The filler valve for the gas tank is on top of the tank under the cab roof.
Invert the gas canister and place its nozzle over the gas filler valve.
Support the tank from underneath and press the canister down. The gas
will be heard hissing as it enters the tank and a small amount will escape
around the valve. This is quite normal and is the tank venting as the liquid
enters. After about 20 to 30 seconds, liquid gas will emerge from the
valve showing that the tank is full. Remove the canister immediately.
2) FILLING THE BOILER
A syringe and plastic pipe are supplied for initial filling of the boiler. The
boiler is filled with water through a plug under the dummy steam dome on
top of the boiler. The dummy steam dome is a substantial and heavy item
and care is needed when removing it, especially when the engine is hot, as
the dome itself will be hot. Take care not to drop the dome onto the
locomotive, as the weight of it may damage the model. Lift off the dome
then unscrew the large knurled plug complete with safety valve and, using
the syringe supplied, fill the boiler right to the top with clean water.
Distilled water is recommended if available. As an alternative to distilled
water if this is unavailable, clean tap water can be used in soft water areas.
Also, rain water or water from a dehumidifier can be used provided that it
is adequately filtered
Do not use deionised water as this may cause long term damage to the
boiler and fittings.
There has to be a space above the water to allow steam to be raised so,
insert the end of the plastic pipe into the boiler and withdraw 30ml of
water with the syringe. Replace the plug, finger tight followed by the
outer dome.
A water gauge is fitted to the rear of the boiler to show the water level.
7

3) LUBRICATION
Regular lubrication of all working parts is important and should be carried
out before each operating session. There are two types of lubrication
required: The external moving linkages and bearings are lubricated with a
medium oil such as motor engine oil, and the internal steam mechanisms
such as cylinders, pistons and valves are lubricated with a special steam oil
that is mixed with the steam. Infrequent external lubrication will allow
parts to run dry, and over oiling can form pools around operating parts that
attract dirt and grit. If too thin an oil is used it will evaporate very quickly
as the loco gets hot – leading to dry running. We recommend the use of a
20-50 motor oil for external lubrication.
Internal lubrication is achieved by steam oil that is mixed with the steam in
the displacement lubricator, housed in the left-hand side of the cab. Hinge
up the roof and remove the knurled cap from the top and slacken the drain
screw, at the bottom under the cab floor, two or three turns but do not
remove it. Any water in the lubricator will run out through the drain screw.
Tighten the drain screw and refill with the steam oil supplied, then replace
the cap. Take time filling the lubricator, especially when cold, as the oil
takes time to run down and may trap an air bubble. Both cap and drain
screw are fitted with ‘0’ rings and need only be closed finger tight.
NOTE: Only special steam oil as supplied should be used in the lubricator
and under no circumstances should ordinary oil be substituted, or damage
may result. The gas and steam regulators will require periodic lubrication
– see the troubleshooting section for details.
4) LIGHTING THE BURNER
WARNING: Before lighting read the ‘Gas System’ section and be aware
of potential problems. If the gas system is not operating correctly, shut it
off immediately or damage may result. Move the locomotive to another
location before lighting. Butane is heavier than air and small pockets of
gas can collect around the locomotive during filling.
To light the burner, hold a lighted match or cigarette lighter over the top of
the chimney and slowly open the gas regulator by turning it anti-
clockwise. The gas should ignite almost immediately with a pop as the
flame travels down the chimney and into the boiler tube. The burner
should be audible but not too loud.
8

NOTE as stated above, the gas regulator should be opened slowly until
the burner ignites. If opened too quickly, particularly when the engine is
cold or if the gas tank has just been filled, it is possible that the flame may
not travel back into the boiler flue but stay in the smokebox. If this should
happen, the burner will sound quite different to normal and the blue flame
will be visible in the smokebox if viewed down the chimney from a safe
height. Should this happen, turn off the gas immediately or damage may
result and then re-light it. If the problem persists and it is not possible to
ignite the burner correctly, then a dirty jet should be suspected and
cleaned as detailed in the ‘Gas System’ section
For the first couple of minutes keep the burner on low. This is important,
as until it warms up, the flame will be a little unstable and turning it up
too much could cause it to go out. Also, with a completely full tank, liquid
gas could be drawn off instead of vaporized gas, which can also
extinguish the flame.
After a couple of minutes, the gas control valve can be opened more to
speed up steam raising. Open the gas regulator slowly to about one full
turn. The full range of adjustment (closed to fully open) is achieved within
the first full rotation of the gas regulator knob any more is unnecessary.
RUNNING THE LOCOMOTIVE
When full working pressure has been reached (about 40psi), the safety
valve will start to blow off steam. Steam generation can be controlled by
the gas valve in the cab. If the safety valve blows off frequently during
running, then too much steam is being produced, which wastes water and
gas. Turning down the burner will decrease the amount of steam created.
Conversely, if steam pressure is not maintained during a run, then the
burner should be turned up. After a few minutes of running it may be
noticed that the gas pressure through the burner has increased. This is due
to the gas tank becoming warmer and so increasing the gas pressure.
Simply turn the gas down – this may need to be performed several times
during a run. The art of balancing steam generation to the operational
requirement by the adjustment of the gas control valve will quickly be
learned.
The gas tank has a duration of about 25 minutes, though this will vary
depending on gas valve setting. The boiler should not be allowed to run
dry, and the gas tank capacity is such that the gas should run out before
9

the water. Always keep an eye on the water level as indicated by the
boiler water gauge. Extra water can be pumped into the boiler at regular
intervals to maintain the level about 1/2 to 3/4 up the glass.
A top up valve is fitted to the top of the boiler inside the cab. Push the end
of the plastic pipe on the pump bottle into the fitting and pump the handle.
This will inject water into the boiler against steam pressure.
Remove the pipe carefully. Note
that a small amount of water will
sit in the top up valve after the
pump bottle tube is removed and
this will bubble and boil away for
a few moments as the fitting
returns to its normal working
temperature. This is quite normal
and is not a sign of a leaking
valve. The engine can be kept in
steam indefinitely, by refilling the
gas tank each time it becomes
empty and keeping the boiler full
of water by means of the water
pump bottle, but, lubrication must not be forgotten. The lubricator has a
duration of around 30-40 minutes, so this must be drained and refilled
with steam oil each time the gas tank is refilled. When the gas is fully
used up, the steam pressure in the boiler will be seen to gradually drop
until the loco comes to a halt. Should the water expire before the gas is
fully used, the pressure will drop rapidly and the loco will stop. Check the
pressure gauge – if this is zero turn off the gas. No damage will result if
the gas is turned off immediately.
DRIVING THE LOCOMOTIVE MANUALLY
On manually controlled locomotives, there are three main controls, all of
which are housed in the cab.
1) The gas regulator, which should be used to control steam generation as
described earlier.
2) The reversing lever. This is in the left-hand side of the cab and is
moved fully forward for running in a forward direction and full back to
10

run in the reverse direction. It should be parked in the centre (mid gear)
when the locomotive is stationary for any length of time. When in mid
gear position, the valve gear is effectively in neutral and the engine will
not move under steam power.
3) The regulator. This is the main steam control valve and regulates the
speed at which the engine will run. The regulator is accessible through the
rear cab doorway and is moved anti-clockwise to open and clockwise to
close.
Using the reversing lever, select the desired direction of travel and open
the regulator a little. Initially, there will be a certain amount of water in
the pipes and cylinders, which will exhaust into the chimney and drop
down below the smokebox, for a few moments, the engine may move
jerkily until this clears. Once the parts have warmed up, the engine will
move off steadily and its speed can be controlled with the regulator.
Subsequent starts will be quite smooth once the cylinders etc. have
reached their normal operating temperature.
To reverse the locomotive, close the regulator to bring it to a halt, move
the reversing lever over and open the regulator again.
The art of fine control will soon be learnt with a little practice.
DRIVING BY RADIO CONTROL
This model is fitted with 2.4 GHz R/C equipment. On a Radio Controlled
model, speed and direction are controlled by the transmitter. First, turn on
the transmitter and then switch on the receiver on the locomotive with the
switch on the front of the tender. The left hand stick on the transmitter
controls the steam regulator, down for stop up for go. Moving to the left
or right has no function.
The right hand stick operates the reverser, left for forward and right for
reverse. This stick is sprung loaded to return to its central position.
Moving up or down has no function. Using the transmitter, select the
desired direction of travel and then slowly open the regulator. The
locomotive will now move off as described in the manual control section.
For more information on using the radio control equipment, see the
11

manufacturer’s instruction booklet supplied with the Radio Control Set.
The art of fine control will soon be learnt with a little practice
NOTE:
Ensure that the valve gear is fully in gear for the required direction when the
engine is moving. The model is fitted with a simplified Walschaerts type
valve gear which is not suitable for 'notching up' (altering the cut off).
Always bring the locomotive to a halt by closing the regulator before
changing direction. If an emergency stop is required, simply release the
reversing lever, which will spring back into mid gear and halt the train.
Then close the regulator. Always ensure that the regulator is closed before
switching off the transmitter. Always switch off the receiver and transmitter
when not in use to preserve battery life.
It is good practice to switch on the transmitter before the receiver and switch
off the receiver before the transmitter. In this way, the radio receiver is
never on when the transmitter is switched off and so should always be under
your control.
When the batteries are getting low, a poor signal between transmitter and
receiver will result and control of the engine will become erratic. Refer to
the instructions supplied with the radio control equipment. The receiver
batteries are housed in the tender, underneath the dummy coal load.
STORAGE BETWEEN OPERATING SESSIONS
At the end of an operating session, it is good practice to clean the
locomotive carefully with a clean soft cloth, and to oil all bright metal parts.
Do not leave fuel in the gas tank.
Do not leave water in the boiler for long periods.
Do not store in places where the temperature may drop below freezing
as water may still be present in the pipework.
Ensure all controls are closed and the valve gear in mid gear.
Ensure that radio control equipment is switched off and, if the engine
is not to be used for some time, remove all batteries.
Periodically it may be necessary to wash off all traces of dirt and old oil
from the moving parts with paraffin (not thinners). This will remove any
12

accumulations of dirt or grit. After washing with paraffin, leave to dry
thoroughly overnight before re-oiling. It is most important that clean oil is
applied and allowed to penetrate fully into all moving parts before the
locomotive is run again. Manually moving the locomotive back and forth
will assist in distributing the oil fully. Under normal operating conditions
this procedure should not be required more than once or twice per year.
ALTERING WHEEL GAUGE
The wheels are set at the factory for the specified gauge however, for
those who wish to alter this to run on other people’s railways or if you
change the gauge of your track, they are easily reset with the aid of a
conversion kit available separately.
The driving wheels are moveable on their axles and are locked in place by
a small grub screw. They should be adjusted so that the "back to back"
gauge supplied in the kit will just slip between their inner faces. Ensure
that the wheels are evenly spaced relative to each side frame.
To allow for variation in track standards from different manufacturers, the
back to back measurement can be altered from that set by the gauge
supplied.
The driving wheels on this model are fitted with special hard nylon centre
bosses to give electrical insulation when running on railways with electric
track control. Do not over tighten the grub screws, just nip them
sufficiently to hold the wheels in place and check periodically.
Pony truck wheels are swapped for those of the required gauge by
removing the keeper plates. These are held in position by the spring
plunger units that form part of the locomotives suspension. Ensure that
these are replaced correctly and any spacing washers are in the correct
place. The tender bogies are swapped for those of the required gauge by
removing the pivot screws from the underside of the tender frame (two
self tapping screws).
TROUBLE SHOOTING & MAINTENANCE
On a working model of this nature, it is important to keep all working
parts well lubricated. With constant heating up, cooling down and the
stresses of hard work, screws etc. can work loose so, it is good practice to
13

check all fixings and cylinder screws regularly but remember, never over
tighten.
STEAM LEAKS
The cylinders are fitted with '0' rings in the glands sealing both piston and
valve rods. These can be adjusted with a spanner if steam leaks develop.
They should only be tightened just enough to stop the leak, as over
tightening will affect the running of the model. Cylinder covers are fitted
with gaskets and valve chests with ’O’ rings. A little ‘bubbling’ of oil may
sometimes occur around these and is quite normal; however, steam
leaking past the gasket should be attended to. If ‘nipping up’ retaining
screws does not stop a steam leak, a service kit is available which includes
replacement gaskets and seals and full instructions for fitting. Valve chest
screws on top of the cylinders are accessed by removal of the dummy
cylinder cover which simply clips round the cylinder. Spring it gently out
from the bottom and lift off the valve chest at the top.
REGULATOR NOT SHUTTING (R/C models)
The steam regulator seating and seal can, after a period of time become
worn or compressed so that when the lever on the radio control is fully
closed, the locomotive still moves. To overcome this, a trimmer is fitted to
the transmitter. This is the small lever at the side of the main control lever
and is set at the factory to the top of its slot. As wear takes place in the
regulator, it can slowly be moved down the slot to compensate. When it
reaches the bottom, it is time to reset it to the top and adjust the linkage
between the servo and the regulator in the cab. If adjustment does not cure
this problem, the internal '0' ring may be damaged and requires
replacement. Contact the factory for further advice. Periodic oiling of the
gland will help keep the regulator working freely. Place a spot of motor
oil between the gland nut and the regulator arm and work the regulator a
few times.
RADIO CONTROL
If the radio control gives problems, always check the batteries first and
replace if in doubt. AA size batteries are used, both in the locomotive and
in the transmitter. For further details of the Radio Control equipment,
refer to the manufacturers literature supplied.
14

GAS SYSTEM
SR&RL#24 locomotives are fitted with our 'FG' type gas burner, which is
set up and fully tested at the factory.
This system is designed for use with Butane or Iso-Butane gas. Mixed
gasses, i.e. Butane with a proportion of Propane mixed in, are available,
and may be used if straight Butane is unavailable. These come in a variety
of mixes ranging from 90/10 to 60/40 with one of the most common being
70/30. The figures refer to the proportions of the mix i.e. 70/30 contains
70% butane and 30% propane. If using mixed gasses, always choose the
one with the largest proportion of butane. The addition of propane slightly
alters the gasses properties. This can make the burner a little more
difficult to light when cold or after filling the gas tank.
Always open the regulator very slowly when lighting, and only just
sufficient for ignition to take place. Opening too much too soon may
extinguish the flame until the burner reaches normal operating
temperature.
The tiny jet in these units can become blocked by small particles of dirt
making the burner difficult to light, burn weakly at normal operating
temperatures*, burn in the smokebox or fail completely. If any of these
should happen, clean out the jet as follows. (* On very cold days, a burner
may start off burning weakly due to the temperature of the gas but should
increase to its normal level as the engine warms up. This is quite normal)
Carefully, disconnect the gas pipe from the gas jet holder using a 2BA
spanner.
Note when connecting or disconnecting the gas pipe and jet block, do not
use excessive force. Always hold the end of the gas burner near the air
holes to support it otherwise it is possible to cause damage by bending the
body. Slacken the screw retaining the gas jet holder and slide it out to the
rear. Remove the jet from the gas jet holder using a 4BA spanner.
Wash out the jet in fast evaporating thinner (Cellulose or similar). Blow
through the jet from the front, which should clear most blockages.
Although the hole through the jet is tiny, if you hold it up to the light you
should be able to see quite clearly if it is blocked or not. If in doubt, fit a
new jet. A spare gas jet is included with the toolkit. Do not use wire to
clean the jet as this can damage the precision hole and may upset the
15

delicate balance of the gas system.
Reassemble in the reverse order, putting a small amount of PTFE tape
round the thread of the jet. Ensure all connections are tight. When re-
positioning the gas jet holder in the burner, ensure that it is pushed in as
far as it will go.
The gas regulator has a spindle ‘O’ ring housed inside the body which
may need lubrication from time to time if the control becomes ‘spongy’ in
operation, making precise gas control difficult.
As stated previously, the full range of adjustment for normal burner
operation is achieved within the first full rotation of the regulator knob
and it should only be unscrewed more than this for maintenance purposes
and when the tank is empty, and there are no naked lights nearby.
To lubricate it, remove the knurled knob which is retained by a M3 socket
grub screw (M1.5 AF Allen key required) in the side.
Beneath the knob is a back-lash spring and white PTFE washer which will
slide off the spindle. Unscrew the hexagon retaining nut then screw the
spindle out of the body. The ‘O’ ring can now be lubricated.
Replace the spindle followed by the retaining nut. Slide the white PTFE
washer and backlash spring over the spindle and replace the knob. Note
that the grub screw that holds the knob in place tightens into a groove near
the end of the spindle.
16
Gas Regulator (Internal Parts)
Regulator
Body
Back-Lash
Spring
Regulator
Spindle
White PTFE
Washer
Knurled
Knob
‘O’ ring to be
lubricated
Hexagon
Retaining
Nut


Please refer to the ‘owners handbook’ for your particular model of
locomotive, for details on correct use of these pressure vessels.
Pressure vessel care and maintenance
Gas tank
The gas tank is used for the storage of LPG (liquefied petroleum gas)
in the form of butane, iso-butane or as set out in the ‘owners
handbook’.
The tank is fitted with a self-venting filler valve which contains no
serviceable parts. Should the filler valve become defective in any way,
it must be replaced with a new item.
It is recommended that the gas tank should undergo the following
checks, carried out by a ‘competent person’, club, society or pressure
vessel manufacturer, every year:-
1) thorough visual inspection.
And every five to ten years:-
1) hydrostatic pressure test to not less than 1.5 and not more
than 2 times the maximum working pressure.
Boiler
The boiler is fitted with a safety valve to prevent the steam pressure
rising above the maximum allowable working pressure. This is pre-set
to open at between 2.38 bar (35 psi) and 2.72 bar (40 psi) and must
not be adjusted to increase this value. If the safety valve becomes
defective in any way, it should be replaced or returned to the factory
for service and calibration.
It is recommended that the boiler should undergo the following
checks, carried out by a ‘competent person’, club, society, or pressure
vessel manufacturer, every one to two years:-
1) thorough visual inspection.
2) hydrostatic pressure test to not less than 1.5 and not more
than 2 times the maximum working pressure.
3) steam test to check the correct functioning of all steam
controls, gauge and safety valve.
18

Gas Burner
1). Superheater Pipe.
2). Lubricator Pipe.
3). Gas Jet Holder
retaining screw.
4). Gas Jet.
5). Gas Jet Holder.
6). Gas Pipe.
7). Gas Burner fixing
screw.
8). Air Inlet Holes.
19
BOILER FILLING SYSTEM
The boiler filling system is comprised of a hand held pump bottle which
feeds through a flexible water pipe to a check valve on top of the boiler.
No special maintenance is required, though the end of the plastic tube will
require trimming back occasionally. As it is being pushed into a tapered
hole in a hot fitting
every time it is used,
the end gradually
becomes smaller until
it is too loose to seal
and water leaks out as
the bottle is pumped.
When this happens,
simply cut off about
10mm from the end of
the plastic tube with a
pair of scissors or
sharp knife.

20
SERVICE AND PARTS
If any problems arise with this model which are not covered in
these operating instructions or spare parts are required, owners
should first contact their local dealer. Your ROUNDHOUSE dealer is;
If your dealer is unable to help, please contact the Factory directly:
ROUNDHOUSE ENGINEERING CO. LTD.
Units 6-10 Churchill Business Park. Churchill Road.
Wheatley. Doncaster. DN1 2TF. England
Telephone: 01302 328035 Fax: 01302 761312
Email: [email protected]
www.roundhouse-eng.com
ONLINE
/