Page is loading ...

Installation
Instructions
Product #: SA9012
SLS LED
Recessed/Surface
Mount Puck Light
(1.4W)
IMPORTANT: Please read these instructions before starting installation and retain for future reference.
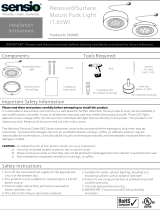
Components: Tools Required:
Important Safety Information
Safety Instructions
Drill
Please read these instructions carefully before attempting to install this product.
It is advisable to keep these instructions in a safe place for further reference. These products must not be modified; if
any modifications are made, it may invalidate the warranty and may render the product unsafe. These LED lights
operate on low voltage (24V). Do not wire the individual LED light fixtures directly to line power. This product is for
indoor use only. Keep out of moisture and use only in dry rooms.
The National Electrical Code (NEC) does not permit cords to be concealed where damage to insulation may go
unnoticed. To prevent fire danger, do not run cord behind walls, ceilings, soffits, or cabinets where it may be
inaccessible for examination. Cords should be visually examined periodically and immediately replaced when any
damage is noted.
CAUTION - To reduce the risk of fire, electric shock, or injury to persons:
a) Use only insulated staples or plastic ties to secure cords
b) Route and secure cords so that they will not be pinched or damaged when the cabinet is pushed to the wall
c) Not in-tended for recessed installation in ceilings, or soffits.
1.Turn off the main electrical supply for the appropriate
circuit at the breaker box.
2.This product is only suitable for connecting to a 24V DC
power source.
3.Position lights where they will not be exposed to
steam, splashes, etc.
4.The LEDs in this fixture cannot be replaced.
5. Suitable for under cabinet lighting, attached to a
mounting surface such as wood or laminate.
6.Failure to use surge protection in problem areas will
void the warranty.
7.Use only approved accessories.
8.IMPORTANT: Fixture must NOT be covered by
insulation.
Surface-mount
Fixture Ring
Recessed/Surface
Light
Installation
Instructions
Screws
Drill Bit
9-11mm
(3/8”-7/16”)
Screwdriver Bit
(for surface mounting)
Hole Saw
60mm (2-3/8”)
(for recessed mounting)

SLS LED Recessed/Surface Mount Puck Light
1
Drill a 2 3/8” (60mm) hole
2
Feed driver lead through hole
3
Press lamp into hole (go to step 5)
A) Recess Mount for Inside Cabinet Top or Double-Walled Cabinet Bottom
1
Drill a 3/8”-7/16” (9-10mm) hole for
driver lead
Mount fixture ring with screws
2
3
Thread lead through hole (go to step 4)
B) Surface Mount Cabinet Top
C) Surface Mount Cabinet Bottom
Mount fixture ring with screws (go to step 4)
Thread driver lead through lead notch
1
Sensio America
877-501-5337
www.sensioamerica.com
• Ensure that the power is disconnected prior to cleaning.
• To keep the finish of this product, wipe over with soft cloth
periodically.
• Do not use harsh chemical solvents, it may discolor or
damage the finish.
Maintenance & Care
Support
4
Press lamp into ring
5
Run lead to driver
LED Power
Supply
Distributo
r
6
Connect driver to power
Final Steps (FS)
Mounting Options
2
/


