Page is loading ...

1
2021.09
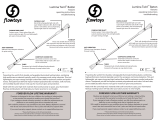
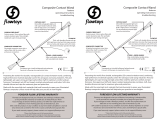
FLOWTOYS COMPOSITE SYSTEM - COMPONENTS
FLOWLIGHT-FS: World’s most revolutionary LED glowstick. Beautifully
sculpted polycarbonate shell refracts full spectrum LEDs. 40 adjustable
modes with many bright and beautiful color and pattern options, kinetic
awareness, accelerometer response, battery and charge level indicators and
more. 1 rechargeable AAA provides 3-27 hours runtime. Connect as many as
you like to ll your tubes with lights.
CAPSULE 2: Amazing capsule light with over 60 adjustable modes, up to
60 programmable modes, wireless connectivity, USB rechargeable, custom
high-temp super bright LEDs, adjustable brightness, accelerometer, motion
responsive modes, USB rmware updateable with more features to come.
1” CLEAR TUBES: Highest quality polycarbonate extrusion, transparent yet
virtually bulletproof, connects to caps and connectors via snap-button holes.
Available in a variety of interchangeable lengths for instant reconguration.
CARBON FIBER SHAFT: Custom woven carbon ber composite with
smooth, glossy nish, 12mm and 15mm diameters. Thin and light-weight
yet super-strong and rigid, enabling eortless ow.
ELASTOMER GRIP: 1mm thick tubing of a proprietary elastomer blend (our
supplier won’t even tell us the formula!). Incredibly grippy and durable, yet
translucent. Encases carbon ber shafts for seamless grip.
TUBE-SHAFT CONNECTORS: Custom 3D-printed parts that screw into the
carbon ber and create a rm connection between the polycarbonate tube
and carbon ber shaft. Tube can be twisted o for travel.
FLOWCAP: Thick, soft, durable silicone body. Inner polycarbonate snap-
cap buttons snap securely onto tubes and release with a rm twist. Built-in
button compatible with capsule lights; connects to owlights with adaptor.
FLOWLIGHT ADAPTOR: Allows you to connect owlights to owcaps. Pops
on and o easily, but will not release owlight when inside a tube.
POD SHELL: Beautiful, thick, super-soft and durable silicone, built-in but-
ton compatible with capsule lights, strategic internal petal-ribs provide
structure and focus mass at the bottom for great rotational inertia. Pod
shells attach to tubes with a friction t - please read instructions and
use caution.
FLOWMASS: These translucent crystalline-looking weights add more
inertia to your ow and optimize the balance of your sta. Add two or more
if you like your tools heavy!
CAPSULE LINK: Tiny but tough, this link ts inside leash-ports of 2 capsules
to link them securely inside tubes. Leaves both buttons accessible.
More modular system components, details and info available on
www.owtoys.com/PARTS
3
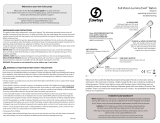
Composite System Guide
features
operating instructions
troubleshooting
inspiration
high performance modular system
endless possibilites for ow
Com·pos·ite: (adjective) made up of various parts or elements.
Composite material: (noun) a combination of two or more distinct materials, each of
which retains its own distinctive properties, to create a new material with properties that
cannot be achieved by any of the components alone.
The Flowtoys Composite System is an extension of our Modular System and combines
high-performance materials typically used in the aerospace and racing industries to
provide incredible equipment for ow. Thin and lightweight, yet super-strong and rigid
carbon ber shafts for optimum comfort and performance. Transparent yet impact-
resistant polycarbonate end-tubes. Soft and clear, yet incredibly durable silicone end caps
for maximum glow and protection. Versatile modular components to enable the perfect
combination of style, length and weight for you!
Made with the same high-tech materials that took humanity to space, your Composite
Flowtoys will help take your ow practice to new dimensions. The world just became a
little more awesome for all of us.
1. Do not use glowsticks or WD-40 with tubing. While polycarbonate is very
strong, it breaks down in the presence of certain esters, including those produced by
chemical glowsticks, mineral spirits and WD-40. Do NOT put chemical glowsticks into
the tubes, otherwise they can become brittle and shatter. If you need to, we recom-
mend lubricating tube parts with vaseline/petroleum jelly.
2. Modularity. Check your components! Most composite system parts are modular
and interchangeable, but not all sizes or all parts go together. A 12mm shaft needs a
12mm connector. Flowlights require an adaptor for the cap and will not t in a
1-capsule tube (for example). Pod shells require C-rings on capsules. Find more tips
for your rig in this guide!
3. Make sure all caps are fully secured before use! Check that the buttons in your
caps are fully clicked into tubing holes.
4. Clean your grip!
Grip can wear out with use and is aected by oils from our skin. To prolong the life of
your grip, clean it after heavy use and before long periods of storage. Use rubbing al-
cohol and a cloth, OR a cloth with warm soapy water to remove oils from the grip. Wipe
away any soap residue with clean water. If your owcaps get dirty, you can clean them
with soap and warm water, or put them in the wash with your laundry: air-dry, no heat!
THINGS TO KNOW :: BEFORE YOU FLOW

2
CAPS :: FLOWCAP
Flowcaps are compatible with all owtoys light engines (owlights, capsules and vision), and
securely click into any owtoys 1” polycarbonate tubes.
FLOWTOYS MODULAR SYSTEM - INSTRUCTIONS
INSTRUCTIONS FOR LIGHTS
Modular system props are compatible with both owlights and capsule lights - instructions
for your lights are included in a separate manual with your prop.
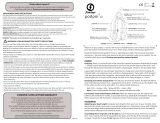
CAPS :: POD SHELL
Pod shells are intended for use with capsule lights only. Can be used as caps for sta ends.
Pod shells provide great rotational inertia for stas and baton ends, but are not recommend-
ed for other props like poi, rope darts, chucks and swinging clubs.
INSERTING CAPSULES INTO POD SHELLS:
Capsules MUST have their C-ring installed before inserting into pod shell. Insert capsule
with C-ring into the bottom of the pod shell rmly. Check button for normal operation. If the
button is dicult to press, check that the capsule is all the way inside the shell and the C-ring
is properly installed on the capsule. Also check that there is not a C-ring already in the pod!
ATTACHING POD SHELL ONTO TUBE:
The pod shell attaches to the tube with a friction t. Push the pod shell over the tube rmly,
ensuring the plastic tube is between the capsule and the silicone tube inside the pod that
holds the capsule in place.
Be aware - the tube must be clean and the edge of the silicone that holds the capsule must
cover the holes in the tube for a secure t. Silicone does not stretch out, warp, or relax like
other plastics, and as long as it is installed correctly the pod cannot y o during use. You
have been warned. We will not replace parts that go ying due to inadequate connection!
ATTACHING CAPSULES TO FLOWCAPS: Insert capsule into owcap, button side in.
Twist and push until it settles. The seams of the capsule must be aligned with the but-
tons inside the cap for it to t in the tube.
DETACHING/ATTACHING FLOWCAPS TO TUBES:
• To detach, twist rmly to release the buttons and pull.
• To attach, place cap over tube, push and twist until snap-buttons
click into the holes.
ATTACHING/DETACHING FLOWLIGHTS TO FLOWCAPS:
• Push the narrow “head” of the owlight into the adaptor, then
insert owlight+adaptor into the owcap.
• Twist until the adaptor clicks into place. The sides of the light
should align with the buttons in the cap.
• To remove owlight with adaptor attached, push the center of
the cap while twisting the light.
• To leave adaptor in the cap, pull light out while gripping the cap.
*click!*
*click!*
*click!*
3
INSTALLING FLOWMASS
Flowmass is slightly tapered with more material on one end— make sure the heavier end is
installed at the far end of your prop, where it counts.
Adding mass to a crystal case: Thread leash through the mass. Hold leash with one hand
and pull the mass down the length of the case with your other hand until mass is in place.
Adding mass to tubes: Apply a little bit of vaseline/petroleum jelly to the inside surface of
the mass and slide the tube through it. Ensure there is enough clearance at the top for your
owcaps to click in properly and securely.
CAPSULE LINK :: CONNECT 2 CAPSULE LIGHTS
The capsule link is a little 3D-printed part that can connect 2 capsule lights together.
• Remove the o-rings from the leash-port (battery side) of two capsules.
• Pry open one shell enough to insert the capsule link then reinstall the O-ring.
• Roll the second capsule’s O-ring over the rst’s, then connect the second capsule to
the link and roll the O-ring onto it.
It is also possible to install and remove the link by prying and holding the capsule
open with the O-rings in place - if you have strong ngers! Only two capsules can be
connected - both buttons should face out.
CONNECTING 2 FLOWLIGHTS
If you have two or more owlights in one tube, you will need to attach the opposite
ends of the owlight to each other for the lights to t properly, and slide in and out of
the tubes conveniently.
Be sure to click them together and apart sideways (laterally as shown in the picture),
NOT up and down in the direction of the pivot (vertically), as this can cause splitting at
the seam and loosen the connection.
CONNECTING SHAFT TO TUBE:
The connectors are screwed into the carbon ber
shaft. Depending on the length of your prop, the
clear polycarbbonate tubes may or may not already
be installed.
If you need to assemble your rig, here’s how:
To attach composite connectors to clear tubes: Line up the 1” tube holes with the con-
nector buttons, and push tube rmly down to the connector buttons.
Connector sizing: We have 2 shaft sizes – 12mm and 15mm, and 2 connector sizes to
match. Please be sure you are using the correct connector - it should t very rmly.
carbon ber
shaft
tube-shaft
connector
1” polycarbonate
tube
FOREVER FLOW LIFETIME WARRANTY
Flowtoys are designed to last you a lifetime, but nothing is indestructible,
so we provide this warranty to enable you to freely nd your ow*.
If you manage to break a owtoys product, we oer free replacements on
defective or non-working parts due to intended use, and
50% credit for products in any condition at any time. Capsule battery depletion is
normal wear & tear and covered for free in rst 2 years and half-price/capsule after.
If you need warranty support, please contact us at support@owtoys.com.
* Please check owtoys.com for full warranty details.
Flowtoys reserves the right to refuse coverage to anyone abusing this warranty.
Please contact us before sending in your product, or it may be returned to sender.
FAQs
Can I break down my sta into shorter pieces for travel?
Yes you can. You can twist and pull o the tubes to shorten your sta - the shortest it can go is
the length of the carbon ber shaft with the connectors attached. Please note that while you can
break them down ocassionally for travel, it’s not intended for frequent disassembly, as it causes
wear-and-tear on the buttons.
My owcap won’t release from the tube.
Make sure to grip the top end of your owcap when removing it. If you grip lower down the cap,
the silicone can press against the tubing and stick, making it harder to remove. New caps can be
hard to open - use a jar gripper to grip the tube with one hand, while twisting the cap o with
your other hand.
/
