Page is loading ...

Owner’s Operator and Maintenance Manual
DEALER: This manual MUST be given to
the user of the patient lift.
USER:
BEFORE using this patient lift, read
this manual and save for future reference.
For more information regarding
Invacare products, parts, and services,
please visit www.invacare.com
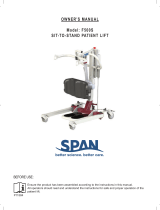
Reliant™ 440
Patient Lift

SYMBOL LEGEND
Reliant™ 440 2 Part No 1141431
WARNING
DO NOT OPERATE THIS EQUIPMENT WITHOUT FIRST READING
AND UNDERSTANDING THIS MANUAL. IF YOU ARE UNABLE TO
UNDERSTAND THE WARNINGS, CAUTIONS AND
INSTRUCTIONS CONTACT A QUALIFIED DEALER OR INVACARE
TECHNICAL SUPPORT BEFORE ATTEMPTING TO USE THIS
EQUIPMENT - OTHERWISE INJURY OR DAMAGE MAY RESULT.
ACCESSORIES WARNING
Invacare products are specifically designed and manufactured for use in conjunction
with Invacare accessories. Accessories designed by other manufacturers have not
been tested by Invacare and are not recommended for use with Invacare products.
SYMBOL LEGEND
"ATTENTION, see
instructions for use".
CAUTION - Pinch Points, fingers
could be pinched.
WARNING - When positioning Lift, be
aware of the position of the Swivel Bar
and the patient. Injury could occur.
2008
"Date of Manufacture"
Device contains Lead
Acid batteries. DO NOT
dispose of batteries in
normal household waste.
They MUST be taken to a
proper disposal site.
Contact your local waste
management company
for information.
EMERGENCY
Mechanical Lowering -
Pull UP on
EMERGENCY Button.
Push DOWN on Boom.

TABLE OF CONTENTS
Part No 1141431 3 Reliant™ 440
TABLE OF CONTENTS
SYMBOL LEGEND .............................................................................. 2
SPECIAL NOTES ................................................................................ 5
LABEL LOCATION ............................................................................ 6
TYPICAL PRODUCT PARAMETERS .................................................... 7
Reliant 440 Patient Lift ..............................................................................................................................7
SECTION 1—GENERAL GUIDELINES ................................................... 8
Weight Limitation.......................................................................................................................................8
Assembling the Lift.....................................................................................................................................8
Using the Sling .............................................................................................................................................8
Operating the Lift .......................................................................................................................................9
Lifting the Patient........................................................................................................................................9
Transferring the Patient ..........................................................................................................................10
Performing Maintenance .........................................................................................................................10
SECTION 2—ASSEMBLY .................................................................. 11
Assembling the Patient Lift.....................................................................................................................11
Attaching the Kneepad............................................................................................................................13
Attaching the Battery...............................................................................................................................14
Mounting the Battery Charger ..............................................................................................................15
SECTION 3—OPERATION ................................................................ 16
Introduction...............................................................................................................................................16
Operating the Patient Lift.......................................................................................................................16
Locking/Unlocking the Rear Casters...............................................................................................16
Raising/Lowering the Patient Lift......................................................................................................17
Closing/Opening Leg Base..................................................................................................................17
Using the Emergency Stop.................................................................................................................17
Activating a Mechanical Emergency Release..................................................................................18
Charging the Battery................................................................................................................................19
SECTION 4—TRANSFERRING FROM ................................................ 20
Lifting Preparation ....................................................................................................................................20
Lifting the Patient......................................................................................................................................21
Moving the Patient....................................................................................................................................22
SECTION 5—TRANSFERRING TO ..................................................... 23
Transferring Patient To Wheelchair ....................................................................................................23
Transferring Patient to Bed....................................................................................................................24
Transferring Patient to Commode.......................................................................................................25

TABLE OF CONTENTS
Reliant™ 440 4 Part No 1141431
TABLE OF CONTENTS
SECTION 6— USING THE PATIENT LIFT AS A STANDING AID ........... 27
Standing Procedure ..................................................................................................................................27
SECTION 7— TROUBLESHOOTING ................................................... 29
SECTION 8— MAINTENANCE .......................................................... 30
Safety Inspection Checklists...................................................................................................................30
Inspect/Adjust Initially .........................................................................................................................30
Institutional Inspect/Adjust Monthly................................................................................................30
In-Home Inspect/Adjust Every Six Months ....................................................................................31
Care and Maintenance of Stand-Up Lift ..............................................................................................32
Detecting Wear and Damage ................................................................................................................32
Cleaning the Sling and the Lift ...............................................................................................................32
Replacing Electric Actuator....................................................................................................................33
Maintaining the Base Adjustment..........................................................................................................34
Replacing the Casters ..............................................................................................................................35
Front Caster..........................................................................................................................................35
Rear Caster ...........................................................................................................................................35
LIMITED WARRANTY ..................................................................... 36

SPECIAL NOTES
Part No 1141431 5 Reliant™ 440
SPECIAL NOTES
Signalwordsareusedinthismanualandapplytohazardsorunsafepracticeswhich
couldresultinpersonalinjuryorpropertydamage.Refertothefollowingtablefor
definitionsofthesignalwords.
NOTICE
THE INFORMATION CONTAINED IN THIS DOCUMENT IS SUBJECT TO
CHANGE WITHOUT NOTICE.
RADIO FREQUENCY INTERFERENCE
Most electronic equipment is influenced by Radio Frequency Interference (RFI).
CAUTION should be exercised with regard to the use of portable communication
equipment in the area around such equipment. If RFI causes erratic behavior, PUSH
the RED Power Switch OFF IMMEDIATELY. DO NOT turn the Power Switch ON
while transmission is in progress.
MAINTENANCE
Maintenance MUST be performed ONLY by qualified personnel.
SIGNAL WORD MEANING
DANGER
Danger indicates an imminently hazardous situation which, if not avoided,
will result in death or serious injury.
WARNING
Warning indicates a potentially hazardous situation which, if not avoided,
could result in death or serious injury.
CAUTION
Caution indicates a potentially hazardous situation which, if not avoided,
may result in property damage or minor injury or both.


TYPICAL PRODUCT PARAMETERS
Part No 1141431 7 Reliant™ 440
TYPICAL PRODUCT PARAMETERS
Reliant 440 Patient Lift
*NOTE:Variesdependingonloadandstroke.
Height at Sling Hook-up - MAX.: 67 inches
Height at Sling Hook-up - MIN.: 39 inches
Base Width OPEN: 44 inches
Base Width CLOSED: 26 inches
Base Height (Clearance): 5 inches
Base Length: 41.5 inches
Caster Size (FRONT/REAR): 4 inches
Weight Capacity: 440 lbs
Weight Out of Carton: 116.5 lbs
Battery: 24V DC (RECHARGEABLE)
Charger Input: 100-240V AC
Charger Output/Charging Time: 29.5V DC Max 6 hours
Audio Low Battery Alarm: Yes
Motor Safety Devices: Anti-Entrapment
*Approx. Lifts per Charge: *100-200 Cycles per charge
Warranty Lift/Electronics: 3 Years/1 Year
Emergency Stop Button: Yes

SECTION 1—GENERAL GUIDELINES
Reliant™ 440 8 Part No 1141431
SECTION 1—GENERAL GUIDELINES
WARNING
SECTION 1 - GENERAL GUIDELINES contains important information for the safe
operation and use of this product.
Checkallpartsforshippingdamagebeforeusing.Incaseofdamage,DONOTusethe
equipment.ContacttheDealerforfurtherinstructions.
TheInvacarepatientliftisNOTatransportdevice.Itisintendedtotransferanindividual
fromonerestingsurfacetoanother(suchasabedtoawheelchair).Movingaperson
suspendedinaslingoverANYdist anceisNOTrecommended.
DONOTattemptanytransferwithoutapprovalofthepatient’sphysician,nurseor
medicalassistant.ThoroughlyreadtheinstructionsinthisOwner’sManual,observea
trainedteamofexpertsperformtheliftingproceduresandthenperformtheentirelift
procedureseveraltimeswithpropersupervisionandacapableindividualactingasa
patient.
InvacareStandAssistandTransferslingsarespecificallydesignedtobeusedin
conjunctionwithInvacarepatientlifts.Slingsandaccessoriesdesignedbyother
manufacturersarenottobeutilizedasacomponentofInvacare’spatientliftsystem.Use
oftheseproductsisprohibitedandwillvoidthelift’swarranty.Usetheslingthatis
recommendedbytheindividual’sdoctor,nurseormedicalassistantforthecomfortand
safetyoftheindividualthatisbeinglifted.
Weight Limitation
DONOTexceedmaximumweightlimitationofthepatientlift.Theweightlimitationfor
theReliant440PatientLiftis440lbs.
Assembling the Lift
DONOTovertightenmountinghardware.Thiswilldamagemountingbrackets.
Using the Sling
IndividualsthatusetheStandAssistSlingMUSTbeabletosupportthemajorityoftheir
ownweight,otherwiseinjurymayoccur.
StandAssistSlings:DONOTusethestandassistslingincombinationwiththepatientlift
asatransportdevice.Itisintendedtotransferanindividualfromonerestingsurfaceto
another(suchasabedtoawheelchair).Movingapersonusingthestandassistslingin
combinationwiththepatientliftoverANYdistanceisNOTrecommended.

SECTION 1—GENERAL GUIDELINES
Part No 1141431 9 Reliant™ 440
StandAssistSlings:Before liftingthepatient,makesurethebottomedgeofthestand
assistslingispositionedonthelowerbackofthepatientandthepatient’sarmsare
outsidethestandassistsling.
StandAssistSlings:ThebeltMUSTbesnug,butcomfortableonthepatient,otherwisethe
patientcanslideoutoftheslingduringtransfer,possiblycausinginjury.
TransferSlings:Beforeliftingthepatient,makesurethebottomedgeofthetransfersling
isatthebaseofthespineandthepatient’sarmsareoutsidethetransfersling.
TransferSlings:DONOTraisethepatienttoafullstandingpositionwhileusingthe
transfersling,otherwiseinjurymayoccur.
DONOTuseanykindofplasticbackincontinencepadorseatingcushionbetween
patientandslingmaterialthatmaycausethepatienttoslideoutoftheslingduring
transfer.
Aftereachlaundering(inaccordancewithinstructionsonthesling),inspectsling(s)forwear,
tears,and loosestitching.
Bleached,torn,cut,fray ed,orbrokenslingsareunsafeandcouldresultininjury.Discard
immediately.
DONOTalterslings.
Besuretochecktheslingattachmentseachtimetheslingisremovedandreplaced,toensure
thatit isproperlyattachedbeforethepatientisremovedfromastationaryobject(bed,chair
orcommode).
Ifthepatientisinawheelchair,securethewheellocksinplacetopreventthechairfrom
movingforwardsorbackwards.
Whenconnectingslingsequippedwithcolorcodedstrapstothepatientlift,theshortestofthe
strapsMUSTbeatthebackofpatientforsupport.Usinglongsection willleav elittleorno
supportforpatientʹsback.Theloopsoftheslingarecolorcodedandcanbeusedtoplace
patientinv ariouspositions.Thecolorsmakeiteasytoconnectbothsidesoftheslingequally.
Makesurethatthereissufficientheadsupportwhenliftingapatient.
Operating the Lift
Makesurethereisanaudibleclickwhenmountingbatteryonthebatterychargerto
confirmpropermounting.Otherwise,injuryordamagemayoccur.
Usethehandlestopushorpullthepatientlift.
Lifting the Patient
Beforepositioningthelegsofthestandupliftaroundthepatient,makesurethatthepatient’s
feetareoutofthe wayofthefootplate,otherwiseinjurymayoccur.
Adjustmentsforsafetyandcomfortshouldbemadebeforemovingthepatient.Patientʹsarms
shouldbeoutsideofthe
slingstraps.

SECTION 1—GENERAL GUIDELINES
Reliant™ 440 10 Part No 1141431
Beforelifting apatientfromastationaryobject(wheelchair ,commodeorbe d),slightlyraise
thepatientoffthestationaryobjectandcheckthatallslingattachmentsaresecure.Ifany
attachmentisnotcorrect,low erthepatientandcorrecttheproblem,thenraisethepatientand
checkagain.
Duringtransfer,withthepatientsuspendedinaslingattachedtothelift,DONOTrollcaster
baseoverobjectssuch ascarpet,raisedcarpetbindings,doorframes,oranyunevensurfaces
orobstaclesthatwouldcreateanimbalanceofth epatientliftandcouldcausethepatientlift
totipover.Us esteeringhandleonthemastatALLtimestopushorpullthepatientlift.
Inv acarerecommendslockingtherearswivelcastersONLYwhenpositioningorremoving
thesling(standassistortransfer)fromaroundthepatient.
Inv acaredoesNOTrecommendlockingoftherearcastersofthepatientliftwhenliftingan
individual.Doingsocouldcausethelifttotipandendangerthepatientandassistants.
Inv acareDOESrecommendthattherearcastersbeleftunlockedduringliftingproceduresto
allowthepatientlifttostabilizeitselfwhenthepatientisinitiallyliftedfromachair ,bedor
anystationary object.
Transferring the Patient
Beforetransferring,checkthattheproduct’sweightcapacitycanwithstandthepatientʹs
weight.
WheelchairwheellocksMUSTbeinalockedpos itionbeforelow eringthepatient intothe
wheelchairfortransport.
Performing Maintenance
Regularmaintenanceofpatientliftsandaccessoriesisnece ssarytoassureproperoperation.
Afterthefirst12monthsofoperation,inspect allpiv otpointsandfastenersforwear .Ifthe
metalis worn,thepartsMUSTbereplaced.Performthisinspectionev erysixmonths
thereafter.
DONOTovertightenmountinghardware.Thiswill
damagemountingbrackets.
Castersandaxleboltsrequireinspectionseverysixmonthstocheckfortightnessandwear .

SECTION 2—ASSEMBLY
Part No 1141431 11 Reliant™ 440
SECTION 2—ASSEMBLY
Assembling the Patient Lift
WARNING
Tighten mounting screws securely. Failure to do so may result in bodily injury or
damage to the lift.
NOTE:Forthisprocedure,refertoFIGURE 2.1onpage 12.
NOTE:TheReliant440ispackedpartiallyassembledforshippingpurposes.
1. Removeallcontentsfromtheboxandplacetheunitonaworkbenchortable.
2. Removethetwomountingscrews,washers,andlocknutsconnectingthemasttothe
base(Detail“A ” ) .
3. Removethemastfromthebase.
4. Positionandre‐attachthemasttothebaseusingthetwomountingscrews,washers,
andlocknutsremovedinSTEP2(Detail“B”).Securelytighten.
5. Insertthepinsoftherodendsupthroughthetabsonthebase(Detail“B”).
6. Attachthepinsoftherodendstothetabsusingthetwolocknutsandwashers.
Securelytighten.
7. Cutthecabletiesecuringtheactuator(Detail“C”).
8. Swingtheactuatorforwardsothatitisoutoftheway.
9. Swingtheboomupandovertothefront.
10. Attachthepushhandletothebackofthemastusingthetwomountingscrews,
locknuts,andwasherswhichareprovided(Detail“D”).
11. Attachthekneepad.RefertoAttachingtheKneepad
onpage 13.


SECTION 2—ASSEMBLY
Part No 1141431 13 Reliant™ 440
Attaching the Kneepad
WARNING
The kneepad is an integral part of the lift and MUST be attached so that the lift can
function correctly and safely.
CAUTION
When connecting the actuator to the boom, DO NOT over-tighten the bolt
because this will deform the clevis and restrict the pivot.
NOTE:Forthisprocedure,refertoFIGURE 2.2onpage 13.
1. Connectthetopoftheactuatortotheboomusingtheboltprovided(Detail“A”).
2. Insertthetwopostsofthekneepadintothetuberetainersofthekneepadreceiver
whileturningthekneepadreleaseleverinaclockwisedirection(Detail
“B”).
3. Releasethekneepadreleaselever.
4. Slidethekneepadinoroutuntilitislockedintoposition.
FIGURE 2.2 Attaching the Kneepad
Actuator
Bolt
Boom
DETAIL “B”
DETAIL “A”
Post
Post
Kneepad
Kneepad
Receiver
Kneepad
Release
Lever
Tube
Retainer
Tube
Retainer

SECTION 2—ASSEMBLY
Reliant™ 440 14 Part No 1141431
Attaching the Battery
WARNING
Ensure there is an audible click when installing the battery either on the battery
charger or control box. Otherwise, injury or damage may occur.
NOTE:Forthisprocedure,refertoFIGURE 2.3.
1. Installthebatteryintothecontrolboxandensurethereisan audibleclick(Detail“A”).
2. EnsurethatthecontrolboxemergencypushbuttonissettotheOff(out)position
(Detail“B”).
3. Ifthecontrolboxemergencypushbuttonissettothe
Onposition,turnthebutton¼
turnclockwise,andthebuttonwillpopout.
FIGURE 2.3 Attaching the Battery
Emergency Push
Button
DETAIL “A”
DETAIL “B”
Battery
Control Box

SECTION 2—ASSEMBLY
Part No 1141431 15 Reliant™ 440
Mounting the Battery Charger
NOTE:Forthisprocedure,refertoFIGURE 2.4.
NOTE:Refertoyourlocalregulationsconcerningpropermountingprocedures.
1. Placethebatterychargerwithmountingbracketonthewallatthedesiredposition.
2. Withapencil,markthemiddleholeposition.
3. Measuredown6½inchesfromthepencilmarkanddrillonemountinghole.
4. Installthebottommountingscrewuntilthereisanapproximate1/8‐inchgapbetween
thescrewheadandthewall.
5. Installthebatterychargerwithmountingbracketontothebottommountingscrew.
6. Drilltheremainingtwomountingholes.
7. Installthetworemainingmountingscrewsthroughthemountingbracketandintothe
wall.Tightensecurely.
8. Plugthebatterychargerintothewallelectricaloutlet.
NOTE:TheOnLEDshouldilluminate.
FIGURE 2.4 Mounting the Battery Charger
Mounting Bracket (STEP 6)
Mounting
Screws
(STEP 7)
Battery Charger
with Mounting
Bracket (STEP 5)
BOTTOM Mounting
Screw (STEP 4)

SECTION 3—OPERATION
Reliant™ 440 16 Part No 1141431
SECTION 3—OPERATION
Introduction
WARNING
DO NOT attempt any transfer without approval of the patient's physician, nurse or
medical assistant. Thoroughly read the instructions in this Owner's Manual, observe
a trained team of experts performing the lifting procedures and then perform the
entire lift procedure several times with proper supervision and a capable individual
acting as a patient.
The legs of the lift MUST be in the maximum open position for optimum stability
and safety. If it is necessary to close the legs of the lift to maneuver the lift under a
bed, close the legs of the lift only as long as it takes to position the lift over the
patient and lift the patient off the surface of the bed. When the legs of the lift are no
longer under the bed, return the legs of the lift to the maximum open position.
NOTE:Invacarerecommendsthattwoassistantsbeusedforallliftingpreparationand
transferringto/fromprocedures;however,thepatientliftcanbeoperatedbyoneassistant.Theuse
ofthepatientliftbyoneassistantshouldbebasedontheevaluationofthehealthcareprofessional
foreachindividualcase.
Operating the Patient Lift
Locking/Unlocking the Rear Casters
NOTE:Forthisprocedure,referto
FIGURE 3.1.
1. Performoneofthefollowing:
• LOCKING‐PressDOWNonthe
bottomofthelockinglever(Detail
“A”).
• UNLOCKING‐Pressthetopofthe
lockinglever(Detail“B”).
FIGURE 3.1 Locking/Unlocking the Rear
Casters
DETAIL “A”
DETAIL “B”
Locking
Lever
Locking
Lever

SECTION 3—OPERATION
Part No 1141431 17 Reliant™ 440
Raising/Lowering the Patient Lift
NOTE:Forthispr ocedur e,refertoFIGURE 3.2.
1. P erformoneofthefollowing:
•RaisingLift‐PresstheUpbuttonon
thehandcontroltoraisetheliftarms
andthe patient.
•LoweringLift‐Press theDown
buttononthehandcontroltolower
theliftarmsandthepatient.
NOTE:If thestand‐upliftisinthefullUp
position,itmaybenecessarytopulldownslightly
onthelift armsbe for ethemastwilllower.
FIGURE 3.2 Raising/Lowering the Patient Lift
Closing/Opening Leg Base
NOTE:Forthispr ocedur e,refertoFIGURE 3.3.
Thebottomrowofthehandcontrolisus ed
toopen orclosethelegsofthebas efor
stabilitypriortoliftingapatient.Pressingthe
leftbuttonwidensthelegbase;theright
buttonclosesthelegbase.
FIGURE 3.3 Closing/Opening Leg Base
Using the Emergency Stop
NOTE:Forthispr ocedur e,refertoFIGURE 3.4.
•PresstheREDemergencystopbuttonon
thecontrolboxtostoptheliftarmsand
patientfromraisingorlowering.
•Todisengage,rotatetheREDemergency
stopbuttonCLOCKWISEuntilitpops
out.
FIGURE 3.4 Using the Emergency Stop
Up Button
Down Button
Hand Control
Widen Leg
Base
Close Leg
Base
Hand
Control
RED Emergency Stop Button
Control
Box
Press to Stop
Lift Arms
Rotate CLOCKWISE to
Disengage Emergency Stop

SECTION 3—OPERATION
Reliant™ 440 18 Part No 1141431
Activating a Mechanical Emergency Release
Primary Emergency Release
NOTE:Forthisprocedure,referto
FIGURE 3.5.
NOTE:Thisprocedurewillbringtheboom
downifthehandcontrolisnotfunctioning
properly.
Toactivatetheprimaryemergencyrelease,
insertapenintotheholelabeled
EmergencyDownonthecontrolbox.
FIGURE 3.5 Primary Emergency Release
Secondary Emergency Release
NOTE:Forthisprocedure,referto
FIGURE 3.6.
NOTE:Allpatientliftactuatorsareequipped
withamechanicalemergencyrelease.The
mechanicalreleasewillenabletheactuatorto
retractwithoutpower.
NOTE:Usetheprimaryemergencyrelease
firstbeforeusingthesecondaryemergency
releaseprocedure.Thisprocedureshouldonly
beusediftheprimaryemergencyrelease
procedureisnotfunctioningor
isunreachable.
NOTE:TheliftMUSTbeunderaloadforthe
mechanicalreleasetofunction.
Toactivatethesecondaryemergency
release,pullupontheREDemergency
gripandpulldownontheboomatthe
sametime.
FIGURE 3.6 Secondary Emergency Release
Control Box
Emergency Down
Hole
Pull Up Red
Tag for
Emergency
Lowering
Actuator
Column

SECTION 3—OPERATION
Part No 1141431 19 Reliant™ 440
Charging the Battery
NOTE:Forthisprocedure,refertoFIGURE 3.7onpage 19.
NOTE:Invacarerecommendsthebatteryberechargeddailytoprolongbatterylife.
NOTE:Anaudiblealarmwillsound(hornwillbeep)whenbatteryislow.
1. Liftuponthehandleonthebackofthebattery(Detail“A”).
2. Liftthebatteryupandoutfromthecontrolbox.
WARNING
Make sure there is an audible click when mounting battery either on the battery
charger or the control box to confirm proper mounting. Otherwise, injury or dam-
age may occur.
3. Placethebatteryonthebatterycharger(Detail“B”).
4. Ensurethereisanaudibleclick(Detail“C”).
NOTE:ThechargeLEDwillilluminate.Whenchargingiscomplete,thechargeLEDwillstop
illuminating.
NOTE:Abatteryneedingtobefullyrechargedwilltakeapproximatelyfourhours.
5. Liftuponthehandleonthebackofthebattery(Detail“A”).
6. Liftthebatteryupandoutawayfromthebatterycharger.
7. Reinstallthebatteryontothecontrolbox(Detail“B”).
8. Ensurethereisanaudibleclick(Detail“C”).
FIGURE 3.7 Charging the Battery
Handle
Audible Click
Control Box
Battery
DETAIL “A”
DETAIL “B”
Battery
DETAIL “C”
NOTE:Thebatteryisshownbeingremovedfromandinstalledintoacontrolbox.Removingand
installingabatteryintoabatterychargerisdonethesameway.

SECTION 4—TRANSFERRING FROM
Reliant™ 440 20 Part No 1141431
SECTION 4—TRANSFERRING FROM
Lifting Preparation
NOTE:AlthoughInvacarerecommendsthattwoassistantsbeusedforallliftingpreparation,
transferringfromandtransferringtoprocedures,ourequipmentwillpermitproperoperationby
oneassistant.Theuseofoneassistantisbasedontheevaluationofthehealthcareprofessionalfor
eachindividual.
WARNING
STANDING SLINGS - Before lifting the patient, make sure the bottom edge of the
standing sling is positioned on the lower back of the patient, and the patient's arms
are outside the standing sling.
TRANSPORT SLINGS - Before lifting the patient, make sure the bottom edge of
the transport sling is at the base of the spine, and the patient's arms are outside the
transport sling.
Invacare does NOT recommend locking the rear casters of the stand-up lift when
lifting and transferring an individual. Doing so could cause the lift to tip and
endanger the patient and assistants.
Invacare does recommend that the rear casters of the stand-up lift be left unlocked
during lifting and transferring procedures to allow the stand-up lift to stabilize itself
when the patient is initially lifted from and transferred to a chair, bed or any station-
ary object.
/