Page is loading ...

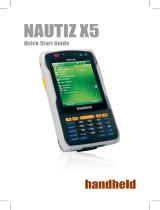
NAUTIZ X5
Quick Start Guide

1 Package
The pictures shown below may differ from the actual products. To
purchase additional or optional products, contact our customer center.
Battery (High Capacity)
Adaptor Spring Wire
Desktop Cradle Stylus Pen
Nautiz X5 Main Body
USB Cable

2 Your Nautiz X5
The pictures shown below may differ from the actual products.
To purchase additional or optional products, contact our customer
center.
Power Button
Speaker
Power LED
Communication LED
LCD Screen
Direction/Send/End/
Number/Character/
Function Buttons
Barcode Scanner Window
USB Cable Connector
Mice
Stylus Pen
Side
Scanner
Button
Earphone Jack
Side Scanner
Button
IrDA
Stylus Pen Strap
Hand strap holder - Top
Flash
Camera
Speaker
Reset Button
Battery
Battery Fixing Pin
Hand strap holder - Bottom
Front scanner Button

Removing battery without power off may cause a technical problem.
Turn off a PDA by using [Power] button on PDA completely to prevent
causing problem of PDA.
When PDA is failing to turn on due to removing battery witout turn off,
please make hard-reset the PDA.
Please press (# button + Enter button + Reset button) at the same time.
All information from Memory (RAM) will be all deleted after hard-reset.
To disconnect the battery
1 Power off the PDA.
2 Turn the fi xing pins on both
sides of the battery pins
outward to disconnect the
battery.
3 Pull out the battery after
lifting it in the direction of
the arrow.
To connect the battery
1 Align the battery to the
groove and insert in the
direction of the arrow.
2 Turn the fi xing pins on both
sides of the battery pins
inward until the battery is
secured.
The pictures shown below may differ from the actual products.
To purchase additional or optional products, contact our customer
center.
3 Connecting/Disconnecting battery

To remove the USIM
Remove the USIM card (or
USAM card) in the direction of
the arrow.
To insert the USIM/USAM
Insert the USIM card (or USAM
card) in the direction of the
arrow.
What is a USAM card?
The USAM card is an embedded application module of a smart
card mounted inside of a card reader to authenticate the validity of
cards and stations, prevent information disclosure by encrypting
communication data and authenticate and validate communication
messages.
What is a USIM card?
The USIM card is the combination of a SIM card with subscriber
information and a Universal IC card (UICC) accommodating
communication and fi nancial information and implements various
functions including user authentication, global roaming, e-commercial
functions as a single card.
4 Inserting/Extracting
USIM/USAM Card

5 Powering On/off
Press the [Power] button on the top of the station to turn your station on/off.
Power Button
Use the stylus pen to select/run/move a target on the screen.
The stylus pen can be separated from the top left of the station.
Tap
This is used to select or execute an item by touching an icon on the
screen once with the stylus pen. This is similar to clicking the left mouse
button.
Drag
This is used to select multiple items. Use the drag function to select
letters or images. This is similar to dragging mouse cursor.
Tap and Hold
This is used to view the function of a desired item. If you tap and hold the
stylus pen on the screen, a pop-up menu opens.
This is similar to clicking right mouse button after selecting an item with
the mouse.
6 Using Stylus Pen

Run ‘Phone’ program from Start menu.
Enter a phone number and press ‘Talk’ to connect the call.
Redial
Select ‘Talk’ button without entering new phone number.
The phone will automatically connect to previous phone
number.
: Back Space
: You can make a call a speed dial number
specifi ed in the speed dial or Edit/Add/Delete
phone number in Menu in speed dial screen.
(Up to 98 speed dials can be saved.)
: List of incoming, outgoing, missed calls.
: To connect a call.
To make a call
Select ‘Talk’ on keypad or ‘Talk’ button on the
screen when receive a call.
The calling number identifi cation differs from
that of the PDA. (USIM address book is not
compatible with PDA address book.)
To receive a call
Select ‘ignore’ button on PDA screen or ‘’
on keypad to refuse a receiving call.
To refuse a call
Select ‘Finish’ button on screen or select ‘’
button on keypad.
To terminating
7 Using the Phone

Run <Memo> program and select [New...] before scanning.
Scanned barcode informaton is appeared in [New] fi le.
The scanned barcode is automatically saved in [Memo].
The barocode information will not be saved if close [Memo]
program without saving.
Select <Menu> from <Memo> program, and select [Attach}
to save the scanned barcode.
To use a barcode in a specifi c program, contact the manufacturer of
the specifi c program.
Using scanner
Press the [Front Scanner] or [Side Scanner] button to start scan a barcode.
The scanned barcode information is automatically saved in the PDA.
Checking the scanned barcode information
Scanning Barcode
To scan a barcode, keep a distance of about 10 cm between the barcode and the
barcode scanner window and scan the barcode at the correct angle.
8 Using Scanner

Press the [Front Scanner] button on the PDA to capture
image or video while camera program is running.
The taken image or video will be automaticaly saved in
the album.
Camera : Select [Camera] from [Start]
Video : Select [Camera] from [Start] > Select [Video] from
the <Menu> in Camera program
Mode : Set Normal/Nurst/Timer from selecting [Camera]
from the program > Select [Mode] from the <Menu> in
Camera program
Resolution : Option for [480*640]/[600*800]/
[768*1024]/[1536*2048]
Flash : Set the fl ash option from selecting [Camera] from
the program Select [Flash] from the <Menu> in Camera
program
If the battery is in low level, the program will not be run or PDA will be
automatically off. If the program is not used more than one minute, the
backlight is automatically off.The video function may differ if users use
their own API.
Capturing Image & Video
Select <image> from [Thumbnail]
From Thumbnail, edit and select option for Zoom, Play slide show, PDA background, etc.
View Album
Full Screen : Set Screen size from selecting [Camera] from the program > Select
[Full Screen] from the <Menu> in Camera program
Option : Set Name/Storage/File size option from selecting [Camera] from the program
> Select [Option] from the <Menu> in Camera program
9 Using Camera

Using ActiveSync
1 Connect a PDA in Cradle or PDA iteslf to user PC by using a USB cable.
Installing ActiveSync
1 Access the Microsoft website to download [Microsoft ActiveSync]
2 When ask for [License Agreement] for downloading, please select [Agreement].
Fill out the user name, Organization on Customer Information, and specify [Saved
Folder] to save AtiveSync program.
3 When download is completed, [Microsoft ActiveSync] is installed for ready to use.
[Microsoft ActiveSync] must be installed in user PC before connecting
a PDA.
Do not install [Microsoft ActiveSync] again if user already had one.
Depends on [Microsoft ActiveSync] version, ActiveSync screen image
may differ.
2 If the PDA is connected to user PC, the [Microsoft ActiveSync] will be automatically
run. Select the [Search] button on the PC.
3 Check, edit, and transfer a image, document, barcode information, music saved in
PDA to user PC from <Mobile Device> folder.
10 Connecting ActiveSync
( Back side of Desktop cradle )
Adaptor Port
USB Cable Port

11 Connecting ActiveSync
FAQ for using ActiveSync
When ‘Unknown Device’ message is pop-up after PC detects a new USB device,
Check if PDA is on, and re-insert the PDA to desktop cradle.
When ‘Connecting’ status continues longer than as a usual,
Remove the PDA from the desktop cradle.
Set connection PDA again from [Connection Settings] ->[Allow USB Connection].
When keep failing on deteting and connecting PDA,
Check USB host cable condition.
Remove the PDA from desktop cradle, and reboot user PC.
Try again for using ActiveSync.
[Window CE] ActiveSync screen image may differ from [Window Mobile],
but the function is the same.
Before using PDA at the begiing, user can install or remove the program
by [Microsoft ActiveSync].

www.handheldgroup.com
/


