Page is loading ...

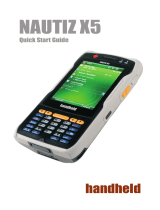
NAUTIZ X3
Quick Start Guide

2
Ref Component Ref Component
1
Receiver
7
Microphone
2
Indicate LED
8
20Pin Universal Connector
3
Scan Keys
9
Volume Keys
4
Power button
10
Direction Key
5
Windows Mobile Function Keys
11
() Backspace, (1aA/FN)key
(keypad function change)
S(Send), E(End) Key, ( ) Enter key
numeric Keys
6
Reset button
Getting Started
Left Side, Front Side, Right Side
Laser Scanner Imager Scanner
2
1
3
4
6
5
7
8
9
10
11

3
Getting Started
Rear Side
Stylus and its string Hand strapMain unit of PDA
Li-ion polymer battery
Data sync cable
Travel Charger
13
14
12
15
b
a
Unpacking the product
Ref Component
12
Stylus pen and holder
13
Camera and Camera flash
a
Micro SD card Slot
14
Hand strap holder
15
Battery latch
b
U-SIM Card Slot

4
Installing the SIM card
Please refer to the manual provided by your service provider for further information on SIM card.
Removing a SIM card.
Installing a SIM card.

5
Installing the main battery
NOTE: One battery is included with the product. You can buy an extra battery separately.
Charging/battery level indicator LED Description
Turned off
Unable to charge PDA / The battery is not properly inserted into the cradle or
the power is off/ The power of the charger or cradle is disconnected.
Red light is on Charging
Red light flashes
Charging error – Ambient temperature is too low or too high. Poor contact
between the battery and the charging terminals due to foreign materials, etc.
Yellow light is on Charging is complete
Caution: Please charge the battery for 24 hours before the first use.
Removing the battery.
Inserting the battery.

6
MicroSD (Micro Secure Digital) card
Select Wireless Manager
Note: Wireless Connectivity option may differ
depending on the configuration.
Wireless Manager Window.
Installing MicroSD.
Removing MicroSD is in the reverse order.

7
Adjust the hand strap for the convenient use of the device for a long period of time.
1. Connect the hand strap to the end of the device beneath the battery cover.
2. Adjust the length of the hand strap by passing the Velcro through the hole.
3. Press both sides of the strap together to get fixed.
Adjusting the hand strap
The screen protective cover is installed at factory before shipment in order to minimize scratching,
which may occur during shipment.
Remove the screen protective cover before use. After removing it, attach protective film to the
screen immediately.
Removing the screen protection cover
There are two kinds of resets: Soft rest and hard reset. A soft reset will restart the NAUTIZ X3
after closing all running programs. A hard reset restarts the NAUTIZ X3 along with resetting
the clock. The data stored in flash memory or storage card will remain. If the NAUTIZ X3 is not
working properly, perform a soft reset first. If the problem persists, perform a hard reset.
How to perform a soft reset
Press the reset button at the front of the device with a stylus. (Reset button)
How to perform a hard reset
Press the reset button at the front of the device with a stylus pen while pressing the power
button at the front. (Power button + reset button)
Resetting NAUTIZ X3
How to enter Sleep Mode
The unit will by default go to sleep mode after 1 minute unless changed under
Start-Settings-System-Backlight.
To change settings for sleep mode manually:
1. Go to Start-Settings-System-Sleep Mode Selector
2. Enabling Long Press will add the option of forcing the unit into sleep mode by pressing
and holding the button pressed down for a few seconds.
3. Enabling Short Press will remove all sleep mode functions but a short press on the power
button will turn off the display but still have all modules running in the background.
Sleep Mode and Backlight Functions

8
1. Open the application Notes in the NAUTIZ X3.
2. Holding the scanning button turns on the aiming pattern which helps to point at a
target. Move the aiming pattern to the centre of a barcode area. The laser beam
indicates that scanning is in progress. If an alarm goes off and the laser is turned off,
this will indicate that the barcode was successfully decoded.
3. Release the scan button.
4. Settings can be found in the Barcode Admin application. Password for Admin is 23646.
Scanning barcodes
1. Open the application Notes in the NAUTIZ X3.
2. The laser beam comes out of the end of NAUTIZ X3, whilst the scan button is held. The
red scan beam should cover the entire barcode. The laser beam indicates that scanning
is in progress. If an alarm goes off and the laser is turned off, this will indicate that the
barcode was successfully decoded.
3. Release the scan button.
Image scanning
Correct
Incorrect
Correct
Incorrect

9
Overview
With the NAUTIZ X3, a user can make a call, save contacts, manage
phone call records, send text messages, save received messages, etc.
Using the phone application
Regardless of running programs, a user can use the phone application
anytime he wants. In order to use the phone application, choose
Start > Phone or just tap the green button on the keypad of the NAUTIZ X3.
Using the Phone
Making a phone call using the phone program
1. Choose Tap Start > Phone or Tap the green Talk key on the
keypad of the NAUTIZ X3.
2. Type in the number that you wish to call
3. Press Send or the green Talk key on the keypad of the NAUTIZ X3.
4. To terminate a call, press End or tap the red End key on the
NAUTIZ X3 keypad.
When incorrect keys are pressed, erase the numbers by tapping
the Delete key one by one.
Text message
You can send or receive text messages using the Text Message features.
Viewing text messages
Even if you are in the middle of a phone call, you can check your text
messages. You will be notified by the New Text Message Notification
window when you have a new text message.
Using the phone

10
Notification of new text message
On the New Text Message screen, you can make a call ands ave,
read or delete messages. If you are subscribed to the Caller’s Number
Identification Service, you can identify the caller by comparing the
number with the information saved on Contacts.
Even if the phone is disabled, you can still read received text
messages.
1. Tab Start > Text Message.
2. The Text Message window will appear.
3. Tap a text message in the message list.
NOTE: When the phone is turned off, you have to
turn it on to make a call or to send a new message.

11
Sending text messages
1. Tap Start > Text Message
2. Tap Create New Text Message
• You can check the size of the message you are writing via the
character counter.
• If you want to know whether the receiver has received your
message, choose Message Transmission Check Request after
tapping Menu > Message Option.
3. You can enter the receiver’s number into the receiver’s number
column or enter the number by searching for the number from
Contacts after tapping Menu > Add Receivers…
4. Enter a message into the message area.
5. When completed, tap Send button.
Viewing pictures and videos
1. Tap Start > Pictures and Videos icon
2. Choose pictures or video clips you want to view.
Taking a picture
1. Tap Start > Pictures and Videos icon.
2. Choose Camera on the navigation bar.
3. Check the image in the view finder, and, if necessary,
adjust settings.
4. Press Enter key to take a picture.

Video recording
1. Tap Start > Pictures and Videos icon
2. Tap camera icon on the navigation bar
3. Choose Menu > Videos to set the
shooting mode to video.
Available recording time will be
displayed on the screen.
4. Start recording by tapping Enter key
Stop recording by tapping Enter key again
Setting the GPS on the NAUTIZ X3
Before use the GPS, please turn on the GPS function from
Start > Settings > System > GPS Power.
The basic features of the External GPS are as follows:
1. Choose Start > Settings > System > External GPS.
2. Set GPS program port to COM9 or (NONE) from the program tab.
3. Set GPS hardware port to COM4 from the hardware tab.
4. Set baud rate to 115 200 from the hardware tab.
Several programs can access GPS data simultaneously.
Each program must access GPS data using Microsoft GPS API
or COM4.
NOTE: The default video recording time is limited
to 30 seconds.
NOTE: For more details, please refer to the User
Manual of the NAUTIZ X3.
www.handheldgroup.com
/
