Page is loading ...

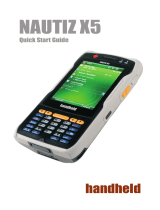
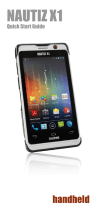
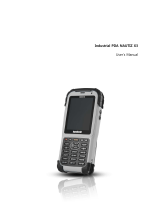
NAUTIZ X4
QUICK START GUIDE

1 WHAT´S IN THE BOX
The pictures shown below may differ from the actual products. To
purchase additional or optional products, contact our customer center.
AC adapter 5V 1.8A for terminal Hand strap
LCD protection lmStandard battery Stylus pen
Nautiz X4 Main Body (Numeric) Nautiz X4 Main Body (QWERTY)
USB Cable

Flash
2 YOUR NAUTIZ X4
Power button
Speaker
Power LED
Notication LED
LCD screen
Keypad
Barcode scanner window
USB cable connector
Mic
Stylus pen
Side scanner button
Volume keys
Earphone jack
Side scanner button
Camera
Stylus pen strap
Hand strap holder
Camera
Speaker
Battery
Hand strap holder
Front scanner button

To remove the battery
1 Power off the PDA.
2 Open the battery cover by
slidig the door’s lock right
and lift up the cover.
3 Remove the battery.
To insert the battery
1 Remove the battery cover by
sliding the door’s lock right
and lift up the cover.
2 Insert the battery.
3 Replace the battery cover.
Battery door Unlock
1
1
2
2
3 INSERT/REMOVE BATTERY

To remove the SIM/Micro SD card
Remove the SIM card (or Micro SD
card) in the direction of the arrow.
To insert the SIM/Micro SD card
Insert the SIM card (or Micro SD
card) in the direction of the arrow.
4 INSERTING/EXRTRACTING
SIM/MICRO SD CARD
SIM
SIM
Micro SD
Micro SD

5 POWERING ON/OFF
Press the [Power] button on the top of the terminal to turn it on/off.
Use the stylus pen to select/run/move a target on the screen.
The stylus pen can be separated from the top left of the terminal.
Tap
This is used to select or execute an item by touching an icon on the
screen once with the stylus pen. This is similar to clicking the left
mouse button.
Drag
This is used to select multiple items. Use the drag function to select
letters or images. This is similar to dragging mouse cursor.
Tap and Hold
This is used to view the function of a desired item. If you tap and hold
the stylus pen on the screen, a pop-up menu opens.
This is similar to clicking right mouse button after selecting an item
with the mouse.
6 USING STYLUS PEN
Power Button

Run ‘Phone’ program from Start menu.
Enter a phone number and press ‘Talk’ to connect the call.
Redial
Select ‘Talk’ button without entering new phone number.
The phone will automatically connect to previous phone
number.
: Back Space
: List of incoming, outgoing, missed calls.
: To connect a call.
To make a call
Select ‘Talk’ on keypad or ‘Talk’ button on the
screen when
receiving
a call.
To receive a call
Select ‘ignore’ button on PDA screen or
on keypad to refuse a receiving call.
To refuse a call
Select ‘End’ button on screen or select
button on keypad.
End call
7 USING THE PHONE

To use a barcode in a specifi c program, contact the manufacturer of
the specifi c program.
Using scanner
Press the [Front Scanner] or [Side Scanner] button to start scanning.
Scanning Barcode
To scan a barcode, keep a distance of about 10 cm between the barcode and the
barcode scanner window and scan the barcode at the correct angle.
8 USING SCANNER

Using ActiveSync
1 Connect a PDA via Cradle or PDA iteslf to user PC by using a USB cable.
[Microsoft ActiveSync] must be installed in user PC before
connecting a PDA.
2 If the PDA is connected to user PC, [Microsoft ActiveSync] will start
automatically.
3 Check, edit, and transfer image, document, barcode information, music
saved in PDA to user PC from <Mobile Device> folder.
9 CONNECTING ACTIVESYNC
( Back side of Desktop cradle )
Adaptor PortUSB Cable Port
Please go to www.handheldgroup.com/manuals to download the full manual.

www.handheldgroup.com
/