
Vino Pins for Wood Surfaces
Installation instructions for Vino Pins (SKUs: VP-, VP-MAG-)
Included Parts
• (1) Vino Pins Neck
• (1) Vino Pins Base
• (2) Wood Lags
• (1) Hex Key
• (2) Nuts
• (1) 8.5”x11” Plotting Guide
Optional Parts
• Vino Pins Neck Extension
• Vino Pins Base Extension
• (2) Vino Pins Magnum Spacers
Important Note: These installation instructions are only for attaching Vino Pins for 750ml, Champagne, and
Magnum wine bottles to solid wood or plywood surface with a minimum thickness of ½“ (12.7mm). Please
reference Vino Pins for Drywall (SKUs: VPC-) for drywall information.
Figure B
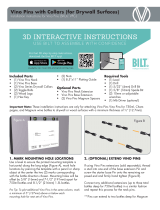
1. MARK MOUNTING HOLE LOCATIONS
Use a level to ensure the printed mounting template is
horizontal along the long edge (Figure A), mark hole
locations by piercing the template with a pencil or sharp
object at the center the two (2) marks corresponding
with the bottle direction chosen. Mounting holes will be
offset by 5/8” (16mm) and 7-1/2” (191mm) apart for
750ml bottles and 8-1/2” (216mm) 1.5L bottles.
Pro Tip: To plot additional Vino Pins in the same column, mark
a minimum of 5” (127mm) above or below each
mounting hole for next set of Vino Pins.
2. (OPTIONAL) EXTEND VINO PINS
If using Vino Pins extensions (sold separately), thread
a stud into one end of the base extension Pin and
screw the starter base Pin onto the remaining ex-
posed end and rmly hand tighten (Figure B).
Connect any additional extensions (up to three total
bottles deep for 750ml bottles) in a similar fashion
and repeat this process for the neck pins.
**Pins can extend to two bottles deep for Magnum
or Champagne bottles and require one (1) Magnum
Required Tools
• (1) Level
• (1) Drill
• (1) 5/32” (4mm) Drill Bit
• (2) 10mm or adjustable
wrenches
• (1) M6 Driver (recommended)
Figure A

Instructions: Vino Pins for Wood Surfaces (VP)
Figure G
Spacer to be inserted between each Starter and Exten-
sion Pin (Figure C).**
3. CONFIRM WALL SURFACE
Drill two (2) pilot holes using a 5/32” (4mm) Drill Bit
(Figure D) to determine whether your installation will be
into solid wood or drywall surface.
NOTE: If it is determined to be drywall, please use (or
purchase if necessary) Vino Series Collars install guide.
4. INSTALL WOOD LAGS
a. Using Hex Key or M6 Driver
Using either the provided hex key, drive the Lag Stud
into the pilot holes until the coarse threads are no longer
visible. When driving the Lag Stud, take care to ensure
it remains level. For larger projects, or if a sturdier tool
is needed, use an optional M6 Driver.
b. Using Nuts
Alternatively, attach two (2) provided nuts onto the ne
threaded end of the Lag Stud. Using two 10mm wrench-
es, tighten the nuts against one another (Figure E),
essentially creating a screw head. Then use one wrench
on the outer nut and screw the wood lag into the pilot
holes until the coarse threads are no longer visible.
4. INSTALL VINO PINS
Thread two (2) Vino Pins Assembiles onto the Studs
(Figure G). Firmly hand-tighten taking care not to over
tighten. Conrm Pins are level. Ensure you are installing
the Neck Pin into the higher of the two holes and the
Base Pin into the lower of the two holes.
5. ADD WINE
Only the good stuff.
Figure E
Figure F
Figure C Figure D

Instructions: Vino Pins for Wood Surfaces (VP)
Problems?
Try Vino Pins installation using BILT 3D intelligent instructions, visit
www.vintageview.com or give us a call at 303-504-9463.
Additional Notes:
All installations into drywall require the use of collars and alternate fasteners
to properly support the Vino Pins. Any application outside of these parameters
is not warranted by VintageView and may result in product and/or installation
failure, property damage and/or bodily injury.
Maintenance and Care:
Vino Pins should be regularly checked for tightness. Should any party to be
found to be loose, tighten by hand until secure. If the face of the wall surface shows signs of breakage, discontin-
ue use immediately until the wall may be adequately repaired. Vino Pins may be cleaned with a damp cloth and
mild dish soap -abrasive pads or steel wool should NOT be used as they will damage the nished surfaces of the
parts.
-
 1
1
-
 2
2
-
 3
3
VintageView Vino Pins 2 Installation guide
- Type
- Installation guide
- This manual is also suitable for
Ask a question and I''ll find the answer in the document
Finding information in a document is now easier with AI
Related papers
-
 VintageView Vino Pins 1 Acrylic Installation guide
-
 VintageView Vino Rails 1 Installation guide
-
 VintageView Vino Series Hidden Base Plate Installation guide
-
 VintageView Evolution Low Profile Angled Base Plate Installation guide
-
 VintageView Vino Rails Designer Grid 3×1 Installation guide
-
 VintageView Vino Series Vertical Extension Bracket Installation guide
-
 VintageView Vino Pins Flex Mag 45 Installation guide
-
 VintageView Vino Series Mini Installation guide
-
 VintageView Vino Series Stemware 2 Installation guide
-
 VintageView Vino Pins Mounting Plates Installation guide
Other documents
-
Vinotemp Vino-440TDG-CH User guide
-
Viking VUBV524GSS Owner's manual
-
Viking VUWC515 Installation guide
-
Viking VURE524GSS Installation guide
-
Hisense HWS54029SS User manual
-
Haier HVFM102A User manual
-
Haier HVFM102A User manual
-
Whirlpool WUW55X24HS User manual
-
Whirlpool WUW55X15HS User manual
-
Amana AWCE50ARS User manual


