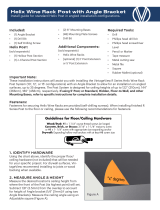
Vino Series Post System with Angle Bracket
Installation guide for Vino Series Post with FCP-ANG Brackets
Included:
• (1) Angle Bracket
• (1) Drill Bit
• (1) Self Drilling Screw
Vino Series Post
(sold separately)
• (1) 62” Post Bottom (c-Channel)
• (1) 62” Post Top
• (1) Mounting Base
Important Note:
These installation instructions will assist you with installing the VintageView Vino Series Post System with an
Angle Bracket to allow for an installation on angled surfaces, up to 35 degrees. Angle Brackets can be added to
one or both ends of a Vino Series Post.
If your Vino Series Post features welded Base Plates, visit www.vintageview.com/welded
Fasteners:
Fasteners for securing Mounting Plates to the Vino Series Posts are provided (self-drilling screws). Each mounting
Plate is pre-drilled for installing Post. When installing nished Vino Series Post to the oor or ceiling, please use
the following recommendations for fasteners (not included):
Additional Components:
(sold separately)
• 96 Mounting Plate screws
• Vino Series Post Mounting Plates
with Self-Drilling Screws
• Vino Pins or Vino Rails
Required Tools:
• Drill
• Phillips head drill bit
• Phillips head screwdriver
Level
• Pencil or Marker
• Tape measure
• Metal cutting saw
• Metal le
• Square
• Adjustable Square
• Rubber Mallet (optional)

Instructions: Vino Series Post with Angle Bracket
Figure A
Figure B
1. IDENTIFY PROPER HARDWARE
Using the chart on the previous page, identify the proper
oor/ceiling hardware (not included) that will be needed
for your specic project. For drywall surfaces in oor or
ceiling, VintageView recommend installing to joists or
wood backing when available.
2. MEASURE ANGLE & HEIGHT
Measure the desired location’s ceiling height from where
the front of the Post (its highest point) will set. Subtract
1/8” (3.5mm) from the overlap to account for height of
Angle bracket (1/4” [7mm] if using two Angle Brackets)
Measure the ceiling angle using an Adjustable square
(Figure A).
3. INSERT MOUNTING BASE
Insert (1) Mounting Base into the open end of the Post
Bottom Piece (with c-channel). Mounting Base must be
fully inserted into the Post Bottom. Base may be oriented
perpendicular or parallel to the Wine Racking.
Secure the Mounting Base into the Post Bottom with (2)
self-drilling screws through the pre-drilled holes (Figure B).
4. MARK THE POST
Lay the connected Post section next to the Post Bottom,
interlaced (Figure C). Position the two sections so that the
measurement from top to bottom of the base plates equals
your measurement from Step 2. Use a pencil or marker to
mark any overlap on the bottom of the connected Post Top.
Turn the post on its side and, using the Adjustable
Square, draw a cut line at desired angle from the mark
(Figure D). Do not cut from the end with the C-Channel.
4. CUT THE POST
Using a Metal Cutting Saw, cut off the welded Mounting
Bracket from the Post Top section at the marked angle
(Figure E). Do not use abrasive saws as they may dam-
age the finish.
5. INSERT ANGLE BRACKET
Insert the Angle Bracket into the Post Top (Figure F,
next page). When inserting, position so the Tube
of the Angle Bracket goes into the lower side of the
Post. The Angle Bracket will t square in the Post
when installed.
Figure C
Figure D
Figure E

Instructions: Vino Series Post with Angle Bracket
6. SECURE THE BRACKET
Using the provided Drill Bit, drill through Post and Angle
below the connection and on the front or back of the
Post. Thread provided Screw to secure the Angle Bracket.
7. CONNECT THE POST
Slide the completed Post Top Section onto the C-Channel
in the Post bottom (Figure G). It may require a Rubber
Mallet to connect fully.
8. MARK MOUNTING HOLES
Place the Post in the desired location. Ensure it is plumb
with a level and mark the mounting holes on the ceiling
and oor. Set Post aside.
9. MARK MOUNTING PLATE HOLES
Lay the rst wine rack Mounting Plate in the desired loca-
tion on the Post. Mark two (2) mounting hole locations.
Mark the holes for the next Plate ensuring a minimum
of 3-3/4” vertical clearance from one Plate to the next
(Figure H). Use a Level and a Square to ensure Plates are
Level. Set the plate to the side.
NOTE: Plates can be installed to one, two, three, or four
sides of the Post with an Angle Bracket. If consecutive
Plates are assembled on adjacent sides, a minimum of
3-3/4” v(96mm) vertical clearance is required (Figure I).
10. PRE-DRILL MOUNTING HOLES
Using the provided Drill Bit, pre-drill all marked mounting
hole locations.
11. ASSEMBLE/INSTALL THE PLATES
For Vino Pins
Mounting Plates are sold in two unique widths: one for
standard 750ml or Champagne bottles and one for mag-
num 1.5L bottles.
(Optional) Assemble the Vino Pins and Vino Pins Exten-
sions (Figure J) to reach desired bottle depth (up to 3
bottles deep for 750ml bottles and up to 2 bottles deep,
with spacer, for Magnum bottles.
Fasten the Vino Pins to the Mounting Plates using
provided M6 Screws (Figure K, next page).
Ensure the higher mounting hole in the Mounting
Plate points in the direction you want the bottle neck
to face. Fasten the Vino Pins Neck (slimmer bottle
impression) piece to the higher of the two holes.
Figure F Figure G
Figure H
Figure I
Figure J

Instructions: Vino Series Post with Vertical Extension
For Vino Rails
Mounting Plates are sold in standard 750ml or Cham-
pagne bottles and magnum 1.5L bottles congurations,
each with choice of single, double, or triple bottle width.
Thread all Vino Rails to the Mounting Plates using the
provided M6 Screws (Figure L).
NOTE: If installing Vino Rails Magnum wine racks, do
not insert supplied Bridge until the entire installation is
finished.
12. INSTALL THE PLATES
Attach one (1) assembled Mounting Plate to the Post
using two (2) provided Self-Drilling Screws into the pre-
drilled holes (Figure L). Repeat the previous step to attach
the remaining Mounting Plate assemblies (Figure M).
13. INSTALL THE SYSTEM
Stand the Post Assembly in the desired location and en-
sure it is plumb both front and back and side-to-side with
a level. Mark mounting holes on oor, ceiling, and wall.
Set Post aside and pre-drill mounting holes.
Place Post back in place, ensuring it is level, and secure
to the ceiling (Figure N) using two (2) of the appropriate
fasteners (not provided). Double check the Post is plumb
and secure the Post to the oor using two (2) of the ap-
propriate fasteners (not provided).
If any of the Mounting Plates appear unlevel, loosen one
(1) Screw slightly and reposition using a Rubber Mallet
and Level (Figure O). Re-tighten the screw.
14. ADD WINE
Only the good stuff.
Problems?
Try using BILT 3D intelligent instructions, visit
www.vintageview.com or call 303-504-9463.
Maintenance and Care:
Vino Pins or Rails should be regularly checked for tightness. If
Figure K Figure L
Figure M
Figure N
any rack is loose, tighten
by hand until secure.
Components of the Vino
Series Post System may
be cleaned with a dust
cloth or rubbing alco-
hol. Abrasive pads or
cleaning supplies should
NOT be used as they will
damage the nish.
Figure M
/
