Page is loading ...

Vino Pins Flex System
Installation guide for the Vino Series Flex (VP-Flex) products
Included:
• (1) Vino Pins Flex Neck Mounting
Strip
• (1) Vino Pins Flex Base Mounting
Strip
• (6) Mounting Hole Caps
• (2) Plastic Couplers
• (4) Spiral Drywall Anchors
• (6) Screws
Important Note:
These installation instructions will assist you with installing the VintageView Vino Pins Flex System into wood-
backed or drywall surfaces.
Surfaces:
Drywall and wood surfaces must be a minimum of 1/2” (12.7mm) thick.
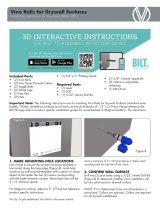
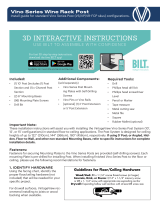
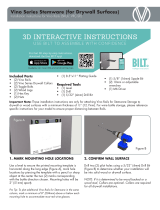
SCAN THE QR CODE TO FIND YOUR PRODUCT
DOWNLOAD THE FREE APP
3D-GUIDED INTERACTIVE ASSEMBLY
INSTRUCTIONS CAN BE FOUND ON BILT
®
Before you begin
Additional Components:
(may be sold separately)
• Vino Pins
• Vino Pins Extensions (optional)
Required Tools:
• Phillips head screwdriver
• Level
• Pencil
• Tape measure
• Drill
• 1/2” Drill bit (spade)
• 1/16” Drill bit
• Protractor or adjustable level for
angled installs
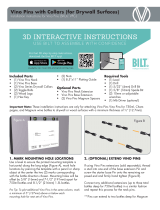
1. ORIENT THE MOUNTING STRIPS
Identify the front and top of each mounting strip, then
note which of the two is for Vino Pins Neck pieces.
The front of the Mounting Strip has more 1/4”
(6.5mm) holes than 1/2” (13mm) holes.
To identify the top of each Mounting Strip, note the
side with the 1/2” (13mm) mounting holes closer to
the top.
Finally, the neck side of the mounting strip has the
higher (offset) of the 1/4” (6.5mm) holes.
Front
Top
Neck

Instructions: Vino Pins Flex (VP-FLEX)
Figure A Figure B
(OPTIONAL)
2. ADD VINO PINS EXTENSION PIECES
Thread one (1) Stud into each Vino Pin Extension for the
Bottle Neck (Figure A). Repeat the process for the Vino
Pin Bottle Base side. Vino Pins are designed to extend up
to three (3) total bottles deep for 750ml bottles and up to
two (2) bottles deep with spacer for magnum bottles.
3. ASSEMBLE THE PINS TO THE STRIP
Insert one (1) Vino Series Screw through the back of one
(1) Vino Pins Flex Neck mounting Strip and thread one
(1) Vino Pin Neck piece until tight against the surface of
the mounting strip (Figure B). Repeat until all Vino Pins
Neck pieces are attached to the Neck Mounting Strip,
and all Vino Pins Base pieces are attached to the Base
Mounting Strip.
4. CHOOSE BOTTLE DIRECTION
Before marking the mounting hole locations, decide
which direction you want the bottle necks to face to deter-
mine which order to mount the Base and Neck Mounting
Strips (Figure C).
5. LAY OUT WALL
The Vino Pins Flex can be mounted vertically or at angles
ranging from 45 degrees to 135 degrees.
Vertical Columns
Starting at least 2 3/4” (70mm) from adjacent wall or
other obstructions and 1” (25.5mm) from the ceiling,
mark the centerline of the first Mounting Strip (Figure D).
From there, measure the distance, noted in chart below
by bottle type, to centerline of the second Mounting Strip.
Hold one Mounting Strip (careful to note the top and
Neck side) in place against the wall, centered on the first
mark at your preferred distance from floor.
Ensure the Strip is plum using a level and mark hole
locations with a pencil (Figure E). Mounting Strips can be
installed on angles up to 45 degrees. Set strip aside.
Figure C
Figure D
Figure E
Centerline Measurements
• Vino Pins Standard (750ml): 7.5” (190.5mm)
• Vino Pins Magnum (1.5L): 8.5” (216mm)

Instructions: Vino Pins Flex (VP-FLEX)
Angeled Columns
Using a speed square or protractor, hold the first Mount-
ing Strip in desired location set to preferred angle. Mark
mounting holes (Figure F). For second Mounting Strip
locations use a level to measure across,from the center
of the mounting locations of the first Strip, the distance
noted on previous page.
The Neck side mounting holes should be offset 3/8”
below the Base side.
Pro tip: Test the fit of irregularly shaped bottles by check-
ing your layout angles on the floor first.
*NOTE: The tops of the Vino Pins Flex Mounting strips
will not be flush in angled installs.
6. DRILL MOUNTING HOLES
Drill 1/16” (1.5mm) pilot holes at marked locations to
determine if installing into wood studs or drywall.
If Drywall: For top mounting point, drill a 1/2”
(12.7mm) hole for toggle bolt. For lower two holes use a
Phillip’s head screwdriver to insert spiral drywall anchors
into wall until it is flush with surface.
7. HANG THE MOUNTING STRIP
Drywall
Remove the expanding nut from toggle bolt and insert
through the top mounting hole on your Mounting Strip.
With the wings of the nut oriented to fold toward the bolt
head, thread the expanding nut onto the bolt so the tip of
it starts to protrude form the end of the nut (Figure G).
Hold the strip so the toggle bolt aligns with the top
mounting and gently push the nut through the wall.
Ensure the wings have fully expanded on the backside
of the wall and gently tighten, verifying the necks remain
level. Secure the rest of the strip through the bottom two
mounting holes with provided screws (Figure H).
Fully tighten the toggle bolt using a screwdriver.
Wood or Studs
Use provided screws and install the Mounting Strip to the
wall at the marked mounting hole locations (Figure I).
Figure F
Figure G
Figure H
Figure I

Instructions: Vino Series Post (for Pins or Rails)
Problems?
Try Vino Pins Flex installation using BILT 3D intelligent instructions, visit
www.vintageview.com or give us a call at 303-504-9463.
Maintenance and Care:
Vino Series wine racks are backed by a lifetime warranty. They should be regu-
larly checked for tightness. Should any piece to be found to be loose, tighten by
hand until secure. If the face of the wall surface shows signs of breakage, dis-
continue use immediately until the wall may be adequately repaired. Vino Series
products may be cleaned with a damp cloth and mild dish soap — abrasive pads
or steel wool should NOT be used as they will damage the finished surfaces of
the parts.
8. HANG THE NEXT MOUNTING STRIP
Repeat steps 5-8 with the second Mounting Strip, centering it horizontally with the second mark on your wall
from Step 4 (vertical installations, ensure tops of Strips are even).
9. INSTALL MOUNTING HOLE CAPS
Press supplied mounting hole caps into the open holes of the face of each Mounting Strip (Figure J).
10. ADD WINE
Only the good stuff.
Figure J
/

