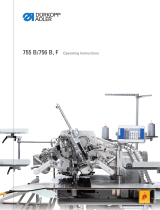
DURKOPP ADLER H867 Owner's manual

Category
Sewing machines
Type
Owner's manual
H867
Operating Instructions
All rights reserved.
Property of Dürkopp Adler AG and protected by copyright. Any reuse of these contents,
including extracts, is prohibited without the written approval in advance of Dürkopp Adler AG.
Copyright © Dürkopp Adler AG - 2012
Table of contents
Operating manual H867 Version 00.0 - Last updated: 01/2012 1
Table of contents
1 General information.............................................................3
1.1 Scope of application of the manual........................................3
1.2 Declaration of conformity .......................................................3
1.3 Applicable documentation......................................................3
1.4 Damage during transport .......................................................3
1.5 Limitation of liability................................................................3
2 Safety instructions...............................................................4
2.1 General safety instructions ....................................................4
2.2 Signal words and symbols used ............................................5
3 Product description.............................................................7
4 Intended use.........................................................................8
5 Technical data......................................................................9
6 Additional equipment ........................................................10
7 Operating instructions ......................................................12
7.1 Product overview .................................................................12
7.2 Switching the power supply on and off ................................12
7.3 Inserting and replacing the needle.......................................13
7.4 Threading in the needle thread............................................14
7.5 Inserting and winding on the looper thread..........................16
7.6 Replacing the looper thread bobbin.....................................18
7.7 Adjusting the thread tension ................................................19
7.7.1 Adjusting the needle thread tension.....................................20
7.7.2 Adjusting the looper thread tension .....................................21
7.8 Setting the thread regulator .................................................21
7.9 Lifting the sewing feet ..........................................................22
7.10 Locking the sewing feet in the upper position......................22
7.11 Sewing foot pressure ...........................................................23
7.12 Sewing foot stroke ...............................................................23
7.13 Stitch length .........................................................................25
7.14 Setting quick functions at the keypad ..................................26
7.15 Sewing .................................................................................28
7.16 Maintenance ........................................................................29
7.16.1 Cleaning the machine ..........................................................29
7.16.2 Checking the oil level...........................................................30
7.16.3 Checking the pneumatic system..........................................31
7.17 Repairs ................................................................................32
8 Set-up instructions ............................................................33
8.1 Checking the delivery scope................................................33
8.2 Removing the transport securing devices............................34
8.3 Fitting the frame components ..............................................34
8.4 Fitting the pedal ...................................................................34
8.5 Completing the table plate ...................................................35
8.6 Fastening the table plate to the frame .................................36
8.7 Fitting the control .................................................................36
Table of contents
2 Operating manual H867 Version 00.0 - Last updated: 01/2012
8.8 Fitting the setpoint device.................................................... 37
8.9 Inserting the machine upper section ................................... 37
8.10 Fitting the damper ............................................................... 38
8.11 Fitting the oil extraction line................................................. 38
8.12 Fitting the knee lever........................................................... 39
8.12.1 Fitting the electrical knee lever............................................ 39
8.12.2 Fitting the mechanical knee lever........................................ 39
8.13 Fitting the control panel....................................................... 40
8.14 Electrical connection ...........................................................41
8.14.1 Fitting the sewing lamp........................................................ 41
8.14.2 Fitting and connecting the sewing lamp transformer........... 42
8.14.3 Connecting the direct drive.................................................. 43
8.15 Pneumatic connection......................................................... 43
8.15.1 Fitting the maintenance unit ................................................43
8.17 Lubrication...........................................................................45
8.18 Sewing test.......................................................................... 46
9 Appendix ............................................................................ 47
General information
Operating manual H867 Version 00.0 - Last updated: 01/2012 3
1 General information
1.1 Scope of application of the manual
This manual describes the intended use and the set-up of the long arm
machine, H867.
It is valid for all submodels listed in Section 5 Technical data.
Operation of the drive is described in a separate operating manual.
1.2 Declaration of conformity
The machine complies with the European regulations specified in the dec-
laration of conformity or in the installation declaration.
1.3 Applicable documentation
The device contains built-in components of other manufacturers,
e.g. drive motors. The corresponding manufacturers have performed a
hazard assessment for these purchased parts and confirmed compliance
of the design with the European and national specifications. The intended
use of the built-in components is described in the corresponding manuals
of the manufacturers.
1.4 Damage during transport
Dürkopp Adler cannot be held liable for any damage during transport.
Check the delivered product immediately after receiving it. Report any
damage to the last transport manager. This also applies if the packaging
is not damaged.
Keep the machines, devices and packaging material in the condition they
were at the time when the damage was identified. That secures any claims
towards the transport company.
Report all other complaints to Dürkopp Adler immediately after receiving
the product.
1.5 Limitation of liability
All information and notes in this operating manual have been compiled in
accordance with the latest technology and the applicable standards and
regulations.
The manufacturer cannot be held liable for any damage due to:
Failure to observe the operating manual
Improper use
Unauthorized modifications to the machine
The deployment of untrained personnel
Damage during transport
Using spare parts not approved
Safety instructions
4 Operating manual H867 Version 00.0 - Last updated: 01/2012
2 Safety instructions
This section contains basic instructions for your safety. Read the instruc-
tions carefully before setting up or operating the machine. Make sure to
follow the information included in the safety instructions. Failure to do this
can result in serious injury and damage to the machine.
2.1 General safety instructions
Only authorized persons may use the machine. Every person who works
with the machine must have read the operating manual first.
The machine may only be used as described in this manual.
The operating manual must be available at the machine's location at all
times.
Also observe the safety instructions and the operating manual of the drive
motor's manufacturer.
Observe the generally applicable safety and accident prevention regula-
tions and the legal regulations concerning industrial safety and the protec-
tion of the environment.
All warnings on the machine must always be in legible condition and may
not be removed. Missing or damaged labels must be replaced immedi-
ately.
For the following work, the machine must be disconnected from the power
supply using the main switch or by disconnecting the power plug:
Threading
Replacing the needle or other sewing tools
Leaving the workplace
Performing maintenance work and repairs
Inspect the machine while in use for any externally visible damage. Inter-
rupt your work if you notice any changes to the machine. Report any
changes to your supervisor. A damaged machine may not be used any
more.
The machine may only be set up by qualified specialists.
Maintenance work and repairs may only be carried out by qualified spe-
cialists.
Safety instructions
Operating manual H867 Version 00.0 - Last updated: 01/2012 5
Safety equipment may not be removed or put out of service. If this cannot
be avoided for a repair operation, the safety equipment must be refitted
and put back into service immediately afterwards.
Work on electrical equipment may only be carried out by qualified special-
ists.
The connecting cable must have a power plug approved in the specific
country. The power plug may only be connected to the power cable by a
qualified specialist.
Work on live components and equipment is prohibited. Exceptions are
defined in the specifications in DIN VDE 0105.
Missing or faulty spare parts could impair safety and damage the machine.
Therefore only use original spare parts from the manufacturer.
2.2 Signal words and symbols used
Safety instructions in the text are distinguished by color bars.
Signal words specify the severity of a hazard:
Danger: resulting in death or serious injury.
Warning: death or serious injury possible.
Caution: moderate to minor injuries possible.
Attention: damage possible.
In the case of hazards to personnel, the following symbols indicate the
type of hazard:
General hazard
Hazard due to sharp objects
Hazard due to electric shock
Safety instructions
6 Operating manual H867 Version 00.0 - Last updated: 01/2012
Examples of the layout of the safety instructions in the text:
Type and source of the hazard
Consequences in the event of noncompliance
Measures for avoiding the hazard
This is what a hazard note looks like for a hazard
that will result in serious injury or even death if not
DANGER
Type and source of the hazard
Consequences in the event of noncompliance
Measures for avoiding the hazard
This is what a hazard note looks like for a hazard
that could result in serious injury or even death if
not complied with.
WARNING
Type and source of the hazard
Consequences in the event of noncompliance
Measures for avoiding the hazard
This is what a hazard note looks like for a hazard
that could result in moderate or minor injury if not
complied with.
CAUTION
Type and source of the hazard
Consequences in the event of noncompliance
Measures for avoiding the hazard
This is what a hazard note looks like for a hazard that could result in
material damage if not complied with.
ATTENTION
Product description
Operating manual H867 Version 00.0 - Last updated: 01/2012 7
3 Product description
The Dürkopp Adler H867 is a heavy-duty long arm machine with extra
large looper.
It is a flatbed sewing machine for double backstitches.
The material to be sewn is moved by lower transport, needle transport and
alternating foot upper support.
Technical features:
Extra-large 3XL looper 40 mm bobbin diameter.
DC drive for all submodels.
Safety snap-on coupling for preventing any misadjustment of or dam-
age to the looper in the event of a thread jamming.
Automatic wick lubrication for machine and looper with oil level indica-
tor at the column.
Maximum passage with ventilated sewing feet: 25 mm.
Residual thread length with automatic thread cutter: approx. 15 mm.
Depending on the submodel, the product is available as 1-needle machine
or 2-needle machine and with or without automatic thread cutter. Submod-
els with automatic thread cutter have a keypad on the machine arm for
quick functions. The keypad functions can be assigned to an additional
button near the handle as an option.
Intended use
8 Operating manual H867 Version 00.0 - Last updated: 01/2012
4 Intended use
The Dürkopp Adler H867 is for sewing moderately heavy to heavy
material.
Moderately heavy to heavy material requires a needle strength
of 140 - 180 Nm.
Heavy material requires a needle strength of 180 - 230 Nm.
The maximum thickness of the material to be sewn is 15 mm.
The machine is only intended for processing dry material.
The sewing machine is intended for industrial use.
The manufacturer will not be held liable for damage resulting from
improper use.
Hazard due to high voltage, crushing and sharp
objects.
Improper use can result in injuries.
Please follow all instructions in the manual.
WARNING
Improper use can result in material damage.
Please follow all instructions in the manual.
ATTENTION
Technical data
Operating manual H867 Version 00.0 - Last updated: 01/2012 9
5 Technical data
Model/
submodel
H867-
190362-70
H867-
290362-70
Length/width/height [mm] 1090/220/500
Weight/with direct drive [kg] 68/72 68/72
Noise:
workplace-specific
emission value as per
DIN EN ISO 10821 for:
Sewing stitch type Backstitch 301
Looper type Vertical, oversize (3XL)
Number of needles 1 2
Needle system 328 (794 and 7x23 possible after conversion)
Maximum needle strength
[Nm]
230
Sewing thread thickness 5/3
Stitch length, forwards /
backwards [mm]
12 / 12
Number of adjustable stitch
lengths
12122
Maximum number of stitches 1800 1800
Number of stitches on
delivery
1800 1600
Reduction of the number of
stitches with stitch lengths
from 9 - 12 mm
1200 1200
Reduction of the number of
stitches with stroke
from 1-3mm
1800 1800
Reduction of the number of
stitches with stroke
exceeding 4 mm
1500 1500
Reduction of the number of
stitches with stroke
exceeding 6 mm
1000 1000
Reduction of the number of
stitches with stroke
exceeding 9 mm
800 800
Maximum fan height (*only
with reversing mechanism)
Maximum sewing foot stroke 9 9
Positive operating pressure
[bar]
666
66
Air consumption [NL] 0,7 0,7
Rated
voltage [V/Hz]
Depends on the drive package
Rated power [kVA]
Additional equipment
10 Operating manual H867 Version 00.0 - Last updated: 01/2012
6 Additional equipment
Additional equipment
Material
number
H867-
190362-
70
H867-
290362-
70
Electropneumatic needle cooling from above for
1-needle machines (NK 20- )
H867 59
X
Electropneumatic needle cooling from below for
1-needle machines (NK 20- )
H867 59
X
Electropneumatic needle cooling from above
(NK 20- )
H867 59
X
Electropneumatic needle cooling from below
(NK 20- )
H867 59
XX
Electropneumatic needle cooling from below
(NK 20-5 )
0867
590024
Residual-thread monitor for the looper thread of
3XL loopers, 1-needle machines (RFW20-1)
H867 59
X
Residual-thread monitor for the looper thread of
3XL loopers, 2-needle machines (RFW20-2)
H867 59
X
Electrical needle plate slide monitoring
for 1-needle machines
0867
590204
Electrical needle plate slide monitoring
for 2-needle machines
0867
590214
Combined eye and finger protection with
machine shutdown
0867
590304
WE-8 maintenance unit for additional pneumatic
equipment 9780
9780
000108
XXXXX
Operating panel bracket 0867
490100
z zz
Halogen sewing lamp for upper sewing machine
section
9822
510003
XXXXX
Sewing lamp attachment set 9880
867100
XXXXX
Sewing lamp transformer for halogen sewing
lamp
0798
500088
XXXXX
1-diode sewing lamp with attachments 9880
867103
XXXXX
Integrated diode sewing lamp 9880
867118
z zz
Power supply unit k for integrated sewing lamp
and 1-diode sewing lamp
9850
001089
z zz
Pneumatic connection package for connecting
frames with maintenance unit
0797
003031
XXXXX
Mechanical sewing foot ventilation 0867
590344
??
Pneumatic sewing foot ventilation (FLP20-1) 0867
590354
??
z= standard equipment
X = optional additional equipment
Additional equipment
Operating manual H867 Version 00.0 - Last updated: 01/2012 11
Edge stop, swiveling N800
080007
XXXXX
Edge stop, swiveling N800
080036
XXXXX
Edge stop / ruler on needle plate slide (2nd seam
clearance suitable for swiveling edge stops)
N800
080022
XX
Edge stop with 2 pneumatically adjustable seam
clearances / fastening on the needle plate slide
N800
005648
XX
Edge stop, swiveling (like Del Veccia) N800
080033
XXXXX
Seam center guide from front, pneumatically
switched
N800
005650
XX
Seam center guide, swiveling (mechanical) N800
XX
Belt guide with pneumatic brake N054
005001
XXXXX
Reflex light barrier for the automatic detection of
the sewing material edge at the end of the seam
(LR20-1)
0867
590074
XX
Memo dongle, external memory, for data
transmission with DA-Classic control
9835
901005
XXXXX
3XL looper, low-maintenance 0868 15
PCB for oil monitoring 9850
867001
z zz
Thread clamp with thread wiper function (FK kit) 0867
592014
XX
Attachment set for a clean seam start 0867
591004
Electropneumatic sewing foot ventilation
(FLP 20-6)
0867
592034
XX
Tool set for M-type 9081
300001
XXXXX
Frames
Frame set for motor, attached to the upper
section, table plate 1600x580 m with pedal
(MG 58-63)
MG58
400404
XXXX
Frame set for motor, attached to the upper
section, table plate 1600x750 m with pedal
(MG 58-63)
MG58
400464
XXXX
Frame set for motor, attached to the upper
section, table plate 1900x580 m with pedal
(MG 58-63)
MG58
400444
z= standard eq
uipment
X = optional additional equipment
Additional equipment
Material
number
H867-
190362-
70
H867-
290362-
70
Operating instructions
12 Operating manual H867 Version 00.0 - Last updated: 01/2012
7 Operating instructions
7.1 Product overview
Figure 1: Complete overview
7.2 Switching the power supply on and off
The lower main switch (2) on the control regulates the power supply.
Figure 2: Switching the power supply on and off
To switch on the power:
Press the main switch (2) down to the "I" position.
The indicator lamps (3) and (4) light up.
To switch off the power:
Press the main switch (2) up to the "0" position.
The indicator lamps (3) and (4) go out.
q
w
r
t
y
u
i
o
a
s
d
e
(1) - Unwinding bracket with thread reel
holder
(2) - Reversing lever
(3) - Handwheel
(4) - Oil level indicator
(5) - Adjusting wheels for the stitch length
(6) - Bobbin winder for the looper thread
(7) - Looper (under the needle plate)
(8) - Sewing foot with needle
(9) - Keypad on the machine arm
(10) -Thread tensioners
(11) - Adjusting wheel for the sewing foot
pressure
(12) - Adjusting wheels for the sewing foot
stroke
+
q
r
w
e
(1) - Switch for the sewing lamp
(2) - Main switch for the power supply
(3) - Indicator lamp on the control
(4) - Indicator lamp on the keypad for the quick functions
Operating instructions
Operating manual H867 Version 00.0 - Last updated: 01/2012 13
7.3 Inserting and replacing the needle
Figure 3: Inserting and replacing the needle
Turn the handwheel back until the needle bar (1) reaches the upper
end position.
Loosen the needle screw (2).
Pull the needle out towards the bottom.
Insert the new needle.
Align the needle in such a way that the groove (4) faces the looper (3).
Tighten the needle screw (2).
2-needle
machines
Note on 2-needle machines:
The procedure for the second needle of 2-needle machines is identical.
Align the needles in such a way that the grooves face away from each
other. Each groove then faces the looper that belongs to this needle.
Risk of injury by the needle point and moving
parts.
Switch off the sewing machine before replacing the
needle.
Do not touch the needle point.
WARNING
q
e
r
w
(1) - Needle bar
(2) - Needle screw
(3) - Looper
(4) - Groove
Damage to the looper point or needle possible due to incorrect
distance from the looper.
The distance between the looper and the needle only needs to be
adjusted if the new needle has a different size.
After changing the needle size, adjust the looper distance.
For this, read the service manual.
ATTENTION
Operating instructions
14 Operating manual H867 Version 00.0 - Last updated: 01/2012
7.4 Threading in the needle thread
Figure 4: Thread guide on the unwinding bracket and machine arm
Fit the thread reel on the thread reel holder (2).
Insert the thread from the rear to the front through a hole in the guide
on the unwinding bracket (1).
Insert the thread from the right to the left through a hole in the addi-
tional guide on the machine arm (3).
Figure 5: Threading procedure for needle thread - part 1
Insert the thread from the rear to the front through the left hole in the
first thread guide (1).
Insert the thread in a wavelike manner through the 3 holes of the sec-
ond thread guide (2): from top to bottom through the right hole, then
from bottom to top through the hole in the middle and finally from top
to bottom through the left hole.
Guide the thread clockwise around the pre-tensioner (3).
Risk of injury by the needle point and moving
parts.
Switch off the sewing machine before inserting the
thread.
WARNING
q
w
e
(1) - Guide on the unwinding
bracket
(2) - Thread reel holder
(3) - Additional guide on the
machine arm
+
1234
+
+
+
+
5
6
4
+
q
w
e
r
t
y
u
i
o
(1) - First thread guide
(2) - Second thread guide
(3) - Pre-tensioner
(4) - Additional tensioner
(5) - Main tensioner
(6) - Additional screw
(7) - Thread tensioning spring
(8) - Spring tip
(9) - Tightening lever
Operating instructions
Operating manual H867 Version 00.0 - Last updated: 01/2012 15
Guide the thread counterclockwise around the additional tensioner (4).
Guide the thread clockwise around the main tensioner (5).
Guide the thread under the additional screw (6) to the thread tension-
ing spring.
Lift the tightening lever (9) with the thread.
Pull the thread under the spring tip (8).
Figure 6: Threading procedure for needle thread - part 2
Guide the thread under the hook (16).
Insert the thread from bottom to top through the hole on the thread
regulator (11).
Insert the thread from the right to the left through the thread
catcher (10).
Insert the thread through the upper thread guide (15).
Insert the thread through a hole in the lower thread guide (14).
Insert the thread through the thread guide on the needle bar (13).
Insert the thread through the needle eye (12) in such a way that the
loose thread end faces the looper.
Pull the thread through the needle eye (12) until the loose thread end
has a length of 4 cm in the highest position at the thread catcher (10).
2-needle
machines
Note on 2-needle machines:
2-needle machines are equipped with a second tensioning screw triangle
for the 2nd needle thread. The threading-in procedure corresponds to that
for the 1st needle thread.
+
1234
a
j
h
g
f
s
d
(10) - Thread catcher
(11) - Thread regulator
(12) - Needle eye
(13) - Thread guide on the needle bar
(14) - Lower thread guide
(15) - Upper thread guide
(16) - Hook
Operating instructions
16 Operating manual H867 Version 00.0 - Last updated: 01/2012
Figure 7: Needle thread threading procedure for 2-needle machines
Guide the threads through the guides and around the tensioning
screws in such a way that the threads do not intersect.
First guide the left-hand needle thread through the left-hand guide
holes and around the left-hand tensioning screw triangle.
Then guide the right-hand needle thread through the right-hand guide
holes and around the right-hand tensioning screw triangle.
7.5 Inserting and winding on the looper thread
Figure 8: Thread guide on the unwinding bracket and machine arm
Fit the thread reel on the thread reel holder (1).
Insert the thread from the rear to the front through a hole in the guide
on the unwinding bracket (2).
Insert the thread from the right to the left through a hole in the addi-
tional guide on the machine arm (3).
1234
+
+
+
+
+
+
+
w
q
(1) - Tensioning screws in triangular
arrangement for the first needle
thread
(2) - Tensioning screws in triangular
arrangement for the second needle
Risk of injury by the needle point and moving
parts.
Switch off the sewing machine before inserting the
thread.
WARNING
q
w
e
(1) - Guide on the unwinding
bracket
(2) - Thread reel holder
(3) - Additional guide on the
machine arm
Operating instructions
Operating manual H867 Version 00.0 - Last updated: 01/2012 17
Figure 9: Winding on the looper thread - part 1
Insert the thread from the rear to the front through the right hole in the
1st thread guide (1).
Insert the thread in a wavelike manner through the 3 holes of the
2nd thread guide (5): from top to bottom through the left hole, from
bottom to top through the hole in the middle and finally from top to bot-
tom through the right hole.
Guide the thread clockwise around the looper thread winding
tensioner (4).
Insert the thread in a wavelike manner through the 2 holes of the
looper thread guide (2): from bottom to top through the left hole and
from top to bottom through the right hole.
Guide the thread to the winding bobbin (3).
Figure 10: Winding on the looper thread - part 2
Clamp the thread behind the cutter (1) and tear off the loose end
behind it.
Fit the bobbin on the winder (2).
Turn the bobbin clockwise until it clicks.
Pull the bobbin lever (3) up.
The looper thread is normally wound on when sewing is in progress. How-
ever, you can also wind on the looper thread without sewing material,
e.g. if you require a full bobbin in order to start sewing.
1234
+
+
+
5
6
4
1
2
9
q
w
e
r
t
(1) - 1. thread guide
(2) - Looper thread guide
(3) - Bobbin winder
(4) - Looper thread winding tension
(5) - 2. thread guide
q
w
e
(1) - Cutter
(2) - Winder
(3) - Bobbin lever
Operating instructions
18 Operating manual H867 Version 00.0 - Last updated: 01/2012
Switch on the sewing machine.
Press the foot pedal forwards.
The machine sews and winds the looper thread from the thread reel onto
the bobbin.
When the bobbin is full, the machine automatically stops winding. The
bobbin lever moves down.
The cutter is automatically moved into its basic vertical position.
Pull off the full bobbin.
Tear off the thread behind the cutter.
Insert a full bobbin in the looper (see Section 7.6 Replacing the looper
thread bobbin).
Repeat the winding-on procedure with an empty bobbin, as described
above.
7.6 Replacing the looper thread bobbin
Figure 11: Replacing the looper thread bobbin
Lift the looper flap (1).
Remove the empty bobbin.
Insert a full bobbin: insert the bobbin in such a way that it moves in the
opposite direction of the looper.
Guide the looper thread through the 1st looper slot (2).
Damage to the sewing feet or needle plate possible if the
thread is wound on without material.
Lock the sewing feet in place in the highest position and adjust the
sewing foot stroke to the smallest value if you wind on thread with-
out sewing material.
ATTENTION
Risk of injury by the needle point and moving
parts.
Switch off the sewing machine before replacing the
looper thread bobbin.
WARNING
w
e
r
t
q
(1) - Looper flap
(2) - 1. looper slot
(3) - Looper spring
(4) - Looper flap guide
(5) - 2. looper slot
  • Page 1 1
  • Page 2 2
  • Page 3 3
  • Page 4 4
  • Page 5 5
  • Page 6 6
  • Page 7 7
  • Page 8 8
  • Page 9 9
  • Page 10 10
  • Page 11 11
  • Page 12 12
  • Page 13 13
  • Page 14 14
  • Page 15 15
  • Page 16 16
  • Page 17 17
  • Page 18 18
  • Page 19 19
  • Page 20 20
  • Page 21 21
  • Page 22 22
  • Page 23 23
  • Page 24 24
  • Page 25 25
  • Page 26 26
  • Page 27 27
  • Page 28 28
  • Page 29 29
  • Page 30 30
  • Page 31 31
  • Page 32 32
  • Page 33 33
  • Page 34 34
  • Page 35 35
  • Page 36 36
  • Page 37 37
  • Page 38 38
  • Page 39 39
  • Page 40 40
  • Page 41 41
  • Page 42 42
  • Page 43 43
  • Page 44 44
  • Page 45 45
  • Page 46 46
  • Page 47 47
  • Page 48 48
  • Page 49 49
  • Page 50 50
  • Page 51 51
  • Page 52 52

DURKOPP ADLER H867 Owner's manual

Category
Sewing machines
Type
Owner's manual

Ask a question and I''ll find the answer in the document

Finding information in a document is now easier with AI