Duerkopp Adler H867-Langarm [Long Arm] User manual

Type
User manual

Duerkopp Adler H867-Langarm [Long Arm] is an advanced sewing machine designed to handle various materials and projects with precision and ease. It excels in tasks that require a long reach, such as sewing large garments, curtains, and upholstery. With its user-friendly features, it's suitable for both home and professional use.

Duerkopp Adler H867-Langarm [Long Arm] is an advanced sewing machine designed to handle various materials and projects with precision and ease. It excels in tasks that require a long reach, such as sewing large garments, curtains, and upholstery. With its user-friendly features, it's suitable for both home and professional use.

H867
Additional Instructions
Tilting support
All rights reserved.
Property of Dürkopp Adler GmbH and protected by copyright. Any reuse of these contents,
including extracts, is prohibited without the prior written approval of Dürkopp Adler GmbH.
Copyright © Dürkopp Adler GmbH 2021
IMPORTANT
READ CAREFULLY BEFORE USE
KEEP FOR FUTURE REFERENCE
Table of Contents
Additional Instructions H867 - 01.0 - 01/2021 1
1 Components of the parts set.....................................................3
2 Function of the parts set............................................................4
3 Installing the parts set ...............................................................6
Table of Contents
2 Additional Instructions H867 - 01.0 - 01/2021
Components of the parts set
Additional Instructions H867 - 01.0 - 01/2021 3
1 Components of the parts set
Check whether the scope of delivery for parts set 0867 142224 is correct
prior to installing the tilting support.
Part number Quantity Description
9202 002887 3 Screw M6x12
9351 000087 4 Adjusting ring
0867 142200 2 Ring
0867 142260 2 Bolt
0867 142190 1 Holder
0867 142240 1 Lever
9706 000314 1 Gas spring
9202 003317 4 Screw M8x25
0867 142173 1 Holder
0867 142250 2 Bolt
0867 142210 1 Lever
Function of the parts set
4 Additional Instructions H867 - 01.0 - 01/2021
2 Function of the parts set
The tilting support is designed to allow for easier tilting of the machine
head. It also increases safety for the user while tilting back the machine.
Position 1 - machine in working position
In this position, the gas spring mechanism acts on the base plate. This
effect makes it easier to tilt the machine head back into the service
position.
Fig. 1: Position 1
CAUTION
Risk of crushing due to the weight of the
machine!
The machine should only be tilted by qualified
technicians.
Function of the parts set
Additional Instructions H867 - 01.0 - 01/2021 5
Position 2 - machine in idle position
The machine head is slowed down by the lever when being tilted back.
This deceleration prevents an uncontrolled tilting motion and stops the
machine head from colliding with the base plate on account of the machine
head's own weight. This feature prevents damage to the machine as well
as injury to the user.
Tilting the machine head all the way into the service position requires that
the machine be tilted backwards by applying active force.
Fig. 2: Position 2
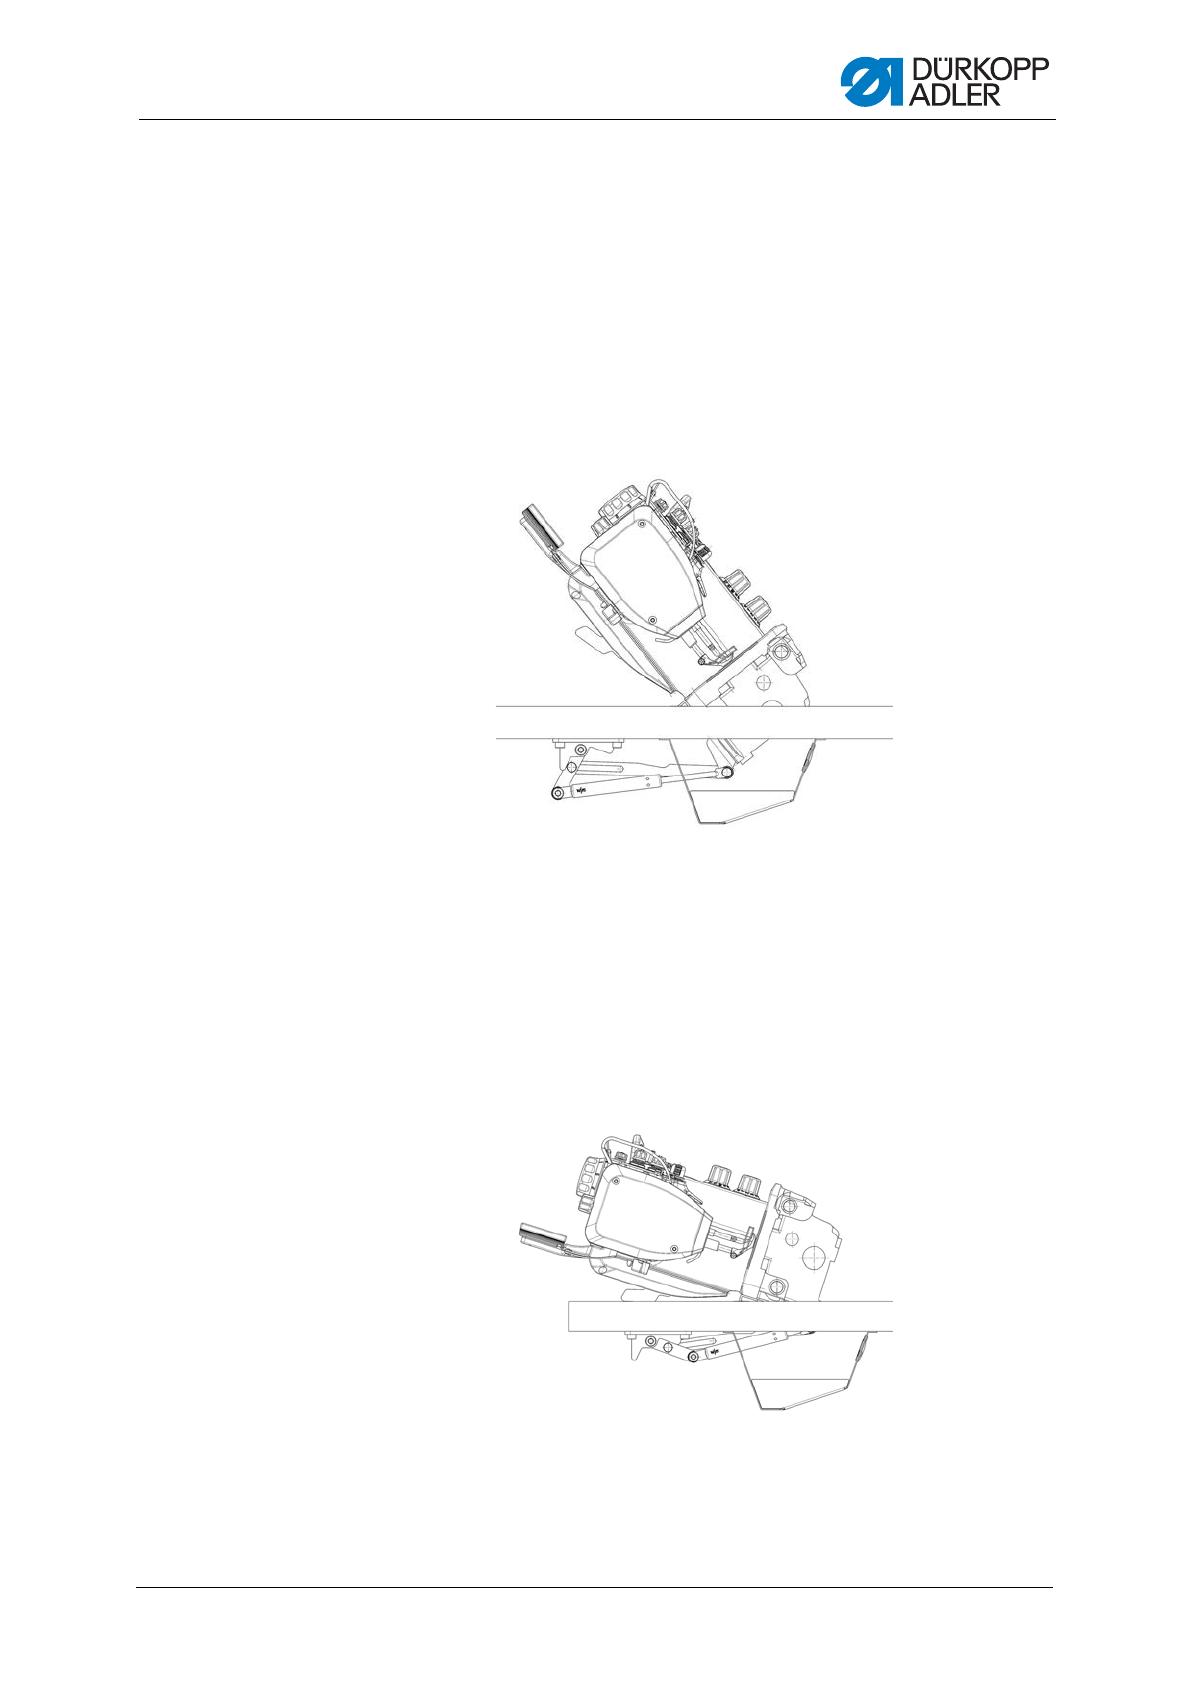
Position 3 - machine in service position
In this position, the machine head is tilted back all the way. The parts set
of the tilting support will also act as a limit stop in this position. This stops
the machine head from slipping out of the hinges and, consequently, the
table top.
Fig. 3: Position 3
Installing the parts set
6 Additional Instructions H867 - 01.0 - 01/2021
3 Installing the parts set
Fig. 4: Installation I
Handling step
1. Loosen the adjusting screws (1).
2. Pull out the bolt (2) on the lever (3).
Fig. 5: Installation II
Handling step
1. Set the machine to the working position.
2. Screw the holder (5) into the table top using the screws (4).
3. Screw the holder (6) into the base plate using the screws (7).
WARNING
Risk of crushing due to the weight of the machine!
Secure the machine against tipping during installation.
Installation of the tilting support by qualified techni-
cians ONLY!
Switch off the machine prior to installation.
(1) - Adjusting screws
(2) - Bolt
(3) - Lever
(4) - Screws
(5) - Holder
(6) - Holder
(7) - Screws
Installing the parts set
Additional Instructions H867 - 01.0 - 01/2021 7
Fig. 6: Installation III
Handling step
1. Tilt the machine head back into the service position.
2. Use the bolt (2) to connect the lever (3), the spacer ring (8) and the
eye of the gas spring (10).
3. Fit the adjusting ring (9) onto the bolt (2) and tighten until there is no
more axial play.
4. Tighten the adjusting screw (1).
Fig. 7: Installation IV
Handling step
1. Tilt the machine back into the working position.
2. Use the bolt (14) to connect the lever (3) and the connecting rod (13).
3. Fit the adjusting ring (11) onto the bolt (14) and tighten until there is
no more axial play.
4. Tighten the adjusting screw (12).
(1) - Adjusting screw
(2) - Bolt
(3) - Lever
(8) - Spacer ring
(9) - Adjusting ring
(10) - Gas spring
(3) - Lever
(11) - Adjusting ring
(12) - Adjusting screw
(13) - Connecting rod
(14) - Bolt
Installing the parts set
8 Additional Instructions H867 - 01.0 - 01/2021
DÜRKOPP ADLER GmbH
Potsdamer Str. 190
33719 Bielefeld
Germany
Phone: +49 (0) 521 925 00
www.duerkopp-adler.com
Subject to design changes - Part of the machines shown with additional equipment - Printed in Germany
© Dürkopp Adler GmbH - Additional Instructions - 0791 867952 EN - 01.0 - 01/2021
  • Page 1 1
  • Page 2 2
  • Page 3 3
  • Page 4 4
  • Page 5 5
  • Page 6 6
  • Page 7 7
  • Page 8 8
  • Page 9 9
  • Page 10 10
  • Page 11 11
  • Page 12 12

Duerkopp Adler H867-Langarm [Long Arm] User manual

Type
User manual

Duerkopp Adler H867-Langarm [Long Arm] is an advanced sewing machine designed to handle various materials and projects with precision and ease. It excels in tasks that require a long reach, such as sewing large garments, curtains, and upholstery. With its user-friendly features, it's suitable for both home and professional use.

Ask a question and I''ll find the answer in the document

Finding information in a document is now easier with AI