Page is loading ...

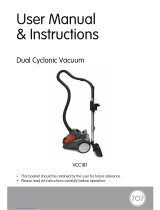
Canister Vacuum Cleaner
Owner’s Manual
READ BEFORE USE
Model No. HB-363

2
WELCOME!
Congratulations, you have acquired a high-quality Hamilton Beach
®
Canister Vacuum Cleaner.
This unit is packed with many features that you will find convenient to use. It will provide you
with trouble-free use if you follow the safety precautions and operating instructions provided in
this easy-to-use manual. Please take the time to read it, and save these instructions for future
use. Please also remember to record the series number. The series number is on a label is
located on the bottom near the rear wheels. Save your receipt by stapling it to this manual for
convenient access.
Model no.: _______________________ Series number: ______________________
Date of purchase: ________________
Index
1. Important Safeguards .......................................................................... 1
2. Parts and Accessories .......................................................................... 3
3. How to Assemble ................................................................................. 4
4. How to Operate .................................................................................... 5
a. Cord Release
b. On/Off Button
c. Working with the Floor Brush
d. Storage of Power Cord
e. Carry Handle
f. Park Position
5. Accessories ......................................................................................... 7
6. Dust Container and Filters ................................................................... 7
a. Emptying the Dust Container
b. Cleaning the Canister Separator
c. Cleaning the Pre-Motor Filter
d. Cleaning the Cover Outlet Filter
7. Troubleshooting ....................................................................................10
8. Warranty ...............................................................................................11
HB-363

1
1. IMPORTANT SAFEGUARDS
WARNING! Shock Hazard: Always switch off and unplug the vacuum cleaner from the
electrical outlet before assembling, opening or emptying the dirt container, or before
connecting/disconnecting the attachments.
CAUTION! Suction Hazard: This vacuum cleaner is a very powerful unit. Before plugging
the cord into the electrical outlet, make sure the vacuum is off. Hold the vacuum cleaner
firmly when starting and in use.
When using the vacuum cleaner, basic safety precautions should always be observed, including
the following.
READ ALL INSTRUCTIONS BEFORE USING THIS APPLIANCE
WARNING – To reduce the risk of fire, electric shock, or injury:
1. Read all instructions.
2. Always fully extend the power cord before use. Be careful not to over extend.
3. Do not unplug by pulling on the cord. To unplug, grasp the plug, not the cord.
4. Hold plug when rewinding onto the cord reel. Do not allow the plug to whip when
rewinding.
5. Do not use outdoors or on wet surfaces.
6. Do not handle the plug or vacuum cleaner with wet hands.
7. Do not leave appliance when plugged in. Unplug from outlet when not in use and
before servicing.
8. Always unplug the vacuum cleaner before connecting or disconnecting the vacuum
hose and accessories.
9. Do not allow to be used as a toy. Close attention is necessary when used by or near
children.
10. This appliance is not intended for use by children or persons with reduced physical,
sensory or mental capabilities, or lack of experience and knowledge, unless they have
been given supervision or instruction concerning the use of the appliance by a person
responsible for their safety.
11. Use only as described in this manual. Use only the recommended attachments.
12. Do not use with damaged cord or plug. If appliance is not working as it should, has
been dropped, damaged, left outdoors or dropped into water, return it to a service
center.
13. Do not unplug by pulling on cord. To unplug, grasp the plug, not the cord.
14. Do not pull or carry by the cord or the hose. Do not use the cord or the hose as a
handle, close a door on the cord or the hose or pull the cord or the hose around sharp
edges or corners. Do not run the vacuum cleaner over the cord or the hose. Keep the
cord away from heated surfaces.

2
15. Do not unnecessarily obstruct any openings of the vacuum cleaner as this may cause
the unit to not work properly or may damage the unit. Do not use with any openings
blocked and do not restrict airflow. Keep all openings free of dust, lint, hair or
anything that might reduce airflow.
16. Keep hair, loose clothing, fingers and all parts of the body away from openings and
moving parts.
17. Do not vacuum anything that is burning or smoking, such as cigarettes, matches, or
hot ashes.
18. Do not vacuum flammable or combustible liquids (lighter fluid, gasoline, kerosene
etc.) or use in the presence of explosive liquids or vapors.
19. Do not vacuum any liquids.
20. Do not vacuum harmful or toxic materials (chlorine, bleach, ammonia, drain cleaner etc.)
21. Do not vacuum hard or sharp objects such as glass, nails, screws, coins etc.
22. Do not use without ALL of the filters in place.
23. Take extra care when vacuuming on stairs.
24. Keep vacuuming area well lit.
25. Turn off all controls on the vacuum before unplugging the vacuum cleaner.
26. Only use approved 13 amp extension cords. Non-approved cords may overheat. Care
should be taken to arrange the cord so that the cord cannot be tripped over.
27. This appliance is intended for household use only.
SAVE THESE INSTRUCTIONS
IMPORTANT: The motor of this product has a thermal cut-off to protect the unit from
overheating. The safety switch will turn off the unit when the motor overheats, which is
usually the result of abnormal use of the unit. The product will resume to normal working
conditions once the motor is completely cooled down.
Other Consumer Safety Information
This appliance is intended for household use only.
WARNING! Shock Hazard: This appliance has a polarized plug (one wide blade) that reduces
the risk of electric shock. The plug fits only one way into a polarized outlet. Do not defeat
the safety purpose of the plug by modifying the plug in any way or by using an adapter.
If the plug does not fit fully into the outlet, reverse the plug. If it still does not fit, have an
electrician replace the outlet.

3
2. PARTS AND ACCESSORIES
1. Flexible Hose*
2. Cord Rewind Button
3. Crevice Tool*
4. Telescopic Metal Extension Tube*
5. Floor Brush
6. Plug
7. Carrying Handle
8. Canister Release Button
9. Cover Outlet Filter*
10. On/Off Switch
11. Canister Separator / Pre-Motor Filter*
12. Furniture Brush*
Common replacement part:
Pre-Motor Filter HB-18365
Cover Outlet Filter HB-18363
*Replacement parts can be purchased at an authorized dealer. Call 1-888-960-0396 to find one
nearest you.
1.
6.
7.
8.
9.
10.
11.
12.
2.
3.
4.
5.

4
Fig 3/1
3. HOW TO ASSEMBLE
1. Insert the flexible hose (Fig.3/1) into the inlet on the main body of the vacuum cleaner
and make sure the markers on the hose are aligned to the markers on the unit. Press
the hose into the unit until it clicks into lock position.
2. Push the telescopic extension tube on to the end of the handle (Fig.3/2).
3. The telescopic tube can be lengthened or shortened by pushing the button in and
sliding the tube apart or together as required (Fig.3/3).
4. Attach the combination floor head by pushing it onto the extension tube (Fig.3/4).
Fig 3/2
Fig 3/3
Fig 3/4

5
4. HOW TO OPERATE
a. Cord Release
Push the cord release button (a) and pull to the desirable length. The yellow mark (1) located on
the cord indicates the maximum length.
NOTICE: Do not pull the cord any further than the yellow mark on the power cord. This is the
maximum safe length. Do NOT pull the power cord past the red mark (2). This may disable the
retraction mechanism for the cord (Fig. 4/1).
b. On/Off Button
1. Insert the plug into the electrical outlet.
2. Press the on/off button located on the top of the vacuum cleaner, to switch the
vacuum on and press the button again to turn the vacuum off. (Fig. 4/1)
Fig 4/1
a

6
c. Working with the Floor Brush
Attach the large floor brush to the end of the tube. The large floor brush has a pedal that toggles
with two positions. The top of the floor brush is equipped with a pedal which allows you to clean
different floor-types:
- Position 1: The bristles are exposed on the bottom of the brush.
Use this to clean hard floors (wood, tiles, etc). Press the pedal on the floor brushes to
get the bristles out. This will prevent scratching the floor. (Fig. 4/1.1)
- Position 2: The bristles are retracted and bottom of the brush is smooth.
This is used to clean carpet. Press the pedal on the floor brush to the other side to
retract the bristles, allowing the floor brush to slide smoothly over the carpet.
(Fig. 4/1.2)
d. Storage of Power Cord
After you have finished using the vacuum, unplug the unit and press the cord release button to
rewind the cord into the unit. Hold the plug to prevent it from whipping while rewinding and use
your hands to carefully guide the cord if necessary.
e. Carry Handle
Use the carry handle located at the rear end of the vacuum cleaner to move the unit from room
to room.
f. Park Position
A parking slot can be found on the left faux wheel of the
vacuum cleaner (a), where the floor brush tool and hose can
be parked for carrying & storage (Fig. 4/2). There is a plastic
channel located close to the base of the floor brush tool (b).
Slide the channel into the slot located on the left side of the
vacuum. Hold the extension tube when lifting and moving the
vacuum in this position.
Fig 4/1.1 Fig 4/1.2
Fig 4/2
b
a

7
5. ACCESSORIES
1. The accessories can be attached directly to the handle by removing the telescopic
tubes and pushing in the desired accessory.
2. The accessories can also be attached to the telescopic extension tube for
extra reach.
Remove the combination floor head and push on the desired accessory:
Crevice tool: For crevices, corners and cracks, etc.
Furniture brush: For carpets, upholstery and stairs etc.
6. DUST CONTAINER AND FILTERS
IMPORTANT: It is recommended to clean the filters every time the dirt container is emptied for
consistent cleaning performance of your machine.
NOTICE: Always unplug the vacuum cleaner from the electrical outlet before removing the dust
container. Do not use the vacuum without ALL of the filters in place.
a. Emptying the Dust Container
1. Press down the Release Button (a), and lift the dust container clockwise in direction
(b). (Fig. 6/1).
2. Hold the dust container over a trash can and press the quick release Empty Button
(a), as directed to empty the container. When all the dirt has fallen, close the
container flap (b). A click will be heard when closed. Then replace the dust container
(Fig. 6/2).
Fig 6/1
Fig 6/2

8
b. Cleaning the Canister Separator
1. Twist and pull the dust container bin from the canister separator (Fig.6/3).
2. The separator should be cleaned with a soft brush and wiped with a damp cloth.
The dust container bin may be wiped clean (Fig. 6/4).
3. Allow the separator to dry completely for 24 hours before replacing.
NOTICE: The separator should not be submerged in water. Do NOT use any
detergents. It is recommend to clean the filter every time you empty the dust
container.
4. Reassemble the dust container and canister separator.
c. Cleaning the Pre-Motor Filter
Note: This is located above the dust container bin. Release the pre-motor filter cover by twisting
the dust container bin’s cap. Lift off the cap to gain access to the filter (a). Remove the filter by
lifting it (Fig. 6/5).
Fig 6/3
Fig 6/4
Fig 6/5

9
1. Separate the pre-motor filter from the mesh cassette. Each filter can be tapped
against the side of a trash can to remove the excess dirt and dust.
Note: This filter should be checked and cleaned periodically.
2. Return the pre-motor filter and cassette to the vacuum cleaner. Replace the pre-motor
filter cover before restarting the vacuum cleaner.
d. Cleaning the Cover outlet filter
Note: This is located between the rear faux wheels of the vacuum.
1. Release the cover outlet filter and remove the cover as shown. Remove the filter by
pulling the tab towards you (Fig. 6/6).
2. The filter can be tapped against the side of a trash can to remove the excess dirt
and dust.
3. Return the cover outlet filter to the vacuum cleaner. Replace the cover before
restarting the vacuum cleaner.
IMPORTANT: The motor of this product has a thermal cut-off to protect the unit from
overheating. The safety switch will turn off the unit when the motor overheats, which is
usually the result of abnormal use of the unit. The product will resume to normal working
conditions once the motor is completely cooled down.
IMPORTANT: Cleaning the filters regularly improves the vacuuming performance. Make
sure that all the filters are replaced back into the vacuum cleaner before using. This
vacuum cleaner is intended for household use only and not for commercial or industrial
use. Store the vacuum in a cool dry area. Any other service should be performed by an
authorized service center.
Fig 6/6

10
7. TROUBLESHOOTING
PROBLEM CAUSE SOLUTION
The vacuum does not work 1. The plug is not properly
plugged in the wall socket.
2. There is no current coming
from the wall socket.
1. Put the plug into the wall
socket.
2. Check whole home fuse/
breaker. See if fuse needs to
be replaced.
The vacuum cleaner won’t pick up. 1. The dust container is not
installed correctly.
2. The dust container is full.
3. The hose is not installed
correctly.
1. Fit the dust container as
described in the Dust
Container and Filter section of
the manual.
2. Empty the dust container.
3. Fit the hose just as described
in the How to Assemble
section of the manual.
The power cord automatically rolls
up.
The roll-up mechanism may be
defective.
Pull the power cord in and out a
number of times. Refer to How
to Operate section of manual.
The power cord cannot be pulled
out.
The power cord may be
entangled.
Carefully pull the cord back and
forth a number of times and
push the button for rolling up the
power cord.
The power cord is not fully wound. The power cord may be
entangled
Pull the power cord out some
length (no further than the yellow
mark).
The flexible hose and accessories
don’t pick up any dust.
1. The dust container is full.
2. One or more filters are clogged
3. The hose is blocked.
1. Empty the dust container
2. Clean the filter(s).
3. Check whether there is a
blockage and remove it
The vacuum cleaner has no or very
weak suction power.
1. The filters may be clogged.
2. Dust container is full.
3. Passage of the hose or mouth-
piece is clogged.
1. Clean filter just as described in
the Dust Container and Filters
section.
2. Empty the dust container and
clean the filter by tapping it
against a trash can until clean.
3. Check whether there is a
blockage and remove it

11
Limited Warranty
What this limited warranty covers:
The manufacturer warrants that your Hamilton Beach
®
vacuum cleaner, model HB-363, for a
period of one year from the date of original purchase, will be free from all defects in material and
workmanship. This limited warranty is granted only to the original consumer purchaser or gift
recipient. Keep the original sales receipt, as proof of purchase is required to make a warranty
claim. This limited warranty is subject to the following provisions:
What this limited warranty does not cover:
• Expensesrelatedtopickup,deliveryorhousecalls.Youareresponsibleforallcosts
associated with returning the product or any component to us, and our returning a
product or component to you.
• Partsofthecleanerthatrequirereplacementundernormaluse,suchasltersand
floor-brush bristles.
• Damageormalfunctioncausedbyaccident,alteration,abuse,misuse,orusenotin
accordance with the Owner’s Manual.
• Damageormalfunctioncausedbyimproperserviceormaintenance,theuseofparts
other than genuine HAMILTON BEACH
®
parts or modifications made to the cleaner
without our prior written approval.
• VacuumspurchasedorusedoutsidetheUnitedStates.
The manufacturer will, at its option, repair or replace a defective vacuum or vacuum cleaner part
that is covered by this limited warranty. This is your exclusive remedy. As a matter of warranty
policy, the manufacturer will not refund the purchase price.
Warranty Registration:
To register for warranty please visit our website at www.essco.net and fill out a registration card.

12
Obtaining warranty service:
To obtain warranty service, call 888-960-0396 or e-mail us at [email protected].
If you prefer, you can write to: ESSCO
Attn: Hamilton Beach Warranty
1933 Highland Road
Twinsburg, OH 44087
When returning parts for repair, please include the model number and series number from the
data label located on the bottom of the unit near the rear wheels.
Further Limitations and Exclusions:
THE WARRANTY PROVIDED ABOVE IS EXCLUSIVE AND IN LIEU OF ALL OTHER EXPRESS
OR IMPLIED WARRANTIES. EVERY IMPLIED WARRANTY, INCLUDING ANY WARRANTY OF
MERCHANTABILITY OR FITNESS FOR A PARTICULAR PURPOSE IS DISCLAIMED EXCEPT TO
THE EXTENT PROHIBTED BY LAW, IN WHICH CASE SUCH WARRANTY IS LIMITED TO THE
DURATION OF THIS WRITTEN WARRANTY. UNLESS STATED HEREIN, ANY STATEMENTS
OR REPRESENTATIONS MADE BY ANY OTHER PERSON OR FIRM ARE VOID. WE EXCLUDE
ALL CLAIMS FOR LOSS, INCONVENIENCE OR DAMAGE INCLUDING DIRECT, SPECIAL,
INCIDENTAL OR CONSEQUENTIAL DAMAGES, RESULTING FROM THE USE OR INABILITY
TO USE THE VACUUM PRODUCT, WHETHER RESULTING FROM BREACH OF WARRANTY
OR ANY OTHER LEGAL THEORY. IN NO EVENT WILL HAMILTON BEACH’S LIABILITY
EXCEED THE PURCHASE PRICE OF THE VACUUM CLEANER, LESS DEPRECIATION.
Some jurisdictions do not allow limitations on how long an implied warranty lasts and some
jurisdictions do not allow the exclusion or limitation of incidental or consequential damages, so
the above limitations and exclusions may not apply to you. This warranty gives you specific legal
rights, and you may also have other rights, which vary from jurisdiction to jurisdiction.
Hamilton Beach
®
is a registered trademark of Hamilton Beach Brands, Inc. used under license by
ESSCO.


/