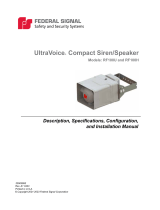
Informer100 Series C IP-enabled 100 Watt Speaker

Federal Signal Informer100 Series C IP-enabled 100 Watt Speaker User manual

  • Hello! I'm your AI assistant for the Federal Signal Informer100 Speaker manual. I have reviewed the document and understand that it provides installation instructions for both I-IP100AC and I-IP100DC models. You'll find details on mounting, wiring, and using the various features. These include multiple alert options, relay outputs, and integration with the Commander system. I'm ready to answer your questions!
  • What are the power options for the Informer100 Speaker?
    How many alarm initiation inputs does the Informer100 have?
    Can the Informer100 be used outdoors?
    What type of relay outputs does the Informer100 have?
    What kind of mounting options does the speaker have?
Description, Specications,
and Installation Manual
25500641
Rev. A1 0823
Printed in U.S.A.
© Copyright 2020-2023 Federal Signal Corporation
Informer100 Speaker
Models I-IP100AC and I-IP100DC Series C
IP-Enabled High-Powered Indoor/Outdoor Speaker
Limited Warranty
This product is subject to and covered by a limited warranty,
a copy of which can be found at www.fedsig.com/SSG-Warranty.
A copy of this limited warranty can also be obtained by written
request to Federal Signal Corporation, 2645 Federal Signal Drive,
University Park, IL 60484, email to [email protected] or
call +1 708-534-3400.
This limited warranty is in lieu of all other warranties, express or
implied, contractual or statutory, including, but not limited to the
warranty of merchantability, warranty of tness for a particular
purpose and any warranty against failure of its essential purpose.
2645 Federal Signal Drive
University Park, Illinois 60484
www.fedsig.com
Customer Support 800-548-7229 • +1 708 534-3400
Technical Support 800-524-3021 • +1 708 534-3400
All product names or trademarks are properties of their respective owners.
3
Description, Specications, and Installation Manual
Federal Signal www.fedsig.com
Contents
Safety Messages......................................................................................................................................................6
Safety Messages to Installers .............................................................................................................................6
General Description ................................................................................................................................................9
Introduction .........................................................................................................................................................9
Features ............................................................................................................................................................ 10
Ordering Information ......................................................................................................................................... 11
Specications ........................................................................................................................................................12
Installation ..............................................................................................................................................................14
Determine a Suitable Location .......................................................................................................................... 14
Wall Mounting ...................................................................................................................................................15
Attaching the Mounting Brackets to the Speaker Housing ................................................................................15
Pole Mounting ...................................................................................................................................................18
Large Pole Mounting (6-inch diameter or larger) ......................................................................................18
Small Pole Mounting (2-3/8 inch or 4-1/2 inch diameter poles) ................................................................19
Mounting with Omni Direction Bracket (2-3/8 inch diameter pole) .................................................................... 20
Mounting without Bracket ..................................................................................................................................21
Opening the Housing ........................................................................................................................................22
Wiring Power to the Control Board ...................................................................................................................22
Wiring to the Relay/Electronic Outputs .............................................................................................................25
Wiring to the Alarm Initiation Input Connections ...............................................................................................25
Using Optional Warning Lights ..........................................................................................................................25
Ethernet Port ..................................................................................................................................................... 28
Relay Outputs ...................................................................................................................................................28
Conguring the Speaker ...................................................................................................................................28
Closing the Housing .......................................................................................................................................... 29
Applications ...........................................................................................................................................................29
Conguring the Informer100 with the DS100 (120 VAC) ..................................................................................29
Wiring Power to the Interconnect Board ...................................................................................................29
Wiring AC to the Interconnect Board .........................................................................................................30
Wiring Audio to the Amplier Board .......................................................................................................... 30
Wiring Relays to the Interconnect Board ..................................................................................................31
Conguring the Informer100 with the DS100 (24 VDC) .................................................................................... 31
4
Informer100 Speaker (Models I-IP100AC and I-IP100DC Series C)
Federal Signal www.fedsig.com
Figures
Figure 1 PS Series Push Button Stations (optional) .......................................................................................... 11
Figure 2 Informer100 Speaker with 225XL light ..................................................................................................12
Figure 3 Bracket attached to speaker..................................................................................................................16
Figure 4 Width and height of bracket ..................................................................................................................16
Figure 5 Depth and height with bracket ..............................................................................................................17
Figure 6 Top view of speaker ...............................................................................................................................17
Figure 7 Ceiling mount ..........................................................................................................................................18
Figure 8 Bracket I-IP100-PMW ..............................................................................................................................18
Figure 9 Bracket I-IP100-PM .................................................................................................................................19
Figure 10 Bracket I-IP100-OMNI ...........................................................................................................................20
Figure 11 Surface mount hole center dimensions .............................................................................................21
Figure 12 Opening speaker ..................................................................................................................................22
Figure 13 DC Controller Board .............................................................................................................................23
Figure 14 AC Controller Board ............................................................................................................................. 24
Figure 15 FB2PST Strobe with Informer100 Speaker.........................................................................................26
Figure 16 151XST Strobe with Informer100 Speaker .........................................................................................27
Figure 17 225XST/225XL Strobe with Informer100 Speaker .............................................................................. 27
Figure 18 DS100 Amplier Board .........................................................................................................................30
Figure 19 Conguration Examples of DS100s with a Informer100 ................................................................... 31
Figure 20 Informer100 Connected to Three DS100s (120 VAC) Wiring Diagram ............................................. 33
Figure 21 Informer100 Connected to Three DS100s (24 VDC) Wiring Diagram ...............................................34
Wiring Power to the Interconnect Board ...................................................................................................31
Wiring Audio to the Amplier Board .......................................................................................................... 32
Ordering Replacement Parts ................................................................................................................................ 32
Getting Service ......................................................................................................................................................32
Appendix A Wiring Diagrams ...............................................................................................................................33
5
Description, Specications, and Installation Manual
Federal Signal www.fedsig.com
Tables
Table 1 Ordering Information ............................................................................................................................... 11
Table 2 Optional Accessories ............................................................................................................................... 11
Table 3 Electrical ...................................................................................................................................................12
Table 4 Visual Indications (Located on internal control board.) .......................................................................13
Table 5 Connectors and Jacks (Control board connectors) .............................................................................13
Table 6 Environmental and Physical ...................................................................................................................14
Table 7 Alarm Initiation Inputs (JP5) ....................................................................................................................25
Table 8 Replacement Parts ...................................................................................................................................32
6
Safety Messages
Informer100 Speaker (Models I-IP100AC and I-IP100DC Series C)
Federal Signal www.fedsig.com
Safety Messages
It is important to follow all instructions shipped with this product. This device is to be
installed by trained personnel who are thoroughly familiar with the country’s electric
codes and will follow these guidelines as well as local codes and ordinances, including
any state or local noise-control ordinances.
Planning
If suitable warning equipment is not selected, the installation site for the Informer100
Speaker is not selected properly, or the Informer100 Speaker is not installed
properly, it may not produce the intended optimum audible warning. Follow Federal
Emergency Management Agency (FEMA) recommendations.
If Informer100 Speakers are not activated in a timely manner when an emergency
condition exists, they cannot provide the intended audible warning. It is imperative
that knowledgeable people, who are provided with the necessary information, be
available at all times to authorize activation.
When Informer100 Speakers are used outdoors, people indoors may not be able to
hear the warning signals. Separate warning devices or procedures may be needed to
eectively warn people indoors.
The sound output of sirens is capable of causing permanent hearing damage. To
prevent excessive exposure, carefully plan siren placement, post warnings, and
restrict access to areas near sirens. Review and comply with any local or state noise
control ordinances as well as OSHA noise exposure regulations and guidelines.
Activating the Informer100 Speaker may not result in people taking the desired
actions if those to be warned are not properly trained about the meaning of warning
sounds. Users should follow FEMA recommendations and instruct those to be warned
of correct actions to be taken.
After installation, service, or maintenance, test the system to confirm that it is
operating properly. Test the system regularly to confirm that it will be operational in an
emergency.
Safety Messages to Installers
People’s lives depend on your safe installation of our products. It is important to follow
all instructions shipped with this product. This device is to be installed by a trained
electrician who is thoroughly familiar with the National Electrical Code and/or Canadian
Electrical Code and will follow the NEC and/or CEC Guidelines as well as all local codes.
This Informer100 Speaker should be considered a part of the warning system and not the
entire warning system.
The selection of the mounting location for this Informer100 Speaker, its controls and
the routing of the wiring is to be accomplished under the Facilities Engineer and the
Safety Engineer direction. Listed below are some other important safety instructions and
precautions you should follow:
Electrocution or severe personal injury can occur when performing various
installation and service functions such as making electrical connections, drilling
holes, or lifting equipment. Therefore, only experienced electricians should install this
7
Safety Messages
Description, Specications, and Installation Manual
Federal Signal www.fedsig.com
product per national, state, and any other electrical codes having jurisdiction. Perform
all work under the direction of the installation or service crew safety foreman.
Read and understand all instructions before installing, operating, or servicing this
equipment.
This product shall be mounted at the minimum hearing distance of ten feet per FEMA
guidelines limiting sound level exposure to 123 dBc maximum sound level.
All eective warning sounds may, in certain circumstances, cause permanent
hearing loss. Take appropriate precautions, such as wearing hearing protection. The
maximum sound level exposure limits specified in OSHA 29 CFR 1910 should not be
exceeded.
I-IP100 series, DSA1, and DS100 devices are intended for permanent installation
and operation per Title 46, Code of Federal Regulations, Parts 110–113, or Title 33,
Code of Federal Regulations, Part 183, Sub-part I, Section 183.410, and the applicable
requirements of the American Boat and Yacht Council, Inc., and/or ANSI/NFPA 302,
“Fire Protection Standard for Pleasure and Commercial Motor Craft.
For optimum sound distribution, do not install this speaker where objects would block
any portion of the front of the Informer100 Speaker.
Do not paint the Informer100 Speaker. No finish or coating is required. Paint may
obstruct the sound output, reducing the eectiveness of the horn.
Establish a procedure to check the signal system for proper activation and operation
routinely.
Any maintenance to the unit MUST be performed by a trained electrician per NEC
Guidelines and local codes or a Federal Signal certified Service Provider.
Never alter the unit in any manner.
The nameplate should NOT be obscured, as it contains cautionary and/or other
information of importance to maintenance personnel.
After installation and completion of the initial system test, provide a copy of these
instructions to all personnel responsible for the operation, periodic testing, and
maintenance of the equipment.
File these instructions in a safe place and refer to them when maintaining and/or
reinstalling the device.
Failure to follow all safety precautions and instructions may result in property damage,
serious injury, or death.
Installation and Service
After installation or service, test the system to confirm that it is operating properly.
Test the system regularly to confirm that it will be operational in an emergency.
If future service and operating personnel do not have these instructions to refer to,
the system may not provide the intended audible warning, and service personnel
may be exposed to death, permanent hearing loss, or other bodily injuries. File
these instructions in a safe place and refer to them periodically. Give a copy of these
instructions to recruits and trainees. Also, give a copy to anyone who is going to
service or repair the Informer100 Speaker.
8
Safety Messages
Informer100 Speaker (Models I-IP100AC and I-IP100DC Series C)
Federal Signal www.fedsig.com
To reduce the risk of electric shock, do not perform any servicing other than what
is contained in the operating instructions unless you are qualified to do so. Refer all
servicing to qualified service personnel. Always test the Informer100 Speaker before
using after repairs have been made.
Ethernet Wiring
Unless shielded or run in conduit, Ethernet wiring must be at least six feet from bare
power wiring or lightning rods and associated wires, and at least six inches from other
wire (for example, antenna wires, doorbell wires, wires from transformers to neon
signs), steam or hot water pipes, and heating ducts.
Do not place Ethernet wiring or connections in any conduit, outlet or junction box
containing high voltage electrical wiring.
If using a cable gland, gland must be UL listed. The Informer100 Speaker has 3/4-inch
and 1/2-inch NPT entry sizes.
Symbol Definition
_A _V Indicates to reduce the risk of fire, replace the fuse as marked.
Pay careful attention to the notice located on the equipment.
Read and understand the information contained in this manual before attempting
to install or service the siren.
9
General Description
Description, Specications, and Installation Manual
Federal Signal www.fedsig.com
General Description
Introduction
The Informer100 Speaker is an indoor and outdoor IP-enabled 100-watt speaker. Use the
Informer100 as a warning and alert device with both audible and visual indicators. The
audible capabilities include locally stored, high-quality, high-powered tones and voice.
The visual indicators include the use of a message board/scrolling display sign support
and strobes, lights, and beacons. The Informer100 can be equipped with up to four local
initiation devices (switches) to activate the unit locally and to the Commander® system for
mass notification communications.
The Informer100 Speaker has an internal 100-watt amplifier/driver to deliver tone
warnings and intelligible voice messages from Informer100 stored memory. The
Informer100 also has several unique capabilities when working with the Federal Signal
Commander software. Using Commander software, the Informer100 can play text-to-
speech, stream wave files, or broadcast live PA. Commander software can perform a talk/
listen to individual Informer100s to allow call-box-type communications. The Informer100
also has remote volume control for optimizing sound levels across your alerting area. The
remote volume control also includes an ambient noise monitoring capability to adjust the
volume depending on external noise levels automatically.
The Informer100 allows the connection of up to four external switches to activate
predefined alert events. The Informer100 can be programmed and configured as a
standalone device to only use the inputs to activate the Informer100. This may be
useful if the location has no network connectivity but where voice and tone alerts from
locally activated inputs are required. The Informer100 can be networked later, and the
activations can be brought into the Commander system for full system capability. When
the Informer100 is networked using the Commander software, alerts initiated at the
Informer100 can be used to activate other devices. The Commander software system
can also alert emergency personnel via email, SMS, and handheld radios using optional
messaging software.
The Informer100 includes a relay output, a DC solid-state relay output, and an AC solid-
state relay output for controlling strobes or other devices. The Informer100 has a 1/2-inch
NPT opening on the top of the speaker for simple installation of pipe mount devices.
The bottom of the speaker has three 3/4-inch NPT openings to allow access to power,
LAN, relay outputs, and activation inputs. The Commander system allows multiple
configurations for activation of the relays during alerts.
The Informer100 is designed for outdoor use and large indoor structures. It can be
powered from 120 or 240 Vac or 24 Vdc, depending on the model purchased. All wiring
interfaces are accessible via internal connectors and built-in NPT entrances for quick and
easy installation.
The Informer100 comes with an adjustable stainless steel wall mount bracket that allows
the angle of the speaker to be adjusted. Optional pole mount brackets are available for
small and large diameter poles.
See the Informer-IP Series C Setup, Program, and User Manual (part number 25500395)
to learn how to set up, configure, program, and use Informer-IP devices.
10
General Description
Informer100 Speaker (Models I-IP100AC and I-IP100DC Series C)
Federal Signal www.fedsig.com
Features
The Informer100 has the following features; some features require the use of the
Commander® software system:
High-powered outdoor or indoor IP-enabled speaker for audible and visual alerts
Speaker rated at 120 dBa for tones and 114.5 dBa for voice at 10 feet
Seven standard built-in warning signals: Wail, Steady, Alternate Wail, Alternate Steady,
Pulsed Wail, Pulsed Steady, Auxiliary Chime
Broadcasts live voice, text-to-speech, and prerecorded voice or tone files
Deliver intelligible voice messages from locally prerecorded files or through the
Commander system
Prerecorded files: 4000 voice or tone messages with 17 hours of total recording time
Ambient noise level monitoring with automatic volume control
Each device can be individually configured for volume and noise-level adjustments
Remote volume control for optimizing sound levels
Speaker as a microphone for talkback feature
Alerts can be sent to single devices, groups or zones, or all devices
Integrated Modbus® PLC Interface
Integrated SIP phone Interface
Commander and CommanderOne® HMI software control and activation options
Wall or pole mount options
Four local alarm initiation inputs to activate the unit locally or standalone operation
Momentary mode: contact closure sounds alarm for the programmed duration.
Continuous mode: sounds alarm for the duration of the closure.
Relay outputs to control strobes or other devices (See page 24 for warning lights
information.)
120/240 Vac or 24 Vdc powered (two models)
Wide outdoor temperature operating range
Commander software provides full two-way control and status monitoring
Allows remote software upgrades
11
General Description
Description, Specications, and Installation Manual
Federal Signal www.fedsig.com
Ordering Information
Table 1 Ordering Information
Part Numbers Description
I-IP100DC 24 Vdc 100 watt wall mount
I-IP100AC 120/240 Vac 100 watt wall mount
I-IP100-PM Small (6-inch or less) Pole Mount Bracket
I-IP100-PMW Large (over 6-inch) Pole Mount Bracket
I-IP100-OMNI Omni Directional Option for IP Speaker
Informer100 Speaker requires Federal Signal Commander® application software (sold
separately).
Informer100 Speaker can be field configured or factory preconfigured to customer
requirements. Contact your local representative for a quotation.
Table 2 Optional Accessories
Part Numbers Description
PSEV-Y Indoor Yellow Station – Push and Turn Reset Button “EVACUATION”
PSEVSC-Y Indoor Yellow Station – Push and Turn Reset Button “EVACUATION,”
with Sounder Cover
PSEM-R Indoor Red Station – Push and Turn Reset button “EMERGENCY”
PSEMSC-R Indoor Red Station – Push and Turn Reset button “EMERGENCY,”
with Sounder Cover
PBS-4 Four-button push station (Indoor)
225XL-024X1,2 Hazardous Location LED Light 24 Vdc
225XL-120-240X1,2 Hazardous Location LED Light 120-240 Vac
1 “X” Indicates color: (A) Amber, (B) Blue, (C) Clear, (G) Green, and (R) Red
2 The light is powered from the same source as the speaker
The following figure illustrates the wall-mounted buttons for activation.
Figure 1 PS Series Push Button Stations (optional)
12
Specications
Informer100 Speaker (Models I-IP100AC and I-IP100DC Series C)
Federal Signal www.fedsig.com
The following is a picture of the Informer100 Speaker shown with optional 225XL Warning
Light.
Figure 2 Informer100 Speaker with 225XL light
Specications
Table 3 Electrical
Operating Voltages I-IP100AC
Switch-selectable 120 or 240 Vac
120 Vac nom, 50/60 Hz or
240 Vac nom, 50/60 Hz
Operating Current I-IP100AC 120 Vac; 26 mA Standby, 1.50 A during a function,
4.50 A during a function if relays are fully loaded.
240 Vac; 21 mA Standby, 820 mA during a function,
3.82 A during a function if relay outputs are fully loaded.
Operating Voltages I-IP100DC 24 Vdc nominal
Operating Current I-IP100DC 24 Vdc; 100 mA Standby, 5.15 A during a function,
12.15 A during a function if relay outputs are fully
loaded.
Relay Outputs Mechanical relay output 2 A at 30 Vdc or 250 Vac, 25 A
max inrush, N.O. dry contacts.
DC solid-state relay output 5 A at up to 28 Vdc current
limited.
AC solid-state relay output 1 A at 20 to 264 Vac zero
crossing switched.
Ethernet Port IEEE 802.3, 10/100 Base-T connection
Alarm Initiating Inputs Four optically Isolated Inputs
Dry Contact closure < 1 kilohm
NOTE: The four optically isolated Alarm Initiation Inputs
allow remote activation of tones and messages through
a volt-free, dry-contact closure.
The momentary contact closure must be a minimum of
500 ms.
13
Specications
Description, Specications, and Installation Manual
Federal Signal www.fedsig.com
Audio Storage Warning siren audio, seven factory installed tones: Wail,
Steady, Alternate Wail, Alternate Steady, Pulsed Wail,
Pulsed Steady, Auxiliary Chime
Prerecorded les—up to 4,000 voice or tone messages
with 17 hours of total recording time
Audio Data 8 bit 8 kHz mono wave (G7.11 μ-law)
Audio Frequency response 300 Hz to 3000 Hz, +1 to -3 dB per octave
Maximum Audio Output 100 watts, 120 dBa tones/114.5 dBa for voice at 10 feet
The following indicators are for troubleshooting purposes only. These indicators are not
visible when the unit is closed.
Table 4 Visual Indications (Located on internal control board.)
POWER Green LED turns on when power is connected. (D5)
ISOLATED POWER Green LED turns on when Isolated power for inputs and relay
outputs is functioning. (D6)
CPU Flashing RED LED indicates the CPU is running its program. (D18)
NETWORK Green LED turns on when unit has made a connection to the
network. (D27)
LISTEN Red LED turns on when Commander® is listening. Unit is sending
audio to Commander. (D25)
TALK Green LED turns on when Commander is talking. Unit is playing
audio being sent. (D26)
AMPOUTPUT
VOLTAGE
Green LED turns on when amplier is active. Brightness indicates
level of amplier output. (D2)
AMPLIFIER
OUTPUT
CURRENT
Green LED turns on when amplier is active. Brightness indicates
level of amplier output. (D8)
ACTIVATION
INPUT #1
Red LED turns on when Activation input #1 is being activated. (D13)
ACTIVATION
INPUT #2
Red LED turns on when Activation input #2 is being activated. (D15)
ACTIVATION
INPUT #3
Red LED turns on when Activation input #3 is being activated. (D19)
ACTIVATION
INPUT #4
Red LED turns on when Activation input #4 is being activated. (D20)
Table 5 Connectors and Jacks (Control board connectors)
JP2 Serial Port for factory approved programming or for message board
display
JP3 Pin Jack Reserved for factory testing
JP4 Relay Outputs 1 and 2 mechanical relay Normally Open
3 – DC solid-state relay, (+) DC power
4 – DC solid-state relay, Switched (+) DC power to strobe or light
5 – AC solid-state relay
6 – AC solid-state relay
NOTE: Mechanical relay output is programmed as Relay 1. Solid-
state relays are programmed as Relay 2.
14
Installation
Informer100 Speaker (Models I-IP100AC and I-IP100DC Series C)
Federal Signal www.fedsig.com
JP5 Initiation inputs 1 and 2 – ISO Ground/Input 1
3 and 4 – ISO Ground/Input 2
5 and 6 – ISO Ground/Input 3
7 and 8 – ISO Ground/Input 4
NOTE: Each input is activated by shorting the two pins associated
with the input.
JP6, JP7, JP8, and
JP9
AC or DC Power
Distribution
1 – L1/Hot/(+) 24 Vdc
2 – L2/Neutral/(-) 24 Vdc Gnd
3 – Earth Ground
NOTE: JP6, JP7, JP8 and JP9 are physically connected to provide
a distribution of AC or DC power. The combined load of all power
should not exceed 8 amperes AC/DC, 25 A max inrush
JP10 Reserved for factory testing
JP11 Short to restore factory default settings
JP12 Reserved for factory testing
JP14 10 VRMS output for driving additional amplied speakers
Table 6 Environmental and Physical
Operating temp range -40˚F to 150˚F (-40°C to +66°C) at 20% duty cycle.
Continuous duty UL rating: -40˚F to 104˚F / (-40˚C to 40˚C).
Humidity range 0-95%, non-condensing
Size
(Height x Width x Length)
7 x 9 x 10 inches (17.8 x 22.9 x 25.4 cm)
Weight
I-IP100DC
I-IP100AC
16.2 lb (7.35 kg)
19.2 lb (8.71 kg)
Installation
Read and adhere to all safety warnings in this manual before installing the
Informer100 Speaker.
ELECTROCUTION HAZARD: Electrocution or severe personal injury can occur
when making electrical connections, drilling holes, or lifting equipment. Therefore,
experienced electricians, per national and local electrical codes, acting under the
direction of the installation crew safety foreman, should perform the installation.
Determine a Suitable Location
The Informer100 can be mounted on any relatively flat surface with the supplied mounting
brackets. The mounting surface must be capable of supporting the weight of the speaker.
15
Installation
Description, Specications, and Installation Manual
Federal Signal www.fedsig.com
Wall Mounting
The Informer100 Speaker comes standard with a bracket for vertical wall or pole mount
with optional pole accessories. The standard mount can be flipped to allow ceiling mount.
To wall mount the Informer100 Speaker:
1. Find a suitable location to mount the speaker. Use industry or company-preferred
practices when mounting hardware to structures.
2. Verify the mounting is adequate to hold the weight of the speaker, cables, and visual
devices if equipped.
3. Refer to Figure 3 or use the U-shaped wall bracket as a template to scribe the
mounting hole locations.
4. Mount the Informer100 Speaker to the mounting surface with user-supplied hardware.
Federal Signal recommends 3/8-inch fasteners.
5. Loosen the pivot bolts to provide the direction of the speaker.
Attaching the Mounting Brackets to the Speaker Housing
To attach the brackets:
1. The mounting brackets are attached to the speaker, as shown below, using the six
supplied 1/4-20 by 5/8 inch screws.
Note the orientation of the curved slots on the L-shaped brackets; this orientation is
important for the speaker to pivot downward.
2. Tighten the 1/4-20 by 5/8 inch screws to approximately 80 in-lb.
3. Attach the U-shaped wall bracket with four supplied sets of 3/8-16 by 1-inch bolts, flat
washers, lock washers, and nuts.
16
Installation
Informer100 Speaker (Models I-IP100AC and I-IP100DC Series C)
Federal Signal www.fedsig.com
Figure 3 Bracket attached to speaker
1/4-20 x 5/8" screws (6)
3/8-16 x 1"
bolts (4)
Note the orientation
of this curved slot
with respect to the
“FS” on the side of
the housing.
1/2" NPT Sealed
from the factory
Figure 4 Width and height of bracket
2.00 in
5.00 in
2.88 in
1.44 in
5X
.397
17
Installation
Description, Specications, and Installation Manual
Federal Signal www.fedsig.com
Figure 5 Depth and height with bracket
6.68 in
2.53 in
12.87 in
2.00 in 10.09 in
Figure 6 Top view of speaker
10.09 in
12.87 in
8.90 in
1/2" NPT Sealed
from the factory
18
Installation
Informer100 Speaker (Models I-IP100AC and I-IP100DC Series C)
Federal Signal www.fedsig.com
Figure 7 Ceiling mount
Pole Mounting
The Informer100 comes standard with a bracket for vertical wall or pole mount with
optional pole accessories.
Large Pole Mounting (6-inch diameter or larger)
Use the following procedure if mounting the speaker with the optional I-IP100-PMW
bracket:
1. Find a suitable location to mount the speaker. Use industry or company-preferred
practices when attaching hardware to poles or other structures.
2. Attach the I-IP100-PMW bracket to the pole using banding or use the pre-drilled holes
to bolt the bracket to the pole or structure.
3. Using the supplied flat washers, lock washers, and 3/8-inch nuts, mount the speaker
to the I-IP100-PMW bracket, as shown in Figure 2.
4. Use the side-pivot bolts to allow adjustment of the speaker up and down to optimize
speaker eectiveness.
Figure 8 Bracket I-IP100-PMW
19
Installation
Description, Specications, and Installation Manual
Federal Signal www.fedsig.com
Small Pole Mounting (2-3/8 inch or 4-1/2 inch diameter poles)
Use the following procedure if mounting the speaker with the optional I-IP100-PM bracket:
1. Find a suitable location to mount the speaker. Use industry or company-preferred
practices when attaching hardware to poles or other structures.
2. Remove the speaker U-shaped bracket; store the pivot/lock bolts.
3. Select the proper I-IP100-PM U-bolt for the pole.
4. Attach the U-shaped bracket from the speaker to the pole using the I-IP100-PM
U-bolt, bracket, nuts, and washers.
5. Attach the speaker and set direction using the pivot and lock bolts.
Figure 9 Bracket I-IP100-PM
20
Installation
Informer100 Speaker (Models I-IP100AC and I-IP100DC Series C)
Federal Signal www.fedsig.com
Mounting with Omni Direction Bracket (2-3/8 inch diameter pole)
Use the I-IP100-OMNI bracket to create an omni-directional speaker. The speaker is
mounted as described in the Small Pole Mount section, with the omni bracket mounted at
a distance of 2.0 inches from the speaker.
Use the following procedure if mounting the speaker with the optional I-IP100-OMNI
bracket:
1. Identify the desired location for the bracket.
2. Attach the bracket using the supplied U-bolts and hardware.
Figure 10 Bracket I-IP100-OMNI
2.0 in
Omni Bracket
/