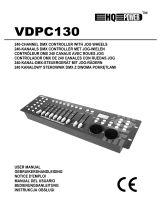
VDPC145

HQ Power VDPC145 User manual

  • Hello! I am an AI chatbot trained to assist you with the HQ Power VDPC145 User manual. I’ve already reviewed the document and can help you find the information you need or explain it in simple terms. Just ask your questions, and providing more details will help me assist you more effectively!
VDPC145
192-CHANNEL DMX CONTROLLER
192-KANAALS DMX LICHTSTURING
RÉGIE DE LUMIÈRE DMX 192 CANAUX
CONTROLADOR DMX DE 192 CANALES
192-KANAL-DMX-STEUERGERÄT
USER MANUAL
GEBRUIKERSHANDLEIDING
NOTICE D’EMPLOI
MANUAL DEL USUARIO
BEDIENUNGSANLEITUNG
VDPC145_v2 VELLEMAN 2
VDPC145 – 192-CHANNEL DMX CONTROLLER
1. Introduction & Features
To all residents of the European Union
Important environmental information about this product
This symbol on the device or the package indicates that disposal of the device after its lifecycle could harm
the environment.
Do not dispose of the unit (or batteries) as unsorted municipal waste; it should be taken to a specialized
company for recycling.
This device should be returned to your distributor or to a local recycling service.
Respect the local environmental rules.
If in doubt, contact your local waste disposal authorities.
Thank you for buying the VDPC145! Please read the manual carefully before bringing this device into service.
This is a 192-channel DMX controller, capable of controlling 12 devices with up to 16 channels. The device features
30 banks of 8 scenes each, 6 chases for scene programming and a 4-digit LED display. Check carefully for damage
caused by transportation. Consult your dealer and don’t install this device if it has been damaged in transit.
2. Safety Instructions
A qualified technician should install and service this device.
Damage caused by disregarding certain guidelines in this manual is not covered by the warranty and the dealer
will not accept responsibility for the ensuing defects or problems.
Do not switch the device on immediately if it has been exposed to changes in temperature. Protect the device
against damage by leaving it switched off until it has reached room temperature.
Make sure that the available voltage does not exceed the voltage stated in the specifications of this manual.
Do not crimp the power cord and protect it against damage from sharp edges. Ask an authorised dealer to replace
the cord if necessary.
Always disconnect the device from the mains when it is not in use or when you wish to clean it. Only handle the
power cord by the plug. Never pull out the plug by tugging the power cord.
Note that damage caused by user modifications to the device are not covered by the warranty. Keep the device
away from children and unauthorised users.
3. General Guidelines
This device is a lighting controller for professional use on stage, in discos, theatres, etc. The VDPC145 should
only be used indoors with the included adapter working on an alternating current of max. 230VAC / 50Hz.
Do not shake the device. Avoid brute force when installing or operating the device.
Select a location where the device will be protected against extreme heat, moisture and dust.
Do not use or transport the device under temperatures < 5°C or > 35°C.
Familiarise yourself with the functions of the device before actually using it. Do not permit operation by unqualified
people. Any damage that may occur will probably be due to unprofessional use of the device.
Use the original packaging if the device is to be transported.
Note that all modifications of the device are forbidden for safety reasons.
Do not remove the serial number sticker from the device as doing so will void the warranty. Only use the device
for its intended purpose. All other uses may cause short circuits, burns, electroshocks, lamp explosions, crashes,
etc. Using the device in an unauthorised way will void the warranty.
Be very careful during the installation: touching live wires can cause life-threatening electroshocks.
Keep this device away from rain and moisture.
Unplug the mains lead before opening the housing.
VDPC145_v2 VELLEMAN 3
4. Description
a) Front Panel
1. Scanner Buttons
SCANNERS CHANNEL
1 1-16
2 17-32
3 33-48
4 49-64
5 65-80
6 81-96
7 97-112
8 113-128
9 129-144
10 145-160
11 161-176
12 177-192
Press the button to activate the selected scanner (LED is lit). All appropriate channels are ready for use and can be
adjusted.
2. Scene Buttons (1 – 8)
Press a button to run or store a scene. The second digit of the LED display shows scenes 1-8.
3. Faders (1 – 8)
Use the faders to adjust the output level of a DMX channel from 0 to 255. The value will appear on the
LCD display.
4. Page Select
Press this button to switch between page A (the first 8 channels) and page B (the next 8 channels) of
a device.
5. Speed Slider
Adjust the chase speed with this slider (0.1 sec. – 10 min.)
6. Fade Time Slider
Adjust the fade time with this slider (0 – 30 sec.)
Fig. 1
VDPC145_v2 VELLEMAN 4
7. LED Display
Displays all necessary information
8. Bank Buttons
Press or to select a bank. The third and fourth digit on the LED display make up the bank
number (01 – 30).
9. Chase (1 – 6)
Press a button to run or store a chase. The first digit on the LED display is the chase number (1 – 6).
10. Program
The device is in MANUAL RUN mode when you turn it on. Hold the PROGRAM button for 2 seconds.
The LED flashes and SCENE and CHASE are ready to be programmed. Hold PROGRAM for 2
seconds again to activate the BLACKOUT mode. The PROGRAM LED extinguishes and the
BLACKOUT indication is lit. Press the BLACKOUT button to return to the MANUAL RUN mode. The
blackout LED goes out.
11. MIDI / ADD
MIDI : Hold the MIDI button for two seconds when the device is in RUN mode. The third and fourth
digit of the LED display start to flash. Select a MIDI channel with or . Press any button
other than or to end the MIDI channel setting.
ADD : Push this button to add lines in a program while the device is in the programming mode.
12. AUTO / DEL
AUTO : Press this button while the device is in the RUN mode. The AUTO TRIGGER LED is lit,
indicating that the AUTO RUN mode has been activated. Press the AUTO button again to
deactivate the auto run mode.
DEL : Push this button to delete a scene or a chase while in the programming mode.
13. MUSIC / BANK COPY
MUSIC : Push this button while in the device is in RUN mode. The MUSIC mode is now
activated and the MUSIC TRIGGER LED is lit. Press this button again to
deactivate the MUSIC mode.
BANK COPY : Press this button to copy a bank when the device is in the programming mode.
14. TAP SYNC / DISPLAY
TAP SYNC : When the device is in the AUTO RUN mode, the running speed depends on the
duration of the interval between the last two times you pressed the TAP
SYNC/DISPLAY button.
DISPLAY : Press this button to choose between 00-255 or 0%-100% display for the faders.
15. BLACKOUT
Press this button to set the output of all channels to 0%. This does NOT affect the other functions of
the device. Press this button again to deactivate the blackout mode.
b) Back Panel
16. MIDI IN
17. DMX POLARITY SELECT
18. DMX OUT (3-pole XLR)
19. DC input (9-12V, 300mA)
Fig. 2
VDPC145_v2 VELLEMAN 5
c) Connections
The manufacturer is not responsible for damage caused by improper connections.
Connect the supplied adapter with the DC jack and connect the other end with a mains outlet.
The device has a built-in microphone for sound control. Use the MIDI input if you want sound control by an external
source.
5. Operating Instructions
Programming Scenes
Hold the PROGRAM button for 2 seconds to activate the PROGRAM mode. The PROGRAM LED will flash.
a) Scene Programming
1. Press the desired SCANNER button to select a device
2. It is possible to select several devices and control them simultaneously.
3. Adjust the appropriate faders to the desired output level.
4. Press the MIDI/ADD button
5. Select the desired bank with or .
6. Press a SCENE button to store this scene in the selected bank.
b) Scene Editing
1. Select the desired scene of a bank by pressing the corresponding SCENE button.
2. Adjust the faders
3. Press the MIDI/ADD button
4. Press SCENE again to store the new settings
c) Copying a Scanner
1. Hold the button for the currently selected scanner
2. Press the button for the scanner you want to copy the settings of the first scanner to.
3. Release both buttons.
d) Copying a Scene
1. Press the SCENE button for the scene you wish to copy
2. Press the MIDI/ADD button.
3. Select a bank with or and press the button for the scene you want to copy the settings of the first scene to.
e) Deleting a Scene
1. Select the desired scene by pressing the corresponding scene button.
2. Press the button for the scene to be deleted while holding the AUTO/DEL button.
f) Clearing all scenes
1. Press PROGRAM and while deactivating the device.
2. Turn the device back on.
VDPC145_v2 VELLEMAN 6
g) Copying a Bank
1. Select the desired bank.
2. Press the MIDI/ADD button.
3. Select the bank you wish to copy with or .
4. Press the MUSIC/BANKCOPY button.
h) Deleting a Bank
1. Select the bank to be deleted.
2. Press AUTO/DEL and MUSIC/BANKCOPY buttons simultaneously.
Programming Chases
Hold the PROGRAM button for 2 seconds to activate the programming mode. The programming LED will start to
flash. One chase can contain up to 240 scenes and the scenes are run in the programmed order. The first scenes to
be run will be the first that were programmed.
a) Programming a Chase
1. Select a chase containing programmed scenes by pressing the appropriate CHASE button.
2. Select a scene from a bank with or and press the corresponding SCENE button.
3. Press the MIDI/ADD button.
b) Copying all Scenes from a Bank to a Chase
1. Select the desired bank with or .
2. Press the MUSIC/BANKCOPY button.
3. Press the MIDI/ADD button.
c) Adding a Step to a Chase
Example : inserting a scene as step 10 in an existing 15-step chase.
1. Press TAPSYNC/DISPLAY to display the CHASE and its STEP on the LCD.
2. Select STEP 9 with or .
3. Press MIDI/ADD, making the step turn to 10.
4. Select a scene from the bank with or and then press the corresponding SCENE button.
5. Press MIDI/REC to add the new scene to the newly inserted step. The previous step 10 becomes step 11, etc..
d) Deleting a Step from a Chase
Example : deleting step 10.
1. Press TAPSYNC/DISPLAY to display the CHASE and its STEP on the LCD.
2. Select step 10 with or .
3. Press AUTO/DEL : step 11 becomes step 10, step 12 becomes step 11, etc.
e) Deleting a Chase
1. Select the desired chase with the CHASE button.
2. Press AUTO/DEL while holding that CHASE button.
VDPC145_v2 VELLEMAN 7
f) Clearing all Chases
1. Press and AUTO/DEL simultaneously while deactivating the device.
2. Turn the device back on.
Running Scenes
The device is in RUN mode when it is turned on. Hold the PROGRAM button for 2 seconds to enter the PROGRAM
mode. Subsequently, the device automatically switches to the BLACKOUT mode. Press the BLACKOUT button to
enter the RUN mode. Only those scenes programmed into a bank can be run.
a) Manual Run
1. Make sure AUTO TRIGGER and MUSIC TRIGGER are off.
2. Select a bank with or or through MIDI signals.
3. Press the desired SCENE button.
b) Auto Run
1. Press AUTO/DEL. The AUTO TRIGGER LED comes on.
2. Press TAPSYNC/DISPLAY. Press it again after an interval of your choice. The interval between the two presses
is the assigned speed of AUTO RUN (max. 10 min.). If you press more than twice, only the last two presses are
taken into account.
3. Select a bank with or or through MIDI signals.
4. Press AUTO/DEL again to leave the AUTO RUN mode.
c) Music Run
1. Press MUSIC/BANKCOPY. The MUSIC TRIGGER LED is lit.
2. Select a bank with or or through MIDI signals.
3. Press MUSIC/BANKCOPY again to leave the MUSIC RUN mode.
d) Midi Run
The scenes from a bank are selected through the MIDI input whenever the device is in the MANUAL RUN, AUTO
RUN or MUSIC RUN mode.
e) Chase Run
To use a chase run you have to make programmes first. A chase run can be activated via the MANUAL RUN, AUTO
RUN, MUSIC RUN and MIDI RUN modes.
Select the desired chase with the CHASE button. The selected chase is displayed on the LCD.
f) Fade Time Control
Adjust the fade time with the slider.
VDPC145_v2 VELLEMAN 8
MIDI Channel Settings
The correct bank is selected by means of the NOTE ON signal coming from the MIDI device e.g. a keyboard.
BANK NOTE NUMBER FUNCTION
BANK 1
00 Turn on/off SCENE 1
01 Turn on/off SCENE 2
02 Turn on/off SCENE 3
03 Turn on/off SCENE 4
04 Turn on/off SCENE 5
05 Turn on/off SCENE 6
06 Turn on/off SCENE 7
07 Turn on/off SCENE 8
BANK 2
08 Turn on/off SCENE 1
09 Turn on/off SCENE 2
10 Turn on/off SCENE 3
“ “
BANK 15
112 Turn on/off SCENE 1
113 Turn on/off SCENE 2
114 Turn on/off SCENE 3
115 Turn on/off SCENE 4
116 Turn on/off SCENE 5
117 Turn on/off SCENE 6
118 Turn on/off SCENE 7
119 Turn on/off SCENE 8
CHASE
120 Turn on/off SCENE 1
121 Turn on/off SCENE 2
122 Turn on/off SCENE 3
123 Turn on/off SCENE 4
124 Turn on/off SCENE 5
125 Turn on/off SCENE 6
126 BLACKOUT
6. Cleaning and Maintenance
1. All screws for installing the devices or parts of the device have to be screwed down tight and must not be
corroded.
2. The housing, mounting supports and connections should not be modified or tampered with e.g. do not drill extra
holes in mounting supports, do not change the location of the connections, etc.
3. The electric power supply cables must be undamaged. Have the device installed by a qualified technician.
4. Disconnect the device from the mains prior to maintenance activities.
5. Wipe the device regularly with a moist cloth. Do not use alcohol or solvents.
6. Entrust a qualified technician with the maintenance of this device. Contact your dealer for spare parts if
necessary.
7. Technical Specifications
Power Supply AC/DC adapter 9-12Vdc/300mA (supplied)
Number of DMX Channels 192
Max. Cable Length 100m
Music Control via built-in microphone or MIDI interface
Dimensions 482 x 132 x 73mm
Weight 2.5kg
The information in this manual is subject to change without prior notice.
VDPC145_v2 VELLEMAN 9
VDPC145 – 192-KANAALS DMX CONTROLLER
1. Inleiding & Kenmerken
Aan alle ingezetenen van de Europese Unie
Belangrijke milieu-informatie betreffende dit product
Dit symbool op het toestel of de verpakking geeft aan dat, als het na zijn levenscyclus wordt weggeworpen,
dit toestel schade kan toebrengen aan het milieu.
Gooi dit toestel (en eventuele batterijen) niet bij het gewone huishoudelijke afval; het moet bij een
gespecialiseerd bedrijf terechtkomen voor recyclage.
U moet dit toestel naar uw verdeler of naar een lokaal recyclagepunt brengen.
Respecteer de plaatselijke milieuwetgeving.
Hebt u vragen, contacteer dan de plaatselijke autoriteiten inzake verwijdering.
Dank u voor uw aankoop! Lees de handleiding voor u het toestel in gebruik neemt.
Dit is een 192-kanaals DMX controller waarmee u 12 toestellen met elk 16 kanalen kunt aansturen. Het toestel
beschikt over 30 geheugenbanken van 8 scènes elk, 6 chases voor de programmering van scènes en een 4-digits
LED display. Ga na of het toestel werd beschadigd tijdens het transport. Zo ja, stel dan de installatie van het toestel
uit en raadpleeg uw dealer.
2. Veiligheidsinstructies
Laat dit toestel installeren en onderhouden door een geschoold technicus.
De garantie geldt niet voor schade die werd veroorzaakt door het negeren van bepaalde richtlijnen in deze
handleiding en uw dealer zal de verantwoordelijkheid afwijzen voor defecten of problemen die hier rechtstreeks
verband mee houden.
Om beschadiging te vermijden, mag u het toestel niet onmiddellijk inschakelen indien het werd blootgesteld aan
temperatuurschommelingen. Wacht tot het toestel kamertemperatuur heeft bereikt.
De beschikbare netspanning mag niet hoger zijn dan de spanning die wordt vermeld in de specificaties achteraan
de handleiding.
De voedingskabel mag niet worden gekrimpt of beschadigd door scherpe voorwerpen. Zo ja, laat uw dealer dan
een nieuwe voedingskabel aanbrengen.
Ontkoppel het toestel voor u het reinigt en wanneer het niet in gebruik is. Raak de voedingskabel enkel aan via de plug
en trek nooit aan de voedingskabel om de plug los te koppelen.
Schade veroorzaakt door wijzigingen die de klant heeft aangebracht aan het toestel vallen niet onder de garantie.
Houd dit toestel uit de buurt van kinderen en onbevoegden.
3. Algemene richtlijnen
Dit toestel is een dimmerpack voor professioneel podiumgebruik in disco's, theaters, enz. U mag dit toestel enkel
binnenshuis gebruiken met een AC stroom van max. 230VAC / 50Hz.
Schud het toestel niet dooreen. Vermijd brute kracht tijdens de installatie en de bediening van dit toestel.
Bij de keuze van de installatieplaats moet u nagaan of het toestel niet wordt gehinderd door stof, extreme
temperaturen en vochtigheid.
U mag het toestel nooit vervoeren of gebruiken bij een temperatuur van < 5 en > dan 35°C.
Maak u eerst vertrouwd met de werking van dit toestel. Ongeschoolde personen mogen dit toestel niet gebruiken.
Meestal is beschadiging het gevolg van onprofessioneel gebruik.
Wees voorzichtig bij de installatie: raak geen kabels aan die onder stroom staan om dodelijke elektroshocks
te vermijden.
Bescherm dit toestel tegen regen en vochtigheid.
Verzeker u ervan dat het toestel niet aangesloten is op een stroombron alvorens het te openen.
VDPC145_v2 VELLEMAN 10
Gebruik de oorspronkelijke verpakking wanneer u het toestel vervoert.
Om veiligheidsredenen mag de gebruiker geen wijzigingen aanbrengen aan het toestel.
De garantie vervalt indien u de sticker met het serienummer verwijdert. Gebruik het toestel enkel voor de
toepassingen die hier worden beschreven om kortsluitingen, brandwonden, elektroshocks, gevaar voor ontploffing
van de lampen, enz. te vermijden. U kunt het toestel beschadigen en de garantie vervalt automatisch indien u het
toestel op een ongeoorloofde manier gebruikt.
4. Beschrijving
a) Frontpaneel
1. Scannerknoppen
SCANNERS KANAAL
1 1-16
2 17-32
3 33-48
4 49-64
5 65-80
6 81-96
7 97-112
8 113-128
9 129-144
10 145-160
11 161-176
12 177-192
Druk op de knop om de geselecteerde scanner te activeren (LED brandt). De gewenste kanalen zijn gebruiksklaar en
kunnen worden geregeld.
2. Scèneknoppen (1 – 8)
Druk op één van deze knoppen om een scène op te slaan of af te spelen. Op de plaats voor de
tweede digit ziet u op de LED display het nummer van de scène verschijnen (1 – 8).
3. Faders (1 – 8)
Gebruik de faders om het uitgangsniveau van een DMX kanaal aan te passen tussen 0 en 255. De
ingestelde waarde verschijnt op de LCD display.
Fig. 1
VDPC145_v2 VELLEMAN 11
4. Page Select
Druk op deze knop om af te wisselen tussen pagina A (de eerste 8 kanalen) en pagina B (de volgende
8 kanalen) van een toestel.
5. Schuifregelaar Speed
Regel de snelheid van de chase met deze schuifregelaar (0.1 sec. – 10 min.)
6. Fade Time schuifregelaar
Regel de fadetijd met deze schuifregelaar (0 – 30 sec.)
7. LED Display
Hier leest u alle belangrijke informatie af
8. Bankknoppen
Druk op of om een (geheugen)bank te selecteren. Het derde en vierde cijfer op de LED display
vormen het banknummer (01 – 30).
9. Chase (1 – 6)
Druk op één van deze knoppen om een chase op te slaan of af te spelen. De eerste digit op de LED
display is het chasenummer (1 – 6).
10. Program
Het toestel bevindt zich bij het inschakelen altijd in de MANUAL RUN mode. Houd de PROGRAM
knop gedurende twee seconden ingedrukt tot de LED begint te knipperen. Nu kunt u de SCENE en de
CHASE programmeren. Houd PROGRAM weer 2 seconden ingedrukt om de BLACKOUT mode te
activeren. De PROGRAM LED dooft uit en de BLACKOUT-aanduiding gaat branden. Druk op de
BLACKOUT knop om terug te keren naar de MANUAL RUN mode. De blackout LED dooft uit.
11. MIDI / ADD
MIDI : Houd de MIDI knop in de RUN mode gedurende twee seconden ingedrukt. De derde en
vierde digit van de LED display beginnen te knipperen. Kies een MIDI kanaal met of .
Druk op om het even welke andere knop om de instelling van het MIDI kanaal te beëindigen.
ADD : In de programmeermode kunt u deze knop gebruiken om lijnen toe te voegen aan een
programma.
12. AUTO / DEL
AUTO : Druk op deze knop terwijl het toestel zich in de RUN mode bevindt. De AUTO TRIGGER
LED gaat branden om aan te geven dat de AUTO RUN is geactiveerd. Druk de AUTO knop
nogmaals in om de auto run mode uit te schakelen.
DEL : In de programmeermode moet u op deze knop drukken om een scène of een chase te
deleten.
13. MUSIC / BANK COPY
MUSIC : Druk op deze knop terwijl het toestel zich in de RUN mode bevindt. De MUSIC
mode is nu geactiveerd en de MUSIC TRIGGER LED gaat nu branden. Druk deze
knop nogmaals in om de MUSIC mode uit te schakelen.
BANK COPY : Druk op deze knop om een bank te kopiëren wanneer het toestel zich in de
programmeermode bevindt.
14. TAP SYNC / DISPLAY
TAP SYNC : In de AUTO RUN mode hangt de afspeelsnelheid af van de lengte van de interval
tussen de laatste twee keer dat u de TAP SYNC/DISPLAY button heeft ingedrukt.
DISPLAY : Druk op deze knop om te kiezen tussen 00-255 en 0%-100% display voor de faders.
VDPC145_v2 VELLEMAN 12
15. BLACKOUT
Druk op deze knop om de output van alle kanalen op 0% te brengen. Dit heeft GEEN invloed op de
andere functies van het toestel. Druk deze knop nogmaals in om de blackout mode uit te schakelen.
b) Achterpaneel
16. MIDI IN
17. DMX POLARITY SELECT
18. DMX OUT (3-polige XLR)
19. DC ingang (9-12V, 300mA)
c) Aansluitingen
De fabrikant is niet aansprakelijk voor schade veroorzaakt door verkeerde aansluitingen.
Sluit de meegeleverde adapter aan op de DC jack en stop het andere uiteinde in een stopcontact.
Het toestel heeft een ingebouwde microfoon voor geluidsregeling. Gebruik de MIDI ingang indien u het geluid door
een externe bron wilt laten sturen.
5. Bedieningsinstructies
Scènes programmeren
Houd de PROGRAM knop gedurende 2 seconden ingedrukt om de PROGRAM mode te activeren. De PROGRAM
LED begint te knipperen.
a) Programmeren van scènes
1. Druk op de gewenste knop om een SCANNER te selecteren
2. U kunt meerdere toestellen selecteren en deze tezelfdertijd sturen.
3. Stel de faders in kwestie in op het gewenste uitgangsniveau.
4. Druk op de MIDI/ADD knop
5. Selecteer de gewenste bank met of .
6. Druk op een SCENE knop om deze scène op te slaan in de geselecteerde bank.
b) Scènes bewerken
1. Druk op een SCENE knop om een scène van een bank te selecteren.
2. Regel de faders
3. Druk op de MIDI/ADD knop
4. Druk nogmaals op SCENE om de nieuwe instellingen op te slaan
c) Een scanner kopiëren
1. Houd de knop ingedrukt van de scanner die momenteel is geselecteerd
2. Druk op de knop van de scanner die u wilt voorzien van de instellingen van de eerste scanner.
3. Laat beide knoppen los.
d) Een scène kopiëren
1. Druk op de SCENE knop van de scène die u wilt kopiëren
2. Druk op de MIDI/ADD knop.
3. Selecteer een bank met of en druk op de knop van de scène die u wilt voorzien van de instellingen van de
eerste scène.
Fig. 2
VDPC145_v2 VELLEMAN 13
e) Een scène wissen
1. Druk op de knop van de scène die u wilt wissen om deze scène te selecteren.
2. Houd de AUTO/DEL knop ingedrukt terwijl u de knop van de scène indrukt die u wilt wissen.
f) Alle scènes wissen
1. Druk op PROGRAM en terwijl u het toestel uitschakelt.
2. Schakel het toestel weer in.
g) Een bank kopiëren
1. Selecteer de bank in kwestie.
2. Druk de MIDI/ADD knop in.
3. Selecteer de bank die u wilt kopiëren met de of knop.
4. Druk de MUSIC/BANKCOPY knop in.
h) Een bank wissen
1. Selecteer de bank die u wilt wissen.
2. Druk AUTO/DEL en MUSIC/BANKCOPY tezelfder tijd in.
Een chase programmeren
Houd de PROGRAM knop gedurende 2 seconden ingedrukt om de programmeermode te activeren. De
programmeerLED begint te knipperen. Eén enkele chase bevat max. 240 scènes en de scènes worden afgespeeld in
de volgorde waarin ze werden geprogrammeerd. De eerste scènes die worden afgespeeld zijn dus de eerste scènes
die werden geprogrammeerd.
a) Chase programmeren
1. Via de betreffende CHASE knop selecteert u een chase met geprogrammeerde scènes.
2. Kies een scène van een bank met of en druk de betreffende SCENE knop in.
3. Druk op de MIDI/ADD knop.
b) Alle scènes van een bank kopiëren naar een chase
1. Selecteer de bank met of .
2. Druk de MUSIC/BANKCOPY knop in.
3. Druk de MIDI/ADD knop in.
c) Een stap toevoegen aan een chase
Praktisch voorbeeld : In een bestaande chase met 15 stappen voegen we een nieuwe scène in als “stap 10”.
1. Druk op TAPSYNC/DISPLAY om de CHASE en de STEP op de LCD display te doen verschijnen.
2. Selecteer STAP 9 met of .
3. Druk op MIDI/ADD om over te schakelen naar stap 10.
4. Gebruik en en druk op de juiste SCENE knop om een scène in een BANK te selecteren.
5. Druk op MIDI/REC om de nieuwe scène in te voegen in de zonet gecreëerde stap. De voormalige stap 10 wordt
nu stap 11, enz.
VDPC145_v2 VELLEMAN 14
d) Een stap wissen uit een chase
Voorbeeld : stap 10 wissen.
1. Druk op TAPSYNC/DISPLAY om de CHASE en de STEP op de LCD display te doen verschijnen.
2. Selecteer stap 10 met of .
3. Druk op AUTO/DEL : stap 11 wordt stap 10, stap 12 wordt stap 11, enz.
e) Een chase wissen
1. Selecteer de chase in kwestie met de CHASE knop.
2. Houd die CHASE knop ingedrukt en druk op AUTO/DEL
f) Alle chases wissen
1. Druk tezelfder tijd op en AUTO/DEL wanneer u het toestel uitschakelt.
2. Schakel het toestel weer in.
Scènes afspelen
Het toestel staat altijd in RUN mode wanneer u het inschakelt. Houd de PROGRAM knop gedurende 2 seconden
ingedrukt om de PROGRAM mode te activeren. Het toestel schakelt vervolgens automatisch over op de BLACKOUT
mode. Druk op de BLACKOUT button om de RUN mode te activeren. U kunt enkel die scènes afspelen die in een
bank zijn geprogrammeerd.
a) Manueel afspelen
1. Ga na of AUTO TRIGGER en MUSIC TRIGGER wel degelijk OFF zijn.
2. Selecteer een bank met of of via een MIDI signaal.
3. Druk op de gewenste SCENE knop.
b) Automatisch afspelen
1. Druk op AUTO/DEL. De AUTO TRIGGER LED gaat branden.
2. Druk op TAPSYNC/DISPLAY. Druk een tweede keer na een interval van uw keuze. De interval tussen deze twee
bepaalt de snelheid van de AUTO RUN functie (max. 10 min.). Indien u meer dan twee keer drukt, dan houdt het
toestel slechts met de laatste twee keer dat u drukte.
3. Selecteer een bank met of of via een MIDI signaal.
4. Druk nogmaals op AUTO/DEL om de AUTO RUN mode te verlaten.
c) Music Run Mode
1. Druk op MUSIC/BANKCOPY. De MUSIC TRIGGER LED licht op.
2. Selecteer een bank met of of via een MIDI signaal.
3. Druk MUSIC/BANKCOPY nogmaals in om de MUSIC RUN mode te verlaten.
d) Midi Run Mode
De scènes van een bank worden geselecteerd via de MIDI ingang wanneer het toestel zich in de MANUAL RUN,
AUTO RUN of MUSIC RUN mode bevindt.
VDPC145_v2 VELLEMAN 15
e) Chase Run Mode
U moet eerst programma’s maken indien u een chase run wilt gebruiken. U kunt een chase run activeren via de
MANUAL RUN, AUTO RUN, MUSIC RUN en MIDI RUN modes.
Selecteer de gewenste chase met de CHASE knop. De geselecteerde chase wordt weergegeven op de LCD.
f) Fade Time Regeling
Regel de fadetijd met de schuifregelaar FADE TIME.
Instellingen van het MIDI kanaal
U moet de correcte bank selecteren via het NOTE ON signaal van het MIDI toestel bv. een keyboard.
BANK “NOTE ON” NUMMER FUNCTIE
BANK 1
00 SCENE 1 in-/uitschakelen
01 SCENE 2 in-/uitschakelen
02 SCENE 3 in-/uitschakelen
03 SCENE 4 in-/uitschakelen
04 SCENE 5 in-/uitschakelen
05 SCENE 6 in-/uitschakelen
06 SCENE 7 in-/uitschakelen
07 SCENE 8 in-/uitschakelen
BANK 2
08 SCENE 1 in-/uitschakelen
09 SCENE 2 in-/uitschakelen
10 SCENE 3 in-/uitschakelen
“ “
BANK 15
112 SCENE 1 in-/uitschakelen
113 SCENE 2 in-/uitschakelen
114 SCENE 3 in-/uitschakelen
115 SCENE 4 in-/uitschakelen
116 SCENE 5 in-/uitschakelen
117 SCENE 6 in-/uitschakelen
118 SCENE 7 in-/uitschakelen
119 SCENE 8 in-/uitschakelen
CHASE
120 SCENE 1 in-/uitschakelen
121 SCENE 2 in-/uitschakelen
122 SCENE 3 in-/uitschakelen
123 SCENE 4 in-/uitschakelen
124 SCENE 5 in-/uitschakelen
125 SCENE 6 in-/uitschakelen
126 BLACKOUT
6. Reiniging en onderhoud
1. Alle gebruikte schroeven moeten goed zijn aangespannen en mogen geen sporen van roest vertonen.
2. De vorm van de behuizing, het montagemateriaal en de aansluitingen moet onveranderd blijven bv. geen extra
gaten boren in montagebeugels, de aansluitingen niet bewerken, enz.
3. De voedingskabels mogen niet beschadigd zijn. Laat het toestel installeren door een geschoold technicus.
4. Verbreek de verbinding met het lichtnet voor u met onderhoudswerkzaamheden begint.
5. Veeg het toestel geregeld schoon met een vochtige doek. Gebruik geen alcohol of solventen.
6. Laat het onderhoud over aan een geschoold technicus. Bestel eventuele reserveonderdelen bij uw dealer.
VDPC145_v2 VELLEMAN 16
7. Technische specificaties
Voeding AC/DC adapter 9-12Vdc/300mA (meegeleverd)
Aantal DMX kanalen 192
Max. kabellengte 100m
Afmetingen 482 x 132 x 73mm
Gewicht 2.5kg
De gegevens in deze handleiding kunnen te allen tijde worden gewijzigd zonder voorafgaande kennisgeving.
VDPC145 – CONTROLEUR DMX A 192 CANAUX
1. Introduction & Caractéristiques
Aux résidents de l'Union européenne
Des informations environnementales importantes concernant ce produit
Ce symbole sur l'appareil ou l'emballage indique que l’élimination d’un appareil en fin de vie peut polluer
l'environnement.
Ne pas jeter un appareil électrique ou électronique (et des piles éventuelles) parmi les déchets municipaux
non sujets au tri sélectif ; une déchèterie traitera l’appareil en question.
Renvoyer les équipements usagés à votre fournisseur ou à un service de recyclage local.
Il convient de respecter la réglementation locale relative à la protection de l’environnement.
En cas de questions, contacter les autorités locales pour élimination.
Nous vous remercions de votre achat ! Lisez le présent manuel attentivement avant la mise en service de l'appareil.
Le VDPC145 est un contrôleur DMX à 192 canaux, capable de contrôler 12 appareils de 16 canaux chacun.
L’appareil est pourvu de 30 BANKS (banques de mémoire) de 8 scènes chacun, 6 chases pour la programmation de
scènes et un afficheur LED à 4 digits. Vérifiez si l'appareil n'a pas été endommagé pendant le transport. Si c'est le
cas, remettez l'installation de l'appareil à plus tard et consultez votre revendeur.
2. Prescriptions de sécurité
Un technicien qualifié doit s'occuper de l'installation et du maintien.
Les dommages causés en ignorant les prescriptions de ce manuel ne tombent pas sous la garantie et votre
revendeur déclinera la responsabilité de défauts ou d'autres problèmes qui en résultent.
Ne branchez pas l'appareil quand il a été exposé à des variations de température. Attendez à ce que l'appareil ait
atteint la température de chambre.
La tension réseau ne peut pas dépasser la tension mentionnée dans les spécifications à la fin de ce manuel.
Le câble d'alimentation ne peut pas être serti ou endommagé par des objets tranchants. Demandez à votre
revendeur d'installer un nouveau câble d'alimentation si nécessaire.
Tirez la fiche pour débrancher l'appareil. Débranchez-le avant de le nettoyer.
Les dommages occasionnés par des modifications à l'appareil du côté du client ne tombent pas sous la garantie.
Tenez votre VDPC145 à l'écart d'amateurs et de jeunes enfants.
Être prudent lors de l’installation : toucher un câble sous tension peut causer des électrochocs mortels.
Protéger l’appareil contre la pluie et l’humidité.
Débrancher le câble d'alimentation avant d'ouvrir le boîtier.
VDPC145_v2 VELLEMAN 17
3. Directives générales
Cet appareil est un bloc de puissance pour usage professionnel dans les discothèques, les théâtres, etc.
Employez cet appareil à l'intérieur et uniquement avec une source de courant CA de max. 230Vac/50Hz.
Evitez de secouer l'appareil et traitez l'appareil avec circonspection pendant l'installation et l'opération.
Choisissez un lieu de montage protégé contre les poussières, l’humidité et les extrêmes de température.
Transportez et employez l'appareil lors d'une température de 5 à 35°C.
Familiarisez-vous avec le fonctionnement de l'appareil. Il est interdit aux personnes non qualifiées d'opérer cet
appareil. La plupart des dégâts sont causés par un usage non professionnel.
Transportez l'appareil dans son emballage d'origine.
Il est interdit de modifier l'appareil pour des raisons de sécurité.
La garantie est invalidée si vous enlevez l'autocollant portant le numéro de série. Employez le VDPC145
uniquement pour les applications décrites dans ce manuel afin d'éviter les courts-circuits, les brûlures, les
électrochocs, etc. Un usage interdit peut occasionner des dommages et annule d'office la garantie.
4. Description
a) Panneau frontal
1. Boutons scanner
SCANNERS CANAL
1 1-16
2 17-32
3 33-48
4 49-64
5 65-80
6 81-96
7 97-112
8 113-128
9 129-144
10 145-160
11 161-176
12 177-192
Pressez le bouton pour activer le scanner sélectionné (LED s’allume). Les canaux désirés sont prêts à l’emploi et
peuvent être réglés.
Fig. 1
VDPC145_v2 VELLEMAN 18
2. Boutons scène (1 – 8)
Pressez un de ces boutons pour mémoriser ou jouer une scène. Le numéro de la scène (1 – 8) est
affiché sur l’écran LCD à la place du deuxième digit.
3. Faders (1 – 8)
Utilisez les faders pour régler le niveau de sortie d’un canal DMX entre 0 et 255. La valeur instaurée
apparaît sur l’afficheur LCD.
4. Page Select (sélection de page)
Pressez ce bouton pour alterner entre la page A (les 8 premiers canaux) et la page B (les 8 prochains
canaux) d’un appareil.
5. Glissière Speed
Réglez la vitesse du chase avec cette glissière (0.1 sec. – 10 min.)
6. Glissière "Fade Time"
Cette glissière permet de régler le fade time (délai de variation) entre 0 et 30 secondes.
7. Afficheur LED
Toutes les informations importantes sont affichées sur l’écran LCD
8. Boutons bank (banque de mémoire)
Pressez ou pour sélectionner une banque. Le numéro de la banque (01 – 30) se compose des
troisième et quatrième digits sur l’afficheur LED.
9. Chase (1 – 6)
Pressez un de ces boutons pour mémoriser ou jouer un chase. Le premier digit sur l’afficheur est le
numéro du chase (1 – 6).
10. Programme
Lors de l’activation, l’appareil se trouve toujours dans le mode MANUAL RUN. Gardez le bouton
PROGRAM enfoncé pendant 2 secondes jusqu’à ce que la LED se mette à clignoter. Il est maintenant
possible de programmer la SCENE et le CHASE. Gardez PROGRAM enfoncé pendant 2 secondes
pour activer le mode BLACKOUT. La PROGRAM LED s’éteint et l’indication BLACKOUT s’illumine.
Pressez le bouton BLACKOUT pour retourner au mode MANUAL RUN. La LED blackout s’éteint.
11. MIDI / ADD
MIDI : Enfoncez le bouton MIDI pendant 2 secondes dans le mode RUN. Les troisième te quatrième
digits de l’afficheur se mettent à clignoter. Choisissez un canal MIDI avec ou . Pressez
n’importe quel autre bouton pour terminer l’instauration du canal MIDI.
ADD : Dans le mode de programmation vous pouvez utiliser ce bouton pour ajouter des lignes à un
programme.
12. AUTO / DEL
AUTO : Pressez ce bouton pendant que l’appareil se trouve dans le mode RUN. La LED AUTO
TRIGGER s’allume pour indiquer que le mode AUTO RUN a été activé. Pressez le bouton
AUTO plusieurs fois pour désactiver le mode auto run.
DEL : Pressez ce bouton dans le mode de programmation pour effacer une scène ou un chase.
13. MUSIC / BANK COPY
MUSIC : Pressez ce bouton pendant que le mode RUN est activé. Le mode MUSIC sera
activé et la LED MUSIC TRIGGER s’allume. Pressez ce bouton de nouveau pour
désactiver le mode MUSIC.
VDPC145_v2 VELLEMAN 19
BANK COPY : Pressez ce bouton pour copier une banque quand l’appareil est dans le mode de
programmation.
14. TAP SYNC / DISPLAY
TAP SYNC : Dans le mode AUTO RUN, la vitesse de défilement dépend du temps écoulé entre les
deux dernières fois que vous avez pressé le bouton TAP SYNC/DISPLAY.
DISPLAY : Pressez ce bouton pour choisir entre l’affichage de 00-255 et 0%-100% pour les
faders.
15. BLACKOUT
Pressez ce bouton pour réduire la sortie de tous les canaux à 0%. Ceci n’a aucune influence sur les
autres fonctions de l’appareil. Pressez ce bouton une nouvelle fois pour désactiver le mode blackout.
b) Panneau arrière
16. MIDI IN
17. DMX POLARITY SELECT
18. DMX OUT (XLR 3 pôles)
19. Entrée CC (9-12V, 300mA)
c) Connexions
Le fabricant n’est pas responsable de dommages causés par des connexions erronées.
Connectez l’adaptateur inclus au jack CC et branchez l’autre bout à une prise.
L’appareil est pourvu d’un microphone incorporé pour le réglage sonore. Utilisez l’entrée MIDI si vous voulez piloter
le son par une source externe.
5. Instructions d’opération
Programmer des scènes
Enfoncez le bouton PROGRAM pendant 2 secondes pour activer le mode PROGRAM (mode de programmation). La
LED de programmation se met à clignoter.
a) Programmation de scènes
1. Pressez un bouton pour sélectionner le SCANNER voulu
2. Il est possible de sélectionner plusieurs appareils et de les piloter en même temps.
3. Réglez les faders en question sur le niveau de sortie désiré.
4. Pressez le bouton MIDI/ADD
5. Sélectionnez la banque désirée avec ou .
6. Pressez un des boutons SCENE pour mémoriser cette scène dans la banque de votre choix.
b) Modifier des scènes
1. Pressez un bouton SCENE pour sélectionner une scène d’une banque.
2. Réglez les faders
3. Pressez le bouton MIDI/ADD
4. Pressez SCENE une nouvelle fois pour mémoriser les nouveaux réglages
Fig. 2
VDPC145_v2 VELLEMAN 20
c) Copier un scanner
1. Gardez le bouton enfoncé du scanner actuellement sélectionné
2. Pressez le bouton du scanner vers lequel vous volez copier les réglages du premier scanner.
3. Lâchez les deux boutons.
d) Copier une scène
1. Pressez le bouton SCENE de la scène à copier
2. Pressez le bouton MIDI/ADD.
3. Sélectionnez une banque avec ou et pressez le bouton de la scène vers laquelle vous voulez copier les
réglages de la première scène.
e) Effacer une scène
1. Sélectionnez la scène en question en pressant le bouton approprié.
2. Gardez le bouton AUTO/DEL enfoncé pendant que vous pressez le bouton de la scène à effacer.
f) Effacer l’ensemble des scènes
1. Pressez PROGRAM et lors de la désactivation de l’appareil.
2. Réactivez l’appareil.
g) Copier une banque
1. Sélectionnez la banque en question.
2. Pressez le bouton MIDI/ADD.
3. Sélectionnez la banque à copier avec le bouton ou .
4. Pressez le bouton MUSIC/BANKCOPY.
h) Effacer une banque
1. Sélectionnez la banque à effacer.
2. Pressez AUTO/DEL et MUSIC/BANKCOPY simultanément.
Programmer un chase
Gardez le bouton PROGRAM enfoncé pendant 2 secondes pour activer le mode de programmation. La LED de
programmation se met à clignoter. Un seul chase contient un max. de 240 scènes et les scènes sont jouées dans
leur ordre de programmation. Cela veut dire que les premières scènes programmées seront les premières à être
joué.
a) Programmer un chase
1. Sélectionnez un chase avec des scènes programmées à l’aide du bouton CHASE approprié.
2. Sélectionnez une scène d’une banque avec ou et pressez le bouton SCENE correspondant.
3. Pressez le bouton MIDI/ADD.
b) Copier toutes les scènes d’une banque vers une chase
1. Sélectionnez la banque avec ou .
2. Pressez le bouton MUSIC/BANKCOPY.
3. Pressez le bouton MIDI/ADD.
/