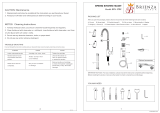
Glacier Bay 4311F-2 Operating instructions
- Category
- Sanitary ware
- Type
- Operating instructions

Model #F2116
STAINLESS STEEL PULL-DOWN KITCHEN FAUCET

Important Information................................2
Warranty...............................................2
Pre-Installation .......................................2
Planning installation.................................2
Tools and Hardware Required.......................2
Part List ……..........…….........................3
Installation ...................................... ....4
Care and Cleaning ...................................9
Troubleshooting.... .................................9
Before beginning the installation of this product, ensure all parts are present. Compare parts with the Part List.
If any part is missing or damaged, do not attempt to install the product. Contact Customer Service for
replacement parts.
TOOLS AND HARDWARE REQUIRED
Adjustable
wrench
Safety
googles
Phillips
screwdriver
SILIC
ONE
Silicone
sealant
□ Observe all local plumbing and building codes.
□ Cover the sink drain to avoid losing any parts.
□ Review all the warnings, care, and maintenance information.
LIMITED LIFETIME WARRANTY
Glacier Bay products are manufactured with superior quality standards and workmanship and are backed by our
limited lifetime warranty. Glacier Bay products are warranted to the original consumer purchaser to be free of
defects in materials or workmanship. We will replace FREE OF CHARGE any product or parts that prove defective.
Simply, return the product / part to any of The Home Depot retail locations or call 1-855-HD-GLACIER (1-855-434-
5224) to receive the replacement item. Proof of purchase(original sales receipt) from the original consumer
purchaser must be made available for all Glacier Bay warranty claims.
This warranty excludes incidental/inconsequential damages and failures due to misuse, abuse or normal wear and
tear. This warranty excludes all industrial, commercial & business usage, whose purchasers are hereby, extended
a five year limited warranty from the date of purchase, with all other terms of this warranty applying except the
duration of warranty.
Some states and provinces do not allow the exclusion or limitation of incidental or consequential damages, so the
above limitations may not apply to you. This warranty gives you specific legal rights and you may also have other
rights that vary from state to state and province to province. Please see a store or contact 1-855-HD-GLACIER for
more details.

R
A
B C D
F
E
H
I
J
K
L
P
M
Q
N
O
S
T
Pre-Installation (continued)
PART LIST
G
O-ring
1
Part Description Quantity
A
1
B
Cartridge
1
C
Screw Nut
1
D
O-ring
1
E
Cap
1
Faucet Assembly
F
1
Handle
H
1
Rubber Washer
Q
Outlet Hose
1
Part Description Quantity
K
1
L
Mounting Shank
1
M
Tool
1
N
Weight
1
O
Pull-out Hose
1
Hose Protector
P
1
Supply Hose
R
2
I
J
1
Metal Washer
1
Fixing Nut
S
1
Escutchen
Waterproof Foam
Spray Head
T
1
G

4
Installation
1
Preparing for installation
CAUTION: Always shut off the water supply before removing or replacing any part of a faucet. Open the
handle to relieve water pressure and ensure that the water is completely shut off.
□ Remove the weight (P).
Remove the protective clip (1) on outlet hose (S).
Unscrew the hose protector (K), screw nut (J), metal washer (I) and rubber washer (H).
□ Check that the pre-assembled supply hoses (R) and outlet hose (S) are tightened securely.
□
□
Push the tab (2) of outlet hose (S) upward and then pull
down the quick connector (3) of pull-out hose (Q) to disconnect them.
2
3
pull
down
push
upward
1
2
Assemble the faucet
□
shank (L).
Put pull-out hose (Q) through the mounting
3
Installing the faucet assembly
□
Insert the faucet assembly (A) through the hole.
□ Use the escutchen (M) and waterproof foam (N) if needed.
This step is for escutcheon installation as
an option for 3 hole application.
If the sink is uneven, use silicone under
the waterproof foam (N).
□
assembly (A).
screw the mounting shank (L) into the faucet

5
Installation (continued)
4
Securing the faucet assembly
□ Pull out the hose (Q) slowly to recommended position
DO NOT pull out the hose (Q) completely from the faucet (A).
where the quick connector (3) stay right out of the mounting shank (G).
Install the rubber washer (H), and metal washer (I) onto the threaded mounting shank (L).
□ Thread the fixing nut (J) onto the mounting
screwdriver. Do not overtighten.
shank (L). Lock it into position by tightening with the provided tool (O) and Philips
□
Recommended Position
3

6
Installation (continued)
Installing the weight
Push the pull out hose (Q) back inside the faucet (A).
Install the hose protector (K) onto the mounting shank.
□ Install the weight (P) at the point of the hose marking “Weight Here”.
□
□
5
"Weight Here" Label

7
Installation (continued)
6
Attaching the quick connector to the receiving block
□ Push the quick connector of pull-out hose (Q) firmly upward and attach it to the receiving block of outlet hose (S).
Push until a “Click” is heard. Tug downward to test engagement.
□ Attach the protective clip on the outlet hose (S).
Protective Clip

8
Installation (continued)
Making the water supply
connections
□
outlet of the water supply valve and tighten with
a wrench. Do not overtighten.
Thread the nut on the supply hose (R) onto the
7
CAUTION: The hot and cold inlet tubes are indicated
by their colors: red means hot and blue means cold.
Avoid twisting wires together or placing the wires
close to each other and damaging.
Install the spray head
□ Install the spray head (T) onto the pull-out hose (Q).
□ Pull the hose assembly from the spout and check for smooth operation. Check the sprayer by pushing the button
to switch from stream to spray.
□ Remove the protective cap (4) on the end of pull-out hose (Q).
8
4

Problem Possible Cause Possible Cause
There are leaks
underneath the handle.
The aerator leaks or has
an inconsistent water
flow pattern.
There are leaks from
the hose underneath
the deck.
The hose does not
retract.
The water pressure is
low.
There is no hot or cold
water.
The screw nut has come loose and the
o-ring on the cartridge is dirty or damaged.
The aerator is dirty or misfitted.
The cartridge may be clogged.
The supply hose and outlet hose connection
may be loose.
The weight is not installed in the
appropriate position.
The connector underneath the deck is
clogged with debris.
The aerator is clogged.
The water supply hose was accidentally
kinked during installation and is limiting
the water flow through.
Tighten the screw nut. Clean or
replace the cartridge or o-ring.
Remove the aerator and check
for debris in the aerator screens.
Remove the cartridge and check
for debris.
Ensure the aerator is properly
installed.
Tighten the connection of the
hoses.
Reinstall or readjust the weight.
Turn off the water supply and
disconnect the connector
/ aerator.
Unscrew the connector / aerator
and clean under running water.
Screw the connector / aerator
back.
Test water flow. If water
pressure is still low then replace
the connnector / aerator.
Reinstall the water supply hose.
□
□
9

-
 1
1
-
 2
2
-
 3
3
-
 4
4
-
 5
5
-
 6
6
-
 7
7
-
 8
8
-
 9
9
-
 10
10
Glacier Bay 4311F-2 Operating instructions
- Category
- Sanitary ware
- Type
- Operating instructions
Ask a question and I''ll find the answer in the document
Finding information in a document is now easier with AI
Related papers
-
Glacier Bay 4313F-1 User guide
-
Glacier Bay 67557-0008D2 Installation guide
-
Glacier Bay VT3322D1-2A Operating instructions
-
Glacier Bay 67778-0001 Installation guide
-
Glacier Bay HD67673-0008D2 Installation guide
-
Glacier Bay 67070-4027H2 Installation guide
-
Glacier Bay 65710N-B8401 Installation guide
-
Glacier Bay 65717N-08104 Installation guide
-
Glacier Bay HD67065-0108D2 Installation guide
-
Glacier Bay HD67780-1008D2 Installation guide


