Page is loading ...

Novell
®
Sentinel
™
www.novell.com
6.0.2
January 2008
Volume V – 3
RD
PARTY INTEGRATION GUIDE

Legal Notices
Novell, Inc. makes no representations or warranties with respect to the contents or use of this documentation, and
specifically disclaims any express or implied warranties of merchantability or fitness for any particular purpose.
Further, Novell, Inc. reserves the right to any and all parts of Novell software, to revise this publication and to
make changes to its content, at any time, without obligation to notify any person or entity of such revisions or
changes.
Any products or technical information provided under this Agreement may be subject to U.S. export controls and
the trade laws of other countries. You agree to comply with all export control regulations and to obtain any required
licenses or classification to export, re-export, or import deliverables. You agree not to export or re-export to entities
on the current U.S. export exclusion lists or to any embargoed or terrorist countries as specified in the U.S. export
laws. You agree to not use deliverables for prohibited nuclear, missile, or chemical biological weaponry end uses.
Please refer to http://www.novell.com/info/exports/ for more information on exporting Novell software. Novell
assumes no responsibility for your failure to obtain any necessary export approvals.
Copyright © 1999-2007 Novell, Inc. All rights reserved. No part of this publication may be reproduced,
photocopied, stored on a retrieval system, or transmitted without the express written consent of the publisher.
Novell, Inc. has intellectual property rights relating to technology embodied in the product that is described in this
document. In particular, and without limitation, these intellectual property rights may include one or more of the
U.S. patents listed at http://www.novell.com/company/legal/patents/ and one or more additional patents or pending
patent applications in the U.S. and in other countries.
Novell, Inc.
404 Wyman Street, Suite 500
Waltham, MA 02451
U.S.A.
www.novell.com
Online Documentation: To access the online documentation for this and other Novell products and to get
updates, see www.novell.com/documentation.

Novell Trademarks
For Novell trademarks, see the Novell Trademark and Service Mark list
(http://www.novell.com/company/legal/trademarks/tmlist.html).
Third-Party Materials
All third-party trademarks are the property of their respective owners.
Third Party Legal Notices
This product may include the following open source programs that are available under the LGPL license. The text
for this license can be found in the Licenses directory.
edtFTPj-1.2.3 is licensed under the Lesser GNU Public License. For more information, disclaimers and
restrictions see http://www.enterprisedt.com/products/edtftpj/purchase.html.
Enhydra Shark, licensed under the Lesser General Public License available at:
http://shark.objectweb.org/license.html.
Esper. Copyright © 2005-2006, Codehaus.
FESI is licensed under the Lesser GNU Public License. For more information, disclaimers and restrictions, see
http://www.lugrin.ch/fesi/index.html.
jTDS-1.2.2.jar is licensed under the Lesser GNU Public License. For more information, disclaimers and
restrictions see http://jtds.sourceforge.net/.
MDateSelector. Copyright © 2005, Martin Newstead, licensed under the Lesser General Public License. For
more information, disclaimers and restrictions see http://web.ukonline.co.uk/mseries.
Tagish Java Authentication and Authorization Service Modules, licensed under the Lesser General Public
License. For more information, disclaimers and restrictions see http://free.tagish.net/jaas/index.jsp.
This product may include the following software developed by The Apache Software Foundation
(http://www.apache.org/) and licensed under the Apache License, Version 2.0 (the "License"); the text for this
license can be found in the Licenses directory or at http://www.apache.org/licenses/LICENSE-2.0. Unless
required by applicable law or agreed to in writing, software distributed under the License is distributed on an "AS
IS" BASIS, WITHOUT WARRANTIES OR CONDITIONS OF ANY KIND, either express or implied. See the
License for the specific language governing permissions and limitations under the License.
Apache Axis and Apache Tomcat, Copyright © 1999 to 2005, Apache Software Foundation. For more
information, disclaimers and restrictions, see http://www.apache.org/licenses/.
Apache FOP.jar, Copyright 1999-2007, Apache Software Foundation. For more information, disclaimers and
restrictions, see http://www.apache.org/licenses/.
Apache Lucene, Copyright © 1999 to 2005, Apache Software Foundation. For more information, disclaimers
and restrictions, see http://www.apache.org/licenses/.
Bean Scripting Framework (BSF), licensed by the Apache Software Foundation Copyright © 1999-2004. For
more information, disclaimers and restrictions see http://xml.apache.org/dist/LICENSE.txt.
Skin Look and Feel (SkinLF). Copyright © 2000-2006 L2FProd.com. Licensed under the Apache Software
License. For more information, disclaimers and restrictions see https://skinlf.dev.java.net/.
Xalan and Xerces, both of which are licensed by the Apache Software Foundation Copyright © 1999-2004. For
more information, disclaimers and restrictions see http://xml.apache.org/dist/LICENSE.txt.
This product may include the following open source programs that are available under the Java license.
JavaBeans Activation Framework (JAF). Copyright © Sun Microsystems, Inc. For more information,
disclaimers and restrictions see http://www.java.sun.com/products/javabeans/glasgow/jaf.html and click
download > license.

Java 2 Platform, Standard Edition. Copyright © Sun Microsystems, Inc. For more information, disclaimers and
restrictions see http://java.sun.com/j2se/1.5.0/docs/relnotes/SMICopyright.html.
JavaMail. Copyright © Sun Microsystems, Inc. For more information, disclaimers and restrictions see
http://www.java.sun.com/products/javamail/downloads/index.html and click download > license.
This product may include the following open source and third party programs.
ANTLR. For more information, disclaimers and restrictions, see http://www.antlr.org.
Boost. Copyright © 1999, Boost.org.
Concurrent, utility package. Copyright © Doug Lea. Used without CopyOnWriteArrayList and
ConcurrentReaderHashMap classes.
ICEsoft ICEbrowser. ICEsoft Technologies, Inc. Copyright © 2003-2004.
ILOG, Inc. Copyright © 1999-2004.
Java Ace, by Douglas C. Schmidt and his research group at Washington University. Copyright © 1993-2005.
For more information, disclaimers and restrictions see http://www.cs.wustl.edu/~schmidt/ACE-copying.html
and http://www.cs.wustl.edu/~pjain/java/ace/JACE-copying.html.
Java Service Wrapper. Portions copyrighted as follows: Copyright © 1999, 2004 Tanuki Software and
Copyright © 2001 Silver Egg Technology. For more information, disclaimers and restrictions, see
http://wrapper.tanukisoftware.org/doc/english/license.html.
JIDE. Copyright © 2002 to 2005, JIDE Software, Inc.
JLDAP. Copyright © 1998-2005 The OpenLDAP Foundation. All rights reserved. Portions Copyright ©
1999 - 2003 Novell, Inc. All Rights Reserved.
Monarch Charts. Copyright © 2005, Singleton Labs.
OpenSSL, by the OpenSSL Project. Copyright © 1998-2004. For more information, disclaimers and
restrictions, see http://www.openssl.org.
Oracle Help for Java. Copyright © 1994-2006, Oracle Corporation.
Rhino. Usage is subject to Mozilla Public License 1.1. For more information, see
http://www.mozilla.org/rhino/.
SecurityNexus. Copyright © 2003 to 2006. SecurityNexus, LLC. All rights reserved.
Sonic Software Corporation. Copyright © 2003-2004. The SSC software contains security software licensed
from RSA Security, Inc.
Tao (with ACE wrappers) by Douglas C. Schmidt and his research group at Washington University, University
of California, Irvine and Vanderbilt University. Copyright © 1993-2005. For more information, disclaimers and
restrictions see http://www.cs.wustl.edu/~schmidt/ACE-copying.html and
http://www.cs.wustl.edu/~pjain/java/ace/JACE-copying.html.
Tinyxml. For more information, disclaimers and restrictions see
http://grinninglizard.com/tinyxmldocs/index.html.
yWorks. Copyright © 2003 to 2006, yWorks.
NOTE: As of the publication of this documentation, the above links were active. In
the event you find that any of the above links are broken or the linked web pages are
inactive, please contact Novell, Inc., 404 Wyman Street, Suite 500, Waltham, MA
02451 U.S.A.

Preface
The Sentinel Technical documentation is general-purpose operation and reference guide.
This documentation is intended for Information Security Professionals. The text in this
documentation is designed to serve as a source of reference about Sentinel’s Enterprise
Security Management System. There is additional documentation available on the Novell
web portal (http://www.novell.com/documentation/).
Sentinel Technical documentation is broken down into six different volumes. They are:
Volume I – Sentinel Install Guide
Volume II – Sentinel User Guide
Volume III – Sentinel Collector Builder User Guide
Volume IV – Sentinel User Reference Guide
Volume V – Sentinel 3
rd
Party Integration
Volume VI – Sentinel Patch Installation Guide
Volume I – Sentinel Install Guide
This guide explains how to install:
Sentinel Server
Sentinel Console
Sentinel Correlation Engine
Sentinel Crystal Reports
Collector Builder
Collector Manager
Advisor
Volume II – Sentinel User Guide
This guide discusses:
Sentinel Console Operation
Sentinel Features
Sentinel Architecture
Sentinel Communication
Shutdown/Startup of Sentinel
Vulnerability assessment
Event monitoring
Event filtering
Event correlation
Sentinel Data Manager
Event Configuration for Business
Relevance
Mapping Service
Historical reporting
Collector Host Management
Incidents
Cases
User management
Workflow
Solution Packs
Volume III – Collector Builder User Guide
This guide discusses:
Collector Builder Operation
Collector Manager
Collectors
Collector Host Management
Building and maintaining Collectors
Volume IV - Sentinel User Reference Guide
This guide discusses:

Collector scripting language
Collector parsing commands
Collector administrator functions
Collector and Sentinel meta-tags
Sentinel correlation engine
User Permissions
Correlation command line options
Sentinel database schema
Volume V - Sentinel 3
rd
Party Integration Guide
Remedy
HP OpenView Operations
HP Service Desk
Volume VI - Sentinel Patch Installation Guide
Patching from Sentinel 4.x to 6.0 Patching from Sentinel 5.1.3 to 6.0
Feedback
We want to hear your comments and suggestions about this manual and the other
documentation included with this product. Please use the User Comments feature at the
bottom of each page of the online documentation and enter your comments there.
Additional Documentation
The other manuals on this product are available at http://www.novell.com/documentation.
The additional documentation available on Sentinel:
Sentinel 6.0 Installation Guide
Sentinel 6.0 Patch Installation Guide
Sentinel 6.0 Reference Guide
Documentation Conventions
The following are the conventions used in this manual:
Notes and Warnings
NOTE: Notes provide additional information that may be useful or for
reference.
WARNING:
Warnings provide additional information that helps you identify and stop
performing actions in the system that cause damage or loss of data.
Commands appear in courier font. For example:
useradd –g dba –d /export/home/oracle –m –s /bin/csh
oracle
Go to Start > Program Files > Control Panel to perform this action: Multiple actions
in a step.
References
à For more information, see
“Section Name” (if in the same Chapter).
à For more information, see
“Chapter Name” (if in the same Guide).
à For more information, see
Section Name in Chapter Name, Name of the
Guide
(if in a different Guide).

Other References
The following manuals are available with the Sentinel install CDs.
Sentinel User Guide
Sentinel Collector Builder User Guide
Sentinel User Reference Guide
Sentinel 3
rd
Party Integration Guide
Release Notes
Contacting Novell
Website: http://www.novell.com
Novell Technical Support:
http://support.novell.com/phone.html?sourceidint=suplnav4_phonesup
Self Support:
http://support.novell.com/support_options.html?sourceidint=suplnav_supportprog
Patch Download Site: http://download.novell.com/index.jsp
24x7 support: http://www.novell.com/company/contact.html.
For Collectors/Connectors/Reports/Correlation/Hotfixes/TIDS:
http://support.novell.com/products/sentinel.

Contents
1 Remedy Integration 1-1
Configuration...........................................................................................................................................1-1
Remedy to Sentinel Data Flow...........................................................................................................1-5
Installing Sentinel ...............................................................................................................................1-8
Remedy to Sentinel Data Flow Configuration..........................................................................................1-8
2 Remedy Help Desk Operations 2-1
Remedy Help Desk Operations...............................................................................................................2-1
Manually Reconfiguring the Remedy Interface Settings..........................................................................2-1
Remedy Settings................................................................................................................................2-2
Resetting the Remedy Password .......................................................................................................2-2
3 Installing HP OpenView Service Desk for Windows 3-1
System Requirements.............................................................................................................................3-1
Installation...............................................................................................................................................3-2
Configuring HP OpenView Service Desk............................................................................................3-3
Enabling Service Desk to Sentinel (bi-directional) Interface...............................................................3-4
4 HP OpenView Service Desk Integration 4-1
HP OpenView Service Desk....................................................................................................................4-1
Sending Incidents to HP OpenView Service Desk..............................................................................4-2
HP OpenView Service Desk Client.....................................................................................................4-3
HP OpenView Service Desk – Bi-Directional Interface.......................................................................4-4
Manually Reconfiguring the HP OpenView Service Desk Interface Settings......................................4-5
Contents 1

1 Remedy Integration
Remedy integration for Sentinel v4.2 or v5 can be used to create workflow
applications that are integrated with both the Remedy Trouble Ticketing System
and Sentinel system. Key features with the Remedy integration are:
Ability to create a new case in Remedy Help Desk based on an incident in
Sentinel.
Ability to update a related case in Help Desk, when a Sentinel incident is
updated.
Ability to update a Sentinel incident when a related Case in Help Desk is
updated.
Configuration
To change the Remedy Help Desk Case form:
1. Login into Remedy Administrator > Forms, double-click on HPD
HelpDesk.
2. In order to support integration with Sentinel, the Help Desk Case form
needs a character (EsecIncidentId) and attachment pool (Attachment
Pool) field to be added. These field entries will be used to add incident
attachments to the form.
3. To add the EsecIncidentId character field:
Remedy Integration 1-1

Click New Character Field button and place it somewhere on the
form.
Under the Display tab, set a label.
Under the Database tab, in the Name field set the name to
EsecIncidentID.
4. To add the Attachment Pool character field with the following three
fields: EsecEvents, EsecVuln and EsecAdv.
Click Create Attachment Pool button.
Under the Display tab, in the label field enter a label name (ex: esec
attachments).
Under Attach Fields, in the Enter Attachments Field Label, enter:
à EsecEvent and click Add
à EsecVuln and click Add
à EsecAdv and click Add
5. Click Save.
To create a web service:
1. In Remedy Administrator, in the navigation pane high-light Web
Services. Right-click New Web Services and click the Web Services tab.
1-2 3
rd
Party Integration Guide

2. Using the Help Desk Case as a base form, create a Web Service called
EsecToHelpDesk and select Base Form HPD HelpDesk.
3. Make two operations for this web service called:
opCreate
opSet
You can do so by removing the other operations.
4. Select OpCreate and click Output Mapping button. Make the screen
match the following illustration.
Remedy Integration 1-3

Select Input Mapping button for opCreate. Make the screen match the
following illustration.
NOTE: To remove an item, high-light it > right-click > cut.
Click Save.
1-4 3
rd
Party Integration Guide

Select Input Mapping button for opSet. Make the screen match the following
illustration.
There is no output mapping for opSet. For opSet, you have to specify a
qualification:
5. Go to the Permissions tab and move the service to Public by moving
Public from left to right. Click Save.
Remedy to Sentinel Data Flow
In order for Sentinel Web Service to be accessible, you must have a web server
with Axis web application running by the time of Sentinel Server startup.
Remedy to Sentinel Data Flow:
1. In the Remedy Administrator, high-light Filters and right-click Add
Filter.
2. Create a filter for Help Desk Case form that is executed on a modified
event. Make sure your screen matches the following illustration.
Remedy Integration 1-5

3. Under the If Action tab, in the New Action drop down menu select Set
field action, in the Set Field pane select WEB SERVICE and provide the
URL for Sentinel Web Service (http://<webserver IP or DNS
name>:8080/axis/services/EsecWebService?wsdl).
1-6 3
rd
Party Integration Guide

4. In the Choose Operation drop down menu, select updateEsecIncident
method and set the Input and Output mapping.
Click Output Mapping button. Make your screen match the following
illustration:
Click the Input Mapping button. Make your screen match the following
illustration.
NOTE: To set your Map, select an item on the left (that is, incidentId),
select an item on the right (that is, EsecIncidentId) and click the Map
button.
Remedy Integration 1-7

NOTE: After setup, whenever you save a change in Help Desk Case
form, the change will be submitted to a Sentinel service.
5. Click Save.
Installing Sentinel
When installing Sentinel with Remedy, you will need to have an account with
Remedy. From this account you will be prompted for the following information.
NOTE: You must have Remedy Integration permission.
Username
Password
Requestor Name
Requester ID
Requestor Login
Group Name (may be left blank)
Individual Name (may be left
Blank)
Server Name
Service Name
For Remedy to Sentinel Data Flow, you will be prompted for:
Sentinel Webserver (<machine name:port>)
Sentinel Username (such as esecadm)
Sentinel UserID
Sentinel UUID
Sentinel Lock ID (usually set to 1 or 2, this is....
Installing Sentinel:
1. Select Remedy integration during install.
2. Have the above information available during the install process.
Remedy to Sentinel Data Flow Configuration
If you will be using the 3
rd
Party Integration (Remedy Integration), it is
recommended to install and configure in the following order:
1. Install Remedy Help Desk Application and Remedy 6.0 with Web
Services Plug-in.
2. Configure new Filters and Web services in the Remedy Help
Application.
3. Install Sentinel
In order to have Remedy to Sentinel data flow, you must:
In order for Sentinel WebService to be accessible, you must have a web
server with Axis web application running before sentinel server is started.
Copy all the jar files from the following location on your Sentinel Server to
<axis web application>\webclient\lib.
à %ESEC_HOME%\lib
à %ESEC_HOME%\sentinel\console
à %ESEC_HOME%\communicator (for v4.2 only)
Copy your Sentinel Server configuration.xml and .keystore file to a location
of your choice to your webserver. Both files are located at
%ESEC_HOME%.
à Edit the configuration.xml on your web server to point to the .keystore
file.
à Add the following JVM option to your webserver,
1-8 3
rd
Party Integration Guide

Dcom.esecurity.configurationfile=<path to
configuration.xml>\configuration.xml
You must create a filter for the Help Desk Case form that is executed on a
“Modified” event. This filter calls the Sentinel web server.
Remedy Integration 1-9

2 Remedy Help Desk Operations
Remedy integration can be used to create workflow applications. Features with
the Remedy integration are:
Ability to create a new case in Remedy Help Desk based on an incident in
Sentinel.
Ability to update a related case in Help Desk, when Sentinel incident is
updated.
Ability to update a Sentinel incident when a related Case in Help Desk is
updated.
Remedy Help Desk Operations
To send an Incident for Remedy Help Desk (v4.5.x and later):
1. Click the Incidents tab.
2. In the navigator pane, expand the Incident Views folder and high light
Incident View Manager.
NOTE: If you already have an incident set for another external system,
you cannot change it.
3. Expand one of the incident views and double-click on your incident.
Your incident will open.
4. Click the Remedy button.
The Incident will be updated with an External Data tab and Remedy button.
To update an Incident to Remedy Help Desk (v4.5.x and later):
1. Click the Incidents tab.
2. Expand the navigator pane on the left and double-click an incident that is
set to Remedy Help Desk.
3. Click the Remedy button in the Incident. Annotation will be added under
the External tab.
Manually Reconfiguring the Remedy Interface
Settings
During the initial installation of the Remedy Help Desk Interface, the Remedy
settings are stored in the das_query.xml file. Use the information in this section
of the documentation if you need to modify these settings after installation.
Remedy Help Desk Operations 2-1

2-2 3
rd
Party Integration Guide
Remedy Settings
Remedy settings are stored in the das_query.xml file under the
RemedyARServerService component as follows:
Resetting the Remedy Password
The Remedy passwords are stored in an encrypted format in the das_query.xml
file. Therefore, if you need to reset the passwords stored in this file, you must use
the utility described below.
To reset the Remedy interface password:
1. Go to %ESEC_HOME%/sentinel/bin/.
2. Enter:
extconfig -n das_query.xml [-r
remedy_password]
-r is the Remedy password

3 Installing HP OpenView Service Desk for
Windows
Sentinel’s bi-directional integration with HP OpenView Service Desk, which is
licensed separately, provides new valuable features to the Sentinel Console.
Sentinel leverages HP OpenView Service Desk’s Asset Management capabilities
to provide referential information to aide in the response to security threats and
attacks. These new features provide the ability to:
Send Incident(s) to HP Service Desk (SD)
Attach Event(s) to a HP SD Incident
Attach Vulnerability Information to a HP SD Incident
Query and Populate Configuration Item (Asset) information both in Sentinel
Console Incident and SD
Round Trip Integration: SD send updates to Novell and Novell sending
updates to SD
Update SD Incident Status from Novell’s Sentinel Console
Update Sentinel’s Incident Status from HP SD
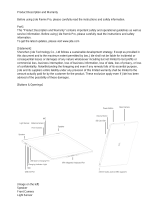
Below is a typical installation configuration. Your configuration may be different.
System Requirements
For hardware and software requirements for HP OpenView Service Desk Client,
Server and Agent, see HP OpenView Service Desk Installation Guide.
Sentinel supports the following versions of HP OpenView Service Desk:
Installing HP OpenView Service Desk for Windows 3-1
/