Page is loading ...

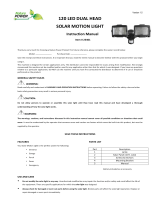
NL-DSW2/DSG2
INSTRUCTION MANUAL
Questions, problems, missing parts?
We’re ready to help. Call Novolink Customer Service
9 a.m. - 5 p.m., Monday-Friday
1-800-933-7188
NOVOLINKINC.COM
We appreciate the trust and confidence you have placed in Novolink through the
purchase of this solar motion light. We strive to continually create quality products
designed to enhance your home. Visit us online to see our full line of products
available for your home improvement needs. Thank you for choosing Novolink!

1-Year Warranty 2
Tools and Hardware 3
Main Package Contents 4
Planning Installation 5
Installing the Solar Panel 6
Installing the Motion Light 8
Connecting the Solar Panel to the Motion Light 10
Charging and Replacing the Battery 11
Operation 13
Maintenance, Cleaning and Care 15
Troubleshooting 16
SAFETY INFORMATION
This manual has been carefully designed and organized to make the
assembly, operation, and continued maintenance of the product as easy and
safe as possible, provided it is installed, operated, maintained, and tested
in strict accordance with the instructions and warnings contained in this
manual. Read and follow all guidelines and operating instructions before the
first use of this product. Store the manual in a safe, easily accessible location.
WARNINGS
When selecting a replacement battery, ensure the correct
battery type is chosen.
Keep these instructions safe for future reference.
Do not make any additions to the wiring of the LED Solar
Motion Light.
Always take precautions if using a step ladder when
installing the LED Solar Motion Light.
1
TABLE OF CONTENTS

2
1-YEAR WARRANTY: WHAT IS COVERED
The manufacturer warrants to the original purchaser that the products
delivered are free of defects in material and workmanship for the
period listed below from the date of purchase.
The manufacturer requires a proof of purchase for any warranty claim.
The warranty is conditioned on the following:
1. The manufacturer must be notified within the period of the
warranty from the date purchased and have been given the
opportunity of inspection by return of any alleged defective
product.
2. The product must not have been abused, misused or improperly
maintained, installed or repaired during the warranty period.
3. Such alleged defects should not be deemed as a result of any
circumstance not falling under ordinary ‘wear and tear’.
The manufacturer makes no other warranty or representation
either expressed or implied.
4. The manufacturer’s maximum liability is limited to the purchased
price of the product. In no event shall the manufacturer be liable
for any consequential, indirect, incidental, or special damages of
any nature arising from the sale or use of this product.
Contact Novolink Customer Service
1-800-933-7188
or visit www.novolinkinc.com

TOOLS REQUIRED
HARDWARE NEEDED
3
TOOLS AND HARDWARE
PART DESCRIPTION QUANTITY
AA Screws 6
BB Plugs 6
CC Quick-Clip mounting bracket 1
Power Drill
Phillips Screwdriver
AA
Level
Pencil
BB
Safety Goggles
Ladder
CC

4
MAIN PACKAGE CONTENTS
PART DESCRIPTION QUANTITY
A Dual Head LED Motion Light 1
B Solar Panel with Wire 1

5
PLANNING INSTALLATION
For the best result, locate the solar panel in a position where it
receives direct sunlight and is generally free from cover and shade.
Be aware and consider foliage and building overhangs, which will
affect the solar panel’s ability to charge.
NOTE: Face the solar panel due south for maximum sun exposure.
Select an area where the Motion Light and Solar Panel can be
mounted with ease. Consider that the units must be within 15 feet
(the length of the power cable from the Solar Panel) to be connected.
15 Feet

6
INSTALLING THE SOLAR PANEL
1. Place the solar panel mounting bracket on the desired wall.
2. Mark with a pencil, the four pre-drilled holes in the mounting
bracket on the wall.
3. Utilize a standard power drill to create the mounting holes.

4. Place four plugs (BB) in the mounting holes.
5. Place the solar panel mounting bracket (B) over the four plugs
(BB).
6. Use a Phillips screwdriver to screw in the four screws (AA) into
the pre-drilled holes of the mounting bracket.
7
Pre-drilled holes
BB (4)
AA (4)
Solar Panel
Mounting
Bracket

Place the Quick-Clip mounting bracket (CC) on the desired wall.
1. Mark with a pencil, the two pre-drilled holes in the mounting
bracket on the wall.
2. Utilize a standard power drill to create the mounting holes.
3. Place two plugs (BB) in the mounting holes.
4. Place two plugs (BB) in the mounting holes.
5. Place the Quick-Clip mounting bracket (CC) over the two plugs
(BB).
6. Use a Phillips screwdriver to screw in the two screws (AA) into
the pre-drilled holes of the Quick-Clip mounting bracket.
NOTE: The beveled side of the Quick-Clip mounting bracket should be
facing downwards and the flat side should be facing outwards.
8
INSTALLING THE MOTION LIGHT
AA CC BB
CC
AA
CC
BB

1. Once the Quick-Clip mounting bracket (CC) is installed, ensure
all the screws are tightly fastened. The LED Motion Light is now
ready to be positioned into place.
2. Place the light hook (pre-installed on the back of the light) over
the mounting bracket. At this point, a click will be heard as the
light secures into place.
9
INSTALLING THE MOTION LIGHT

1. Insert the wire plug from the solar panel to the motion light socket
located underneath the battery housing.
2. The LED Solar Motion Light is now installed and ready to charge.
CONNECTING THE SOLAR PANEL TO THE MOTION LIGHT
10

11
CHARGING AND REPLACING THE BATTERY
Before Use
Before the LED Solar Motion Light can operate to its full capacity,
the solar panel needs to be in sunlight for 3 days to fully charge the
included battery. Charge the unit in the “OFF” position.
Once Charged
The Motion Light will charge automatically everyday, as long as the
Solar Panel is exposed to direct sunlight. Insure that there are no
obstructions that place the Solar Panel in a shaded area.
On days that have reduced sunlight, or in some geographical areas
that do not have regular sunlight exposure, the battery may take longer
to charge, or may not charge at all. Contact a Customer Service
Representative, or review the Troubleshooting section if the Motion
Light is not powered.
Replacing the Battery
Insure that the battery is not charging before replacing the battery
pack. The battery pack is located in back of the light’s battery housing.
□
1. Turn the switch to the “OFF” position. Remove the four screws
from the battery housing.

12
2. Separate the battery pack connector. Remove the old battery pack
and replace it with a new identical rechargeable battery pack.
3. Replace the cover of the battery housing and secure it with the
four screws.
NOTE: Please contact Novolink for battery replacement information.
Battery

13
OPERATION
OFF/AUTO Switch: Light will turn on when motion is detected
at nighttime only. If the battery has limited power, the unit will
automatically go into ECO mode, where in the light will reduce
brightness in order to conserve battery power.
Adjustable features:
• Time Delay (TIME): Adjusts the amount of time the light will stay on
after triggering, from 1 minute up to 15 minutes
• Sensitivity (SENS): Adjusts the sensitivity of the motion sensor. Low,
Medium and High settings.
• LUX: Combensates for ambient light sources that may affect proper
operation of the unit, especially the Dusk-to-Dawn feature.v

15
MAINTENANCE, CLEANING AND CARE
• Periodically check the connection from the solar panel to the light.
Ensure this plug is correctly inserted.
• Some seasonal adjustment of the solar panel may be required to
offset shorter charge days during the winter.
• Ensure the solar panel is free from any obstruction such as trees
or buildings.
• The solar panel should be cleaned on a regular basis. This will
ensure the LED Solar Motion light charges consistently.
• To clean the solar panel, use a damp cotton cloth. Never use any
abrasive materials or cleaning products.
• The lens of the LED light should also be cleaned with a damp
cotton cloth. This ensures a clear illumination.

Problem Solution
Where should the solar panel be
mounted?
Mount the solar panel in a position that will
enable the maximum amount of light to be
absorbed. In the Northern Hemi- sphere this is
usually south facing.
Does the solar panel require direct sun to
charge?
The solar panel can charge the internal battery
in direct and indirect light. For best results,
place the panel in direct light to maximize and
increase efficiency.
Can additional or extended cable wire
for the LED Solar Motion Light be
purchased?
At this point there are no extensions available
for the cable that connects the light to the solar
panel. Any additions to the cable will void the
warranty.
Why does the LED Solar Motion Light not
illuminate at night?
Log into the App and check the battery status
of the unit. If the battery is low, then allow it to
fully charge before using the light. If the battery
is charged, adjust the LUX in the light’s Settings
menu.
Where can a new battery for the LED
Solar Motion Light be purchased?
Please contact www.novolinkinc.com or call
1-800-933-7188.
Are any parts of the LED Solar Motion
Light weatherproof?
All parts of the LED Solar Motion Light are fully
weather- proofed and are ideal for any exterior
installation.
Why does the LED Solar Motion Light
appear to ‘strobe’ or flash?
Log into the App and check the battery status
of the unit. If the battery is low, then allow it to
fully charge before using the light. If the battery
is charged, adjust the LUX in the light’s Settings
menu.
Will decorative or street lights have an
effect on the LED Solar Motion Light’s
ability to operate?
Yes, the sensor of the LED Solar Motion Light is
light sensitive. For nighttime usage, ensure no
other light activates the motion sensor.
TROUBLESHOOTING
16

17
Questions, problems, missing parts?
We’re ready to help. Call Novolink Customer Service
9 a.m. - 5 p.m., Monday-Friday
1-800-933-7188
NOVOLINKINC.COM
/