Page is loading ...

FEATURES
•Solar lamp head with pivot to adjust the light angle.
•Solar panel with 10 feet (3m) of wire.
•One light bulb includes 12 ultra bright LEDs.
•Automatically turns on at dusk and lasts for 8 hours.
BLACK METAL
SOLAR LAMP
Instruction Manual
SKU# 1965570
Please read the instructions thoroughly prior to installation, then store in a
safe place for future reference.
1

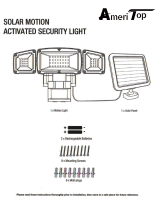
B: 1 x LampA: 1 x Solar panel
C: 1 x Mounting bracket D: 8 x Mounting screws
E: 2 x Mounting screws F: 8 x Wall plugs
2 x 18650 lithium-ion
rechargeable battery
(pre-installed)
Parts List
2

Ensure your solar panel is placed so that its exposure to the sun is optimized.
Be aware of objects such as trees or property overhangs that may impede the
panel's ability to generate a charge.
The angle of the solar panel can be
adjusted utilizing the pivot point where the
solar panel attaches to the bracket. This
allows you to maximize sun exposure.
Use a power drill (not included) to create the holes on your chosen mounting
surface. Use 6 of the included wall plugs (F) and 6 longer mounting screws (D)
to fasten the solar panel to the surface.
Note - Recommended tools: Power drill or screwdriver.
3
Installation of the Solar Panel
Solar panel Solar panel

Note - The lamp has a pivot
point, this allows the light to
be angled to illuminate a
surface. Once the desired angle
Is achieved, tighten the twist
dial to fix the light in position.
Place the bracket (C) on your chosen surface and use 2 longer mounting
screws (D) to mount the bracket (C).
The base of the light fixture mounts onto this bracket and is secured using the
two small included mounting screws (E).
4
Installation of the Lamp

Connect the solar panel and cable to the light fixture. Make sure that the
rotation is intact, and then flip the switch on. This will allow the light to begin
operation.
The solar light will only illuminate when the solar panel is in darkness. You can
test if the light is operating correctly by pressing the switch button and
covering the solar panel. The light should illuminate. lf this process fails to
illuminate the bulb, press the switch button again and re- test. lf once again
the light fails to illuminate, charge for at least 8 hours before using, the light
will automatically last for 8 hours after sunset.
5
Operating the Solar Light
Note - The switch is located on
the back of solar panel.

Should you need to replace the light's batteries,
unscrew the 4 screws in the back of solar panel.
Remove the spent batteries and replace with 2
identical type of rechargeable battery.
When replacing the batteries, observe the correct
polarity and match the battery specifications with
the batteries you have removed.
BATTERY: 2 x 18650 3.7V/2000mAh (lithium-ion
rechargeable battery)
Battery Warning
When replacing the batteries for the solar lamp, be sure to:
•Use rechargeable batteries only.
•Match the replacement battery specifications with the batteries that have
been removed.
•Observe the correct polarity (+ and -) when installing the replacement
batteries.
•Do not mix old and new batteries.
•Do not mix alkaline, standard (carbon zinc) or rechargeable (nickel-
cadmium or nickel-metal hydride, etc.) batteries.
•Contains lithium-ion battery.
•Battery must be recycled or disposed of properly.
6
Battery Replacement

•Your solar lamp is not a toy. Keep it out of reach of small children.
•Your solar lamp must be installed in a dry environment.
•Your weather-resistant solar panel must be installed outdoors to receive
direct light from the sun.
•lf using a step ladder, you may require a second person to help install the
solar lamp.
•Prior to installation, lay out all components to ensure they correspond to the
parts diagram on page 2.
•Never look directly into the solar lamp when illuminated.
Care & Maintenance
•From time to time, ensure the plug between the solar panel and light is
securely connected.
•It is advisable to adjust the angle of the solar panel to optimize the exposure
of the sun during the winter months.
•The solar panel should be cleaned with a damp cotton cloth on a regular
basis. This will ensure optimal performance and battery charging.
Periodically, utilize the same technique to clean the solar lamp.
•Never let any abrasive material come into contact with the solar panel.
Distributed by TRACTOR SUPPLY COMPANY
5401 Virginia Way, Brentwood TN 37027
For customer support call 1-888-376-9601
www.TractorSupply.com
MADE IN CHINA
7
Safety Information
/


