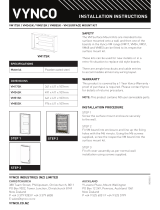
INSTALLATION INSTRUCTIONS
AUCKLAND
9 Levene Place, Mount Wellington
PO Box 12 249, Penrose, Auckland 1061
New Zealand
P +64 9 525 6051 F +64 9 525 5799
VYNCO INDUSTRIES (NZ) LIMITED
CHRISTCHURCH
388 Tuam Street, Phillipstown, Christchurch, 8011
PO Box 9022, Tower Junction, Christchurch 8149
New Zealand
P +64 3 379 9283 F +64 3 379 6838
VYNCO.CO.NZ
����
S
�位
1
更改文件号
� 核
� �
�数��
日 期
日期
批 准
� 字
1.0
公差
mm
1
日 期
日 期
±0.05
�幅
A4
88USBM2/88USBM2B - USB CHARGER MECH
INSV0116
SPECIFICATIONS
Rated Supply Voltage 220-240V AC, 50Hz
Maximum Current 2.1A x1or 1.05A x2 @5V DC
Operating Temperature -5° to 40°C
ta 40°C
SAFETY
Suitable for use as a charging device only – DO NOT
use for data transmission. Not suitable for charging
non-USB compatible devices
All wiring should be carried out by a licensed/
registered electrician or similarly qualied person and
installed according to the AS/NZS 3000 Wiring Rules.
The 88USBM2 must be used in conjunction with an
accessible isolator or MCB. Always isolate from
power before wiring or changing the USB.
The 88USBM2 product must be tted to a wall plate
and installed in a suitable enclosure (mounting block
or ush box). The input wires are only intended as
internal wiring and should not be accessible in use.
IP20
WARRANTY
This product is covered by the standard 5 Year Vynco
Warranty - proof of purchase is required. Please
contact Vynco for details of returns procedure.
NOTE: This product contains NO user serviceable parts.
WIRING
L = Live or Phase – Brown or Red
N = Neutral – Blue or Black
FITMENT
Indoor use only. Designed to t all current Vynco switch
gear ranges. Note tment details below:
• 3,4,5,6 gang switch plates - maximum of 2x
88USBM2 mechs can be installed in plate.
• Positioning of mechs must retain a space between
each 88USBM2 and allow complete assembly to be
tted into suitable enclosure.
INSTALLATION PROCEDURE
STEP 1
Securely press 88USBM2 mech into switch
or socket plate.
STEP 2
Connect wiring:
STEP 3
Secure switch or socket plate to suitable enclosure
with screw fasteners.
STEP 4
Turn on power and test for correct operation.
/


