Page is loading ...

REALLY
Yard & Pool
Vinyl Gate
Important stuff to know about
installing your WamBam gate.
1-877-778-5733
w ww.wamb amfence.com
Ver 1, July 2015

1
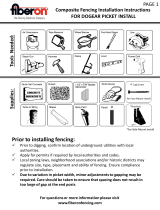
1 - Read Over Fence Instructions First
Your gate and fence will work better together as an
integrated
solution if you rst take the time to read and understand your
fence instructions.
2 -
Do a Dry Run First on the Gate Frame
Only (not pickets or boards)
Please do not glue or screw your gate frame together until you
have rst temporarily assembled the gate. In other words,
do a dry run rst.
This will ensure four things:
a)
The assembled gate is the correct width as per
the product overview drawing.
b) That you have everything necessary to complete the gate.
c) That you will have assembled the gate in the correct order.
d) All the pieces t and function properly.
It is easier to trouble shoot when things are not screwed together.
3 - Ideally, Install Your Gate Posts
Before Your Fence Posts
Your fence panels will be more forgiving for a custom t than
your gate. Ideally, position and install your gate posts
before you do anything else, or very early on in the
process of setting up your fence run.
Install Your Gate Posts
Before Installing Your
Fence Posts.
Reality Check
Yard & Pool Vinyl Gate
For more information,
contact us at 1 877-778-5733.
Conrm Opening Prior to Final
Assembly of Gate w/Hardware.

2
4 -
Ideally, Do Not Hang Your Gate System Off a Single
Non-Supported Post.
Your gate will perform better and last longer if your hinge post is connected to a panel of fence which is
connected to another post. The weight strain will be transferred unto two posts versus just one. Installing
fence panels on both sides of your gate is the ideal in all situations. If this is not possible because of space
restrictions, please contact us for alternative solutions to overcome.
For more information, contact us at 1 877-778-5733.
Do Not Hang Gate on Lone Soldier Post.
Yard & Pool Vinyl Gate
Pool Code Notes
For swimming and other child safety gates, most safety standards specify:
a) Your fence height needs to be between 4’ and 6’ high minimum
b) Your gate needs to open outwards away from the pool
c) Latch releasing mechanism to be minimum 54” o the ground.
*The Yard & Pool gate will require a specialized latching system to meet pool code.
Use MagnaLatch Top Pull Hardware (not included).
Magna Latch Top Pull Code is # MLTPS2BGA.
*Always conrm these and other requirements with the appropriate authorities in your area.
Code will change from one location to another across the country.
Gate Brace Warning
The gate brace included with this gate may be considered a climbing surface by some pool inspectors
and therefore in conict with pool code. This gate can be assembled and installed without the brace if
and when necessary.

3
Box Contents
Yard & Pool Vinyl Gate
For more information, contact us at 1 877-778-5733.
Posts Sold Separately as 2-Packs
.090in. wall
thickness
Each Gate Box Includes:
• Top Rail (1)
• Gate Hinges (2)
• Pickets (8)
• Arch Brackets (2)
•
Gate Latch (1)
• Vertical Stiles (2)
• Stainless Steel Screws (16)
• Gate Bottom Brackets (2)
• Bottom Rail (1)
Sold Separately:
• 6ft. Posts (2-Pack)
.050in. wall
thickness
• Tube of Glue (1)
• Gate Brace (1)

PRODUCT OVERVIEW
For more information, contact us at 1 877-778-5733.
4
Yard & Pool Vinyl Gate
Posts Sold Separately
Ground
7.75in.
48in.
3.5in.
41.5in.
56.84in.
1.5in.
3.5in.
3.5in.
1.5in.
2in.
22in.
58.84in.
52in.
50in.
54.5in.
Gate InstallationGate Assembly
B
A B
C
D
3.5in.
1.5in.
.090in. wall thickness
C
1.5in.
D
3.5in.
A
1.5in.3.56in.
36in.
10in.
20in.
Concrete Footing

For more information, contact us at 1 877-778-5733.
5
Assemble the Gate Frame Bottom & Sides
STEP 1
Detailed Installation Instructions
Yard & Pool Vinyl Gate
Completely assembled gate shown A - Run bead of vinyl weld continously around
the inside of the gate bracket
D - Insert vertical gate stiles. They will BOTTOM OUT
against bottom horizontal rail
C D
B
Note that the bottom rail
is Ribbed internally.
GLUE
GLUE
Did you do a dry run of assembly first?
Please read page 1 of instructions.
GLUE
Handle with care: vinyl weld
glue takes approximately
five minutes to cure.
A
C - Insert the bottom rail ALL THE WAY until it
BOTTOMS OUT INSIDE GATE BRACKET
B - Insert the bottom rail ALL THE WAY until it BOTTOMS OUT inside gate bracket
IMPORTANT!
Insert fully to this point.
Insert fully to this point.
Fasten gate brackets to internal
members though inside
of frame using screws.

For more information, contact us at 1 877-778-5733.
6
Yard & Pool Vinyl Gate
Insert Pickets & Assemble
the Gate Frame Top
STEP 2
Did you do a dry run of assembly first?
Please read page 1 of instructions.
Insert pickets in the proper
order according to their height
as shown above.
A
A - Run bead of vinyl weld continously around
the inside of the gate bracket
B - Insert the top rail inside arch brackets
as illustrated
D - Insert pickets in the proper order through
holes in the bottom rail
E - Slide gate arch (with brackets) over the
pickets and vertical gate stiles
D
B
E
C - Run bead of vinyl weld continously around
the inside of the gate bracket
C
GLUE
GLUE
GLUE
CORRECT
Insert to this point.
WRONG

For more information, contact us at 1 877-778-5733.
7
Screw Gate Frame/Brackets
STEP 3
Yard & Pool Vinyl Gate
A
A -
ENSURE YOUR GATE IS SQUARE and screw brackets as illustrated. The corner-to-corner
measurement must be the same, and
the width of the gate should be 48”.
48in.

For more information, contact us at 1 877-778-5733.
8
Fasten Gate Hinges
& Gate Latch
STEP 4
Yard & Pool Vinyl Gate
A
A - Fasten gate hinges and gate latch onto the gate brackets with screws
For swimming and other child safety gates, most safety standards specify:
a) Your fence height needs to be between 4’ and 6’ high minimum
b) Your gate needs to open outwards away from the pool
c) Latch releasing mechanism to be minimum 54” off the ground.
*The Plain Jane gate will require a specialized latching system to meet pool code.
Use MagnaLatch Top Pull Hardware (not included) and Captain Morgan Post Caps Only.
Magna Latch Top Pull Code is # MLTPS2BGA.
*Always confirm these and other requirements with the appropriate authorities in your area.
Code will change from one location to another across the country.

(4)
1.25” (#10)
Screws
(2)
.25” Lock
Washers
(2)
.25” Nuts
(2)
.25” x .75”
Hex Bolts
For more information, contact us at 1 877-778-5733.
9
Yard & Pool Vinyl Gate
Gate Brace Parts
B - Re-confirm the gate is square, and screw
bracing into place.
A
B
Assemble & Fasten
Gate Brace
STEP 5
Top Bar
Bottom Bar
A - Assemble gate bace
with bolts, washers and
nuts as necessary.
1
2
3

For more information, contact us at 1 877-778-5733.
10
Position, Adjust & Align Gate/
Secure Hinges to Posts
STEP 6
Yard & Pool Vinyl Gate
A
A - Use temporary spacers or blocks to rest the gate on during alignment and installation
B - Fasten hinges to posts with screws
B

11
Level Gate & Adjust Hinges
STEP 7
Yard & Pool Vinyl Gate
Adjust the spring tension
in gates as necessary.
Use steel insert pin.
A
A - Fasten gate hinges accordingly B -
Check for level, fit and function to latching post
C
B
LEVEL
D
C -
Hinges can be adjusted moderately
to bring gate into level alignment
with post
Latch is designed for left and right hand applications.
Temporarily remove the spring, bolt and reverse
paddle portion as necessary.

For more information, contact us at 1 877-778-5733.
12
Align & Install Latch
STEP 8
Yard & Pool Vinyl Gate
A
A - Align and fasten the gate latch catch to fit and function with the gate finger.
B
Congratulations! You did it!
Go grab a beverage of your choice, admire your
handy work, and show us what you got by entering
our annual photo/video contests!
/