Page is loading ...

To be safe while installing this product, read all messages and understand all instructions.
Mount a winch per the winch maker instructions. Use safe winching practices.
Always wear safety glasses while installing or working on this product. Recheck nuts and
bolts and re-torque after 250 miles. Periodically check the nuts and bolts during the life of
the product. Do not use this product if it is damaged. Check state and local laws regarding
permitted bumper sizes, types and heights.
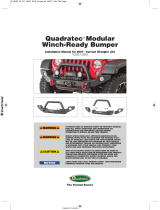
Winch Ready JK Front Bumper
Installation Manual for 2007 - Current Wrangler (JK) #JKFBTB-002
JK_STUBBY_WINCH_F_BUMPER_JKFBTB-002.indd 1 8/20/19 3:05 PM

A
B
C
D
E
F
GH
I
J
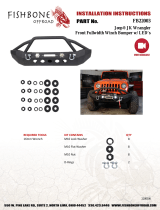
Winch Ready Front Bumper Parts & Tools
REQUIRED TOOLS:
Safety Glasses
18mm Socket Extension & Ratchet
Phillips Screwdriver
Forked Clip/Trim Removal Tool
KIT CONTENTS LIST:
A.) Winch Ready Front Bumper (1)
B.) D-Rings (2)
C.) D-Ring Washers (4)
D.) D-Ring Isolators (2)
E.) M12 Flat Washers (8)
F.) M12 Nuts (8)
G.) M4 Phillips Screws (8)
H.) M4 Flange Nuts (8)
I.) M12 Split Washers (8)
J.) M12 Bolts (8)
K.) D-Ring Mounting Brackets (2)
J
K
2
JK_STUBBY_WINCH_F_BUMPER_JKFBTB-002.indd 2 8/20/19 3:05 PM

Step 1
Step 3
Step 5
Step 2
Step 4
Step 6
Put on safety glasses. Remove the 4 plastic push rivets
on the underside of the bumper that are holding on the
splash guard. (Step 1)
Using an 18mm socket remove the 8 bumper retaining
nuts. There are 2 on the inside and outside of each
frame rail. (Step 3) Remove bumper from the frame rails.
Unplug the factory wiring harness from the fog lights.
(Step 5)
Remove the two plastic push rivets on the backside.
(Step 2) Remove the splash guard.
Note: This will not be reused.
Careful not to damage the fog light harness, as it is
attached to the bumper. Use a forked pry tool to
remove the harness retaining clips from the backside
of the bumper. (Step 4)
Remove the Factory frame guard. Locate the plastic
screw rivets on either side. (Step 6)
3
JK_STUBBY_WINCH_F_BUMPER_JKFBTB-002.indd 3 8/20/19 3:05 PM

Step 7
Step 9
Step 11
Step 8
Step 10
Remove the plastic screw rivets with
a Phillips screwdriver. (Step 7)
Install the fog lights with the 8 provided Phillips head
screws and ange nuts using a Phillips screwdriver.
(Step 9)
With the help of a friend lift the bumper into place on the
frame of the Jeep. (Step 11)
Remove the factory fog lights from the factory bumper
with a Phillips screwdriver. (Step 8) Set aside fog lights
for reuse later.
Before installing the bumper you must rst install your
winch and fairlead on to the bumper according to your
winch’s installation instructions.
Step 12
Pass 4 M12 bolts through the D-ring mounting bracket
and through the factory frame holes. Repeat on other
side. (Step 12)
4
JK_STUBBY_WINCH_F_BUMPER_JKFBTB-002.indd 4 8/20/19 3:05 PM

Finally, install D-Rings with provided washers
and Isolators. (Step 15)
Step 14
Secure the bolts with the 8 M12 nuts, split washer and
at washers on the back of the frame. Tighten with an
18mm socket and ratchet. (Step 13)
Reconnect fog-light wiring. (Step 14)
Step 12
5
Step 13
Step 14
Step 15
JK_STUBBY_WINCH_F_BUMPER_JKFBTB-002.indd 5 8/20/19 3:05 PM
/


