Page is loading ...

056504-001r1 Printed in USA May, 2009
OWNER'S MANUAL
SNAPLESS PANEL UPGRADE KIT
FOR ADD-A-ROOM & BREEZEWAY SCREEN ROOMS
RV Accessories
T
HIS MANUAL SUPPLEMENTS THE ADD-A-ROOM INSTRUCTIONS
TABLE OF CONTENTS
First Time Preparation .................................................................................................................. 2
Installing the Snapless Brackets.............................................................................................................2
Install the Side Panels with the Snapless Poles......................................................................... 3
Component Checklist.................................................................................................................... 4

CAREFREE OF COLORADO INSTALLATION AND OPERATION MANUAL SNAPLESS UPGRADE KIT
056504-001r1 2
FIRST TIME PREPARATION
If this is an upgrade to an existing room setup, go directly to "Installing the Snapless Brackets".
1. Extend the awning out completely according to the
manufacturer's instructions. Ensure that the open roll bar
slot and the slot access is down and accessible.
2. If necessary, clean and deburr the slot and slot access.
3. Slide the pull strap down to the opposite end of the roll bar.
4. Slide the front panel and door into the slot. Zip the door
and panel together if not previously done.
• For full size rooms, center the panel beneath the
awning canopy.
• For rooms shorter than the awning, position the room in
the desired position. If the room is offset to one side, it
is recommended that the outside zipper edge is
approximately 3" in from the edge of the canopy.
5. On the roll bar mark the edge of the zipper.
6. Measure 1/2" down from the roll bar slot with the canopy fabric.
7. Drill a 5/16" hole into the rollbar. Clean and deburr the hole as
required. Use extreme care to not damage the canopy.
Tip: Use a punch or small drill bit to mark and start the
hole. This will prevent the larger drill bit from "skipping" on
the curved surface of the roll bar.
8. Measure and note the final distance (dimension "W") from the edge of the awning canopy to the center
of the hole. This dimension will be used to mount the rafter brackets on the RV wall.
9. Repeat steps 5 – 8 for the other side.
INSTALLING THE SNAPLESS BRACKETS
1. For an existing installation:
• Remove and replace the upper rafter bracket with the
snapless upper bracket.
• Remove the twist fasteners from the RV wall.
• Go to step 3.
2. For a new installation:
• On the RV wall measure in from the edge of the awning
canopy a distance equal to the dimension "W" measured
previously on the roll bar.
• Measure down 1" from the center of the awning rail. This is
the position of the rafter bracket slot as shown.
• Using the bracket as a template mark the location of the
mounting holes then drill four (4) 1/8" pilot holes.
• Coat the back of the bracket with a quality silicone sealant
and attach the bracket to the wall using four (4) #8 x 3/4
hex head screws.
3. Using a non-permanent method of marking, mark center line of the bracket to the floor line. The
centerline must be perpendicular to the awning rail.
4. At the floor line, attach the lower mounting bracket using two (2) each #8 x 3/4 hex head screws.
NOTE: If the awning rail to floor line distance is outside of the 73"-85" range shown, it will be
necessary to adjust the location of the lower bracket to fit in this range. If the bracket is not
mounted at the floor line, it must be mounted in a location with adequate backing. Sheet
metal or fiberglass siding alone is not adequate to support the bracket and side wall.
Open Slot
Access
1/2”
O 5/16”
W
Panel Zipper
Zipper Edge Canopy Edge
AAR001
W
1”
Top Bracket
Bottom Bracket
Floorline
73” - 85”
(ref)
#8 x 3/4
Screw (2)
#8 x 3/4
Screw (4)
Canopy Edge
AAR003

CAREFREE OF COLORADO INSTALLATION AND OPERATION MANUAL SNAPLESS UPGRADE KIT
056504-001r1 3
INSTALL THE SIDE PANELS WITH THE SNAPLESS POLES
Install the front panel, door and skirting according to the instructions with the room.
1. Extend the rafter pole to its maximum length. To extend the pole, twist the
inner (smaller) tube a quarter turn, lock in place with a reverse quarter turn.
2. (Detail A) Unfold the side panel and slide the rafter into the pocket at
the top of the panel.
• The hook on the rafter pole goes to the back edge of the panel.
• Choose the pocket that best matches the pitch of the awning.
3. (Detail B) Lift the panel and rafter up and hook the rafter into the "U"
slot of the mounting bracket on the RV wall.
4. (Detail C) Lift the front edge of the panel up, unlock the rafter pole then
insert the pin into the mounting hole of the roll bar.
5. Extend and lock the rafter.
6. If necessary, adjust the pitch of the awning so that the room hangs
with the back edge parallel with the coach wall.
7. Assemble the pole pieces. Slide the upper and center pieces together until
the valco button snaps into place. Slide the bottom tube into the bottom of
the center pole; it locks and unlocks with a simple quarter-turn twist.
8. (Detail D) Slide the pole assembly onto the rubber track of the side
panel. The hook goes to the top.
9. (Detail E) Holding the pole at an angle, hook the pole into the lower T-slot
of the upper mounting bracket.
10. (Detail F) Rotate the pole down and align the lower pin with the lower
bracket. Adjust the length of the pole to ensure a snug fit. Lock the
pole with a quarter turn twist of the bottom tube.
11. (Detail F) Smooth the double rubber seal against the RV wall.
12. Adjust the panel on the rafter pole and Snapless pole so that the panel is hanging straight.
13. Zip the side panel and front panel (or door) together.
14. (Detail G) Attach the vinyl insert to the skirt and wall panel as shown.
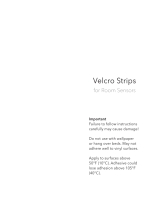
NOTE: If the velcro is missing, additional hook and loop strips are furnished with the kit. Make
sure that the skirting is clean and dry before attaching the velcro strip. For maximum
adhesion, allow 24 hours for the adhesive to set before using.
AAR009
DETAIL D DETAIL E
DETAIL F
Quarter-Turn
Lock - Unlock
Rubber
Track
Snapless
Pole
(3 pieces)
Smooth Rubber Seal
Against RV Wall
Velcro “Hook”
(on Skirting)
Velcro “Loop”
(on Panel)
Vinyl Insert
Panel Not Shown
for Clarity
DETAIL G
Valco
Button
15. At the bottom of the panels and skirt, fold any excess material inside the room and secure the panels to
the ground using stakes and the appropriate row of grommets. Stakes not included.
AAR008
Rafter
Quarter-Turn
Lock - Unlock
Hook
DETAIL
A
DETAIL B
DETAIL C
Rafter
Hook

CAREFREE OF COLORADO INSTALLATION AND OPERATION MANUAL SNAPLESS UPGRADE KIT
056504-001r1 4
COMPONENT CHECKLIST
AAR502sm
Top Bracket
(qty: 2)
Upper Rafter Pole
(qty: 2)
Lower Rafter Pole
(qty: 2)
Adjustment Pole
(qty: 2)
Bottom Bracket
(qty: 2)
2” Velcro “Hook”
(qty: 2)
Vinyl Insert
(qty: 2)
1” Velcro “Loop”
(qty: 2)
10 x 3/4 Screw
(qty: 16)
Storage
Bag
Reference Publications located @ www.carefreeofcolorado.com:'
056503-011 LTD Add-A-Room Installation Manual
056503-021 Flat Pitch Add-A-Room Installation Manual
056504-001 Snapless Upgrade Kit
056505-001 Hard Door Upgrade Installation
VELCRO® is the registered trade name of Velcro Industries. The term "velcro" is used to generically describe the
fabric hook and loop fasteners used with the product described in this manual.
/