Page is loading ...


Artwork by Karen Bonaker
Contents
Introducing Corel Painter 2017 . . . . . . . . . . . . . . . . . . . . . . . . . . . . .1
Artist profiles . . . . . . . . . . . . . . . . . . . . . . . . . . . . . . . . . . . . . . . . . . . .3
What’s included? . . . . . . . . . . . . . . . . . . . . . . . . . . . . . . . . . . . . . . . . .6
Key features . . . . . . . . . . . . . . . . . . . . . . . . . . . . . . . . . . . . . . . . . . . . .8
Texture Painting . . . . . . . . . . . . . . . . . . . . . . . . . . . . . . . . . . . . . . . . . . . 8
Interactive Gradient Tool . . . . . . . . . . . . . . . . . . . . . . . . . . . . . . . . . . . 11
Gradient Express Painting: . . . . . . . . . . . . . . . . . . . . . . . . . . . . . . . . . . 13
Dab Stencils. . . . . . . . . . . . . . . . . . . . . . . . . . . . . . . . . . . . . . . . . . . . . . . 15
Glazing Brushes . . . . . . . . . . . . . . . . . . . . . . . . . . . . . . . . . . . . . . . . . . . 17
Dropper Tool. . . . . . . . . . . . . . . . . . . . . . . . . . . . . . . . . . . . . . . . . . . . . . 19
Palette Drawers . . . . . . . . . . . . . . . . . . . . . . . . . . . . . . . . . . . . . . . . . . . 20
Artists’ Layouts . . . . . . . . . . . . . . . . . . . . . . . . . . . . . . . . . . . . . . . . . . . . 22
Brush Selector . . . . . . . . . . . . . . . . . . . . . . . . . . . . . . . . . . . . . . . . . . . . . 22
Property Bars. . . . . . . . . . . . . . . . . . . . . . . . . . . . . . . . . . . . . . . . . . . . . . 22

Artwork by Android Jones
Introducing Corel
®
Painter
®
2017
Corel
®
Painter
®
2017 is the world's most expressive digital art studio.
It's like no other paint program on the market. There are many
reasons why creative professionals and digital artists have chosen
to make Corel Painter an integral of their design process, but two
really stand out — painting tools and workflow features.
The power and diversity of its revolutionary digital painting tools is
what makes Corel Painter the paint program that all others are
measured against. Its expansive collection of painting tools not only
offers an unrivaled ability to emulate traditional art, but also gives
users the power to redefine what's possible in digital art.
Each version of Corel Painter has pushed the envelope by
consistently adding new tools and features that quickly became the
benchmark in the digital art world — Particle Brushes, Dynamic
Speckles, and Audio Expression to name just a few from recent
releases. Corel Painter 2017 continues this push to deliver
groundbreaking features that aren't simply mind-blowing, but also
incredibly powerful in a range of creative sectors and workflows.
The addition of Texture Painting helps artists seamlessly integrate an
array of surface textures into their work unlike ever before. New Dab
Stencils offer infinite possibilities by letting you intelligently mask a
brush dab using a variety of stenciling media like papers or flow
maps. And Glazing Brushes give you an unprecedented level of
control over the evolution of your painting using velvety,
transparent translucent paint transitions just like the Renaissance
masters.

Artwork by Michael Bast
Features that simplify and accelerate artistic workflows are another
reason that Corel Painter is a staple in so many creative sectors. A
loyal and passionate user base actively participates in Painter's
development by offering constructive feedback, and sharing their
work, tools and methods. These insights and suggestions drive so
many of these workflow innovations. That's why Corel Painter 2017
delivers enhanced property bars that put the most important brush
controls at your fingertips ensuring that you spend as much time as
possible doing what you do best — painting. There's also new
Artists Layouts, collections of pre-defined user-interface
arrangements, tailored for a variety of digital art workflows that
display only the relevant palettes and tools in a click. And new
Palette Drawers let you combine the tools and content you need in
a convenient grouping, which you can minimize in a click when you
need more workspace.
Give it a try, and we're sure you’ll agree — Corel Painter 2017 is
changing what’s possible in digital art.

Artwork by Cliff Cramp
Artist profiles
Concept artists
Corel Painter 2017 offers concept artists a powerful and versatile
feature set for every stage of their workflow. The ability to add
randomness to brush variants gives concept artists the freedom to
discover a world of creative possibilities as they paint with tools that
have a traditional look and feel. Once the right look has been
pinpointed, Corel Painter 2017 has the tools that they need to
quickly refine even the most minute detail of every element of their
concepts.
Illustrators
Illustrators count on Painter because of the power and diversity of a
toolset that lets them work with precision, speed, and confidence.
Whether creating a character or publishing an illustration, package
design, or promotional piece, Corel Painter 2017 has the art tools
illustrators need to bring their vision to life and immerse their
audience in the story. It’s the perfect medium for visually capturing
and expressing their ideas, from initial sketches to fully rendered
designs. No other program allows them to transition seamlessly
from traditional methods to the world of digital art quite like Corel
Painter. Whatever real-world medium they’ve counted on before,
there’s a Painter equivalent that lets them create just like they always
have, only faster.

Artwork by Jun-ichi Fujikawa
Manga and Comic artists
A wide range of sketching, drawing and inking tools make Corel
Painter 2017 the best digital art program for manga and comic
artists to develop a personal style that stands out. So much of their
work calls on traditional methods that Painter is renowned for
emulating, from watercolor to oil to liquid ink. Painter has the tools
that they need to create clean, crisp lines, bold effects, and subtle
shading. Often working to aggressive deadlines, they know they can
count on a comprehensive set of composition and symmetry tools
and intuitive color management features. There’s no other tool on
the market that gives them the power to build up a concept and
then bring it to life in living color with such impact.
Fine artists
Corel Painter 2017 provides the most natural way to transition from
traditional to digital art on-the-market. Fine artists can easily
combine classic art practices and time-honored techniques with
state-of-the-art Natural-Media technology to create digital art that’s
just as impressive as what they can create on a physical canvas. Corel
Painter 2017 can save them valuable time thanks to the ability to
undo mistakes in a way that only a digital art studio allows. What's
more, there's no toxic fumes or costly art supplies.

Artwork by Heather Michelle Chinn
Photo artists
With powerful Auto-Painting and Cloning tools, plus one-of-a-kind
image painting features found only in Corel Painter 2017, photo
artists can capture a moment and easily transform the image into a
digital work of art. They have everything they need to produce
visually stunning painted keepsakes and sellable works of photo art
in no time.
Students and teachers
Painter is a vital asset for all budding artists and an essential
component for any art-related curriculum. It has digital tools that
mimic the look and feel of their real world counterparts and
perspective and composition features that simplify some of the
fundamentals of art. Corel Painter 2017 offers a natural way for
students to learn traditional art techniques in an environment that’s
very conducive to experimentation — without the cost and mess
associated with traditional art supplies.

Artwork by Brian Pollett
What’s included?
Main application
• Corel Painter 2017, Mac OS
®
and Windows
®
versions
Content
• Libraries of unique brushes, gradients, nozzles, patterns, and
paper textures
Documentation
• HTML Help (Windows) and Apple Help (Macintosh
®
) files
• Online User Guide and Getting Started Guide (PDF)
•Welcome Screen
• youtube.com/paintertutorials
•painterartist.com

Artwork by Ryan Church
Minimum system requirements
Mac OS
®
version:
• Mac OS
®
X 10.11, 10.10 or 10.9 (with latest revision)
• Multi-core Intel
®
with 64-bit support
• 2 GB of RAM (8 GB or higher recommended)
• 750 MB of hard disk space for application files
• Mouse or tablet
• 1280 × 800 screen resolution (1920 × 1080 recommended)
• DVD drive (required for box installation)
• Safari v7 or higher
Windows
®
version:
•Microsoft
®
Windows
®
10 (64-bit), Microsoft Windows 8.1 (64-
bit), or Windows 7 (64-bit), with the latest Service Packs
•Intel
®
Core 2 or AMD Athlon
™
64 processor (2 GHz or faster)
• 2 GB of RAM (8 GB or higher recommended)
•
1 GB of hard disk space for application files
1
1
• Mouse or tablet
• 1280 × 800 screen resolution (1920 × 1080 recommended)
• DVD drive (required for box installation)
•Microsoft
®
Internet Explorer
®
11 or higher
Upgrade eligibility:
To purchase the upgrade version of this
product, you must own a previous licensed version of Painter. Your
original serial number will be required. Please note that upgrade
eligibility excludes Trial, Academic, OEM and Not for Resale (NFR)
versions.
1. Additional space may be required for Microsoft .NET Framework
4.6

Artwork by Brian Pollett
Key features
Corel Painter 2017 is the world’s most authentic digital art studio.
Painting tools
Painter is famous for an expansive collection of painting tools that
inspire artists and give them the freedom to create without
boundaries.
New!
Texture Painting:
This groundbreaking new brush category
with source-blending technology makes it easy to integrate
complex textures into your work. Whether you’re aiming for a look
that is more lifelike or one that’s completely futuristic, or you want to
make a digital painting look authentically timeworn, Texture Painting
offers limitless possibilities.
For concept artists and character designers, perfecting the look and
feel of every element of their work is critical. Maybe a face needs just
the right weather-beaten complexion, a car needs to look like it was
driven to hell and back, or a landscape has to be otherworldly —
there’s a Texture brush designed specifically for the task at hand.
Texture brushes can yield a range of stunning results. You can easily
give grayscale images, photos, or digital paintings a totally new look
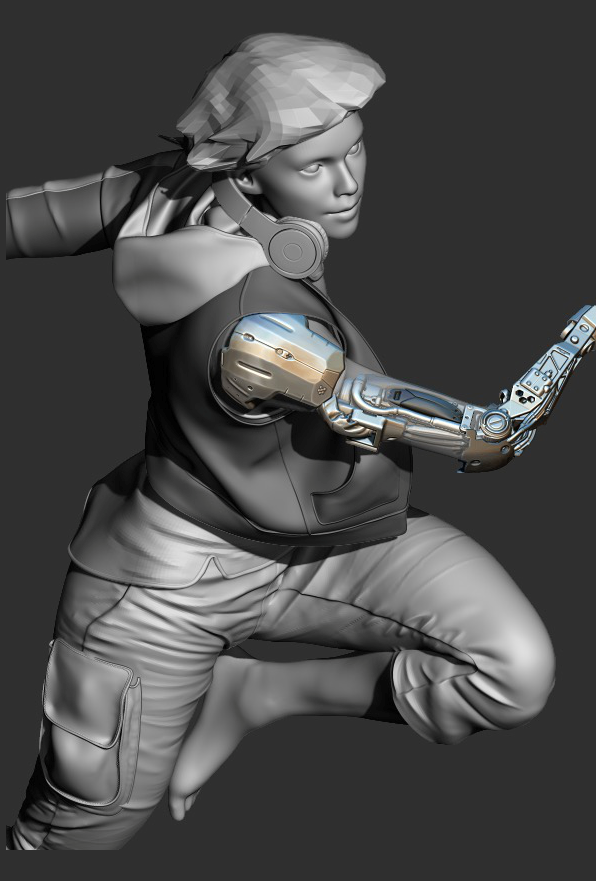
and feel. You can even take a 2D rendering of a 3D model and add
the perfect surface or touch up the texture work with Painter tools.

Artwork by Mike Thompson
Texture Painting doesn’t simply modify brushstroke opacity as you
paint. It lets you intelligently blend a texture into existing content
using a range of stylus expressions, such as pressure. It respects the
transparency of the selected texture, giving you full control of when,
where, and how much texture is used.
You start by choosing or creating a texture and pairing it with
brushes designed specifically for adding texture. And by combining
Texture brushes, flexible brush customization options, and the ability
to capture and import your own textures, you can add any number
of surfaces styles to your work.
You can even add Dab Stencils, grain, and smudging to the brushes
with all the speed, precision and control you expect from Painter. In
addition, you can make your own custom textures from scratch or
by modifying a preset texture.
There’s a variety of options for how to blend the texture with the
existing paint, luminance and color. After you’ve tried a few Texture
brushes and experimented with their settings, you’ll really get an
idea of their potential.
A 3D model is rendered into a 2D bitmap image (left);
Texture is added to the image in Corel Painter (right).

Artwork by Justin Buus
Give it a try
Painting with texture
1 Open the sample file Texture_paint.png.
2 Choose Window Brush Selector Panel to display the
Brush Selector as a floating panel.
3 Click a Texture brush category and a brush variant.
4 On the property bar, click the Texture selector , and click
a texture.
5 Click the Show Texture button on the property bar to
display a representation of the texture onscreen to help you
manipulate it in relation to the underlying brushstrokes or
image. You can control the transparency of the texture
display by moving the Visibility slider.
6 Click the Move and Size button .
Drag the texture to reposition it or drag a corner handle to
resize. You can also skew, rotate, or distort the texture. If
you customize a texture that you want to reuse, click Save
As in the Transform Textures panel.
7 Experiment with the Texture brush variants.
There are variants that cover the underlying pixels, blend
with the image, add color texture as it blends, smudge
texture as you blend, or uses the color or luminance
information of the texture.

Artwork by Tricia Flohr
New!
Interactive Gradient Tool:
In Corel Painter 2017, getting
stunning painted backgrounds is easier than ever with the new
Interactive Gradient tool. It lets you quickly create and edit a
gradient to give paintings a range of depth and lighting variations. If
you’re just starting a new document, you can kick-start things by
filling the background with a gradient and experimenting with
different preset styles. Or if you have an existing sketch or painting,
you can apply and tweak a gradient in context of your work with edit
nodes. Corel Painter 2017 has a library of gradients to choose from,
or you can create your own and save it for reuse.
The Interactive Gradient tool lets you achieve
precise shading and lighting variations.

Artwork by Manuel Sanz
Give it a try
Applying a gradient interactively
1 Choose File New to create a new document.
2 Click the Interactive Gradient tool in the toolbox.
3 Click the Gradient Selector on the property bar, and
click a gradient fill thumbnail.
4 Choose a gradient on the property bar:
• Linear Gradient
• Radial Gradient
• Circular Gradient
• Spiral Gradient
5 Click the Padding button on the extended property bar,
and choose one of the following options:
•
Extend
— to extend the color of the start and end nodes
• Mirror — to mirror a gradient on either side of the start
and end nodes
• Repeat — to repeat a gradient on either side of the
start and end nodes
6 Click and drag on the canvas.
The direction and size of the gradient depend on where you
first click, the distance that you drag, and the direction in
which you drag. Each color in the gradient fill is
represented by a square node on the interactive gradient
control.
7 Adjust the position of the gradient by dragging the start or
end node.
You can add a color to the gradient by clicking anywhere
along the interactive gradient control and choosing a color.

Artwork by Fiona Sansom
New!
Gradient Express Painting:
When a blank white canvas is
blocking your creativity or you need a back-drop for a new concept
design, the new Express Paint feature allows to create stunning
gradients in a matter of seconds. It allows you to apply a wide
variety of painting styles automatically to any gradient, quickly
creating the inspiration you need in virtually any composition.

Artwork by Greg Newman
Gradient Express Painting lets you to apply a wide
variety of painting styles automatically to any gradient.
Give it a try
Auto-painting backgrounds with gradients
1 Click the Interactive Gradient tool in the toolbox.
2 Click the Gradient Selector on the property bar, and
click a gradient fill thumbnail.
3 On the property bar, set gradient options.
Make sure the Edit nodes check box on the property bar is
enabled.
4 Click the Padding button on the extended property bar,
and choose one of the following options:
5 Click and drag on the canvas.
6 Click the Express Paint button on the property bar, and
choose an auto-painting style.
To preview the paint effect in the image window, enable the
Preview Effect option.
7 Click the Commit Gradient button on the property bar.

Artwork by Melissa Gallo
Enhanced!
Dab Stencils:
This new feature gives artists more power
to craft and create expressive, unique brushstrokes. Dab Stencils let
you change the brushstroke opacity before you paint, basing it on
the active paper, flow map or texture. You can fine-tune exactly how
much source texture to reveal as you paint and link Dab Stencils to a
variety of real-time stylus input factors. And using them with the
new Texture Brush variants gives you even greater control over the
look and feel of your brushstrokes.
Dab Stencils give you full control over brushstroke
opacity based on the active paper, flow map or texture.

Artwork by Karen Bonaker
Give it a try
Applying a dab stencil to a brush variant
1 Choose a Dab Stencil brush variant or a brush variant that
supports Dab Stencil.
Dab Stencil works well with brushes that use any of the
following dab types: Captured, Dynamic Speckles, Circular,
Computed Circular, and Static Bristle.
2 Choose Window Brush Control Panels Dab Stencil.
3 Choose a stencil option from the Source list box.
You can choose a texture, paper, or flow map.
4 Click the selector button next to the Source list box, and
choose the flow map, paper texture, or texture you want to
use as a source.
5 Adjust any of the following sliders:
• Strength slider — to set the maximum level of opacity
that the stencil applies to the dab
• Min Strength slider — to set the minimum level of opacity
that the stencil applies to the dab
• Strength Jitter slider — to set the range of opacity
variability of the dab stencil based on the maximum and
minimum strength settings
Smoothness slider — to smooth the jitter of opacity
variability of the dab stencil
6 Paint on the canvas.

Artwork by Héctor Sevilla Luján
New!
Glazing Brushes:
Some of the best Painter developments
have been the result of user suggestions. Here’s another one —
Glazing Brushes. They let you control the evolution of your painting
using velvety, translucent paint transitions just like the Renaissance
masters. Glazing Brushes deliver stroke-level opacity, so the paint of
each brushstroke is applied independently. The paint that each dab
deposits on the canvas builds up smoothly from a minimum to a
maximum. This creates a smooth blend between colors, with no
unwanted colors where dabs overlap. You’ll really see Glazing
Brushes at their best when you fluctuate stylus pressure in a single
brushstroke.
Glazing Brushes allow you to work with very high levels of
transparency and paint with light, semi-transparent brushstrokes.

Artwork by Melissa Gallo
Give it a try
Painting with Glazing brushes
1 Choose a Glazing brush variant from the Brush Selector.
2 Choose Window Brush Control Panels Glazing.
3 Choose a merge mode from the Merge list box.
4 Adjust any of the following sliders:
• Glazing slider — to set the maximum level of opacity in a
brushstroke
• Min Glazing slider — to set the minimum level of opacity
in a brushstroke
• Glazing Jitter slider — to set the range of opacity
variability in a brushstroke
• Smoothness slider — to smooth the jitter of opacity
variability in a brushstroke
5 Choose an option from the Expression list box to link
brushstroke opacity to an expression such as pressure, tilt,
direction to vary the opacity in a brushstroke.
6 Paint on the canvas.
/

