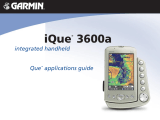
Garmin iQue iQue M5 Reference guide

Category
Navigators
Type
Reference guide

This manual is also suitable for

iQue
®
M5
Quick Reference Guide
Finding Places & Creating Routes
Once you load detailed maps to your iQue M5 (see the Setup Guide), you
can search for addresses, restaurants, hotels, and many other Points of Inter-
est. The iQue M5 calculates turn-by-turn directions to your destination.
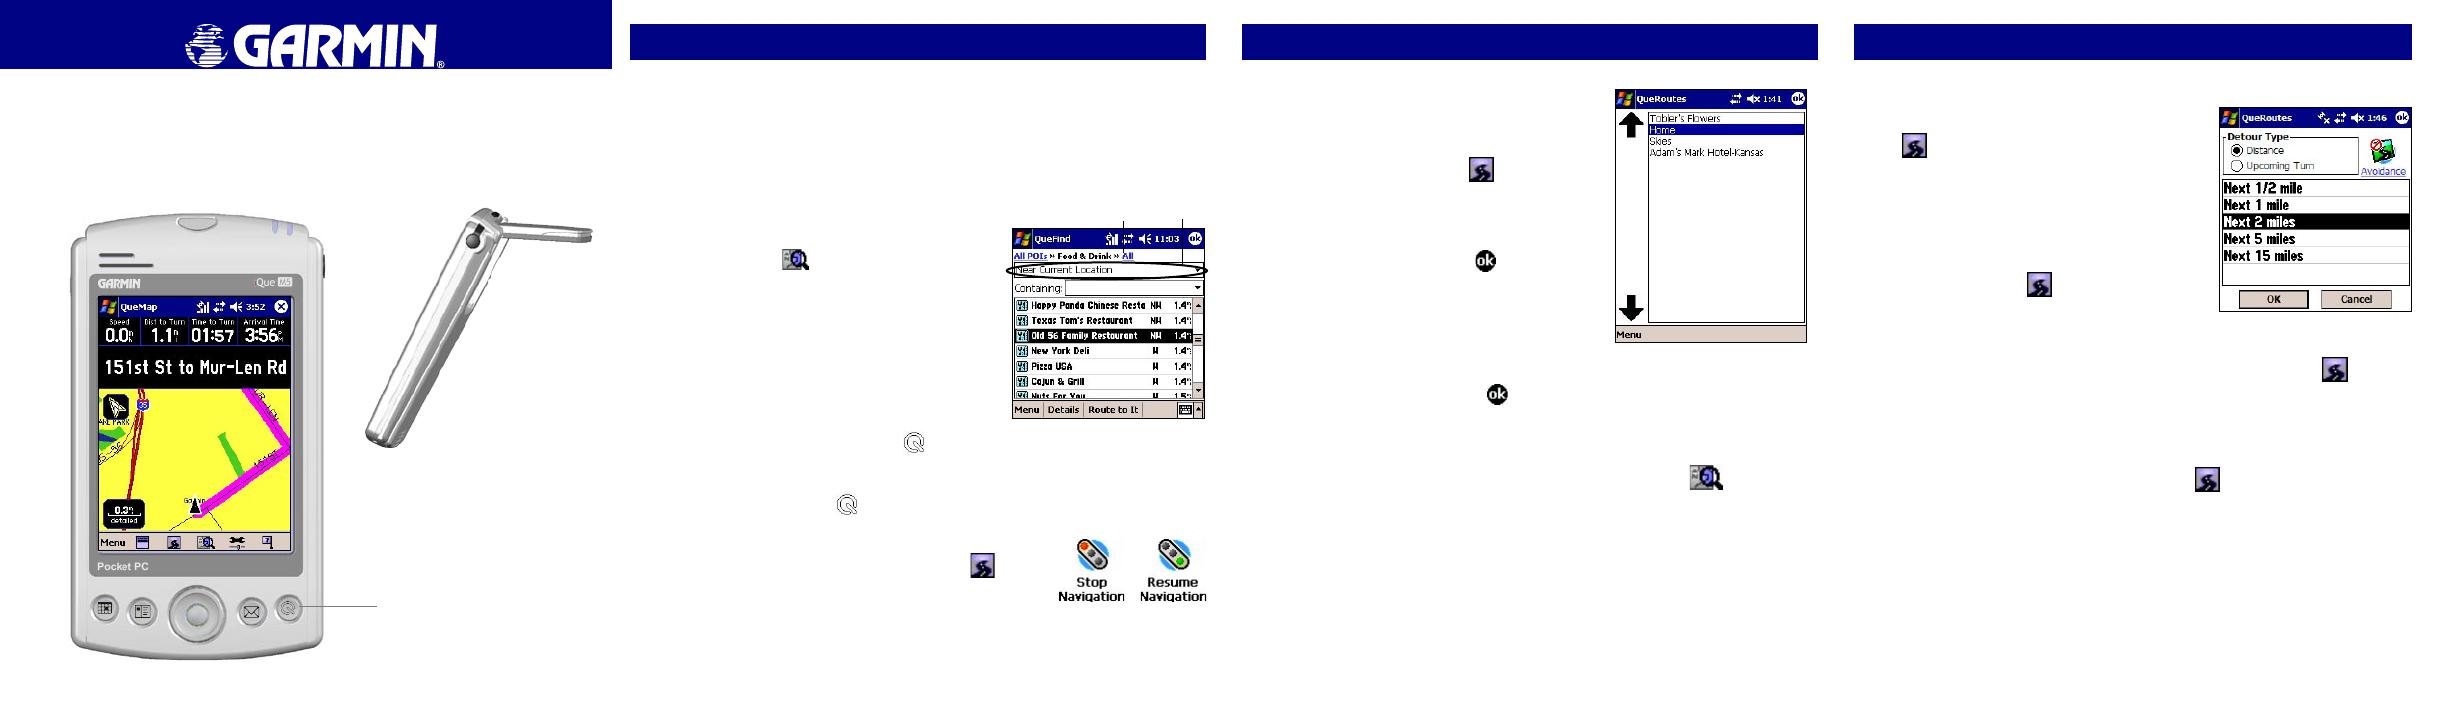
To find a nearby restaurant
and route to it:
1. From QueMap (the Map page), tap the
QueFind icon .
2. Tap the
Food & Drink icon.
3. Tap the
Search By drop-down menu and
select Near Current Location.
3. Tap a restaurant you want to go to.
Then tap Route to It.
To repeat directions:
Press and hold the Que button .
To view route turns:
Press the Que button to view the QueTurns page.
To stop or restart a route:
From QueMap, tap the QueRoutes icon . Then
tap Stop Navigation or Resume Navigation.
© Copyright 2004 Garmin Ltd. or its subsidiaries
190-00427-02 Rev. A Printed in Taiwan
Press the Que button
to view other Que pages
To open the GPS antenna, press the
antenna release down (on the back
of the unit) and lift up the antenna so
that it is parallel to the horizon.
Adding Via Points (Extra Stops)
To add Via points (extra stops) to
your route:
1. With an active route on QueMap,
tap the QueRoutes icon . Then
tap Edit Vias.
2. Tap
Menu and then Add from Map or
Add from Find. Then select a place to
add to your route and tap .
3. Tap a Via point in the list and then
tap the arrows to move the point up
or down. Tap Menu and then Deter-
mine Best Order to let the iQue M5
determine the best order automatically.
When you are finished, tap
to
recalculate your route.
To find a place near an active route:
1. With an active route on QueMap, tap the QueFind icon .
2. Select a category. Then tap the
Search By drop-down menu on the
search page and select Near Current Route or Near Route
Destination.
3. Tap a point to select it. To add the point to your route, tap
Menu and then
Add as Via Point. Reorder the Via points as necessary and tap OK.
Search By
Tap the All link to
narrow your search.
Tap the links at the top of the
page to narrow your search.
The Via points are listed in order
from first to last in the route. Tap a
point and then tap an arrow to move
the point up or down in the list.
Detours/Saving Routes
To add a detour to an active route:
1. From QueMap, tap the QueRoutes icon
. Then tap Detour.
2. Select a type of detour:
Distance or
Turns. Then select the number of miles
or the turn you want to avoid.
3. Tap
OK. The route recalculates auto-
matically. To cancel the detour, tap the
QueRoutes icon and then Cancel
Detour.
To save an active route:
1. With an active route on QueMap, tap the QueRoutes icon . Then
tap Save Current Route.
2. Rename the route if you wish and tap
Save.
To activate a saved route:
1. From QueMap, tap the QueRoutes icon . Then tap Menu and
select Saved Routes.
2. Tap a route in the list of saved routes and tap
Activate.
Home Location
You can set a special Location called a Home Location, which can be your
residence or a place you return to frequently.
To set a Home Location:
1. From QueMap, tap the QueRoutes icon
. Then tap Set Home Location.
2. Tap
Set from Find and then search for
your home address, or tap Set from
Map and find your home on the map.
Then tap .
3. Tap
again to save.
To change your Home Location:
1. From QueMap, tap Menu and then QuePreferences.
2. Tap the
Routing tab. Then tap Home.
3. Change your Home Location as described in steps 2 and 3 above.
To route to Home:
From QueMap, tap the QueRoutes icon . Then tap Route to Home.
QueTrip/Changing Preferences
To use QueTrip:
1. Press the Que button repeatedly until
QueTrip appears.
2. From within QueTrip, tap Reset Trip
to
reset distance and time fields.
3. To reset other fields, tap
Menu and then
Reset Odometer, Reset Max Speed Only,
or Reset All.
To adjust the backlight:
1. Tap the System Status icon and then
tap Backlight.
2. Adjust the brightness of the backlight. Make other
changes as necessary and tap .
To change how routes are calculated:
1. From QueMap, tap Menu and then QuePreferences. Then tap the
Routing tab.
2. Under
Route Preference, select the method you want to use to
calculate routes. Select Custom to choose your own road
combinations or to calculate routes based on your driving habits.
To change map settings:
1. From QueMap, tap Menu and then QuePreferences.
2. Make adjustments to map settings as necessary. Tap
to save.
Saving Locations
A Location is a point on the map that you store in memory. You can use
Locations in routes or associate them with contacts and appointments. See
the Que Applications Guide for more information.
To save a Location:
Tap the Where Am I? icon to save your current position as
a Location.
Tap anywhere on the map to activate the Pan Toolbar. Place the map
pointer on the point you want to save as a Location. Then tap the
Information icon on the Pan Toolbar.
Search for a point with QueFind. Tap and hold on the point you want to
save as a Location and select Add to My Locations.
To find a Location:
From QueMap, tap the QueFind icon and then tap My
Locations. Search for a Location just as you would search for any
other type of point. You can route to a Location or view it on QueMap.
To create a Location for a Contact or appointment:
1. Open Contacts or Calendar by tapping Start or by pressing the
Calendar or Contacts buttons on your iQue M5.
2. Tap and hold on the Contact or appointment you want to create a
Location for. Select
Que and then Add to My Locations or Set
Location Point.
3. Select an address for the Location. To route to this Contact or appoint
-
ment, tap and hold on the item, tap Que, and select Route to It.
Navigating with QueMap
7
4
3
5
1
2
6
8
a. Exit
b. Zoom In/Out
c. Zoom Area/Pan Map
d. Measure Distance
e. Information
a. b. c. d. e.
1. Tap the System Status icon to view GPS Satellite status.
2. Tap to change map orientation from Track Up
(shown) to North Up
(North is at the top of the map).
3. Tap
Zoom Scale to zoom in or out.
4. Tap to
Show/Hide Data Fields.
5. Tap the
Map Detail icon to adjust how much map detail appears.
6. Tap the Where Am I?
icon to view information about current position.
7. Tap and hold on
Data Fields to customize how they appear.
8. Tap anywhere on the map to open the Pan Toolbar
.
  • Page 1 1
  • Page 2 2

Garmin iQue iQue M5 Reference guide

Category
Navigators
Type
Reference guide
This manual is also suitable for

Ask a question and I''ll find the answer in the document

Finding information in a document is now easier with AI