Page is loading ...

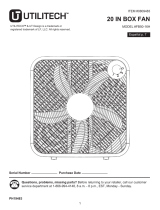
ITEM #0625627
Utilitech & UT Design® is a registered trademark
of LF, LLC. All Rights Reserved.
11
Questions, problems, missing parts? Before returning to your retailer, call our customer
service department at
5 p.m., EST, Friday.
ATTACH YOUR RECEIPT HERE
Serial Number
Purchase Date
1-866-994-4148, 8 a.m. - 6 p.m., EST, Monday - Thursday, 8 a.m. -
20 IN.
INDOOR/OUTDOOR FAN
MODEL #SFSDE-500B-A
Français p. 7
Español p. 13
1
AB17655

SAFETY INFORMATION
PREPARATION
Please read and understand this entire manual before attempting to assemble, operate or install
the product.
CAUTION
Before beginning assembly of product, make sure all parts are present. Compare parts with package
contents list and hardware contents list. If any part is missing or damaged, do not attempt to
assemble the product.
Estimated Assembly Time: 20 minutes
WARNING
READ AND SAVE THESE INSTRUCTIONS
1. Please unplug the fan from the socket and clean it with a soft cloth.
2. Do not immerse the fan.
3. Please fit the guard onto fan before starting up the fan.
4. This fan is not intended for use by people (including children) with reduced physical, sensory
or mental capabilities or lack of experience and knowledge unless they have been given
supervision or instruction concerning use of the fan by a person responsible for their safety.
Supervise children to ensure they do not play with the fan.
1. Please unplug the fan before moving it or performing maintenance. Don’t touch the
fan when your hands are wet.
2. Those who are not qualified electricians should not disassemble, repair or rebuild the fan.
3. Please unplug the fan when it is not in use.
4. Please don’t unplug the fan by holding the cable cord. Unplug by holding the plug.
5. Please don’t use the fan when there is damage to the cable cord or plug.
6. Please don’t use the fan with an extension cord.
7. Please don’t use the fan close to fires.
8. Please don’t insert your hand or other objects into the guard or near the movable parts.
9. To reduce the risk of fire or electric shock, do not use this fan with any solid-state speed
control device.
10. If the supply cord is damaged, it has to be replaced by the manufacturer, its service agent or
similarly qualified persons in order to avoid hazard.
Tools Required for Assembly (not included): Phillips Screwdriver, wrench
HARDWARE CONTENTS (shown actual size)
AA
Screw
Qty.6
3

AA
AA
HARDWARE USED
Screw
x4
AA
HARDWARE USED
Screw
x2
2. Insert the U-bracket on the fan body (A) into the standing pole (B), then secure with screws (AA)."
4
AA
ASSEMBLY INSTRUCTIONS
1. Insert 4 screws (AA) through the holes in the stand pole (B), then attach the stand
pole to the base (C).
B
B
C
A
B

OPERATING INSTRUCTIONS
1. Test GFCI (Ground Fault Circuit Interrupter) plug BEFORE EACH USE.
Plug GFCI into power outlet. Press RESET button (A).
Indicator (B) should turn red.
A
C
B
CARE AND MAINTENANCE
5
TROUBLESHOOTING
The fan fails to
operate.
1. Fan may not be plugged in.
1. Make sure the fan is plugged in
and electrical outlet is working
properly.
2.There may some be obstructions
in the fan.
2. Check for any obstruction. If you find
an obstruction, turn the fan to “0”.
Unplug the fan and carefully remove
the obstruction. Plug the fan in and
turn it on again, referring to the
OPERATING INSTRUCTIONS.
PROBLE
.
.
.
Press TEST button (C). Indicator (B) should turn off.
GFCI plug is tripped.
Press RESET button (A) again for use.
DO NOT USE FAN IF ABOVE TEST FAILS.
Call customer service department for assistance.
.
2. ADJUSTING AIR SPEED
The fan has three speeds (LOW, MEDIUM and HIGH).
Pull the chain of the unit to adjust air flow to desired speed.
Unplug the appliance before cleaning.Don’t use any water
for cleaning metal surfaces.
In order to remove the dust from the protective screen, use a vacuum cleaner or remove
the front protective screen by removing the securing screw on the edge of the screen
with a screwdriver.After cleaning, remount the safety screen.After doing this, fasten the
securing screw on the edge of the protective screen.

WARRANTY
REPLACEMENT PARTS LIST
For replacement parts, call our customer service department at
1-866-994-4148, 8 a.m. - 6 p.m., EST,
Monday - Thursday, 8 a.m. - 5 p.m., EST, Friday.
Printed in China
6
A
TWO-YEAR LIMITED WARRANTY. The manufacturer warrants this product to be free from
manufacturing defects in material and
workmanship. This warranty does not cover transit damages.
This warranty does not apply to
damagesfrom accident, misuse, alteration of any kind to the fan or
where the connected voltage is
more than the nameplate voltage. This warranty does not apply to the
finish on any portion of the
product. Servicing performed by unauthorized persons shall render the
warranty invalid. For warranty
service, contact Customer Service at 1-866-994-4148, 8 a.m. - 6 p.m.,
EST
, Monday - Thursday,
8 a.m. - 5 p.m., EST, Friday.
Some states do not allow the limitation or exclusion of certain damages. Therefore, these limitations
and exclusions may not apply to you. This warranty gives the consumer specific legal rights. You
may have other rights that vary from state to state.
PART #
NOITPIRCSEDTRAP
A
B
C
D
E
Blade
PART #
SFSDE-500B-A-A
SFSDE-500B-A-B
SFSDE-500B-A-C
SFSDE-500B-A-D
SFSDE-500B-A-E
A
A
A
B
C
D
E
Capacitor
Pull Chain
Switch
Adjustable knob

CONTENIDO DEL PAQUETE
14
DESCRIPCIÓN CANTIDAD
PIEZA
A
1
1
B
C
1
C
A
B
Varilla de soporte
Cuerpo del ventilador
Base
/


