Page is loading ...

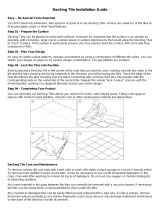
Deck Tile Installation Guide
v20211019

Important Note
Deck Tile Installation
Removing Tiles
Cuing Deck Tile
Slat Tile Installation
Fascia/Trim Installation
Installing Deck Tile Stair Trim
CONTENTS
1
2 - 3
3
4 - 5
6 - 9
10
11 - 12

U
Deck Tile Installation Guide / v20211019 1
Prior to installing any composite product, it is recommended that you check with local building codes
for any special requirements or restrictions. The diagrams and instructions outlined in this guide are
for illustration purposes only and are not meant or implied to replace a licensed professional. Any
construction or use of NewTechWood must be in accordance with all local zoning and/or building codes.
The consumer assumes all risks and liability associated with the construction and use of this product.
Safety
When dealing with any type of construction project, it is necessary to wear appropriate safety equipment
to avoid any risk of injuries. NewTechWood recommends but is not limited to the following safety
equipment when handling, cutting, and installing the Deck Tile: gloves, a respiratory protection, long
sleeves, pants, and safety glasses.
Tools
Standard woodworking tools may be used. It is recommended that all blades have a carbide tip.
Environment
A clean, smooth, at, and strong surface is needed to install Deck Tile correctly. Please check with local
building codes before ever installing any type of decking. If installation does not occur immediately,
NewTechWood's products need to be put on a at surface at all times. Never ever should it be put on a
surface that is NOT at.
Static
Static can also be more prevalent in areas that are of higher altitude because the humidity is lower. For
these areas, be careful of using conducive objects such as metal railing and chairs as static shocks might
occur more often. A potential way to lower the amount of static shocks occurring is to apply Staticide
(www.aclstaticide.com) on your deck or use anti-static mats before doorways. NewTechWood’s products
have been tested against EN 1815 - Assessment of Static Electrical Propensity and have received values
under the maximum standard of 2kV.
Layout
Before installing the Deck Tile, always make sure that you are installing it on a clean smooth at surface.
The Deck Tile CANNOT be installed on places such as dirt, soil, or raised structure it must be laid out on
a at solid surface.
IMPORTANT NOTE:
Read All Sections Before You Start
For the most up to date information, please visit our website @ www.newtechwood.com

U
2
Deck Tile Installation Guide / v20211019
The Deck Tile is relatively easy to install using its four side interlocking base making it very user friendly.
Each side has two male and female connectors that connect to an adjacent tile, these connectors are
circled in
Diagram 1
.
Deck Tile Installation
1Place the rst tile in a corner along the edge
of the area you will be installing, as shown
in
Diagram 2
.
Note:
There must be at least a 1/2" (12 mm)
gap between walls or any object to allow
for expansion and contraction. Failure to
do so could result in warping of the tile,
buckling, or other damage.
This gap must be respected even when a
trim or fascia is used on the deck tile.
DIAGRAM 3
DIAGRAM 4
Next, take another tile and determine which
type of pattern/style you like to do. Vertical
is shown in
Diagram 3
and horizontal is
shown in
Diagram 4
.
Protip: Mix around the different styles
(vertical and horizontal) to give your deck
a unique look.
2
DIAGRAM 1
DIAGRAM 2
Expansion and Contraction Gap

U
Deck Tile Installation Guide / v20211019 3
Removing Tiles
DIAGRAM 8
DIAGRAM 10
DIAGRAM 7
Finally, attach the last two connectors and
push down to lock everything into place, as
shown in
Diagram 7
.
5
Repeat steps 1-5 until deck is completed.
6
2Next, with the gripping the tile pull up
towards your body while the other hand
pushes down on the adjacent tile, as shown
in
Diagram 9
.
3Continue to pull with the gripped hand until
nally all connectors are separated from the
adjacent tile, as shown in
Diagram 10
.
1If a tile needs to be removed, the best way
is to rst have one hand grip one tile’s edge
and the other to be on the adjacent tile, as
shown in
Diagram 8
.
DIAGRAM 9
DIAGRAM 6
4Then, attach the first two connectors into
each other, as shown in
Diagram 6
. You
might need to lift up on one of the tiles to
get a better grip.
DIAGRAM 5
Now, take the second tile and align the
connectors up with the first tile, as shown
in
Diagram 5
.
3

U
4
Deck Tile Installation Guide / v20211019
Cuing Deck Tile
Cutting the Deck Tile is simple and quick. Just
remember that you need a carbide tip blade
when cutting.
Corners/Edges
2Next, take the piece and redraw the
measured area that you will be cutting onto
the Deck Tile.
1First, measure the corner/edge that will
need to be cut, as shown in
Diagram 11
.
Note:
There must be at least a 1/2" (12 mm)
gap between walls or any object to allow
for expansion and contraction. Failure to
do so could result in warping of the tile,
buckling, or other damage.
This gap must be respected even when a
trim or fascia is used on the deck tile.
DIAGRAM 11
Then, take the Deck Tile and cut either
with a circular saw, table saw, hand saw, or
jigsaw. Always remember to use a carbide
tip blade on these tools, as shown in
Diagram 12
. The nal piece we cut for this
corner is shown in
Diagram 13
.
3
DIAGRAM 12
DIAGRAM 13

U
Deck Tile Installation Guide / v20211019 5
6Repeat steps 1-5 for any other corners/
edges until the deck is completed.
DIAGRAM 17
Expansion and Contraction Gap
DIAGRAM 18
Expansion and Contraction Gap
DIAGRAM 15
5Finally, put the nished piece in its corner/
edge, as shown in
Diagram 16
.
DIAGRAM 16
Expansion and Contraction Gap
Note: There must be at least a 1/2" (12 mm)
gap between walls or any object to allow for
expansion and contraction. Failure to do so
could result in warping of the tile, buckling, or
other damage.
This gap must be respected even when a trim
or fascia is used on the deck tile.
4Now, take the Deck Tile and sand down the
sides of the cuts to make them smooth, as
shown in
Diagram 15
.
Note: Before cutting, always turn the
Deck Tile over and make sure that the cut
lines you have marked on the Deck Tile
do not cross over any screws on the back.
Never ever should you be cuing through
the screws, as shown in
Diagram 14
. If
your lines cross over these screws, first
unfasten the screws and then cut the
Deck Tile.
DIAGRAM 14

U
6
Deck Tile Installation Guide / v20211019
Slat Tile Installation
When the gap between the installed Deck Tiles and the wall is less than 12 7/16" (316mm), as
shown in
Diagram 19
,
Single Slat Tile
is the appropriate accessories to complete the Deck Tile
installation neatly and seamlessly. See
Table 1
shown below on how to make the slat tile selection.
TABLE 1
Single Slat Tile
DIAGRAM 19
Gap Range Selection of Tile
12 3/8" (315mm) to 11 7/16" (290mm)
11 3/8" (289mm) to 3 1/2" (88mm)
Deck Tile
Single Slat Tile
Expansion and Contraction Gap
1/2" (12mm)
Gap to be trimmed
Wall
Deck Tiles

U
Deck Tile Installation Guide / v20211019 7
2Draw the cutting line according to the
measured dimension, as shown in
Diagram 21
.
DIAGRAM 21
Note: A minimum gap of 1/2" (12mm)
needs to be left between the cut slat
tile and the wall to allow the Deck
Tile for expansion and contraction due
to temperature change, as shown in
Detail 21-1
.
Detail 21-1
1Measure the gap in-between the installed
Deck Tile's edge and the wall, as shown in
Diagram 20
.
Then, select which kind of tile to be used
according to
Table 1
on page 6.
DIAGRAM 20
Expansion and
Contraction Gap
1/2" (12mm)
Deck Tiles
Wall

U
8
Deck Tile Installation Guide / v20211019
3Before cutting, always turn over the slat tile and ensure that the cutting line do not cross over any
screws, as shown in
Diagram 22
. Never cut any lines that have screw interferring as they pose a risk
for injury. It is recommended to re-design the cutting path where the cutting lines do no cross the
screws.
DIAGRAM 22
Note:
1. The distance between the screw's center and the cut slat tile's edge can not be less than
1/4" (7mm), as shown in
Detail 22-1
.
Detail 22-1
Screw
min. 1/4" (7mm)
Cuing Line
Screw

U
Deck Tile Installation Guide / v20211019 9
4Cut the slat tiles along the cutting lines, and
sand the cut edge smooth with sandpaper,
as shown in
Diagram 23
.
DIAGRAM 23
5Put the cut single tiles in place and align the
interlocking connectors with the Deck Tile,
as shown in
Diagram 24
. Then push down
to lock it with the Deck Tiles.
DIAGRAM 24
6
Diagram 25
presents the final appearance
after completing the installation.
DIAGRAM 25
Deck Tiles
Sandpaper
Cut Slat Tile
Cut Slat Tile
Deck Tiles

U
10
Deck Tile Installation Guide / v20211019
Installing Trim
The Deck Tile has three different trim options:
straight, inward and outward trim.
Straight TrimStraight Fascia
Place the straight fascia, as shown in
Diagram 26
to nish the deck.
Place the straight trim, as shown in
Diagram 29
to nish the deck.
Outward Fascia
Place the outward fascia, as shown in
Diagram 27
to nish the deck’s corner.
Inward Fascia
Place the inward fascia, as shown in
Diagram 28
to nish the deck’s corner.
DIAGRAM 28
DIAGRAM 27
Outward Trim
Inward Trim
Place the outward trim, as shown in
Diagram 30
to nish the deck’s corner.
Place the inward trim, as shown in
Diagram 31
to
nish the deck’s corner.
DIAGRAM 31
DIAGRAM 30
DIAGRAM 26 DIAGRAM 29
Fascia/Trim Installation
Installing Fascia
The Deck Tile has three different fascia options:
straight, inward and outward fascia.

U
Deck Tile Installation Guide / v20211019 11
1 3/4" (45mm)
1 3/4" (45mm)
Wood
Stairs Trim
Wood Screw
6# x 1"
Grid
1 3/4" (45mm)
1 3/4" (45mm)
Metal Frame
Stairs Trim
Drilling Screw
6# x 3/4"
Grid
Concrete
1 3/4" (45mm)
1 3/4" (45mm)
Stairs Trim
Plastic Anchor
Plug Ø5/32*1 1/2 "
Grid
Wood Screw
6# x 1 1/2 "
Installing Deck Tile Stair Trim
1First gure out what kind of material you are
laying your quick deck over.
We will go over three different types of
material:
a. Wood
b. Metal
c. Concrete
a. Wood
For wood #6 wood screws that are 1” (25.4mm)
will be used to fasten the stair trims grid to the
wood, as shown in
Diagram 26
.
b. Metal
For metal #6 drilling screws that are 3/4” (19mm)
will be used to fasten the stair trims grid to the
metal, as shown in
Diagram 41
.
c. Concrete
For concrete a combination of #6 wood screws
that are 1 1/2” (38mm) and a plastic anchor will
be used to fasten the stair trims grid to the
concrete, as shown in
Diagram 42
.
DIAGRAM 39
DIAGRAM 40
DIAGRAM 41
DIAGRAM 42

U
12
Deck Tile Installation Guide / v20211019
2After guring out which material you will be
installing your stair trim on start installing,
as shown in
Diagram 43
. Ensure that when
installing more than one stair trim that the
gap between the stair trim is similar to that
of the deck tile for an overall even look and
also to allow for expansion and contraction.
3If the stair trim does not fit exactly it will
need to be cut down to size. First measure
the remaining distance, as shown in
Diagram 44
.
4Next take your measurement and mark it on
the stair trim and cut accordingly, as shown
in
Diagram 45
.
5Install the cut stair trim, as shown in
Diagram 46
.
6Install the rest of the stairs with stair trims,
as show in
Diagram 47
if there are multiple
stair treads present.
DIAGRAM 43
DIAGRAM 44
DIAGRAM 45
DIAGRAM 46
7Now the deck tiles can be installed onto the
stair trims, as shown in
Diagram 48
.
DIAGRAM 47
DIAGRAM 48
L1 一 3/16" (5mm)
L
1 一 3/16" (5mm)

U
Deck Tile Installation Guide / v20211019 13
10 Next the riser and stair tread needs to be
installed with deck tiles.
11 First measure the risers and stair treads, as
shown in
Diagram 52
.
8If your tile needs to be cut, as shown in
Diagram 49
ensure that the screws are
taken out if the cut you are making is
directly over the screws on the grid.
9Install the cut deck tile, as shown in
Diagram 50
.
DIAGRAM 50
DIAGRAM 51
DIAGRAM 52
DIAGRAM 49
13 Install the cut Deck Tiles for the stair
treads, as shown in
Diagram 54
. Align the
interlocking connectors of the stair tread
tiles with the stair trim, then push down to
lock it with the stair trim.
DIAGRAM 53
DIAGRAM 54
12 Cut the Deck Tiles to fit on the risers and
stair treads, as shown in
Diagram 53
. If you
are cutting a line where the screws are xed
on the grid rst unfasten the screws on the
grid and then cut the Deck Tiles according
to the measured dimension.
L
2 一 11/16" (27mm)
L
3 一 3/16" (5mm)
L4 一 3/16" (5mm)
①:
L
2 一 11/16" ( 27mm)
②:
L
3 一 3/16" (5mm)
③:
L
4 一 3/16" (5mm)
L
1 一 3/16" (5mm)

U
14
Deck Tile Installation Guide / v20211019
15 Repeat steps 11 and 12 for the remaining stair
treads and risers, as shown in
Diagram 56
.
16
Diagram 57
shows a completed staircase
with the stair trims along with the tiles.
14 Next install the cut Deck Tiles for the
risers, as shown in
Diagram 55
. Align the
interlocking connectors of the riser tiles
with the stair trim, then push down to lock
it with the stair trim.
DIAGRAM 56
DIAGRAM 57
DIAGRAM 55

Deck Tile Installation Guide
v20211019
©2021 Newtechwood Corporation
NewTechWood is a registered trademark of Newtechwood Corporation.
To obtain a copy of the most current version of this installation guide,
visit us online at www.newtechwood.com.
®
/