Page is loading ...


2
Introduction
3
Safety Precautions
4
Hardware and Buttons
5
Applications and Widgets
7
Touch Screen Display
12
LED Backlighting
14
Setting the Date and Time
15
Adjusting Sound
19
Safety Features
20
Music Player
23
Video Player
28
Radio App
29
iPod App
36
Bluetooth Setup
40
Using WiFi
46
Insane NavEngine
48
Downloading Apps
50
Support
52
Frequently Asked Questions
53
Appendix A: Factory Data Reset
57
Appendix B: Torque Setup
62

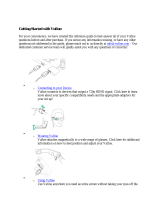
Congratulations on the purchase of your new Insane Audio
head unit!
Hopefully, by now you’ve already installed your Insane Audio
head unit, and you are reading this guide right in the dash of
your vehicle! If not, and you need help installing your Insane
Audio head unit, please visit our support page.
All Insane Audio Android-based head units are fairly simple to
operate, but if you are new to the Android operating system
or need some general assistance, then this guide is for you.
This Quick Start Guide is designed to show you the basics to
get you started.
3

IMPORTANT: Please use common sense
when operating your Insane Audio head unit.
You should NEVER be operating the unit,
watching videos or television while driving.
Keep your hands on the wheel, and keep your
eyes on the road!
4
Never attempt to open your Insane Audio head unit or repair
it yourself. Doing so is not only dangerous, but it will void your
warranty.
This product uses a 12V power supply system and should be
properly grounded at all times. Please consult a professional
car stereo installer if you aren’t sure whether or not your
system has been properly installed.

This section will focus on Insane Audio’s JK2001, but the same
general principles apply for other Insane Audio Android-based
head units.
5
The following buttons are on the right side of your JK2001.
Should you ever need to reset your unit, you can
press this button with a pen or paper clip.
The BAND button toggles through
AM/FM frequency bands.
Automatic Music Search.
See the Radio app section.
Turning this knob will seek through
songs or radio presets.
Push and hold to power off.
This button will pause/play from
several different apps (e.g. Music,
Radio, iPod).
Opening this flap will reveal the microSD
slot. This is a great place to store music
or movies. See Music Player section.

The following buttons are on the left side of your JK2001.
6
Turning this knob will
adjust the volume.
Push to mute.
The HOME button will bring
you back to the Home Screen
from any app.
The NAVI button opens the
Insane NavEngine app or
other custom app.
The BT button opens the
Bluetooth app.
Opening this flap will reveal
the slot where the Insane
NavEngine maps are stored.
internal microphone

7
This is the main menu of your Insane Audio head unit. At the
bottom of your screen you will see an icon with six squares
grouped together. We call this the “six pack”.
Clicking on the six pack will lead you to the app drawer
where you can view all applications currently installed on the
system. Note that these are arranged alphabetically.

8
Your unit comes with all sorts of different applications but
how you use the system is entirely up to you! You can remove
apps or download new ones from the Google Play store. At
time of this writing, there are over 2 million apps available on
Google Play. Many of them are free, and almost all of them
will work with your new Insane Audio head unit!
To move an application from the App Drawer to your Home
Screen, simply press and hold on the specific app and drag
where you would like that app to be. When you do that, you
now have an icon on your Home Screen.

9
It’s important to understand the differences between icons
on your Home Screen and applications in the App Drawer.
Icons on your Home Screen are simply shortcuts to
applications. So you can move or delete these however you’d
like.
To delete an icon from your Home Screen, simply hold it
down then drag it to the trash. That application will still exist
in the App Drawer, however, so you can always add it back by
pressing the six pack and then dragging that application back
to your Home Screen.
Also note that you have several pages on your Home Screen
for icons or widgets. Try swiping the screen to the left and
right and check it out!

10
Android also has the concept of widgets. A widget is a control
or tool that you can add to your home screen. Unlike a
shortcut to an app, a widget displays information or allows
you to control an aspect of the system right from your Home
Screen.
Your Insane Audio head unit already contains a bunch of cool
widgets that we put on there for you. To access them, press
the six pack, then swipe the screen past all of the
applications. Widgets are found to the right of applications in
the app drawer. Just like applications, simply hold down the
widget you want to move and drag it to your Home Screen.

11
To move a widget to your Home Screen, simply repeat the
drag and drop method for apps.
And to delete one off your Home Screen, just drag and drop
to the top red bar.
Of course, you can always download additional widgets from
the Google Play store.

12
All Insane Audio head units come with extremely high quality,
high resolution, fully capacitive touch screen displays. That
means that not only does it look great, but you can navigate
the system and access data in a far more enriching
experience then ever possible before.
Your touch screen contains a special protective coating from
the factory, however, you still should take a few simple steps
to ensure years of trouble free use.
• When cleaning the screen, power it off the unit first.
• Use only a lint-free or microfiber cloth.
• Never use any chemicals or cleaning products on the
touch screen. A very small amount of soapy water will do
the trick.
• After cleaning, make sure that the surface is free from
moisture by wiping it with a dry lint-free cloth.

13
You can adjust the brightness of your screen by swiping down
twice from the top of the screen at the main menu and
clicking on the brightness icon.

14
You can adjust your LED backlighting to be any color you’d
like. To do this, first go to the Settings menu (accessible
through the App Drawer), and then look for Element.
In here, you can either choose from the preset solid color
options, create your own color by using the sliders on the
left, or select the rainbow option which will set the system to
gradually fade through all colors in the rainbow.

15
There are two places where the time is set: the system
Settings and the Clock Widget.
The system Settings can be accessed by pressing the six pack.
Then find the Settings icon.

16
From the Settings menu, select Date & Time.
There are a lot of options here, but we recommend starting
simple, and then playing around with advanced features as
you get more comfortable. To that effect, turn off all three
automatic time checkboxes, and then manually set your date,
time and time zone.

17
The Clock widget is on the main menu and has its own time
controls as well as some pretty cool features. For example,
you can set a “home” time zone. Then, when you drive to a
different time zone, it will automatically add another clock
and show both your home time and your local time. You can
also add another world city that you'd like to display the local
time for. Here too, while there are lots of options, we
recommend starting simple.
So, from the Home Screen, click on the Clock widget. On the
right hand corner is a “3 pack”. Click on that and then
Settings.

18
Disable “Automatic home clock”.
Then go back one menu and tap on the red globe icon. This
will bring up a list of world cities. Note that if you check any
of these boxes, then the time for that city will appear on the
clock widget. Make sure all of them are unchecked if you only
want one time to show up on your main menu.

19
InsaneEQ gives you full control over how things sound inside
your vehicle. The easiest way to access this is to swipe down
twice from the top of your screen, and select Amp.
equalizer
balance/fade

20
Your Insane Audio head unit is shipped to you from our
factory with certain safety precautions enabled, however, this
can be customized just like everything else on the system.
IMPORTANT: Please use your Insane Audio
head unit responsibly! Do not operate or
attempt to watch video while driving. Always
pay attention to the road, keep both hands
on the wheel, and make safety your top
priority!
You’ll want to first access the App Drawer from the Home
Screen.
/