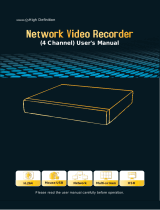
NVR-6332P16-H4/F

Novus NVR-6332P16-H4/F User manual

  • Hello! I am an AI chatbot trained to assist you with the Novus NVR-6332P16-H4/F User manual. I’ve already reviewed the document and can help you find the information you need or explain it in simple terms. Just ask your questions, and providing more details will help me assist you more effectively!
U s e r s m a n u a l
(s h ort )
NVR-6332-H2
NVR-6316-H1
NVR-6308P8-H1
NVR-6304P4-H1
NVR-6332-H2,NVR-6316-H1,NVR-6308P8-H1,NVR-6304P4-H1
User’s manual (Short) ver.1.0
All rights reserved © AAT Holding S.A.
2
IMPORTANT SAFEGUARDS AND WARNINGS
EMC (2004/108/EC) and LVD (2006/95/EC ) Directives CE Marking
Our products are manufactured to comply with requirements of following directives and national regulations implementing the
directives:
Electromagnetic compatibility EMC 2004/108/EC; Low voltage LVD 2006/95/EC with further amendment. The Directive applies
to electrical equipment designed for use with a voltage rating of between 50VAC and 1000VAC as well as 75VDC and
1500VDC.
WEEE Directive 2002/96/EC Information on Disposal for Users of Waste Electrical and Electronic Equipment
This appliance is marked according to the European Directive on Waste Electrical and Electronic Equipment (2002/96/EC)
and further amendments. By ensuring this product is disposed of correctly, you will help to prevent potential negative
consequences for the environment and human health, which could otherwise be caused by inappropriate waste handling
of this product.
The symbol on the product, or the documents accompanying the product, indicates that this appliance may not be treated as
household waste. It shall be handed over to the applicable collection point for the waste electrical and electronic equipment
for recycling purpose. For more information about recycling of this product, please contact your local authorities, your
household waste disposal service or the shop where you purchased the product.
RoHS Directive 2002/95/EC
Concerning for human health protection and friendly environment, we assure that our products falling under RoHS Directive
regulations, regarding the restriction of the use of hazardous substances in electrical and electronic equipment, were designed and
manufactured in compliance with mentioned regulation. Simultaneously, we claim that our products were tested and do not contain
hazardous substances exceeding limits which could have negative impact on human health or natural environment.
Information
The device, as a part of professional CCTV system used for surveillance and control, is not designed for self installation in
households by individuals without technical knowledge. The manufacturer is not responsible for defects and damages
resulted from improper or inconsistent with user s manual installation of the device in the system.
ATTENTION!
PRIOR TO UNDERTAKING ANY ACTION THAT IS NOT PROVISIONED FOR THE GIVEN PRODUCT IN ITS USER S MANUAL AND
OTHER DOCUMENTS DELIVERED WITH THE PRODUCT, OR THAT ARISES FROM THE NORMAL APPLICATION OF THE PRODUCT, ITS
MANUFACTURER MUST BE CONTACTED OR THE RESPONSIBILITY OF THE MANUFACTURER FOR THE RESULTS OF SUCH AN
ACTION SHELL BE EXCLUDED.
1. Prior to undertaking any action please consult the following manual and read all the safety and operating
instructions before starting the device.
2. Please keep this manual for the lifespan of the device in case referring to the contents of this manual is necessary;
3. All the safety precautions referred to in this manual should be strictly followed, as they have a direct influence on
NVR-6332-H2,NVR-6316-H1,NVR-6308P8-H1,NVR-6304P4-H1
User’s manual (Short) ver.1.0
All rights reserved © AAT Holding S.A.
3
FOREWORD INFORMATION
1. FOREWORD INFORMATION
1.1. Network recorder’s technical data
NVR-6332-H2
VIDEO
IP Cameras 32 channels at 2592 x 1944 resolution (video + audio)
Supported Cameras/Protocols NOVUS, ONVIF
Supported Resolution max. 2592 x 1944
Compression H.264, H.264+, H.265
Monitor Output main (split screen, full screen, sequence): 1 x HDMI, 1 x VGA (up to 2 monitors simultaneously)
Dualstreaming Support yes*
AUDIO
Audio Output 1 x line-out (RCA) 1 x HDMI
RECORDING
Recording Speed
960 kl/s (32 x 30 kl/s dla 2592 x 1944)
Stream Size
256 Mb/s in total from all cameras
Recording Mode time-lapse, triggered by: manual, alarm input, motion detection
Prealarm/Postalarm
up to 5 s/up to 600 s
DISPLAY
Display Speed 960 fps (32 x 30 fps)**
PLAYBACK
Playback Speed 480 fps (16 x 30 fps for 2592 x 1944) **
Recorded Data Search by date/time, events
BACKUP
Backup Methods USB port (HDD or Flash memory), network
Backup File Format AVI
STORAGE
Internal storage for recording available mount: 2 x HDD 3.5” 6 TB SATA
Total Capacity 12 TB
ALARM
Motion Detection supports camera’s motion detection*
System Reaction to Alarm Events buzzer, e-mail, recording activation, PTZ
NETWORK
Network Interface 1 x Ethernet - RJ-45 interface, 10/100/1000 Mbit/s
Network Protocols Support HTTP, TCP/IP, IPv4, DHCP, DNS, DDNS, NTP, UPnP, SMTP
ONVIF Protocol Support Profile S (ONVIF 2.2 or higher)
PC/MAC Software NVR-6000 Viewer/-
Smartphone Software SuperLive Plus (iPhone, Android)
Max. Number of Connections
with NVR 1
Bandwidth 256 Mb/s in total to all client workstations
PTZ
PTZ Functions pan/tilt/zoom, preset commands*
AUXILIARY INTERFACES
USB Ports 1 x USB 2.0, 1 x USB 3.0
OPERATING SYSTEM
Operating System Linux
Operation Mode triplex
OSD languages: Polish, English, others
Control PC mouse and IR remote controller (in-set included), network
System Diagnostic automatic control of: HDDs, network, camera connection loss
Security password protection, IP filtering, MAC filtering
INSTALLATION PARAMETERS
Dimensions (mm) 380 (W) x 53 (H) x 268 (D)
Weight 1.5 kg (without HDD)
Power Supply 100 ~ 240 VAC
Power Consumption 40 W (with 2 HDDs)
Operating Temperature -10°C ~ 50°CEdit feature
* Function depends on communication protocol, for details please check compatibility table ** Available with dual streaming mode.
NVR-6332-H2,NVR-6316-H1,NVR-6308P8-H1,NVR-6304P4-H1
User’s manual (Short) ver.1.0
All rights reserved © AAT Holding S.A.
4
FOREWORD INFORMATION
NVR-6316-H1
VIDEO
IP Cameras 16 channels at 2592 x 1944 resolution (video + audio)
Supported Cameras/Protocols NOVUS, ONVIF
Supported Resolution max. 2592 x 1944
Compression H.264, H.264+, H.265
Monitor Output main (split screen, full screen, sequence): 1 x HDMI
Dualstreaming Support yes*
AUDIO
Audio Output 1 x line-out (RCA) 1 x HDMI
RECORDING
Recording Speed Up to 480 kl/s (16 x 30 kl/s for 2592 x 1944)
Stream Size 80 Mb/s in total from all cameras
Recording Mode time-lapse, triggered by: manual, motion detection
Prealarm/Postalarm up to 5 s/up to 600 s
DISPLAY
Display Speed 480 fps (16 x 30 fps)**
PLAYBACK
Playback Speed Up to 480 fps (16 x 30 fps for 2592 x 1944) **
Recorded Data Search by date/time, events
BACKUP
Backup Methods USB port (HDD or Flash memory), network
Backup File Format AVI
STORAGE
Internal storage for recording available mount: 1 x HDD 3.5” 6 TB SATA
Total Capacity 6 TB
ALARM
Motion Detection supports camera’s motion detection*
System Reaction to Alarm Events buzzer, recording activation, PTZ, e-mail with atatchment
NETWORK
Network Interface 1 x Ethernet - RJ-45 interface, 10/100 Mbit/s
Network Protocols Support HTTP, TCP/IP, IPv4, DHCP, DNS, DDNS, NTP, UPnP, SMTP
ONVIF Protocol Support Profile S (ONVIF 2.2 or higher)
Smartphone Software SuperLive Plus (iPhone, Android)
Max. Number of Connections with NVR 2
Bandwidth 80 Mb/s in total to all client workstations
PTZ
PTZ Functions pan/tilt/zoom, preset commands*
AUXILIARY INTERFACES
USB Ports 1 x USB 2.0, 1 x USB 3.0
OPERATING SYSTEM
Operating System Linux
Operation Mode triplex
OSD languages: Polish, English, others
Control PC mouse and IR remote controller (in-set included), network
System Diagnostic automatic control of: HDDs, network, camera connection loss
Security password protection, IP filtering, MAC filtering
INSTALLATION PARAMETERS
Dimensions (mm) 300 (W) x 52 (H) x 248 (D)
Weight 1.5 kg (without HDD)
Power Supply 100 ~ 240 VAC
Power Consumption 20 W (with 1 HDD)
Operating Temperature -10°C ~ 50°CEdit feature
* Function depends on communication protocol, for details please check compatibility table ** Available with dual streaming mode.
NVR-6332-H2,NVR-6316-H1,NVR-6308P8-H1,NVR-6304P4-H1
User’s manual (Short) ver.1.0
All rights reserved © AAT Holding S.A.
5
FOREWORD INFORMATION
NVR-6304P4-H1 / NVR-6308P8-H1
VIDEO
IP Cameras
4 channels at 2592 x 1944 resolution (video + audio) 8 channels at 2592 x 1944 resolution (video + audio)
Supported Cameras/Protocols
NOVUS, ONVIF
Supported Resolution
max. 2592 x 1944
Compression
H.264, H.264+, H.265
Monitor Output
main (split screen, full screen, sequence): 1 x HDMI
Dualstreaming Support
yes*
AUDIO
Audio Output
1 x line-out (RCA) 1 x HDMI
RECORDING
Recording Speed
120 kl/s (4 x 30 kl/s dla 2592 x 1944) 240 kl/s (8 x 30 kl/s dla 2592 x 1944)
Stream Size
80 Mb/s in total from all cameras 50 Mb/s in total from all cameras
Recording Mode
time-lapse, triggered by: manual, motion detection
Prealarm/Postalarm
up to 5 s/up to 600 s
DISPLAY
Display Speed
120 fps (4 x 30 fps)** 240 fps (4 x 30 fps)**
PLAYBACK
Playback Speed
120 fps (4 x 30 fps for 2592 x 1944) ** 240 fps (4 x 30 fps for 2592 x 1944) **
Recorded Data Search
by date/time, events
BACKUP
Backup Methods
USB port (HDD or Flash memory), network
Backup File Format
AVI
STORAGE
Internal storage for recording
available mount: 1 x HDD 3.5” 6 TB SATA
Total Capacity
6 TB
ALARM
Motion Detection
supports camera’s motion detection*
System Reaction to Alarm Events
buzzer, recording activation, PTZ, e-mail with atatchment
NETWORK
Network Interface
1 x Ethernet - RJ-45 interface, 10/100 Mbit/s
4 x Ethernet PoE - RJ-45 interface, 10/100 Mbit/s 8 x Ethernet PoE - RJ-45 interface, 10/100 Mbit/s
Network Protocols Support
HTTP, TCP/IP, IPv4, DHCP, DNS, DDNS, NTP, UPnP, SMTP
ONVIF Protocol Support
Profile S (ONVIF 2.2 or higher)
Smartphone Software
SuperLive Plus (iPhone, Android)
Max. Number of Connections with NVR
2
Bandwidth
40 Mb/s in total to all client workstations 80 Mb/s in total to all client workstations
PTZ
PTZ Functions
pan/tilt/zoom, preset commands*
AUXILIARY INTERFACES
USB Ports
2 x USB 2.0
OPERATING SYSTEM
Operating System
Linux
Operation Mode
triplex
OSD
languages: Polish, English, others
Control
PC mouse and IR remote controller (in-set included), network
System Diagnostic
automatic control of: HDDs, network, camera connection loss
Security
password protection, IP filtering, MAC filtering
INSTALLATION PARAMETERS
Dimensions (mm)
300 (W) x 52 (H) x 248 (D)
Weight
1.16 kg (without HDD)
Power Supply
100 ~ 240 VAC
Power Consumption
12 W (with 1 HDD) + 36 W PoE 20 W (with 1 HDD) + 100W PoE
Operating Temperature
-10°C ~ 50°CEdit feature
* Function depends on communication protocol, for details please check compatibility table ** Available with dual streaming mode.
NVR-6332-H2,NVR-6316-H1,NVR-6308P8-H1,NVR-6304P4-H1
User’s manual (Short) ver.1.0
All rights reserved © AAT Holding S.A.
6
FOREWORD INFORMATION
1.2. Main characteristics
Supports resolution up to 2592 x 1944
Supported protocols: ONVIF
Recording up to 2592 x 1944
Recorded stream size up to 256 Mb/s in total from all cameras (for NVR-6332-H2)
Internal HDDs mount up to 2 (for NVR-6332-H2)
WARNING!
ONVIF protocol support was verified with IP cameras based on ONVIF ver. 2.2 and compatible
with the "PROFILE S".
Implementation of the ONVIF protocol by different manufacturers may vary by some functions,
which can make them work improperly or not in accordance with expectation. AAT HOLDING
Company is not responsible for incompatibility problems resulting from cameras of other brands
than NOVUS, which are using ONVIF protocol. If you are using ONVIF protocol cameras other
than NOVUS brand it is recommended to test each time whether required functions work
correctly.
1.3. Package contents
Unpack the device carefully. After unpacking, please ensure that package contains the following items:
Network Video Recorder
USB Mouse
Remote control
Power supply
User’s manual (short)
If any of the elements has been damaged during transport, pack all the elements back into the original
packaging and contact your supplier.
NVR-6332-H2,NVR-6316-H1,NVR-6308P8-H1,NVR-6304P4-H1
User’s manual (Short) ver.1.0
All rights reserved © AAT Holding S.A.
7
STARTING THE DEVICE
2. STARTING THE DEVICE
2.1 Electrical connection and other back panel elements.
NVR-6304P4-H1
NVR-6308P8-H1
1. .AUDIO IN: Audio mono inputs to connect microphones*.
2. VGA: Main monitor connectors, use the D-SUB VGA cable to connect monitor.
3. HDMI: Main monitor connectors, use the HDMI cable to connect monitor.
4. USB: USB port for external Flash memory and other USB devices.
5. LAN: RJ-45 connector port to connect to the local network and internet.
6. PoE LAN: RJ-45 connector ports with PoE support for IP cameras
7. POWER SOCKET: To plug in the 48V power cord
8. POWER SW: NVR power switch.
9. AUDIO OUT : Audio output
* Will be available in the future.
6
5
4
3
2
1
8
9
7
6
5
4
3
2
1
9
8
7
NVR-6332-H2,NVR-6316-H1,NVR-6308P8-H1,NVR-6304P4-H1
User’s manual (Short) ver.1.0
All rights reserved © AAT Holding S.A.
8
STARTING THE DEVICE
NVR-6316-H1
1. ALARM IN/OUT: Alarm in/out block
2. POWER SOCKET: To plug in the 12V power cord
3. HDMI: Main monitor connectors, use the HDMI cable to connect monitor.
4. USB: USB port for external Flash memory and other USB devices.
5. LAN: RJ-45 connector port to connect to the local network and internet.
6. .AUDIO IN: Audio mono inputs to connect microphones*.
7. AUDIO OUT : Audio output
* Will be available in the future.
NVR-6332-H2
1. POWER SOCKET: To plug in the 12V power cord
2. LAN: RJ-45 connector port to connect to the local network and internet.
3. VGA: Main monitor connectors, use the D-SUB VGA cable to connect monitor.
4. HDMI: Main monitor connectors, use the HDMI cable to connect monitor
5. LAN: RJ-45 connector port to connect to the local network and internet.
6. .AUDIO IN: Audio mono inputs to connect microphones*.
7. AUDIO OUT : Audio output
* Will be available in the future.
6
5
4
3
2
1
7
6
5
4
3
5
2
7
NVR-6332-H2,NVR-6316-H1,NVR-6308P8-H1,NVR-6304P4-H1
User’s manual (Short) ver.1.0
All rights reserved © AAT Holding S.A.
9
STARTING THE DEVICE
2.2 HDD mounting
Novus 6000 NVRs supports 2 internal SATA HDD (model NVR-6332-H2) or 1 internal SATA HDD
(models NVR-6304P4-H1, NVR-6308P8-H1, NVR-6316).
WARNING!
In order to find information regarding the compatible models of HDDs and their maximum
capacities, please contact Novus distributor or check the information presented at
www.novuscctv.com. AAT HOLDING Company is not responsible for any problems from using
not recommended hard drives.
The list of compatible HDDs contains all the HDDs that can be used with a given DVR including
HDDs designed for office use - so called desktop disks. However, due to the fact that reliability of
the recording process and data safety are paramount factors of any CCTV system, we strongly
advise to use HDDs designed for continuous (24/7) operation.
You need to format disks if they were used in a different device. All data saved on HDD prior to
format will be lost.
Installation HDD in NVR-6304P4-H1, NVR-6308P4-H1,NVR-6316
In order to mount HDD, please loose the screws in the locations shown on the picture below and
remove the cover.
WARNING: !
Before removing cover unplug the power cord from the NVR. When NVR is turned on before
disconnecting the power cord, shut down the recorder using the NVR menu.
NVR-6332-H2,NVR-6316-H1,NVR-6308P8-H1,NVR-6304P4-H1
User’s manual (Short) ver.1.0
All rights reserved © AAT Holding S.A.
10
STARTING THE DEVICE
After enclosure, mount the disk using mounting screws (4 pcs.), And then connect the power cord and
signal.
After connecting the hard drive mount the cover start the NVR to check and format the hard drive.
CAUTION:
If you use the disk was used in another device, it is necessary to format it before using.
Formatting the drive erase all the data from disk. All drives in the recorder should be exactly the
same type.
Installation HDD in model NVR-6632
In order to mount HDD, please loose the screws in the locations shown on the picture below and
remove the cover recorder pushing it to the back and then lifting up.
After enclosure, mount the disk or disks using mounting screws (4 pieces on the disc), then connect the
power cord and signal cable.
NVR-6332-H2,NVR-6316-H1,NVR-6308P8-H1,NVR-6304P4-H1
User’s manual (Short) ver.1.0
All rights reserved © AAT Holding S.A.
11
STARTING THE DEVICE
2.3. Connecting the power supply.
Please connect provided power cord in the rear power port of the NVR like depicted below.
To start the unit turn on the power switch on back panel (NVR-66304P4-H1, NVR-66308P8-H1 only).
Initialization lasts approximately 60 seconds. During this time executing any device functions and
pressing any buttons is prohibited. To shut down the device please use the menu.
CAUTION:
Make connection when the power is not applied and the power switch is turned off.
Do not place the power cord under the carpet or rug. The power cord is usually earth-grounded.
However, even if it's not earth-grounded, never modify it on your own for earth-grounding.
Make sure that power adapter is placed near of NVR and secured from accidental disconnection.
If the device was brought from a location with lower temperature, please wait until it reaches the
temperature of location it is currently in. Turning the device on immediately after bringing it
from a location with lower ambient temperature is forbidden, as the condensing water vapour
may cause short-circuits and damage the device as a result.
Before starting the device familiarize yourself with the description and the role of particular
inputs, outputs and adjusting elements that the device is equipped with.
NVR-6332-H2,NVR-6316-H1,NVR-6308P8-H1,NVR-6304P4-H1
User’s manual (Short) ver.1.0
All rights reserved © AAT Holding S.A.
12
2.4. Connecting monitor
This product supports following interfaces for main monitor: HDMI, VGA.
For HDMI following resolutions are supported: 1280x1024, 1920x1080 i 3840x2160.
2.5. Connecting camera and Network
NVRs NVR-6304P4-H1 and NVR-6308P8-H1 have built-in 4/8 PoE ports RJ-45 with PoE support,
which can be used for connecting cameras. Please notice that the Ethernet connection is effective
within 100 meter distance. To connect IP cameras please connect cables like on image and follow the
described below.
We recommend that you configure the camera before connecting to a recorder, as described the
manual camera. Please note that cameras have addressed the unique IP address supported by the
recorder. Recorders with built-in PoE switches use a different address from the cameras connected via
the built-in switch and another to connect to a device connected via the LAN port.
Connecting cameras and network recorders NVR-6304P4-H1 / NVR-6308P8-H1
STARTING THE DEVICE
IP CAMERAS
NOVUS NVR
INTERNET
PC
NETWORK SWITCH
NVR-6332-H2,NVR-6316-H1,NVR-6308P8-H1,NVR-6304P4-H1
User’s manual (Short) ver.1.0
All rights reserved © AAT Holding S.A.
13
Connecting cameras and network recorders NVR-6316-H1, NVR-6332-H2
Note: In order to ensure stability and protection against overload and unauthorized access, we
recommend separating the network monitoring of LANs used by users.
Before configuring the connection of the cameras in the recorder, we recommend using a PC to
configure the cameras according to the instructions of the camera.
2.6. Connecting external devices
Connecting audio ports
Audio output signal normally are above 200mV 1kΩ. You can connect to it the audio amplifier with
the external speakers.
Connecting USB devices
NVR has 1 x USB 2.0 port on front and one 1 x USB 2.0 on back (NVR-6332-H2 have 3.0 USB port
on back panel) . They could be used for connecting external Flash memory, mouse connection and
other USB compatible devices. To connect storage memory it is recommended to use port USB 3.0
STARTING THE DEVICE
NETWORK SWITCH
INTERNET
PC
NOVUS NVR
IP CAMERAS
NVR-6332-H2,NVR-6316-H1,NVR-6308P8-H1,NVR-6304P4-H1
User’s manual (Short) ver.1.0
All rights reserved © AAT Holding S.A.
14
Connecting alarms ports
NVR-6316-H1 has local alarm input and output. To connect alarm input please refer image below
An example of connecting the sensor to the alarm input 1.
STARTING THE DEVICE
NO COM
ALARM
Power
source
ALARM
IN1 IN2 IN3 IN4
GND SENSOR
NVR-6332-H2,NVR-6316-H1,NVR-6308P8-H1,NVR-6304P4-H1
User’s manual (Short) ver.1.0
All rights reserved © AAT Holding S.A.
15
NVR OPERATING
3. NVR OPERATING
3.1. Front panel description
1. LED Diodes for monitoring NVR activity.
- REC - monitors recording activity
- NET - monitors networking activity
- PWR - activities when power is on
2. USB USB 2.0 port for external Flash memory and mouse connection.
.
3.2. Controlling via USB mouse
It is possible to control NVR via an USB mouse connected to the USB port. Double-click on any
camera in split screen display mode switches the display to full-screen mode. Subsequent double-click
returns to previous display mode. Move cursor to the top or click the right key of mouse to bring up
MAIN MENU and select START icon.
Certain positions allow to select them via mouse scroll. Depending on NVR operating mode, pressing
RMB displays a corresponding function menu.
3.3. System operations
To start NVR plug power cable and switch on power button (NVR-6308P8-H1,NVR-6304P4-H1). The
power led turns on. After booting, the video output default is multi-window output mode.
Note:
If the currently selected NVR menu language is not as expected, to change it, please follow the
procedure described in chapter 4.3 of this manual.
1
2
1
2
NVR-6332-H2,NVR-6316-H1,NVR-6308P8-H1,NVR-6304P4-H1
User’s manual (Short) ver.1.0
All rights reserved © AAT Holding S.A.
16
To unlock the DVR menu, press the button at the bottom left of the screen.
After clicking on button click-on “LOGIN”
Then login in entering password in PASSWORD field (default password for user root is “pass”)
and then click-in login button
NVR OPERATING
NVR-6332-H2,NVR-6316-H1,NVR-6308P8-H1,NVR-6304P4-H1
User’s manual (Short) ver.1.0
All rights reserved © AAT Holding S.A.
17
3.4. Startup configuration
Prior to using NVR for the first time, initial setup is strongly advised. Before you connect the IP
cameras to the NVR, please set up network and stream parameters of IP cameras in the right way.
Note:
For suggested values for IP camera setting please refer to the “Cameras Capability Table” available
on the www.novuscctv.com website. If you set wrong values some problems may appear: the NVR
cannot search the IP camera, the stream cannot be connected, the image is not fluent, the image quality
is bad and so on.
In case of first NVR start WIZARD SETUP menu window will occur (if function wasn’t disabled
earlier). To configure NVR please follow procedure like below, after finishing all the steps you’ll be
ready to work:
Provide username and password and click on NEXT button so start wizard.
NVR OPERATING
NVR-6332-H2,NVR-6316-H1,NVR-6308P8-H1,NVR-6304P4-H1
User’s manual (Short) ver.1.0
All rights reserved © AAT Holding S.A.
18
I. Network Settings : This menu allows to set up networking. Default IP configuration is
192.168.1.100 netmask 255.255.255.0 . For NVRs with build in PoE switches (NVR-6304P4-H1 i
NVR-6308P8-H1) it is necessary to configure IP address for switch in INTERNAL ETHERNET
PORT SECTION. Please note that IP subnet for the ETHERNET PORT 1 and INTERNAL
ETHERNET PORT were different. In cases where it is necessary to NVRa connection to the Internet
(for remote access, email sending, etc.), Configure the following parameters: Gateway, Primary and
Secondary DNS. You can also enable DHCP mode allows you to download an IP address from a
DHCP server (required if running a DHCP server). It is possible to change the default HTTP port
designed to display panel Web device and RTSP ports and port server data. After changing parameter
pres NEXT button.
NVR OPERATING
NVR-6332-H2,NVR-6316-H1,NVR-6308P8-H1,NVR-6304P4-H1
User’s manual (Short) ver.1.0
All rights reserved © AAT Holding S.A.
19
II. QR Codes : This menu allows to you to scan a QRcode in the Supelive plus application or enter a
device code to autonat.com site. The service allows you to connect to a device connected to the Internet
network is behind a router equipped with NAT.
NOTE: AAT Holding S.A is not responsible for the operation of the service autonat.com which is
provided by third parties.
III. Add Camera: Allows you to configure the camera and add them to the recorder. Upper window
displays a sophisticated camera by the NVR. To change the addressable cameras, click on the icon
in the column EDIT (This works with cameras NOVUS IP 3000 series).
NVR OPERATING
NVR-6332-H2,NVR-6316-H1,NVR-6308P8-H1,NVR-6304P4-H1
User’s manual (Short) ver.1.0
All rights reserved © AAT Holding S.A.
20
Enter the address in the IP ADDRESS and set the masks in the SUBNET MASK then press the OK
button to save the settings.
Press the button to add a camera to the system.
Added camera will be displayed on the bottom of the menu list. To edit the connection settings of the
camera, press the EDIT column.
If you are having problems connecting to the camera, you must enter the correct user name in the
USER NAME and password in the PASSWORD field and then press the OK button to save the
settings. If the NVR connected to the camera will be on STATUS will be displayed Connected. To
remove a camera from the list, press the in DELETE column.
NVR OPERATING
/