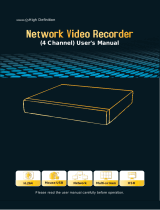
Novus NVR-6204P4-H1 User manual

Category
Digital Video Recorders (DVR)
Type
User manual
u s e r s m a n u a l
NVR-6332-H2
NVR-6316-H1
NVR-6308P8-H1
NVR-6304P4-H1
NVR-6332P16-H4
NVR-6332-H8
NVR-6332-H2,NVR-6316-H1,NVR-6308P8-H1,NVR-6304P4-H1, NVR-6332-H8, NVR-6332P16-H4
user’s manual ver.1.1
IMPORTANT SAFEGUARDS AND WARNINGS
All rights reserved © AAT HOLDING S.A.
2
EMC (2004/108/EC) and LVD (2006/95/EC ) Directives
CE Marking
Our products are manufactured to comply with requirements of following directives and
national regulations implementing the directives:
Electromagnetic compatibility EMC 2004/108/EC.
Low voltage LVD 2006/95/EC with further amendment. The Directive applies to electrical
equipment designed for use with a voltage rating of between 50VAC and 1000VAC as well
as 75VDC and 1500VDC.
WEEE Directive WEEE 2012/19/EU Information on Disposal for Users of Waste
Electrical and Electronic Equipment
This appliance is marked according to the European Directive on Waste Electrical and Electronic
Equipment (2002/96/EC) and further amendments. By ensuring this product is disposed of correctly,
you will help to prevent potential negative consequences for the environment and human health,
which could otherwise be caused by inappropriate waste handling of this product.
The symbol on the product, or the documents accompanying the product, indicates that this
appliance may not be treated as household waste. It shall be handed over to the applicable collection
point for the waste electrical and electronic equipment for recycling purpose. For more information
about recycling of this product, please contact your local authorities, your household waste disposal
service or the shop where you purchased the product.
RoHS Directive RoHS 2011/65/EU
Concerning for human health protection and friendly environment, we assure that our
products falling under RoHS Directive regulations, regarding the restriction of the use of
hazardous substances in electrical and electronic equipment, were designed and
manufactured in compliance with mentioned regulation. Simultaneously, we claim that our products
were tested and do not contain hazardous substances exceeding limits which could have negative
impact on human health or natural environment.
Information
The device, as a part of professional CCTV system used for surveillance and control, is not designed for
self installation in households by individuals without technical knowledge.
The manufacturer is not responsible for defects and damages resulted from improper or inconsistent
with user’s manual installation of the device in the system.
ATTENTION!
PRIOR TO UNDERTAKING ANY ACTION THAT IS NOT PROVISIONED FOR THE GIVEN PRODUCT IN ITS
USER’S MANUAL AND OTHER DOCUMENTS DELIVERED WITH THE PRODUCT, OR THAT ARISES FROM
THE NORMAL APPLICATION OF THE PRODUCT, ITS MANUFACTURER MUST BE CONTACTED OR THE
RESPONSIBILITY OF THE MANUFACTURER FOR THE RESULTS OF SUCH AN ACTION SHELL BE
EXCLUDED.
NVR-6332-H2,NVR-6316-H1,NVR-6308P8-H1,NVR-6304P4-H1, NVR-6332-H8, NVR-6332P16-H4
user’s manual ver.1.1
IMPORTANT SAFEGUARDS AND WARNINGS
All rights reserved © AAT HOLDING S.A.
3
1. Prior to undertaking any action please consult the following manual and read all the safety and
operating instructions before starting the device.
2. Please keep this manual for the lifespan of the device in case referring to the contents of this
manual is necessary;
3. All the safety precautions referred to in this manual should be strictly followed, as they have a
direct influence on user’s safety and durability and reliability of the device;
4. All actions conducted by the servicemen and users must be accomplished in accordance with the
user’s manual;
5. The device should be disconnected from power sources during maintenance procedures;
6. Usage of additional devices and components neither provided nor recommended by the producer
is forbidden;
7. You are not allowed to use the device in high humidity environment (i.e. close to swimming pools,
bath tubs, damp basements);
8. Mounting the device in places where proper ventilation cannot be provided (e. g. closed lockers
etc.) is not recommended since it may lead to heat build-up and damaging the device itself as a
consequence;
9. Mounting the device on unstable surface or using not recommended mounts is forbidden.
Improperly mounted device may cause a fatal accident or may be seriously damaged itself. The
device must be mounted by qualified personnel with proper authorization, in accordance with this
user’s manual.
10. Device should be supplied only from a power sources whose parameters are in accordance with
those specified by the producer in the devices technical datasheet. Therefore, it is forbidden to
supply the devices from a power sources with unknown parameters, unstable or not meeting
producer’s requirements;
11. You cannot allow any metal objects get inside the recorder. It might cause serious damage. If a
metal object gets inside the device contact the authorised Novus service immediately.
12. The manufacturer does not bear responsibility for damage or loss of data stored on HDDs or other
media occurred during the usage of the product.
Due to the product being constantly enhanced and optimized, certain parameters and functions
described in the manual in question may change without further notice.
We strongly suggest visiting the www.novuscctv.com website in order to access the newest manual .
Technical changes reserved without prior notice and printing errors possible.
All rights reserved © AAT HOLDING S.A.
4
TABLE OF CONTENTS
NVR-6332-H2,NVR-6316-H1,NVR-6308P8-H1,NVR-6304P4-H1, NVR-6332-H8, NVR-6332P16-H4
user’s manual ver.1.1
TABLE OF CONTET ......................................................................................................................... 4
1. BASIC CONFIGURATION............................................................................................................ 6
1.1. Language change ...................................................................................................................... 6
1.2. Menu operating ........................................................................................................................ 7
1.3. Initial configuration .................................................................................................................. 8
1.4. Live preview .......................................................................................................................... 14
1.5. Searching and playing recorded video .................................................................................. 17
2. NVR MENU .................................................................................................................................... 17
2.1. Menu system ........................................................................................................................... 17
2.1.1. Basic. .......................................................................................................................... 18
2.1.1.1. General Settings ................................................................................................. 18
2.1.1.2. Date and Time .................................................................................................... 19
2.1.1.3. Output Settings .................................................................................................. 20
2.1.2. Maintenance ............................................................................................................... 21
2.1.1.2. View Log ............................................................................................................ 21
2.1.2.2. Factory default .................................................................................................... 22
2.1.2.3. Upgrade ............................................................................................................... 22
2.1.2.4. Backup and Restore ............................................................................................ 22
2.1.3. Information ................................................................................................................ 22
2.1.3.1. Basic ................................................................................................................... 22
2.1.3.2. Camera Status ..................................................................................................... 22
2.1.3.3. Alarm Status ....................................................................................................... 23
2.1.3.4. Record Status ...................................................................................................... 23
2.1.3.5. Network Status .................................................................................................... 23
2.1.3.6. Disk ..................................................................................................................... 24
2.2. Camera .................................................................................................................................... 25
2.2.1. Manage Camera .......................................................................................................... 25
2.2.1.1. Add Camera ........................................................................................................ 26
2.2.1.2. Add Manually ..................................................................................................... 27
2.2.1.3. Add Group ......................................................................................................... 27
2.2.2. Image ........................................................................................................................... 28
2.2.2.1. OSD Settings ....................................................................................................... 28
2.2.2.2. Image Settings ..................................................................................................... 28
2.2.2.3. Mask Settings ...................................................................................................... 28
2.2.3. Motion Settings ........................................................................................................... 29
2.2.4. Intelligence Analysis .................................................................................................. 30
2.2.4.1. Object Detection ................................................................................................. 32
2.2.4.2. Exception ............................................................................................................ 33
2.2.4.3. Tripwire .............................................................................................................. 34
2.2.4.4. Intrusion ............................................................................................................. 35
2.2.5. PTZ .............................................................................................................................. 36
2.2.5.1. Preset ................................................................................................................... 36
2.2.5.2. Cruise .................................................................................................................. 37
2.3. Record ............................................................................................................................ 38
2.3.1. Mode Settings ........................................................................................................ 38
2.3.2. Mode Settings ........................................................................................................ 39
2.3.3. Parameters .............................................................................................................. 39
2.3.3.1. Event recording parameters ................................................................................ 39
2.3.3.2. Schedule recording settings ................................................................................ 40
2.3.4. Stream Settings ...................................................................................................... 40
2.3.4.1. Sub Stream Settings ............................................................................................ 40
2.3.5. Record Settings ...................................................................................................... 40
All rights reserved © AAT HOLDING S.A.
5
TABLE OF CONTENTS
NVR-6332-H2,NVR-6316-H1,NVR-6308P8-H1,NVR-6304P4-H1, NVR-6332-H8, NVR-6332P16-H4
user’s manual ver.1.1
2.4. Alarm ............................................................................................................................. 40
2.4.1. Event Notification ................................................................................................. 40
2.4.1.1. Alarm-out ........................................................................................................... 40
2.4.1.2. E-mail ................................................................................................................. 41
2.4.1.3. Display ............................................................................................................... 41
2.4.1.4. Buzzer ................................................................................................................ 41
2.4.2. Motion Alarm ........................................................................................................ 42
2.4.3. Sensor Alarm ......................................................................................................... 43
2.4.4. Exception............................................................................................................... 43
2.4.4.1. IPC Offline Settings ........................................................................................... 43
2.4.4.2. Exception Handling Settings .............................................................................. 43
2.4.5. Alarm Status .......................................................................................................... 44
2.5. Disk ............................................................................................................................... 42
2.5.1. Disk Management ................................................................................................. 44
2.5.2. Storage Mode ........................................................................................................ 45
2.5.3. Disk ....................................................................................................................... 46
2.5.4. S.M.A.R.T. Information ........................................................................................ 47
2.6. Network ........................................................................................................................ 46
2.6.1. TCP/IPv4 ............................................................................................................... 47
2.6.2. Port ........................................................................................................................ 48
2.6.3. DDNS .................................................................................................................... 49
2.6.4. E-mail .................................................................................................................... 47
2.6.5. UPnP ..................................................................................................................... 48
2.6.6. NAT ...................................................................................................................... 48
2.6.7. Telnet .................................................................................................................... 48
2.7. Account and Authority ................................................................................................. 48
2.7.1. Add User ............................................................................................................... 48
2.7.2. Edit User................................................................................................................ 49
2.7.3. Edit Group ............................................................................................................. 50
2.7.4. Security ................................................................................................................. 41
2.7.4.1. Black and white list ............................................................................................ 51
3. NETWORK AND OPERATION UTILIZING WEB BROWSER ............................ 52
3.1. Recommended PC specification for web browser connections ..................................... 52
3.2. Establishing connection ................................................................................................. 52
3.3. Live view panel ............................................................................................................. 53
3.4. Playback panel ............................................................................................................... 56
3.5. Backup panel ................................................................................................................. 57
3.6. Function panel ............................................................................................................... 58
4. REMOTE ACCESS CONFIGURATION .................................................................... 58
Note :
Words like “clik”, “press”, “hold” used in that manual refers to virtual buttons available either in NVRs menu or in web
interface.
NVR OPERATING
All rights reserved © AAT HOLDING S.A.
6
NVR-6332-H2,NVR-6316-H1,NVR-6308P8-H1,NVR-6304P4-H1, NVR-6332-H8, NVR-6332P16-H4
user’s manual ver.1.1
1. BASIC CONFIGURATION
1.1. Language change
If after NVR booting up the currently selected menu language is different than expected, to change it,
please follow the steps below:
Click-on bottom left on start menu button .
Then select menu options to open (third from the bottom)
In the NVR menu, select the tab SYSTEM
In the displayed menu, select the English language in the third from the top of the box and click the
button on the bottom menu.
After saving settings, the language will be switched to English.
NVR OPERATING
All rights reserved © AAT HOLDING S.A.
7
NVR-6332-H2,NVR-6316-H1,NVR-6308P8-H1,NVR-6304P4-H1, NVR-6332-H8, NVR-6332P16-H4
user’s manual ver.1.1
1.2. Menu operating
To operate the menu press the button at the bottom left of the screen.
Then click-on LOGIN position
Then in login window please provide password for user root (default password for root user is pass)
and then press LOGIN button
All rights reserved © AAT HOLDING S.A.
8
STARTING THE DEVICE
NVR-6332-H2,NVR-6316-H1,NVR-6308P8-H1,NVR-6304P4-H1, NVR-6332-H8, NVR-6332P16-H4
user’s manual ver.1.1
1.3. Initial configuration
Prior to using NVR for the first time, initial setup is strongly advised. Before you connect the IP
cameras to the NVR, please set up network and stream parameters of IP cameras in the right way.
Note:
For suggested values for IP camera setting please refer to the “Cameras Capability Table” available
on the www.novuscctv.com website. If you set wrong values some problems may appear: the NVR
cannot search the IP camera, the stream cannot be connected, the image is not fluent, the image
quality is bad and so on.
In case of first NVR start WIZARD SETUP menu window will occur (if function wasn’t disabled
earlier). To configure NVR please follow procedure like below, after finishing all the steps you’ll be
ready to work:
Provide username and password and click on NEXT button so start wizard.
All rights reserved © AAT HOLDING S.A.
9
STARTING THE DEVICE
NVR-6332-H2,NVR-6316-H1,NVR-6308P8-H1,NVR-6304P4-H1, NVR-6332-H8, NVR-6332P16-H4
user’s manual ver.1.1
I. Network Settings : This menu allows to set up networking. Default IP configuration is
192.168.1.100 netmask 255.255.255.0 . For NVRs with build in PoE switches (NVR-6304P4-H1 i
NVR-6308P8-H1) it is necessary to configure IP address for switch in INTERNAL ETHERNET
PORT SECTION. Please note that IP subnet for the ETHERNET PORT 1 and INTERNAL
ETHERNET PORT were different. In cases where it is necessary to NVRa connection to the Internet
(for remote access, email sending, etc.), Configure the following parameters: Gateway, Primary and
Secondary DNS. You can also enable DHCP mode allows you to download an IP address from a
DHCP server (required if running a DHCP server). It is possible to change the default HTTP port
designed to display panel Web device and RTSP ports and port server data. After changing parameter
pres NEXT button.
NVR OPERATING
All rights reserved © AAT HOLDING S.A.
10
NVR-6332-H2,NVR-6316-H1,NVR-6308P8-H1,NVR-6304P4-H1, NVR-6332-H8, NVR-6332P16-H4
user’s manual ver.1.1
II. QR Codes : This menu allows to you to scan a QRcode in the Supelive plus application or enter a
device code to autonat.com site. The service allows you to connect to a device connected to the
Internet network is behind a router equipped with NAT.
NOTE: AAT Holding S.A is not responsible for the operation of the service autonat.com which is
provided by third parties.
III. Add Camera: Allows you to configure the camera and add them to the recorder. Upper window
displays a sophisticated camera by the NVR. To change the addressable cameras, click on the
icon in the column EDIT (This works with cameras NOVUS IP 3000 series).
NVR OPERATING
All rights reserved © AAT HOLDING S.A.
11
NVR-6332-H2,NVR-6316-H1,NVR-6308P8-H1,NVR-6304P4-H1, NVR-6332-H8, NVR-6332P16-H4
user’s manual ver.1.1
Enter the address in the IP ADDRESS and set the masks in the SUBNET MASK then press the OK
button to save the settings.
Press the button to add a camera to the system.
Added camera will be displayed on the bottom of the menu list. To edit the connection settings of the
camera, press the EDIT column.
If you are having problems connecting to the camera, you must enter the correct user name in the
USER NAME and password in the PASSWORD field and then press the OK button to save the
settings. If the NVR connected to the camera will be on STATUS will be displayed Connected. To
remove a camera from the list, press the in DELETE column.
All rights reserved © AAT HOLDING S.A.
12
STARTING THE DEVICE
NVR-6332-H2,NVR-6316-H1,NVR-6308P8-H1,NVR-6304P4-H1, NVR-6332-H8, NVR-6332P16-H4
user’s manual ver.1.1
IV.Disk Settings : In this tab displays information about the hard disk detected by the DVR.
Before starting work, you need to format the hard disk by selecting it in the list of drives and then
pressing FORMAT.
Formatting may take a few moments. After properly formatted STATUS field should have a value of
„RW” (Read/Write).
V. Record Settings :
You can set one of the modes:
- MANUAL RECORD SETTINGS - You can set the recording time from the moment you select the
manual recording from 1 minute to 1 hour or manually off recording.
All rights reserved © AAT HOLDING S.A.
13
STARTING THE DEVICE
NVR-6332-H2,NVR-6316-H1,NVR-6308P8-H1,NVR-6304P4-H1, NVR-6332-H8, NVR-6332P16-H4
user’s manual ver.1.1
AUTO - set all the cameras on one of the following modes :
- MOTION RECORD - starts recording after receiving motion detection information from the
camera.
- SENSOR RECORD - starts recording after alarm generated on alarm input
- MOTION RECORD + SENSOR RECORD - starts recording after motion detecion alarm and after
alarm from alarm inputs
- ALWAYS(24x) RECORD +MOTION RECORD - constant recording and recoring after receiving
motion detection information from the camera.
- ALWAYS(24x) RECORD + SENSOR RECORD - constant recording and recording alarm
generated on alarm input
- ALWAYS(24x) RECORD + MOTION RECORD + SENSOR RECORD - constant recording and
recording alarm generated on alarm input and after receiving motion detection information from the
camera.
NVR OPERATING
All rights reserved © AAT HOLDING S.A.
14
NVR-6332-H2,NVR-6316-H1,NVR-6308P8-H1,NVR-6304P4-H1, NVR-6332-H8, NVR-6332P16-H4
user’s manual ver.1.1
1.4. Live preview
NOVUS network video recorders features a multilingual OSD menu allowing to adjust the settings of
the device. Available languages are: English, Polish, and others
As soon as the NVR completes its initialization process, it will enter the real-time monitoring image.
Displaying all cameras simultaneously is the default mode. On the bottom of screen STATUS BAR is
displayed.
To start access to the NVR click on the button to launch the start menu.
After clicking log on to the system (the default password for the root user is a "pass").
STATUS BAR description:
MENU BAR
VIDEO WINDOW
VIEW MENU
START MENU
Item Icon Description
Search Launches search for recordings
Playback
Starts playback menu
Backup Starts backup menu
NVR OPERATING
All rights reserved © AAT HOLDING S.A.
15
NVR-6332-H2,NVR-6316-H1,NVR-6308P8-H1,NVR-6304P4-H1, NVR-6332-H8, NVR-6332P16-H4
user’s manual ver.1.1
Menu bar icons
Item Icon Description
Settings Click to run configuration of NVR parameters
Logout
Starts playback menu
Shutdown Starts backup menu
Item Icon Description
Settings Click to open start menu
Full screen
Switches video view to full screen
Single view Start displaying camera in single view
Quad view Start displaying 4 cameras in video view
9 cam. View Start displaying 9 cameras in video view
Other divisions Opening video subdivisions
Other divisions Open 1 main + 5 or 7 additional views
Dwell Starts displaying images in sequence
Dwell settings Start/Stop time setting switch
All rights reserved © AAT HOLDING S.A.
16
STARTING THE DEVICE
NVR-6332-H2,NVR-6316-H1,NVR-6308P8-H1,NVR-6304P4-H1, NVR-6332-H8, NVR-6332P16-H4
user’s manual ver.1.1
View menu :
Detailed information about configuration, service and installation of device is
available in full version of user's manual located on the www.novuscctv.com
Item Icon Description
OSD ON/OSD OFF
Turns on/off OSD information
Playback
Starts playback for displayed cameras
Manual Record
Turn on / off manually recording channels.
Manual Alarm
Allow to trigger the alarm manually.
Recording Status
Displays information about the recording
Alarm Status
Displays the status of alarm devices
Disc Status
Information about disc status
Network status
View information about network usage
Device Information
Displays information about the state of operation of
the basic components of recorder
Item Icon Description
Camera List of cameras to display
Single Channel Se -
quences
Select a group of cameras to display in single
channel
Customize Displays
Modes
Customize display and save settings
All rights reserved © AAT HOLDING S.A.
17
STARTING THE DEVICE
NVR-6332-H2,NVR-6316-H1,NVR-6308P8-H1,NVR-6304P4-H1, NVR-6332-H8, NVR-6332P16-H4
user’s manual ver.1.1
1.5. Searching and playing recorded video
To begin playback of recorded material, select the button to play in the live preview, you will
see the window below:
Choose the date from the calendar and press OK button. You can identify the type of the recording
data by the color in the bar.
Green (Manual) : data saved by manual recording.
Blue (Schedule) : continuous data recording.
Yellow (Motion) : motion event data recording.
Red (Alarm) : alarm event data recording.
To play the searched data simply double click a desired point on or press PLAY button.
To control playback, you can use the following buttons from the playback options:
Stop - stops replaying
Rewind - Starts playback backward using key-frames
Pause/Play - Stop/Pasue replay
Declaration/Acceleration - change of pace playback possible times (1/32, 1 / 16,1 / 8,1 / 4,1 / 2,
1,2,4,8,16,32)
GRAPH WITH RECORDING
CALENDAR
VIEW OPTIONS
REPLAY OPTIONS
All rights reserved © AAT HOLDING S.A.
18
FOREWORD INFORMATION
NVR-6332-H2,NVR-6316-H1,NVR-6308P8-H1,NVR-6304P4-H1, NVR-6332-H8, NVR-6332P16-H4
user’s manual ver.1.1
- Frame Forward/Backward : Jump forward/backward frame by frame
- +/- 30 seconds - jumps forward/backward 30 seconds in recording time
- Event list - displays a list of events (motion detection, alarm input activation) registered for the
selected channel
- Backup - start menu archiving recordings
- Backup status - displays the current status of archival recordings
- Back - close the replay menu
2. NVR MENU
2.1. Menu system
In order to change the system settings click-on button from left bottom of the menu and then
click-on the SETTINGS. The SYSTEM menu have the menu sections.
2.1.1. Basic
2.1.1.1. General Settings
You can set the following settings :
DEVICE NAME - allows to set device name
DEVIC NO. sets the device number
LANGUAGE - allow to choose language for NVR menu
All rights reserved © AAT HOLDING S.A.
19
FOREWORD INFORMATION
NVR-6332-H2,NVR-6316-H1,NVR-6308P8-H1,NVR-6304P4-H1, NVR-6332-H8, NVR-6332P16-H4
user’s manual ver.1.1
VIDEO FORMAT - allow to choose PAL or NTSC mode
MAIN OUTPUT - allows to choose resolution from 1280x1024, 1920x1080, 3840x2160 modes.
ENABLE WIZARD - checking this field starts startup wizard after user login
LOG IN AUTOMATICLY - checking this field automaticly logs in uaser after NVR start
LOG OUT AUTOMATICALY - cheking the box log outs the user out of the system after the time
given in WAIT TIME .
To save the settings press APPLY button.
2.1.1.2 Date and Time
After clicking-in DATE AND TIME menu the following menu appears :
For DATE and TIME settings following settings are available :
SYSTEM TIME - sets the date and time in NVR
DATE FORMAT selects for date format from : DD/MM/RRRR, RRRR/MM/DD, MM/DD/RRRR,
DD/MM/YYYY
For network time synchronization the following settings are available :
SYNCHRONUS - MANUAL mode allow user to set the time manually. NTP mode allows to enter
NTP server address or select one from the predefined list.
In TIME ZONE/DST section it’s possible to select TIME ZONE location.
DST - displays information whether time is set to summer time
NVR OPERATING
All rights reserved © AAT HOLDING S.A.
20
NVR-6332-H2,NVR-6316-H1,NVR-6308P8-H1,NVR-6304P4-H1, NVR-6332-H8, NVR-6332P16-H4
user’s manual ver.1.1
2.1.1.3 - Output Settings
DWELL SETTINGS column displays a list of division to display. To add new division clik on
button.
In active windows it’s possible to choose division and then select cameras from left side list.
Functions for following buttons :
-delete all cameras from the view
- save the selected camera list to view
After the camera selection press the the APPLY button to save the settings.
To enable the dwell in live view press the button.
Camera selection
Add new view
Division selection
  • Page 1 1
  • Page 2 2
  • Page 3 3
  • Page 4 4
  • Page 5 5
  • Page 6 6
  • Page 7 7
  • Page 8 8
  • Page 9 9
  • Page 10 10
  • Page 11 11
  • Page 12 12
  • Page 13 13
  • Page 14 14
  • Page 15 15
  • Page 16 16
  • Page 17 17
  • Page 18 18
  • Page 19 19
  • Page 20 20
  • Page 21 21
  • Page 22 22
  • Page 23 23
  • Page 24 24
  • Page 25 25
  • Page 26 26
  • Page 27 27
  • Page 28 28
  • Page 29 29
  • Page 30 30
  • Page 31 31
  • Page 32 32
  • Page 33 33
  • Page 34 34
  • Page 35 35
  • Page 36 36
  • Page 37 37
  • Page 38 38
  • Page 39 39
  • Page 40 40
  • Page 41 41
  • Page 42 42
  • Page 43 43
  • Page 44 44
  • Page 45 45
  • Page 46 46
  • Page 47 47
  • Page 48 48
  • Page 49 49
  • Page 50 50
  • Page 51 51
  • Page 52 52
  • Page 53 53
  • Page 54 54
  • Page 55 55
  • Page 56 56
  • Page 57 57
  • Page 58 58
  • Page 59 59
  • Page 60 60
  • Page 61 61
  • Page 62 62
  • Page 63 63
  • Page 64 64
  • Page 65 65
  • Page 66 66
  • Page 67 67
  • Page 68 68
  • Page 69 69
  • Page 70 70
  • Page 71 71
  • Page 72 72
  • Page 73 73
  • Page 74 74
  • Page 75 75
  • Page 76 76
  • Page 77 77
  • Page 78 78
  • Page 79 79
  • Page 80 80
  • Page 81 81
  • Page 82 82
  • Page 83 83
  • Page 84 84
  • Page 85 85
  • Page 86 86
  • Page 87 87
  • Page 88 88
  • Page 89 89
  • Page 90 90
  • Page 91 91
  • Page 92 92
  • Page 93 93
  • Page 94 94
  • Page 95 95
  • Page 96 96
  • Page 97 97
  • Page 98 98
  • Page 99 99
  • Page 100 100
  • Page 101 101
  • Page 102 102
  • Page 103 103
  • Page 104 104
  • Page 105 105
  • Page 106 106
  • Page 107 107
  • Page 108 108
  • Page 109 109
  • Page 110 110
  • Page 111 111
  • Page 112 112
  • Page 113 113
  • Page 114 114
  • Page 115 115
  • Page 116 116
  • Page 117 117
  • Page 118 118
  • Page 119 119
  • Page 120 120

Novus NVR-6204P4-H1 User manual

Category
Digital Video Recorders (DVR)
Type
User manual

Ask a question and I''ll find the answer in the document

Finding information in a document is now easier with AI

in other languages