Sony 4-191-794-11(1) User manual

Category
Camcorders
Type
User manual

This manual is also suitable for

Digital HD Video Camera Recorder
Printed in Japan
Printed on 70% or more recycled paper using VOC
(Volatile Organic Compound)-free vegetable oil
based ink.
4-191-794-11(1)
2010 Sony Corporation
Before operating the unit, please read this manual thoroughly,
and retain it for future reference.
Operating Guide
Digital HD Video
Camera Recorder
http://www.sony.net/
HXR-MC50E/MC50P
HXR-MC50E/MC50P
2
GB
Read this first
Supplied items
The numbers in ( ) are the supplied
quantity.
AC Adaptor (1)
Power cord (Mains lead) (1)
Component A/V cable (1)
A/V connecting cable (1)
USB cable (1)
USB Adaptor Cable (1)
Lens hood (1)
Microphone (1)
Wind Screen (1)
Microphone holder (1)
Wireless Remote Commander (1)
A button-type lithium battery is already
installed. Remove the insulation sheet before
using the Wireless Remote Commander.
Rechargeable battery pack NP-FV70 (1)
CD-ROM “Video Camera Application
Software” (1)
“PMB” (software, including “PMB Help”)
CD-ROM “Manuals for Digital HD
Video Camera Recorder” (1)
Operating Guide” (2)
See page 21 for the memory card you can use
with this camcorder.
Using the camcorder
Do not hold the camcorder by the following
parts, and also do not hold the camcorder by
the jack covers.
Viewfinder
LCD Screen
Battery pack
Lens hood
Microphone or Microphone holder
The camcorder is not dustproofed, dripproofed
or waterproofed. See “About handling of your
c
amcorder” (p. 123).
Even if the camcorder is turned off, the GPS
function is working as long as the GPS switch
is set to ON. Make sure that the GPS switch is
3
GB
set to OFF during take off and landing of an
airplane (HXR-MC50E).
Menu items, LCD panel, viewfinder and
lens
A menu item that is grayed out is not available
under the current recording or playback
conditions.
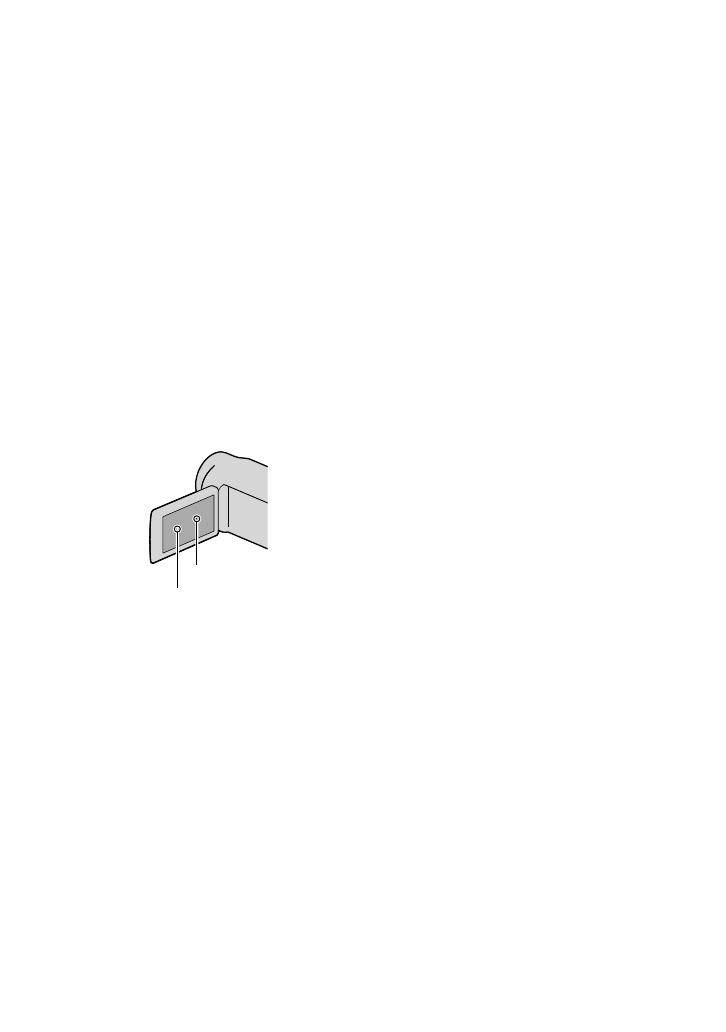
The LCD screen and viewfinder are
manufactured using extremely high-precision
technology, so over 99.99% of the pixels are
operational for effective use. However, there
may be some tiny black points and/or bright
points (white, red, blue, or green in color) that
appear constantly on the LCD screen. These
points are normal results of the manufacturing
process and do not affect the recording in any
way.
Exposing the LCD screen, the viewfinder or the
lens to direct sunlight for long periods of time
may cause malfunctions.
Do not aim at the sun. Doing so might cause
your camcorder to malfunction. Take images
of the sun only in low light conditions, such as
at dusk.
About language setting
The on-screen displays in each local language
are used for illustrating the operating
procedures. Change the screen language before
u
sing the camcorder if necessary (p. 19).
On recording
To ensure stable operation of the memory card,
it is recommended to initialize the memory
card with your camcorder before the first use
(p
. 98). Initializing the memory card will erase
all the data stored on it and the data will be
irrecoverable. Save your important data on your
PC etc.
Before starting to record, test the recording
function to make sure the image and sound are
recorded without any problems.
Compensation for the contents of recordings
cannot be provided, even if recording or
playback is not possible due to a malfunction of
the camcorder, recording media, etc.
TV color systems differ depending on the
country/region. To view your recordings on a
TV, you need a PAL system-based TV.
Television programs, films, video tapes,
and other materials may be copyrighted.
Unauthorized recording of such materials may
be contrary to the copyright laws.
Because of the way that the image device
(CMOS sensor) reads out image signals, the
following phenomena may occur.
The subjects passing by the frame rapidly
might appear crooked depending on the
recording conditions. (This phenomenon may
be notable in displays having high motion
resolution.)
Horizontal lines appear on the screen during
recording under fluorescent lights. The
phenomena can be reduced by adjusting the
s
hutter speed (p. 33).
Images on the screen look horizontally
divided when a subject is lighted with a flash.
The phenomena can be reduced by using a
slower shutter speed.
Notes on playing back
The camcorder is compatible with MPEG-4
AVC/H.264 High Profile for high definition
image quality (HD) recording. Therefore, you
cannot play back images recorded with high
definition image quality (HD) on the camcorder
with the following devices;
Other AVCHD format compatible devices
which are not compatible with High Profile
Devices which are not compatible with the
AVCHD format
You may not be able to play back normally
images recorded on your camcorder with other
Black points
White, red, blue or green points
4
GB
devices. Also, you may not be able to play back
images recorded on other devices with your
camcorder.
Standard (STD) image quality movies recorded
on SD memory cards cannot be played on AV
equipment of other manufacturers.
Discs recorded with HD image quality
(high definition)
This camcorder captures high definition footage
in the AVCHD format. DVD media containing
AVCHD footage should not be used with DVD
based players or recorders, as the DVD player/
recorder may fail to eject the media and may
erase its contents without warning. DVD media
containing AVCHD footage may be played on
a compatible Blu-ray Disc
player/recorder or
other compatible device.
Save all your recorded image data
To prevent your image data from being lost,
save all your recorded images on external media
periodically. It is recommended that you save
the image data on a disc such as DVD-R, etc.
using your computer. Also, you can save your
image data using a VCR, or a DVD/HDD
r
ecorder (p. 72).
You cannot make a AVCHD disc from the
image data recorded with
(MENU)
[Show others] [
REC MODE] (under
[SHOOTING SET] category) set to [HD
FX]. Save them on a Blu-ray Disc or using an
ext
ernal media (p. 67, 70).
Notes on battery pack/AC Adaptor
Be sure to remove the battery pack or the AC
Adaptor after turning off the camcorder.
Disconnect the AC Adaptor from the
camcorder, holding both the camcorder and the
DC plug.
Note on the camcorder/battery pack
temperature
When the temperature of the camcorder
or battery pack becomes extremely high or
extremely low, you may not be able to record
or play back on the camcorder, due to the
protection features of the camcorder being
activated in such situations. In this case, an
in
dicator appears on the LCD screen (p. 110).
When the camcorder is connected to a
computer or accessories
Do not try to format the recording media of the
camcorder using a computer. If you do so, your
camcorder may not operate correctly.
When connecting the camcorder to another
device with communication cables, be sure to
insert the connector plug in the correct way.
Pushing the plug forcibly into the terminal
will damage the terminal and may result in a
malfunction of the camcorder.
If you cannot record/play back images,
perform [MEDIA FORMAT]
If you repeat recording/deleting images for
a long time, fragmentation of data occurs on
the recording media. Images cannot be saved
or recorded. In such a case, save your images
on some type of external media first, and then
perform [MEDIA FORMAT] by touching
(MENU) [Show others]
[MEDIA FORMAT] (under [MANAGE
MEDIA] category)
the desired medium
[YES]
[YES] .
Notes on optional accessories
We recommend using genuine Sony accessories.
Genuine Sony accessories may not be available
in some countries/regions.
About this manual, illustrations and
on-screen displays
The example images used in this manual for
illustration purposes are captured using a
digital still camera, and therefore may appear
different from images and screen indicators that
actually appear on your camcorder. And, the
illustrations of your camcorder and its screen
indication are exaggerated or simplified for
understandability.
5
GB
In this manual, the internal memory of the
camcorder and the memory card are called
“recording media.
In this manual, the DVD disc recorded with
high definition image quality (HD) is called
AVCHD disc.
Design and specifications of your camcorder
and accessories are subject to change without
notice.
Confirm the model name of your
camcorder
The model name is shown in this manual when
there is a difference in specification between
models. Confirm the model name on the
bottom of your camcorder.
The main differences in specification of this
series are as follows:
HXR-MC50E: GPS-compatible
HXR-MC50P: GPS-incompatible
Notes on use
Do not do any of the following. Otherwise, the
recording media may be damaged, recorded
images may be impossible to play back or may
be lost, or other malfunctions could occur.
ejecting the memory card when the access
l
amp (p. 22) is lit or flashing
removing the battery pack or AC Adaptor
from the camcorder, or applying mechanical
shock or vibration to the camcorder when the
(Movie)/ (Photo) lamps (p. 23) or the
access lamp (p. 22) are lit or flashing
When using a shoulder belt (sold separately), do
not crash the camcorder against an object.
Do not use your camcorder in very loud areas.
6
GB
Operation flow
Getting started (p. 11)
Prepare the power source and memory card.
Recording movies and photos (p. 23)
Recording movies p. 24
Changing the recording mode (p. 30)
Expected recording time (MEDIA INFO, p
. 98)
Shooting photos p. 26
Playing movies and photos
Playback on the camcorder p. 35
Playing images on a TV p
. 43
Saving images
Saving movies and photos with a computer p. 59
Saving movies and photos in external media p
. 70
Saving images with a DVD writer/recorder p
. 72
Deleting movies and photos (p. 46)
If you delete the image data that has been saved on your
computer or a disc, you can record new images on the free
media space again.
7
Table of contents
GB
Table of contents
Read this first . . . . . . . . . . . . . . . . . . . . . . . . . . . . . . . . . . . . . . . . . . . . . . . . . . . . . . . . . . . . . . . . . . . . . . . . . . . . . . . . . . . . . . . . . 2
Notes on use .
. . . . . . . . . . . . . . . . . . . . . . . . . . . . . . . . . . . . . . . . . . . . . . . . . . . . . . . . . . . . . . . . . . . . . . . . . . . . . . . . 5
Operation flow .
. . . . . . . . . . . . . . . . . . . . . . . . . . . . . . . . . . . . . . . . . . . . . . . . . . . . . . . . . . . . . . . . . . . . . . . . . . . . . . . . . . . . . . 6
Getting started
Step 1: Attaching the supplied microphone and the lens hood . . . . . . . . . . . . . . . . . . . . . . . . . 11
Attaching the microphone holder .
. . . . . . . . . . . . . . . . . . . . . . . . . . . . . . . . . . . . . . . . . . . . . . . . . . . 11
Attach the microphone to the microphone holder .
. . . . . . . . . . . . . . . . . . . . . . . . . . . . . . . 12
Attaching the lens hood .
. . . . . . . . . . . . . . . . . . . . . . . . . . . . . . . . . . . . . . . . . . . . . . . . . . . . . . . . . . . . . . . . 13
Step 2: Charging the battery pack .
. . . . . . . . . . . . . . . . . . . . . . . . . . . . . . . . . . . . . . . . . . . . . . . . . . . . . . . . . . . . 15
Step 3: Turning the power on, and setting the date and time .
. . . . . . . . . . . . . . . . . . . . . . . . . . 18
Changing the language setting .
. . . . . . . . . . . . . . . . . . . . . . . . . . . . . . . . . . . . . . . . . . . . . . . . . . . . . . . 19
Step 4: Preparing the recording media .
. . . . . . . . . . . . . . . . . . . . . . . . . . . . . . . . . . . . . . . . . . . . . . . . . . . . . . 20
Selecting the recording media for movies .
. . . . . . . . . . . . . . . . . . . . . . . . . . . . . . . . . . . . . . . . . . 20
Selecting the recording media for photos .
. . . . . . . . . . . . . . . . . . . . . . . . . . . . . . . . . . . . . . . . . . 20
Inserting a memory card .
. . . . . . . . . . . . . . . . . . . . . . . . . . . . . . . . . . . . . . . . . . . . . . . . . . . . . . . . . . . . . . . 21
Recording/Playback
Recording . . . . . . . . . . . . . . . . . . . . . . . . . . . . . . . . . . . . . . . . . . . . . . . . . . . . . . . . . . . . . . . . . . . . . . . . . . . . . . . . . . . . . . . . . . . 23
Recording movies .
. . . . . . . . . . . . . . . . . . . . . . . . . . . . . . . . . . . . . . . . . . . . . . . . . . . . . . . . . . . . . . . . . . . . . . . 24
Shooting photos .
. . . . . . . . . . . . . . . . . . . . . . . . . . . . . . . . . . . . . . . . . . . . . . . . . . . . . . . . . . . . . . . . . . . . . . . . . 26
Useful functions for recording movies and photos .
. . . . . . . . . . . . . . . . . . . . . . . . . . . . . . . . . . . . . . . 28
Zooming .
. . . . . . . . . . . . . . . . . . . . . . . . . . . . . . . . . . . . . . . . . . . . . . . . . . . . . . . . . . . . . . . . . . . . . . . . . . . . . . . . . . . 28
Recording better images automatically (INTELLIGENT AUTO) .
. . . . . . . . . . . . . . . . . . 28
Selecting high definition image quality (HD) or standard image
quality (STD) .
. . . . . . . . . . . . . . . . . . . . . . . . . . . . . . . . . . . . . . . . . . . . . . . . . . . . . . . . . . . . . . . . . . . . . . . . . . . . . . 29
Selecting the recording mode .
. . . . . . . . . . . . . . . . . . . . . . . . . . . . . . . . . . . . . . . . . . . . . . . . . . . . . . . . 30
Prioritizing the subject .
. . . . . . . . . . . . . . . . . . . . . . . . . . . . . . . . . . . . . . . . . . . . . . . . . . . . . . . . . . . . . . . . . 30
Capturing smiles automatically (Smile Shutter) .
. . . . . . . . . . . . . . . . . . . . . . . . . . . . . . . . . . 31
Recording sound with more presence (5.1ch surround recording) .
. . . . . . . . . . . . 31
Recording high quality photos during movie recording (Dual Rec) .
. . . . . . . . . . . 32
Recording in dark places (NightShot). . . . . . . . . . . . . . . . . . . . . . . . . . . . . . . . . . . . . . . . . . . . . . . . . 32
Recording in mirror mode .
. . . . . . . . . . . . . . . . . . . . . . . . . . . . . . . . . . . . . . . . . . . . . . . . . . . . . . . . . . . . . 32
Controlling the image settings manually with the MANUAL dial .
. . . . . . . . . . . . . . 33
Playback on the camcorder .
. . . . . . . . . . . . . . . . . . . . . . . . . . . . . . . . . . . . . . . . . . . . . . . . . . . . . . . . . . . . . . . . . . . . 35
8
GB
Useful functions for playing movies and photos . . . . . . . . . . . . . . . . . . . . . . . . . . . . . . . . . . . . . . . . . . . 38
Searching for desired images by date (Date Index) .
. . . . . . . . . . . . . . . . . . . . . . . . . . . . . . . 38
Searching for desired scene by pinpoint (Film Roll Index) .
. . . . . . . . . . . . . . . . . . . . . . 38
Searching for desired scene by face (Face Index) .
. . . . . . . . . . . . . . . . . . . . . . . . . . . . . . . . . 39
Playing back a digest of your movies (Highlight Playback) .
. . . . . . . . . . . . . . . . . . . . . 39
Using PB zoom with photos .
. . . . . . . . . . . . . . . . . . . . . . . . . . . . . . . . . . . . . . . . . . . . . . . . . . . . . . . . . . . 41
Playing back a series of photos (Slide show) .
. . . . . . . . . . . . . . . . . . . . . . . . . . . . . . . . . . . . . . . 42
Playing images on a TV .
. . . . . . . . . . . . . . . . . . . . . . . . . . . . . . . . . . . . . . . . . . . . . . . . . . . . . . . . . . . . . . . . . . . . . . . . . 43
Connecting a TV using [TV CONNECT Guide] .
. . . . . . . . . . . . . . . . . . . . . . . . . . . . . . . . . . . . . . 43
Using “BRAVIA Sync .
. . . . . . . . . . . . . . . . . . . . . . . . . . . . . . . . . . . . . . . . . . . . . . . . . . . . . . . . . . . . . . . . . . . . . 45
Making good use of your camcorder
Deleting movies and photos . . . . . . . . . . . . . . . . . . . . . . . . . . . . . . . . . . . . . . . . . . . . . . . . . . . . . . . . . . . . . . . . . . . . 46
Protecting recorded movies and photos (Protect) .
. . . . . . . . . . . . . . . . . . . . . . . . . . . . . . . . . . . . . . . . 47
Dividing a movie .
. . . . . . . . . . . . . . . . . . . . . . . . . . . . . . . . . . . . . . . . . . . . . . . . . . . . . . . . . . . . . . . . . . . . . . . . . . . . . . . . . 48
Capturing a photo from a movie .
. . . . . . . . . . . . . . . . . . . . . . . . . . . . . . . . . . . . . . . . . . . . . . . . . . . . . . . . . . . . . . 49
Dubbing/copying movies and photos from the internal memory
to memory card .
. . . . . . . . . . . . . . . . . . . . . . . . . . . . . . . . . . . . . . . . . . . . . . . . . . . . . . . . . . . . . . . . . . . . . . . . . . . . . . . . . . 50
Dubbing movies .
. . . . . . . . . . . . . . . . . . . . . . . . . . . . . . . . . . . . . . . . . . . . . . . . . . . . . . . . . . . . . . . . . . . . . . . . . 50
Copying photos .
. . . . . . . . . . . . . . . . . . . . . . . . . . . . . . . . . . . . . . . . . . . . . . . . . . . . . . . . . . . . . . . . . . . . . . . . . . 51
Using the Playlist of movies .
. . . . . . . . . . . . . . . . . . . . . . . . . . . . . . . . . . . . . . . . . . . . . . . . . . . . . . . . . . . . . . . . . . . . 52
Creating the Playlist .
. . . . . . . . . . . . . . . . . . . . . . . . . . . . . . . . . . . . . . . . . . . . . . . . . . . . . . . . . . . . . . . . . . . . 52
Playing the Playlist .
. . . . . . . . . . . . . . . . . . . . . . . . . . . . . . . . . . . . . . . . . . . . . . . . . . . . . . . . . . . . . . . . . . . . . . 53
Using the GPS function (HXR-MC50E) .
. . . . . . . . . . . . . . . . . . . . . . . . . . . . . . . . . . . . . . . . . . . . . . . . . . . . . . . 54
Setting the GPS function .
. . . . . . . . . . . . . . . . . . . . . . . . . . . . . . . . . . . . . . . . . . . . . . . . . . . . . . . . . . . . . . . 55
Acquiring the current location information .
. . . . . . . . . . . . . . . . . . . . . . . . . . . . . . . . . . . . . . . . 55
Searching for a desired scene by recording location (Map Index) .
. . . . . . . . . . . . . 56
Displaying the coordinate information (COORDINATES) .
. . . . . . . . . . . . . . . . . . . . . . . . 57
Adjusting the clock and the area automatically (AUTO CLOCK ADJ/
AUTO AREA ADJ) .
. . . . . . . . . . . . . . . . . . . . . . . . . . . . . . . . . . . . . . . . . . . . . . . . . . . . . . . . . . . . . . . . . . . . . . . . . 57
Saving movies and photos with a computer
Preparing a computer (Windows) . . . . . . . . . . . . . . . . . . . . . . . . . . . . . . . . . . . . . . . . . . . . . . . . . . . . . . . . . . . . . 59
Step 1 Checking the computer system . . . . . . . . . . . . . . . . . . . . . . . . . . . . . . . . . . . . . . . . . . . . . . 59
St
ep 2 Installing the supplied software “PMB” .
. . . . . . . . . . . . . . . . . . . . . . . . . . . . . . . . . . . . 60
Starting PMB (Picture Motion Browser) .
. . . . . . . . . . . . . . . . . . . . . . . . . . . . . . . . . . . . . . . . . . . . . . . . . . . . . . 62
Reading “PMB Help .
. . . . . . . . . . . . . . . . . . . . . . . . . . . . . . . . . . . . . . . . . . . . . . . . . . . . . . . . . . . . . . . . . . . . . 62
Selecting the method for creating a disc (computer) .
. . . . . . . . . . . . . . . . . . . . . . . . . . . . . . . . . . . . . 63
Creating a disc with one touch (One Touch Disc Burn) .
. . . . . . . . . . . . . . . . . . . . . . . . . . . . . . . . . . . 65
Importing movies and photos to a computer .
. . . . . . . . . . . . . . . . . . . . . . . . . . . . . . . . . . . . . . . . . . . . . . 66
9
Table of contents
GB
Creating an AVCHD disc . . . . . . . . . . . . . . . . . . . . . . . . . . . . . . . . . . . . . . . . . . . . . . . . . . . . . . . . . . . . . . . . . . . . . . . . . 67
Creating a standard definition image quality (STD) disc that can be played on
ordinary DVD players .
. . . . . . . . . . . . . . . . . . . . . . . . . . . . . . . . . . . . . . . . . . . . . . . . . . . . . . . . . . . . . . . . . . . . . . . . . . . . 68
Saving images with an external device
Saving images in external media (DIRECT COPY) . . . . . . . . . . . . . . . . . . . . . . . . . . . . . . . . . . . . . . . . . . . 70
Creating a disc with a DVD writer, recorder .
. . . . . . . . . . . . . . . . . . . . . . . . . . . . . . . . . . . . . . . . . . . . . . . . . 72
Selecting the method for creating a disc .
. . . . . . . . . . . . . . . . . . . . . . . . . . . . . . . . . . . . . . . . . . . 72
Creating a disc with the dedicated DVD writer, DVDirect Express .
. . . . . . . . . . . . . 73
Creating a high definition image quality (HD) disc with a DVD writer, etc.,
other than DVDirect Express .
. . . . . . . . . . . . . . . . . . . . . . . . . . . . . . . . . . . . . . . . . . . . . . . . . . . . . . . . . . 75
Creating a standard definition image quality (STD) disc with
a recorder, etc. .
. . . . . . . . . . . . . . . . . . . . . . . . . . . . . . . . . . . . . . . . . . . . . . . . . . . . . . . . . . . . . . . . . . . . . . . . . . . . 76
Customizing your camcorder
Using menus . . . . . . . . . . . . . . . . . . . . . . . . . . . . . . . . . . . . . . . . . . . . . . . . . . . . . . . . . . . . . . . . . . . . . . . . . . . . . . . . . . . . . . . 79
Operating menus .
. . . . . . . . . . . . . . . . . . . . . . . . . . . . . . . . . . . . . . . . . . . . . . . . . . . . . . . . . . . . . . . . . . . . . . . . 79
Using MY MENU .
. . . . . . . . . . . . . . . . . . . . . . . . . . . . . . . . . . . . . . . . . . . . . . . . . . . . . . . . . . . . . . . . . . . . . . . . . . 80
Using the
OPTION MENU . . . . . . . . . . . . . . . . . . . . . . . . . . . . . . . . . . . . . . . . . . . . . . . . . . . . . . . . . . . 81
Menu lists .
. . . . . . . . . . . . . . . . . . . . . . . . . . . . . . . . . . . . . . . . . . . . . . . . . . . . . . . . . . . . . . . . . . . . . . . . . . . . . . . . . . . . . . . . . . 82
MANUAL SETTINGS (Items to adjust for scene condition) . . . . . . . . . . . . . . . . . . . . . . . . . . . . . . . . . . . . . 84
SHOOTING SET (Items for customized shooting) . . . . . . . . . . . . . . . . . . . . . . . . . . . . . . . . . . . . . . . . . . . . . . . 89
PHOTO SETTINGS (Items for recording photos) . . . . . . . . . . . . . . . . . . . . . . . . . . . . . . . . . . . . . . . . . . . . . . . . . 93
PLAYBACK (Items for playback) . . . . . . . . . . . . . . . . . . . . . . . . . . . . . . . . . . . . . . . . . . . . . . . . . . . . . . . . . . . . . . . . . . 95
EDIT (Items for editing) . . . . . . . . . . . . . . . . . . . . . . . . . . . . . . . . . . . . . . . . . . . . . . . . . . . . . . . . . . . . . . . . . . . . . . . . . . . 97
OTHERS (Items for other settings). . . . . . . . . . . . . . . . . . . . . . . . . . . . . . . . . . . . . . . . . . . . . . . . . . . . . . . . . . . . . . . . . . 97
MANAGE MEDIA (Items for recording media) . . . . . . . . . . . . . . . . . . . . . . . . . . . . . . . . . . . . . . . . . . . . . . . . . . . 98
GENERAL SET (Other setup items) . . . . . . . . . . . . . . . . . . . . . . . . . . . . . . . . . . . . . . . . . . . . . . . . . . . . . . . . . . . . . . . 99
Additional information
Troubleshooting . . . . . . . . . . . . . . . . . . . . . . . . . . . . . . . . . . . . . . . . . . . . . . . . . . . . . . . . . . . . . . . . . . . . . . . . . . . . . . 103
Self-diagnosis display/Warning indicators. . . . . . . . . . . . . . . . . . . . . . . . . . . . . . . . . . . . . . . . . . 110
Recording time of movies/number of recordable photos .
. . . . . . . . . . . . . . . . . . . . . . . . . . . . . . 114
Expected time of recording and playback with each battery pack .
. . . . . . . . . . . 114
Expected recording time of movies .
. . . . . . . . . . . . . . . . . . . . . . . . . . . . . . . . . . . . . . . . . . . . . . . . . 114
Expected number of recordable photos .
. . . . . . . . . . . . . . . . . . . . . . . . . . . . . . . . . . . . . . . . . . . 115
Using your camcorder abroad .
. . . . . . . . . . . . . . . . . . . . . . . . . . . . . . . . . . . . . . . . . . . . . . . . . . . . . . . . . . . . . . . . 117
10
GB
Maintenance and precautions . . . . . . . . . . . . . . . . . . . . . . . . . . . . . . . . . . . . . . . . . . . . . . . . . . . . . . . . . . . . . . . . . 119
About the AVCHD format .
. . . . . . . . . . . . . . . . . . . . . . . . . . . . . . . . . . . . . . . . . . . . . . . . . . . . . . . . . . . . . 119
About GPS (HXR-MC50E) .
. . . . . . . . . . . . . . . . . . . . . . . . . . . . . . . . . . . . . . . . . . . . . . . . . . . . . . . . . . . . . . 119
About the memory card .
. . . . . . . . . . . . . . . . . . . . . . . . . . . . . . . . . . . . . . . . . . . . . . . . . . . . . . . . . . . . . . . 121
About the “InfoLITHIUM” battery pack .
. . . . . . . . . . . . . . . . . . . . . . . . . . . . . . . . . . . . . . . . . . . . . 122
About x.v.Color .
. . . . . . . . . . . . . . . . . . . . . . . . . . . . . . . . . . . . . . . . . . . . . . . . . . . . . . . . . . . . . . . . . . . . . . . . . . 123
About handling of your camcorder .
. . . . . . . . . . . . . . . . . . . . . . . . . . . . . . . . . . . . . . . . . . . . . . . . . 123
Specifications .
. . . . . . . . . . . . . . . . . . . . . . . . . . . . . . . . . . . . . . . . . . . . . . . . . . . . . . . . . . . . . . . . . . . . . . . . . . . . . . . . . . . . 126
Quick reference
Screen indicators . . . . . . . . . . . . . . . . . . . . . . . . . . . . . . . . . . . . . . . . . . . . . . . . . . . . . . . . . . . . . . . . . . . . . . . . . . . . . . . . . 130
Parts and controls .
. . . . . . . . . . . . . . . . . . . . . . . . . . . . . . . . . . . . . . . . . . . . . . . . . . . . . . . . . . . . . . . . . . . . . . . . . . . . . . . 131
Index .
. . . . . . . . . . . . . . . . . . . . . . . . . . . . . . . . . . . . . . . . . . . . . . . . . . . . . . . . . . . . . . . . . . . . . . . . . . . . . . . . . . . . . . . . . . . . . . . 135
Getting started
11
GB
Getting started
Step 1: Attaching the supplied microphone and
the lens hood
Attaching the microphone holder
Turn up the cover of the fixing lever of the microphone holder.
Make sure that the fixing lever is turned fully counterclockwise.
Orient the arrow on the back of the microphone holder in the same
direction as the arrow on the Active Interface Shoe, and insert the
microphone holder in the direction of the arrow to attach.
The cover of the fixing
lever
The fixing lever
12
GB
Fix the microphone holder by turning the fixing lever clockwise until it
clicks.
If the microphone holder is turned, orient it in the direction shown in the illustration.
Return the cover of the fixing lever to its original position.
Notes
If you use the built-in microphone, remove the microphone holder.
Attach the microphone to the microphone holder
When you use the supplied microphone for recording sound, do the following steps.
Attach the wind screen to the supplied microphone .
MIC (PLUG IN POWER) jack
13
Getting started
GB
Unlock the stopper of the microphone holder and open the cover.
Align the convex part of the microphone with the concave part of the
holder, then place the microphone into the holder. Close the cover and lock
the stopper securely.
Be sure to align the mark on the microphone with the mark on the holder.
Connect the microphone cable to the MIC (PLUG IN POWER) jack.
Attaching the lens hood
Align the part marks , on the lens hood to those on the camcorder,
and attach the lens hood.
Turn the lens hood holder clockwise to lock the lens hood.
The fixing lever
14
GB
Notes
Do not touch the lens or the lens cover when you attach the lens hood.
The attached lens hood may interfere with flash operation. When you record photos with the lens hood
attached, touch
(MENU) [Show others] [FLASH MODE] (under [PHOTO SETTINGS]
category) [OFF] (the default setting).
An optional filter, etc., cannot be attached if the lens hood is attached.
To remove the lens hood
Turn the fixing ring in the opposite direction of when attaching and remove it.
15
Getting started
GB
Step 2: Charging the battery pack
You can charge the “InfoLITHIUM” battery pack (V series) after attaching it to your
camcorder.
Notes
You cannot attach any “InfoLITHIUM” battery pack other than the V series to your camcorder.
1
Turn off your camcorder by closing the LCD screen after replacing the
viewfinder.
2
Attach the battery pack by sliding it in the direction of the arrow until it
clicks.
3
Connect the AC Adaptor and the power cord (mains lead) to your
camcorder and the wall outlet (wall socket).
Align the mark on the DC plug with that on the DC IN jack.
Battery pack
AC
Adaptor
/CHG (flash/charge)
lamp
To the wall outlet (wall socket)
Power cord (Mains lead)
DC IN jack
DC plug
16
GB
The /CHG (flash/charge) lamp lights up and charging starts. The /CHG (flash/charge)
lamp turns off when the battery pack is fully charged.
4
When the battery is charged, disconnect the AC Adaptor from the DC IN
jack of your camcorder.
Tips
See page 114 on recording and playing time.
When your camcorder is on, you can check the approximate amount of remaining battery power with the
remaining battery indicator at the upper left on the LCD screen.
Charging time
Approximate time (min.) required when you fully charge a fully discharged battery pack.
Battery pack Charging time
NP-FV50 155
NP-FV70 (supplied) 195
NP-FV100 390
Times measured with the camcorder at 25 C (77 °F).
10
C to 30 C (50 °F to 86 °F) is recommended.
To remove the battery pack
Close the LCD screen. Slide the BATT (battery) release lever () and remove the battery
pack ().
To use a wall outlet (wall socket) as a power source
Make the same connections as “Step 2: Charging the battery pack.” Even if the battery pack is
attached, the battery pack is not discharged.
Charging the battery pack abroad
You can charge the battery pack in any countries/regions using the AC Adaptor supplied with
your camcorder within the AC 100 V - 240 V, 50 Hz/60 Hz range.
Notes
Do not use an electronic voltage transformer.
17
Getting started
GB
Notes on the battery pack
When you remove the battery pack or disconnect the AC Adaptor, replace the viewfinder, close the LCD
screen and make sure that the
(Movie)/ (Photo) lamps (p. 23), the access lamp (p. 22) are turned
off.
The
/CHG (flash/charge) lamp flashes during charging under the following conditions:
The battery pack is not attached correctly.
The battery pack is damaged.
The temperature of the battery pack is low.
Remove the battery pack from your camcorder and put it in a warm place.
The temperature of the battery pack is high.
Remove the battery pack from your camcorder and put it in a cool place.
We do not recommend using an NP-FV30, which only allows short recording and playback times, with
your camcorder.
Notes on the AC Adaptor
Use the nearby wall outlet (wall socket) when using the AC Adaptor. Disconnect the AC Adaptor from
the wall outlet (wall socket) immediately if any malfunction occurs while using your camcorder.
Do not use the AC Adaptor placed in a narrow space, such as between a wall and furniture.
Do not short-circuit the DC plug of the AC Adaptor or battery terminal with any metallic objects. This
may cause a malfunction.
18
GB
Step 3: Turning the power on, and setting the
date and time
1
Open the LCD screen of your camcorder.
Your camcorder is turned on and the lens cover is opened.
To turn on your camcorder when the LCD screen is open, press POWER.
2
Select the desired geographical area with
/ , then touch [NEXT].
To set the date and time again, touch (MENU) [Show others] [CLOCK/ LANG]
(under
[GENERAL SET] category) [CLOCK SET]. When an item is not on the screen, touch
/ until the item appears.
3
Set [SUMMERTIME], date and time, then touch
.
The clock starts.
If you set [SUMMERTIME] to [ON], the clock advances 1 hour.
Notes
The date and time does not appear during recording, but they are automatically recorded on the
Touch the button on the
LCD screen
MODE lamp
POWER button
19
Getting started
GB
recording media, and can be displayed during playback. To display the date and time, touch
(MENU) [Show others] [PLAYBACK SET] (under
[PLAYBACK] category) [DATA
CODE] [DATE/TIME]
.
If the button you touch does not react correctly, calibrate the touch panel (p. 124).
Once the clock is set, the clock time is automatically adjusted with [AUTO CLOCK ADJ] and [AUTO
AREA ADJ] set to [ON] (p
. 57). The clock may not be adjusted to the correct time automatically,
depending on the country/region selected for your camcorder. In this case, set [AUTO CLOCK ADJ] and
[AUTO AREA ADJ] to [OFF] (HXR-MC50E).
To turn off the power
Close the LCD screen. The (Movie) lamp flashes for a few seconds and the power is turned
off.
Tips
You can turn off your camcorder also by pressing POWER.
If the viewfinder is pulled out, retract the viewfinder as shown in the illustration below.
On turning the camcorder on or off using the LCD screen or the viewfinder
The power of the camcorder is turned on or off depending on the status of the LCD screen or
the viewfinder.
Status Power of the
camcorder
LCD screen Viewfinder
Open Retracted On
Pulled out On
Closed Retracted Off
Pulled out On
Notes
Even if the LCD screen is closed, if the viewfinder is pulled out, the camcorder is not turned off. When
you turn off the power of the camcorder, make sure that the viewfinder is retracted to the original
position.
Changing the language setting
You can change the on-screen displays to show messages in a specified language.
Touch
(MENU) [Show others] [CLOCK/ LANG] (under [GENERAL SET]
category) [
LANGUAGE SET] a desired language .
20
GB
Step 4: Preparing the recording media
The recording media that can be used are displayed on the screen of your camcorder as the
following icons.
*
Internal
memory
Memory
card
* In the default setting, both movies and photos are recorded on the internal memory. You can perform
recording, playback and editing operations on the selected medium.
Tips
See page 114 for the recordable time of movies.
See page 115 for the number of recordable photos.
Selecting the recording media for movies
Touch (MENU) [Show others] [MEDIA SETTINGS] (under
[MANAGE MEDIA] category) [MOVIE MEDIA SET].
The [MOVIE MEDIA SET] screen appears.
Touch the desired recording media.
Touch [YES] .
The recording medium is changed.
Selecting the recording media for photos
Touch (MENU) [Show others] [MEDIA SETTINGS] (under
[MANAGE MEDIA] category) [PHOTO MEDIA SET].
The [PHOTO MEDIA SET] screen appears.
Touch the desired recording media.
Touch [YES] .
The recording medium is changed.
  • Page 1 1
  • Page 2 2
  • Page 3 3
  • Page 4 4
  • Page 5 5
  • Page 6 6
  • Page 7 7
  • Page 8 8
  • Page 9 9
  • Page 10 10
  • Page 11 11
  • Page 12 12
  • Page 13 13
  • Page 14 14
  • Page 15 15
  • Page 16 16
  • Page 17 17
  • Page 18 18
  • Page 19 19
  • Page 20 20
  • Page 21 21
  • Page 22 22
  • Page 23 23
  • Page 24 24
  • Page 25 25
  • Page 26 26
  • Page 27 27
  • Page 28 28
  • Page 29 29
  • Page 30 30
  • Page 31 31
  • Page 32 32
  • Page 33 33
  • Page 34 34
  • Page 35 35
  • Page 36 36
  • Page 37 37
  • Page 38 38
  • Page 39 39
  • Page 40 40
  • Page 41 41
  • Page 42 42
  • Page 43 43
  • Page 44 44
  • Page 45 45
  • Page 46 46
  • Page 47 47
  • Page 48 48
  • Page 49 49
  • Page 50 50
  • Page 51 51
  • Page 52 52
  • Page 53 53
  • Page 54 54
  • Page 55 55
  • Page 56 56
  • Page 57 57
  • Page 58 58
  • Page 59 59
  • Page 60 60
  • Page 61 61
  • Page 62 62
  • Page 63 63
  • Page 64 64
  • Page 65 65
  • Page 66 66
  • Page 67 67
  • Page 68 68
  • Page 69 69
  • Page 70 70
  • Page 71 71
  • Page 72 72
  • Page 73 73
  • Page 74 74
  • Page 75 75
  • Page 76 76
  • Page 77 77
  • Page 78 78
  • Page 79 79
  • Page 80 80
  • Page 81 81
  • Page 82 82
  • Page 83 83
  • Page 84 84
  • Page 85 85
  • Page 86 86
  • Page 87 87
  • Page 88 88
  • Page 89 89
  • Page 90 90
  • Page 91 91
  • Page 92 92
  • Page 93 93
  • Page 94 94
  • Page 95 95
  • Page 96 96
  • Page 97 97
  • Page 98 98
  • Page 99 99
  • Page 100 100
  • Page 101 101
  • Page 102 102
  • Page 103 103
  • Page 104 104
  • Page 105 105
  • Page 106 106
  • Page 107 107
  • Page 108 108
  • Page 109 109
  • Page 110 110
  • Page 111 111
  • Page 112 112
  • Page 113 113
  • Page 114 114
  • Page 115 115
  • Page 116 116
  • Page 117 117
  • Page 118 118
  • Page 119 119
  • Page 120 120
  • Page 121 121
  • Page 122 122
  • Page 123 123
  • Page 124 124
  • Page 125 125
  • Page 126 126
  • Page 127 127
  • Page 128 128
  • Page 129 129
  • Page 130 130
  • Page 131 131
  • Page 132 132
  • Page 133 133
  • Page 134 134
  • Page 135 135
  • Page 136 136
  • Page 137 137
  • Page 138 138
  • Page 139 139

Sony 4-191-794-11(1) User manual

Category
Camcorders
Type
User manual
This manual is also suitable for

Ask a question and I''ll find the answer in the document

Finding information in a document is now easier with AI